Kitbashing a Sherman Mineroller in 1/35th scale By Malcolm Ireson | 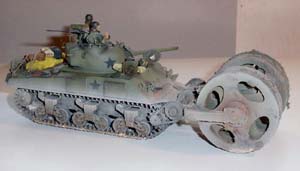 | Introduction The kits used to make this were as follows 1. Tamiya M4A3 Sherman, the retooled model
2. AFV Club Sherman running gear.
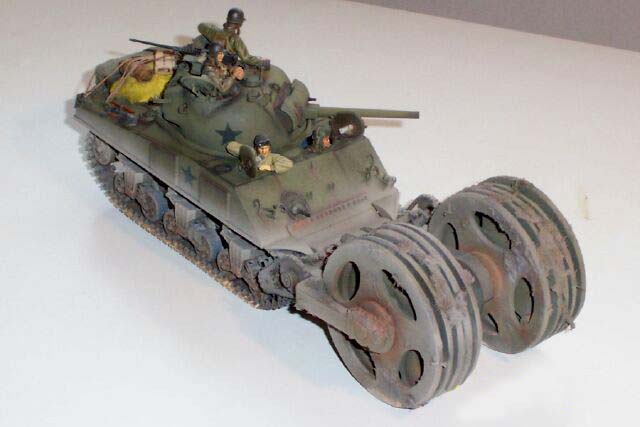
3. Verlinden mine roller conversion set.
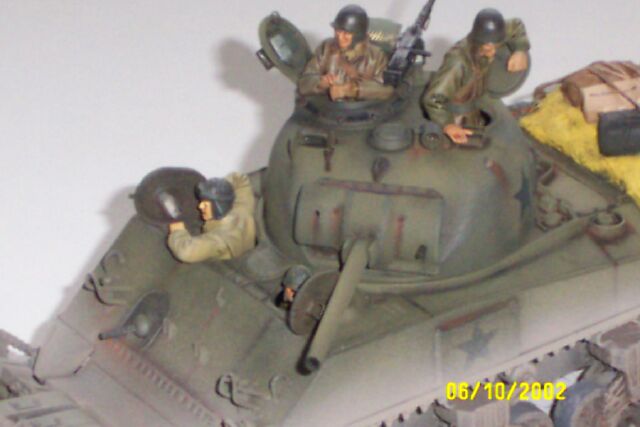
4. Verlinden Sherman crew figures.
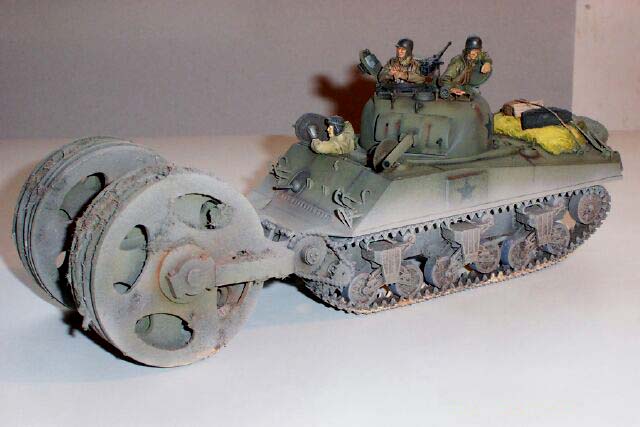
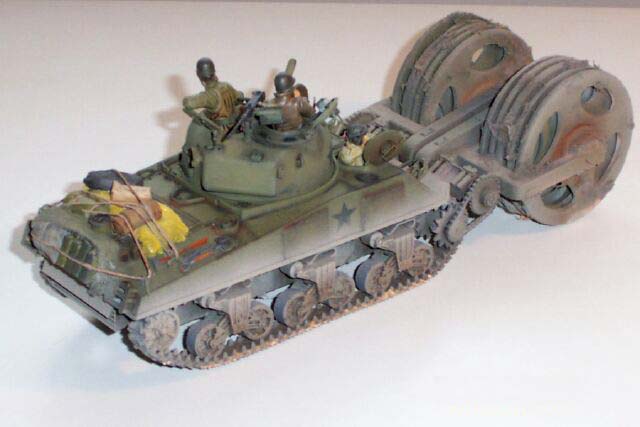
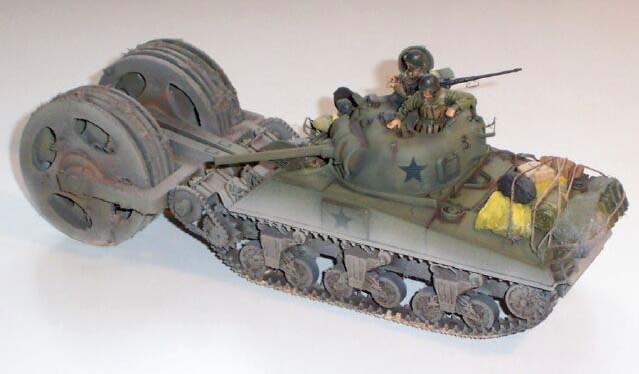
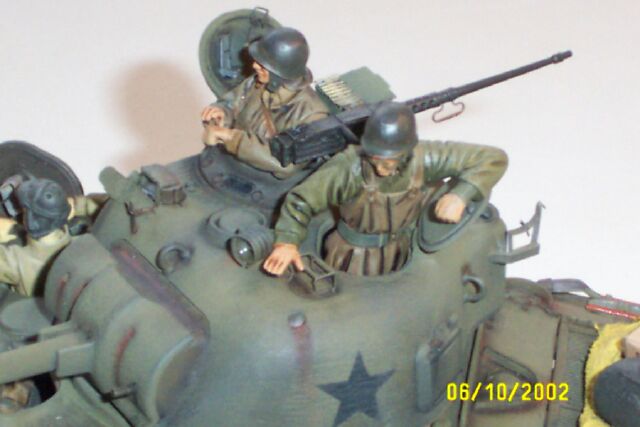
5. Arber Sherman etched set No. 35 032. The Build. 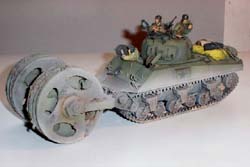 I started off by constructing the running gear, which AFV Club supply as a model on their own. Leaving the tracks until later, the running gear was then fitted to the hull of the model. The fit was good, and there were no problems. The only thing is you have to remove the bolts from the front face of the drive sprocket to allow the Verlinden conversion set to fit, more on that later. I started off by constructing the running gear, which AFV Club supply as a model on their own. Leaving the tracks until later, the running gear was then fitted to the hull of the model. The fit was good, and there were no problems. The only thing is you have to remove the bolts from the front face of the drive sprocket to allow the Verlinden conversion set to fit, more on that later. With the running gear on, the tracks were then added, again by AFV Club. These were time consuming, but worth it in the end. Individual track links, you either love, or hate 'em!! I then moved back to the Tamiya plans , and followed these, using the PE where needed. At this stage I must say that the etched set provided by Arber is very, very good. More or less everything is replicated in brass. It's up to you how much of the set you use, but if you're making a Sherman, this is the one to get. I followed the plans up until section 7 where with the upper hull complete, I stuck it to the lower hull, a little bit of fiddling around was needed here, and filler was used on the rear deck, but nothing major. The Roller 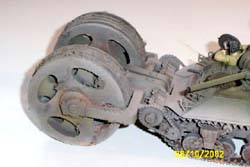 I then turned my attention to the Verlinden conversion, the rollers HAVE to be painted before assembly as you cannot get in between them otherwise. I then turned my attention to the Verlinden conversion, the rollers HAVE to be painted before assembly as you cannot get in between them otherwise. The conversion is all resin with a little bit of PE – which anyone who has made a Verlinden conversion before knows is as tough as old boots – so the PE went in the bin!! Although not before I used it as a template for plastic card. Sorry Mr. Verlinden. This is where it gets a bit tricky. Since the conversion set turns out to be nearly as heavy as the real thing, the complete conversion was made off the model. It makes the construction a little bit fiddly. However the basic construction is very straightforward and very well done. There were no problems here at all. The resin parts needed a bit of clearing up, but that's resin for you. The detail and fit are both excellent. When fitting the roller to the model.... TAKE CARE as this could make or break your model. 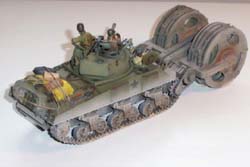 The tracks, and running gear have to be fitted on the tank in their final position. First thing, get your model on a flat surface and test fit the conversion to your model, a little bit of work is needed here, but it will fit. The tracks, and running gear have to be fitted on the tank in their final position. First thing, get your model on a flat surface and test fit the conversion to your model, a little bit of work is needed here, but it will fit. There are two large mounting brackets that fit on to the front of the Sherman drive housing, line these up and mark their place on the model using a pencil. Remove the rollers, so all that you're left with are the mounting brackets and the rods that run through them. Do not glue the rods in yet, but use them to line the brackets up, and glue them on to the drive housing. Remove the rods, and fit the rest of the mine rollers in to the brackets. DO NOT GLUE ANYTHING until you have the complete roller assembly on the front of the tank.  Because the conversion is so heavy, it will pull the front on the tank down, which will raise the back end of the model. Gently push down on the back end of the model, so the tracks are touching the flat surface. Next push down the rollers so they are touching the surface, then with any spare fingers you have run glue into all the joints of the conversion to make it solid. Hold it for a while, then check that everything that should be touching the ground is !! Because the conversion is so heavy, it will pull the front on the tank down, which will raise the back end of the model. Gently push down on the back end of the model, so the tracks are touching the flat surface. Next push down the rollers so they are touching the surface, then with any spare fingers you have run glue into all the joints of the conversion to make it solid. Hold it for a while, then check that everything that should be touching the ground is !! If you plan to put your model on a scenic base with some ground work , you can afford to be a bit out of line, but if it's going to be static, EVERYTHING MUST TOUCH THE GROUND. With the mine roller on the model is now very heavy. So be careful. If you drop it on your toe, it'll hurt!! The Arber detail set was now fitted to the upper hull. My word, what a detail set - this is truly THE detail set for the Sherman. There were no major problems here, just follow the plans, and take your time. How much of the set you use is up to you, but if you use all of it, well done as there's enough of it . The turret 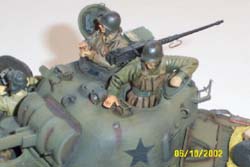 Again the plans for both the model and the detail set were followed. Now you end up with a Sherman, with a mine roller as big and as heavy as the Sherman which needs to be painted - remember to mask off the rollers, as they should have already been painted. Again the plans for both the model and the detail set were followed. Now you end up with a Sherman, with a mine roller as big and as heavy as the Sherman which needs to be painted - remember to mask off the rollers, as they should have already been painted. Painting First of all please let me say that there are many ways of painting olive drab, this is but one. It is not THE way, but my way. It works for me, and I am not going to get into a heated discussion about the various shades of olive drab!! 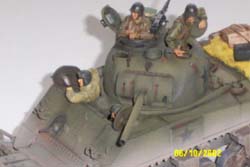 But let me say this, if you get a basic olive drab colour, cover it in mud, expose it to the elements, let crew climb all over it, and such like, the basic colour will change. It will become weathered, remember this the next time you look at a model and are just about to say that's the wrong shade of green!!! (sermon over) But let me say this, if you get a basic olive drab colour, cover it in mud, expose it to the elements, let crew climb all over it, and such like, the basic colour will change. It will become weathered, remember this the next time you look at a model and are just about to say that's the wrong shade of green!!! (sermon over) Everything was first sprayed in primer, and allowed to dry for 24 hours, the entire model was sprayed black, and allowed to dry, then Tamiya olive drab was sprayed in a cloud pattern over everything, a second coat of olive drab was applied, but this time, lightened with a bit of yellow, again in a cloudy pattern over the entire model. 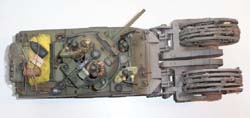 At this stage it looks terrible, but don't worry, a wash of burnt umber, and black was given all over the model, darkening the mixture around hatches, raised detail etc. This was then put aside to dry for 48 hours. At this stage it looks terrible, but don't worry, a wash of burnt umber, and black was given all over the model, darkening the mixture around hatches, raised detail etc. This was then put aside to dry for 48 hours. While this was drying I turned to the crew figures. We all have our own way of painting figures, and I'm not as good as I should be at it, so look carefully at any references you have . . that one I leave to you !  Back to the tank, The stars were painted on using masks, the whole model was dry brushed using Humbrol paints, it's up to you how much you weather your model, but don't overdo it. Static grass was added to the rollers, and some on the running gear, and to finish off pastel chalks were used for the dust, exhaust stains, etc., Two coats of matt varnish were sprayed over all the model to seal it. Back to the tank, The stars were painted on using masks, the whole model was dry brushed using Humbrol paints, it's up to you how much you weather your model, but don't overdo it. Static grass was added to the rollers, and some on the running gear, and to finish off pastel chalks were used for the dust, exhaust stains, etc., Two coats of matt varnish were sprayed over all the model to seal it. That's about it, I hope you like the model, and this is of some help. | 


|