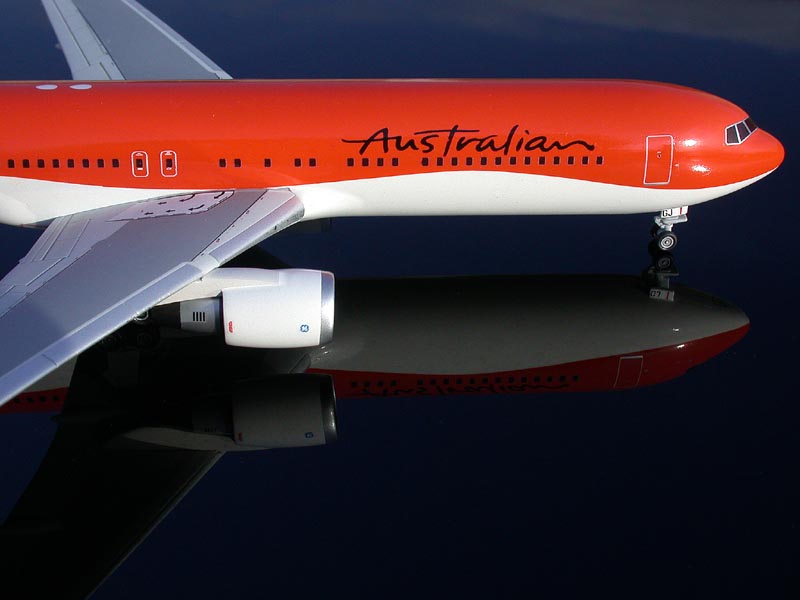
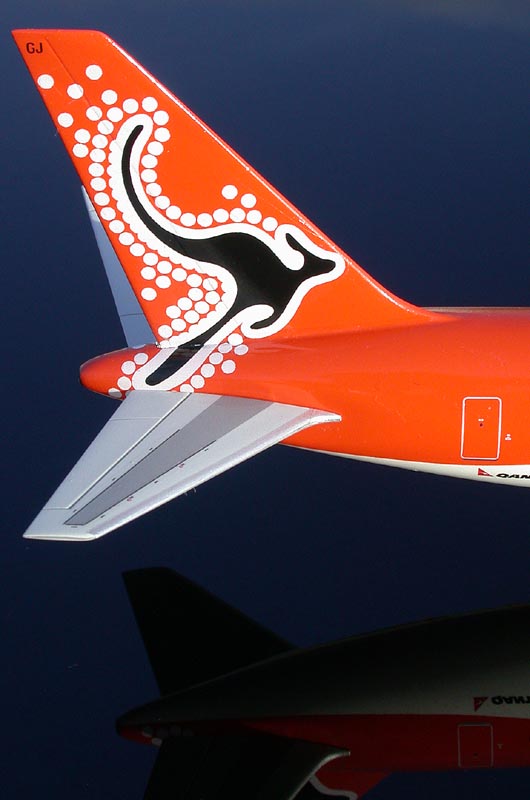
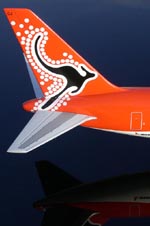
Australia's Newest Livery: Building the Australian
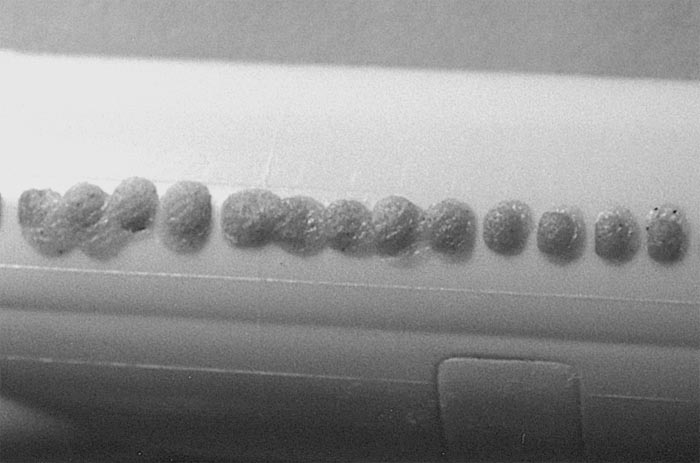
767-300 in 1/200 | 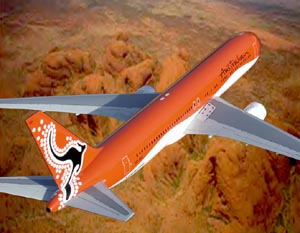 | Project Once in a while, a new paint job just knocks your socks off. This was one such scheme. With the 'Roo on the tail, the curved cheat line - and that color! I knew I had to do this one the minute I saw this on DRAW Decals www.drawdecal.com site. This article started out as a review just on the decal sheet, but after a few recent emails with questions on the South African 737 I did last year for Internet Modeler, I thought some of you would like additional details on painting. I'll also tell you how a computer graphic program contributed to the project. Prototype History 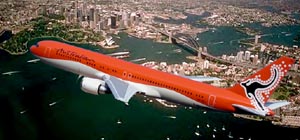 Australia's newest international airline officially took to the skies on October 27, 2002, with this new design created by Hulsbosch Communication by Design, features a kangaroo on the tail and ochre - the color of the heart of Australia - as its signature color. Australian Airlines, owned by Qantas Airways Limited, flys from Cairns, Australia to Fukuoka, Singapore, Taipei and Hong Kong, Nagoya and Osaka. Australia's newest international airline officially took to the skies on October 27, 2002, with this new design created by Hulsbosch Communication by Design, features a kangaroo on the tail and ochre - the color of the heart of Australia - as its signature color. Australian Airlines, owned by Qantas Airways Limited, flys from Cairns, Australia to Fukuoka, Singapore, Taipei and Hong Kong, Nagoya and Osaka. The Decal Sheet This sheet is one of DRAW Decals newer releases, actually being on the market one week after the airplane made its roll out from the paint shop on September 15, 2002. Thanks to one of DRAW's contributing artists, a very talented Argentinean named 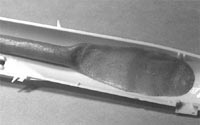 Cristian Xavier Baló created the artwork over a weekend. This is an ALPS printed sheet and is available in 1/200 and 1/144. It contains all the titles, logos and windows. The builder will have to provide the Corogard for the wings. Cristian Xavier Baló created the artwork over a weekend. This is an ALPS printed sheet and is available in 1/200 and 1/144. It contains all the titles, logos and windows. The builder will have to provide the Corogard for the wings. Fuselage 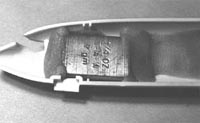 Before I started on the body, I wiped all the mating surfaces and the back side of the windows down with Polly S Plastic Prep. This removes all the mold release and finger grease. As you might remember from the last article, I was using Zap-a-Gap and baking soda to fill the windows. I was having a hard time removing some tiny air bubbles in the Zap with a pin before I added the baking soda. I'm now doing something "new and improved". Before I started on the body, I wiped all the mating surfaces and the back side of the windows down with Polly S Plastic Prep. This removes all the mold release and finger grease. As you might remember from the last article, I was using Zap-a-Gap and baking soda to fill the windows. I was having a hard time removing some tiny air bubbles in the Zap with a pin before I added the baking soda. I'm now doing something "new and improved". 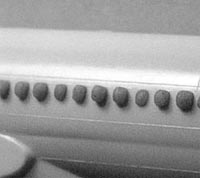 I'm now using Apoxie® Sculpt epoxy putties. This is like Milliput, but it's made here in the states and you can get a fresh batch buying direct from the factory. It comes in two sealed plastic tubs in 10 different colors. You knead both parts together into a long pencil shaped piece the length of the windows. I then place it in behind the open windows and push toward the outside. The putty then oozes out of the holes like your kids' Playdough toys. I'm now using Apoxie® Sculpt epoxy putties. This is like Milliput, but it's made here in the states and you can get a fresh batch buying direct from the factory. It comes in two sealed plastic tubs in 10 different colors. You knead both parts together into a long pencil shaped piece the length of the windows. I then place it in behind the open windows and push toward the outside. The putty then oozes out of the holes like your kids' Playdough toys.
 Once this is done, go back and very lightly mash the putty down so it is slightly covering the outside of the window. This putty will start setting up in about an hour and some of the extra can be trimmed with a new blade. After curing in 24 hours, add two strips of tape along each side of the windows. This protects the sides and gets you down to a safe finishing thickness with some 220 sandpaper. Once this is done, go back and very lightly mash the putty down so it is slightly covering the outside of the window. This putty will start setting up in about an hour and some of the extra can be trimmed with a new blade. After curing in 24 hours, add two strips of tape along each side of the windows. This protects the sides and gets you down to a safe finishing thickness with some 220 sandpaper.
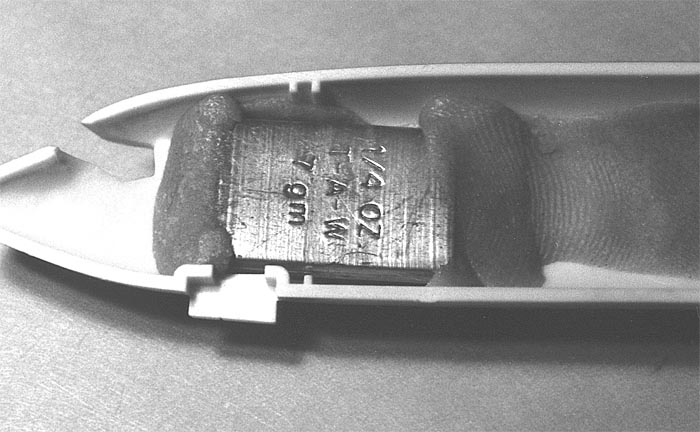
 After I did this, I removed the tape and did a final profiling with 600 to blend it in. This putty feathers out to an extremely fine edge. The company says that there is zero shrinkage and I agree with that. I have yet to see any cracks after painting. As you can see from the photo, this also is a good way to install your nose weight. I placed a 1/4 oz. of lead in each side. This new window method takes a little longer, but I'm much happier with the results, thanks to this great putty. After I did this, I removed the tape and did a final profiling with 600 to blend it in. This putty feathers out to an extremely fine edge. The company says that there is zero shrinkage and I agree with that. I have yet to see any cracks after painting. As you can see from the photo, this also is a good way to install your nose weight. I placed a 1/4 oz. of lead in each side. This new window method takes a little longer, but I'm much happier with the results, thanks to this great putty.
Wings/Engines 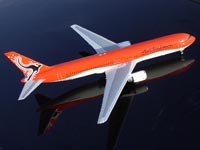 Assemble the engines and the wings per the instructions. Paint and detail these as separate sub assemblies to be glued on after the body is painted and decaled. Assemble the engines and the wings per the instructions. Paint and detail these as separate sub assemblies to be glued on after the body is painted and decaled. The first item is always the surface prep. With the PollyS Plastic Prep, I wiped down all surface areas to be painted. I dipped an old toothbrush in the Polly S and scrubbed out all the recessed seams of sanding dust. The next step was to spray the primer on the body. Two light coats of Tamiya Fine Surface Primer sprayed from the can were applied. This is a thin, near white primer. After it was dry, I corrected any imperfections and re-applied another coat of primer to the area. When everything looked perfect, I applied Tamiya Pure White TS-26 from the spray can to the entire body. After a week to cure, (Tamiya feels dry to the touch in minutes), the orange top was taped off with Tamiya masking tape. 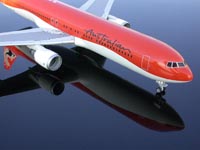 Painting the "Wave" Painting the "Wave"
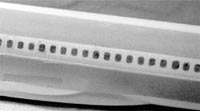
Now came the most difficult part, the "wave." It looked simple enough, but when I studied the instructions and the photos on www.Airliners.net, I saw a problem. Remember how we puttied up the doors, windows and painted the body? These two vital reference marks were now gone. At the front door, the line is slightly below the door sill. At the end of the first row of windows, it's about one window pane below that mark. How do I find the points again? After much thought I came up with an idea. 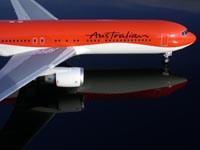 I went back to Airliners.net and found the 90-degree side shot. I then copied it into Adobe Illustrator. Measuring the model, I sized the photo to the exact dimensions and then traced a black line along the front half of orange color. Because part of the curve is hidden by the wing, I copied the first part and pasted it over the missing part and finished the line to the rear. I now had the full set of curves. This wavy black line was placed onto a clean page and printed on heavy weight paper, printed, and then cut out. I now had a template to trace a pencil line for laying the tape down. The rear aligns with the APU doors at the tail and the front is just below the middle of the radome. The beauty of the template is that both sides match perfectly. So you don't have the same headaches I encountered, I have saved this template as a PDF file on DRAW Decals' web site for you to download and print out. I went back to Airliners.net and found the 90-degree side shot. I then copied it into Adobe Illustrator. Measuring the model, I sized the photo to the exact dimensions and then traced a black line along the front half of orange color. Because part of the curve is hidden by the wing, I copied the first part and pasted it over the missing part and finished the line to the rear. I now had the full set of curves. This wavy black line was placed onto a clean page and printed on heavy weight paper, printed, and then cut out. I now had a template to trace a pencil line for laying the tape down. The rear aligns with the APU doors at the tail and the front is just below the middle of the radome. The beauty of the template is that both sides match perfectly. So you don't have the same headaches I encountered, I have saved this template as a PDF file on DRAW Decals' web site for you to download and print out.
 The airplane was taped off and sprayed with Humbrol #82 Lining Orange. This shade is a perfect match for their ochre color and being a flat paint, I could get a nice feathered edge on the tape line so not to have a steep edge over the white. When dry and the tape was pulled off and I lightly sanded the edge with 2000 grit sand paper, smoothing out any ridge. The model was then glossed with Future for decaling. The airplane was taped off and sprayed with Humbrol #82 Lining Orange. This shade is a perfect match for their ochre color and being a flat paint, I could get a nice feathered edge on the tape line so not to have a steep edge over the white. When dry and the tape was pulled off and I lightly sanded the edge with 2000 grit sand paper, smoothing out any ridge. The model was then glossed with Future for decaling.
Decalling The decal sheet is pretty straightforward, with the fit being excellent. I checked the sizing of the titles over the 100% photo I was using and found them to be right on the mark. The decal sheet was missing one set of registration letters under the APU. This was found on the company web site. Also there are three planes flying now. I talked to DRAW about this and they will add these new regs to the sheets. I started decaling on the 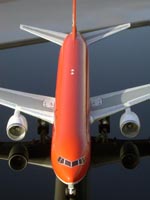 right side first. After the right side was complete, I applied a thin coat of Future with a cotton swab over each decal. ALPS decals have no clear coat and this protected the decals when I worked on the left. After all the decals were on, the entire body was sprayed with Future. right side first. After the right side was complete, I applied a thin coat of Future with a cotton swab over each decal. ALPS decals have no clear coat and this protected the decals when I worked on the left. After all the decals were on, the entire body was sprayed with Future. Final Assembly The completed engines and wings were glued onto the body. I had a very slight gap around the leading edge. This was filled in when the wing had dried with white glue. Apply the glue with a toothpick on the gap. When you have finished, take a Q-Tip dampened with water and remove any excess. You may have to repeat this one or twice to get the correct filling. The dried glue can be painted with a fine brush to hide the area. I use this method to finish out any slight gaps missed in the sub-assemblies. Finish up by 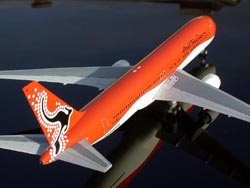 attaching the landing gear. Remember to add your nav lights, beacons and antennas to complete this beautiful model of the 767. attaching the landing gear. Remember to add your nav lights, beacons and antennas to complete this beautiful model of the 767. Conclusion I hope I have made painting of this project a little easier for you. Remember, use new tools to aid in your next project - feel free to experiment - that's how we improve. | 


|