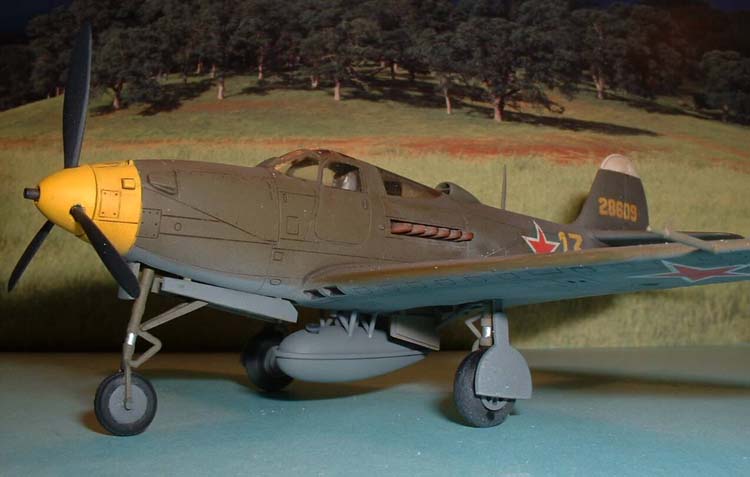
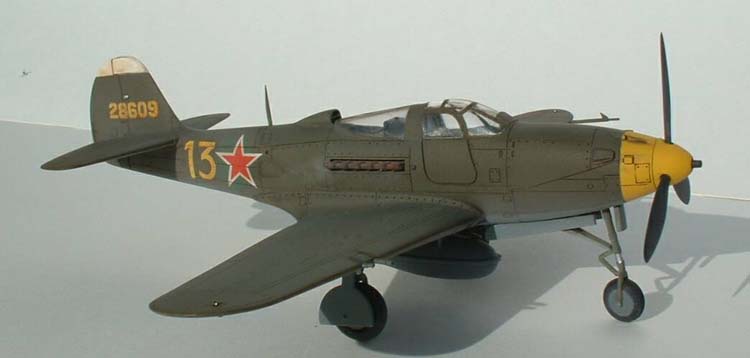
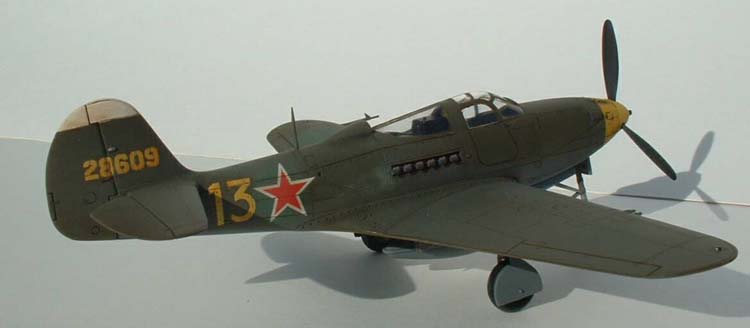
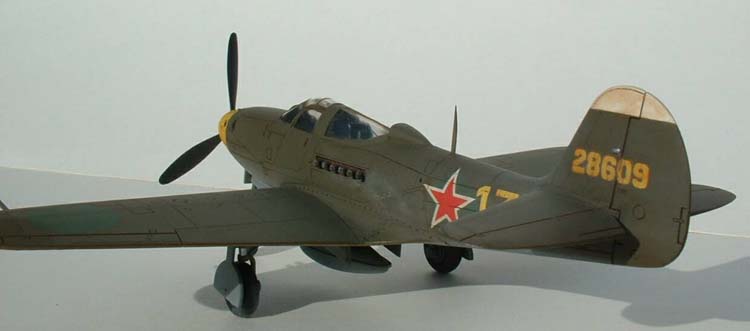
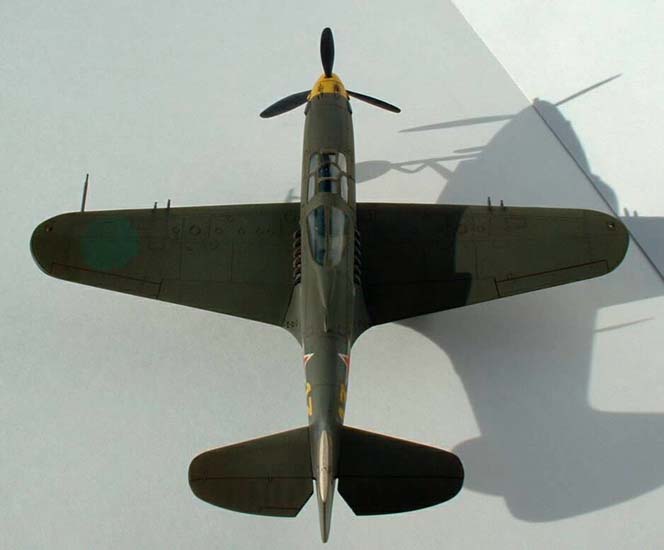
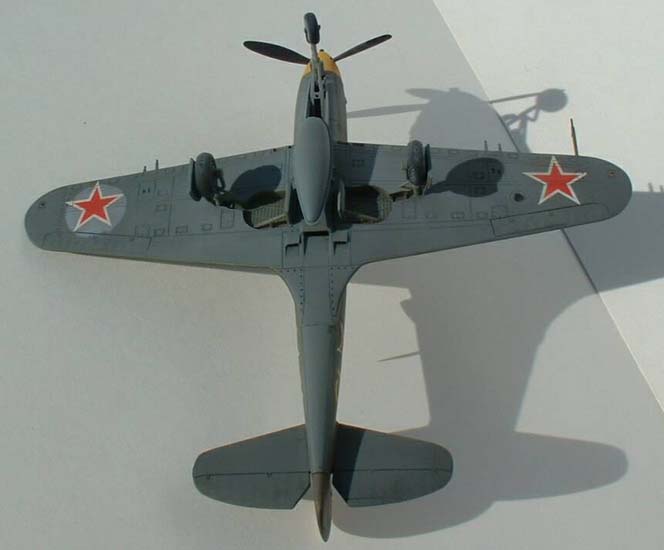
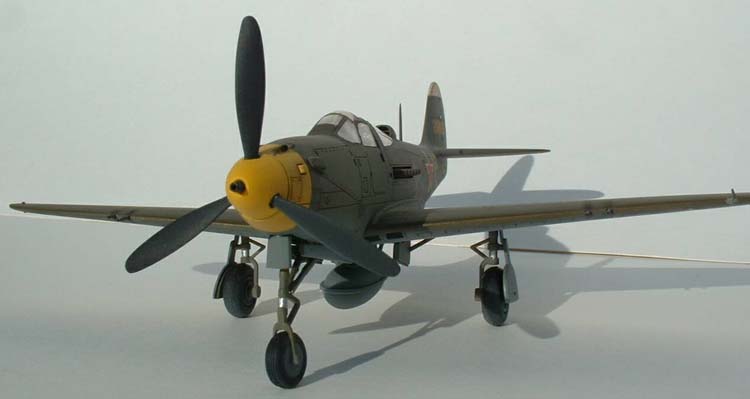
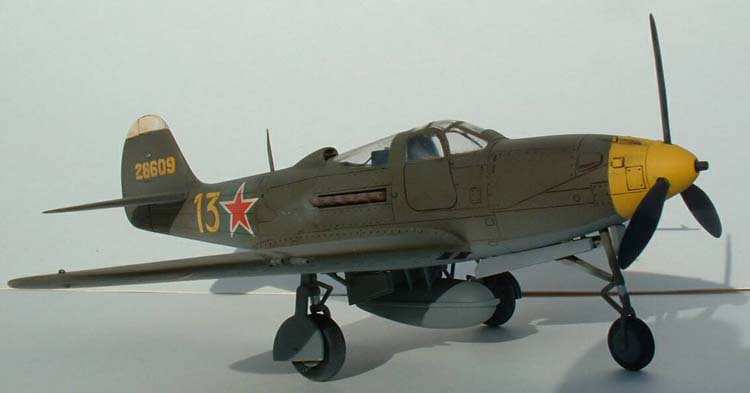
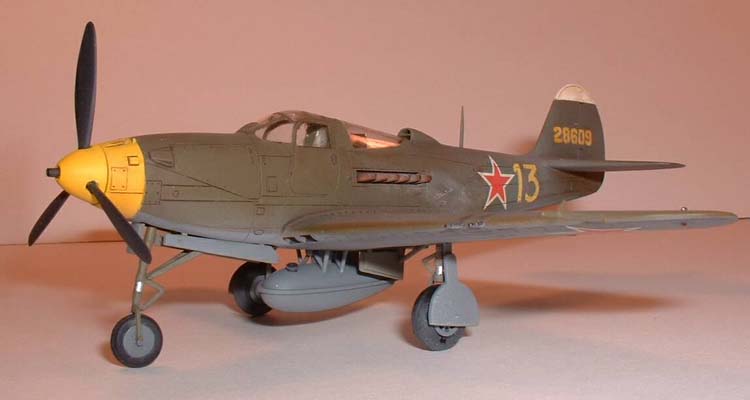
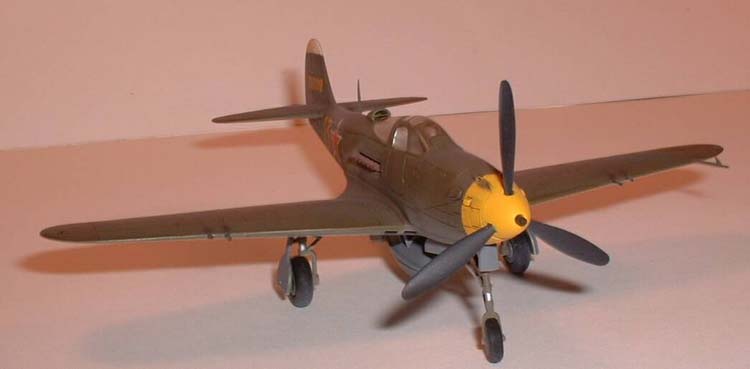
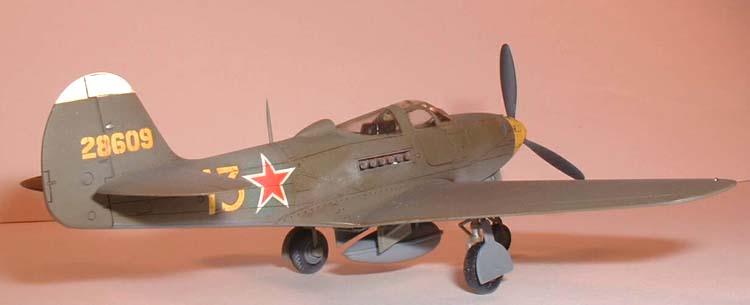
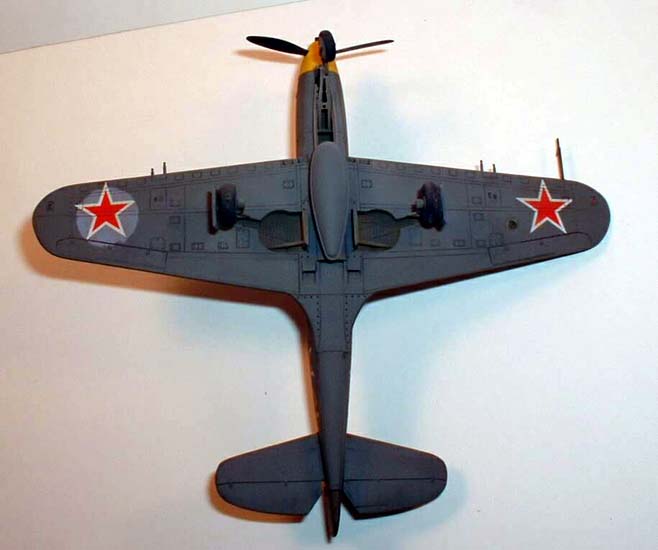
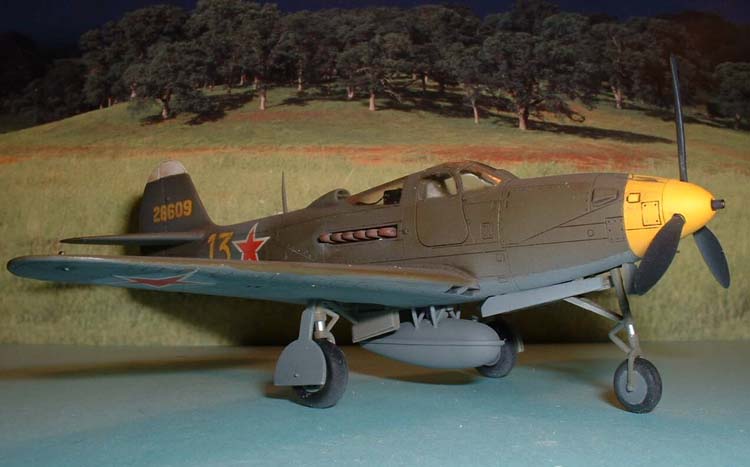
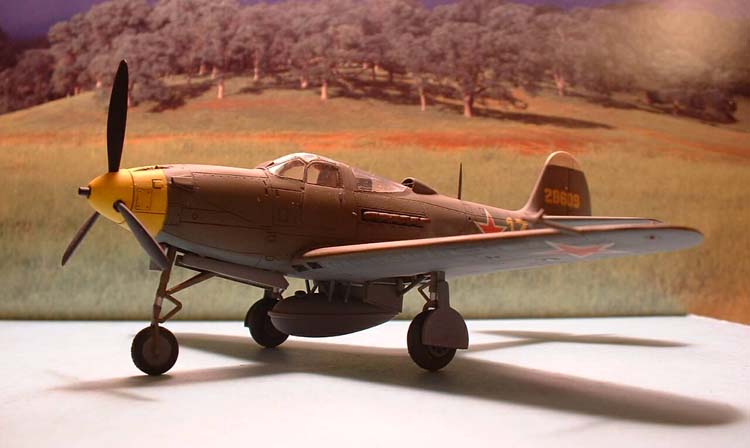
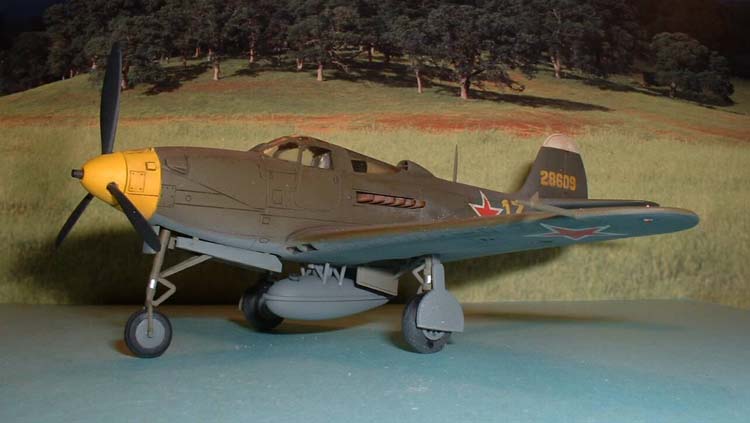
Academy 1/72nd Red Star P-39N |  | History The US didn't have much luck with the P-39. While it had its few proponents, overall the American flyers didn't like it. However, when you're struggling for equipment to help you fight, you'll use everything you have to the best of your ability. This is definitely true with the Soviet use of the Airacobra. While it still had its opponents in the VVS, those who took advantage of its strong suits put the P-39 to good use. Heavily armed the P-39 in the right hands could make short work of just about anything thrown at it. While it was well known that above a certain height the P-39 would suffer dramatically, if used within this guideline the plane was a formidable opponent. However, it took a lot of flying and training to make the P-39 come into its due. This is why it wasn't liked that well by the novice VVS flyer, but put to good use by aces like Pokryshkin, Rechkalov and Fadeev. When organizations like the 9th Guards Fighter Regiment, that housed these aces, used the P-39 under their own doctrine, it was a deadly machine. (For more information about the P-39 use in the 9th Guards, definitely check out Attack of the Airacobras, Soviet Aces, American P-39s & The War Against Germany by the late Dmitriy Loza, translated by James F. Gebhardt.) One "Westernism". While true that aircraft were used in whatever role they were needed, the primary mission of the P-39 was not ground attack, or ground strike. It was used, first and foremost, as an air-to-air weapon of war. I based my model on Andrei Trud's (24 + 8 Victories) second known machine he flew with the 16 GIAP circa fall 1943. It's unknown exactly which type of P-39 it is but it could be a P-39K. Wing armament was removed and it flew with the 37mm cannon in the nose. The Kit The Academy kit of the P-39 consists of 55 injected parts and three clear pieces. Options include different exhausts for the earlier versions; under-wing guns for the P-39Q as well as a spinner for the earlier 20mm canon versions (versus the 37mm of the later versions). Decals that come with the kit are for a P-39Q flown by Lt. Col. William Shomo of the 71st TRS/82nd TRQ, USAAF, 1944; and a P-39N flown by Maj. V.F. Sirotin of the 17th IAP, VVS, 1944. Be aware that Academy supplies the Soviet red stars with a white circle behind it. While the only photo I have of Sirotin's plane doesn't show the markings, it's highly suspect that he flew a P-39 with so obvious a "bulls eye". In fact, there were very few VVS P-39s that retained the white circle, instead having them obliterated by the VVS. If wanting to make the Academy kit into anything other than a P-39N or -Q, it's best to have references about to see exactly what changes are needed to "backdate" the kit. Construction Initially I wanted to build this out of the box. However, with seeing how Academy "missed" in a few places, I just couldn't build it out of the box and live with myself. While I didn't accomplish all changes, I did the ones I deemed necessary for my first P-39 build. Construction starts with the cockpit. If you decide to leave the cockpit open, then you'll need to take care of one big "goof" by Academy. They molded two sets of throttle quadrants to both doors. In fact, the throttle was only on the starboard side (not on the door but the doorframe) so you'll need to remove the one from the port door. What's also unfortunate is that Academy provides the starboard door separate from the rest of the kit, so if you want to leave one of the doors open you're left with the one door that wasn't opened often due to the throttle quadrant being in close proximity. Since I decided to leave the door shut, I didn't do anything extra to the cockpit besides adding photoetch seat belts (coming from the True Details US set). Since there is too much controversy about the color of P-39 cockpits (more so than even VVS cockpit colors) I used Polly Scale French Fokker Dark Green because I thought it looked right. The cockpit is now glued into one side of the fuselage and the fuselage halves glued together, trapping the support strut for the nose gear. I left the nose gear off until last (as well as the propeller and spinner assembly). If glued together carefully, you'll be left with little to no gaps in the fuselage seams. One thing to look out for. Be sure you add plenty of weight to the nose so it sits on its nose gear. I didn't and had to shove more weight into the nose after the model was completely together. I'm guessing that when Academy mentions seven grams of weight in their instructions, they're probably right. Construction continues with assembling the wing pieces together. Before you do so, though, you need to decide what version you're building, as Academy has thoughtfully flashed over the holes for the wing guns of the versions prior to the -Q, as well as the holes in the wings' undersurfaces for the -Q's wing gun pods. One other hint. After gluing in the flip-down landing light into the lower wing piece - and before you add the upper wing pieces - be sure you paint the back end of the light silver. Trust me on this, as I forgot to do so, and it looks really silly without the silver allowing the plastic color to show through. Before adding the wing I decided to make two corrections to the fuselage. First, I added a baffle to the inside of the air scoop on top of the fuselage behind the cockpit. It's an extremely noticeable omission; one I felt needing correction. The other correction was adding the "brows" or "blast deflectors" to the top nose machine gun openings. Basically I took round, plastic rod, cut lengthwise in half, and after gluing them in drilled them out to accept gun barrels later on. The openings in the kit are only acceptable for the earlier versions of the P-39. Now the wings and horizontal tailpieces are glued on and faired in. While I had no problem with the tailpieces, I did have some problem with the port side of the wing root. The Academy kits usually fit really well together, but this one area was a problem for me for whatever reason. All it required, luckily, was just an extra "spot" of putty, and after rescribing the panel lines there were no more problems. Before adding the clear pieces I thought the area under the rear canopy was awfully barren, so I stuck some wiring in there to "jazz" it up. Now I added the clear pieces and a few were stubborn and required a bit of CA to blend in properly. Once it was all blended in, I used the Eduard canopy masks, masked the wheel wells and was ready for painting. Final Assembly and Painting First color to go on was the Aeromaster Neutral Gray acrylic on the undersides. It appears a little dark to me, but I didn't do anything to correct it, just wanting to finish the model. After spraying the Gray, followed by an overcoat of Future (allowing the Future to dry at least 24 hours) I masked the bottom and sprayed the white fin tip - wait at least a day for drying and masked it off - then the rest of the top Aeromaster Olive Drab acrylic. After the Olive Drab was dry and a coat of Future sprayed, then I sprayed the yellow spinner and nose. It definitely worked better for me doing in this way. After it all was dry I then cut out some circles from the wider masking tape. After taking some of the tack out of the tape (by sticking it to my hands a few times) I put the tape down and sprayed the various circles to show where the Soviets painted out the US markings. I used Testor's Armor Green for the green and Polly Scale's Haze Gray for the wing's underside. After that was all dry, it was time to proceed. I unfortunately had two waiting periods for this model. First I waited on the ALPS decals to be printed for me. While this wasn't a long wait, the next two were. Since I didn't like how small (in all dimensions) the Academy wheels were I wanted to replace them. Since I couldn't find the Airwaves resin ones (being told they're out of production) I decided to add the Equipage wheels. Well, that was almost a six-month wait, unfortunately. Originally I wanted this model to be a "slammer" but with that large of a waiting period it just wasn't. I also had to wait to find suitable stars for the machine I was modeling. The machine didn't have Victory stars (with the red border around the white border) instead having only a white bordered red star. Finally I ordered some Techmod decals that came to the rescue. At this stage I added the rest of the decals and exterior details. At first the gun barrels were added to the wings, but later I found out that Trud flew this P-39 without any wing guns so they were later removed. The pitot tube in the wing and the antenna on top of the fuselage were also added. Glued to the underside were the landing gear, all gear doors and extra fuel tank. The nose gear had the molded-in wheel removed and after thinning the fork the Equipage replacement was glued on after painting the hub. Washes with oils and dry brushing with pastel chalks were done to give it a little worn appearance as well as bringing out the engraved panel lines. It appears that there were no wing-walks on this particular example so they were left off. Conclusion The Academy P-39 is an awesome model. Since I wanted my first build to be non-distinct and not one of the major ace's mounts, I chose this machine. I do have plans for the next two I want to build. The next one will be just a little "more" than this one. I have the Eduard Zoom set, so I'll cut out one of the "car door" windows and detail the cockpit just a little more. Finally, the last one will be full bore with the CzechMaster Kit resin set that contains a lot more "bells and whistles", no pun intended. Then again, plans of mice and men. My thanks to Erik Pilawskii for all the help as well as Tomasz Gronczewski for his valuable assistance | 


|