Trumpeter 1/48 SM.79 SparvieroBy Michael BenolkinRevised 7/2/03 | 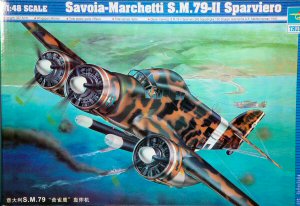 |
History
The Savoia Marchetti SM.79 is probably the most recognizable aircraft to serve in the Italian Air Force during World War II. While it was officially named 'Sparviero' (Sparrow Hawk), it was also known as the 'Gobbo' (Hunchback) due to its unique silhouette. Its designers followed the same design philosophy as other international civil aircraft designers of the era including Junkers and Ford - three engines provide a good balance between performance and safety.
Originally designed as a civil transport, the SM.79-I set records in international competitions during the mid-1930s. The SM.79-I was powered by three 750 hp Alfa Romeo engines. In the late 1930s, the Italian Air Force began receiving the SM.79-II powered by three 1,000 hp Piaggio P.XI RC.40 engines. One additional domestic variant was produced - the SM.79-III that was essentially an SM.79-II with a forward-firing 20mm cannon and no ventral gondola. Over 1,300 Sparvieros were produced through 1944.
The SM.79 was used as a bomber and transport during the Italian alliance with Nazi Germany, but it gained its 'fame' as a torpedo bomber in the Mediterranean. The Sparviero was responsible for sinking several Royal Navy destroyers and the heavy damaging of a battleship and the aircraft carriers Indomitable, Victorious and Eagle.
The Kit
 |
 |
 |
 |
 |
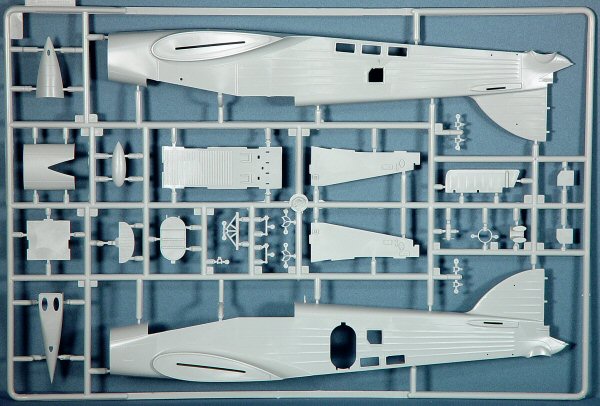
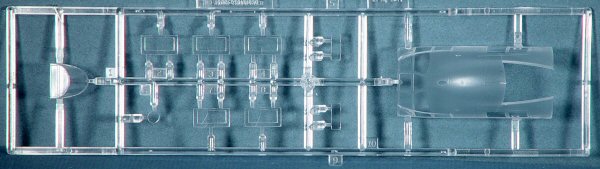
I've become accustomed to being pleasantly surprised and a bit awed by the sheer volume of parts in a Trumpeter kit. Such was the case with the Sparviero too. The kit is clearly well thought out for construction and installation of all of the details. Molded in light gray styrene, parts feature scribed detail where appropriate and raised detail likewise.
Having put aside the Trumpeter 1/35 Mi-4 Hound kit temporarily due to the intimidating number of ejector pin marks throughout the fuselage interior, I had hoped that the SM.79 would be spared that challenge. Alas, while the fuselage interior features nice molded-in detail representing the wooden ribs and stringers of the rear fuselage, these were overcome by numerous ejector pin marks as well. Bad dog, no biscuit!
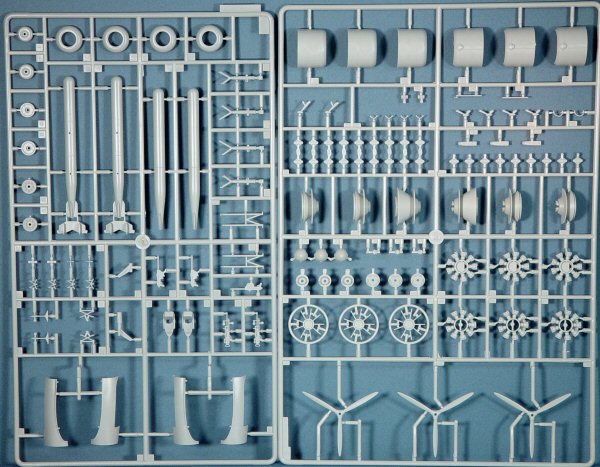
Nevertheless, the kit features quite a few nice features like a positionable crew entry door, open waist gun windows w/machine guns, twin torpedoes, positionable leading edge slats, flaps and flight control surfaces (the instructions refer to the flaps as the inner ailerons). Each of the three engines are nicely detailed though I was a bit surprised that no plumbing was included for the exhaust stacks from each cylinder into the British-styled cowl collector ring. In fact, whilst pondering this detail amongst the photos in the Squadron/Signal SM.79 in Action, I noticed that though this kit appears to represent a later operational configuration, it retains the early exhaust duct configuration - all three engines exhausting from the port side low. In 1939, the SM.79's #3 engine was modified to exhaust from the starboard side low position. Check your references for which bird you're modeling as this detail should be easy enough to correct.
 |
 |
 |
 |
 |
 |
 |
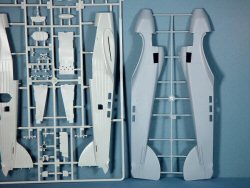
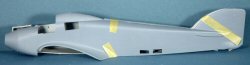
So how does this kit stack up to the Classic Airfames Sparviero? I'm glad you asked. Comparing the fuselages side-by-side (Photo 1), both kits seem to have nailed the shape with one exception.
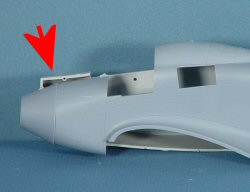
Shortly after reviewing the CA SM.79 kit, I received a nice email from one of our Italian readers who provided some drawings that show that the nose of the CA kit slopes up from the bottom and slopes down from the top too abruptly. You can see (Photo 2) that the slope of the forward fuselage does drop a little too sharply (see arrow). The engine mount cone has a corresponding odd shape, but this one doesn't count as this is covered by the engine cowling.
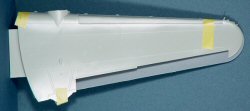
Placing the Trumpeter fuselage on the same diagram (Photo 3) revealed a closer (not perfect) match. Round one goes to Trumpeter.
The next step was to tape the two fuselages together and see what happens (Photos 4 & 5). You can see that with the exception of the nose (Photo 6) and the ever-so-slight difference in shape of the vertical stabilizer (Photo 5), these kits are both close enough for government work.
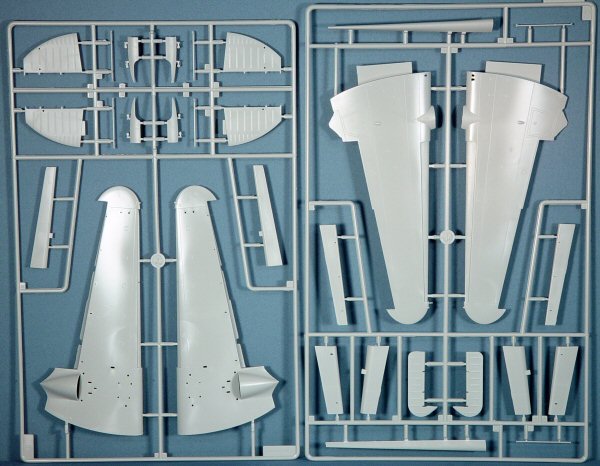
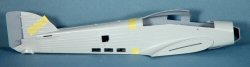
It was at this point that I noticed another major difference between these two kits. The Sparviero had fabric-covered rear fuselage and tail surfaces. Anyone who has spent time around rag-covered birds know the look of stretched doped fabric over ribs and stringers. The ribs and stringers stick up through the fabric and the areas in-between will have a gentle bow or curve. In the case of the Classic Airframes kit, this detail is a bit understated but otherwise correct. On the Trumpeter kit, the ribs and stringers appear more like corrugated metal, more like reinforcing strips down the sides of the fusealge and on the tail. This one is a definite score for the Classic Airframes team.
A look at the wings (Photo 7) reveal that the spans are correct though the chord near the wingtip is wider on the Classic Airframes kit, but not by much. Which one is correct? Beats me - I don't have that diagram.
Interestingly enough, I missed this last detail the first time around - the horizontal stabilizers are not even close to being the same size between the two kits. Thanks for the emails pointing this out! I went back to the drawings that were emailed from Italy after the Classic Airframes review and found that there were usable profiles of the horizontal stabs there, so I fired up the laser printer and put the two kits to test.
 The
Trumpeter horizontal stab was almost a scale foot too narrow in span
while the elevator was almost correct. The Classic Airframes stab and
elevator are molded as one piece, but these scaled out correctly. Score
another big one for Classic Airframes.
The
Trumpeter horizontal stab was almost a scale foot too narrow in span
while the elevator was almost correct. The Classic Airframes stab and
elevator are molded as one piece, but these scaled out correctly. Score
another big one for Classic Airframes.

The one thing that needs to be corrected on the Classic Airframes' part (and the reason that the Trumpeter elevator was almost correct) is that the base of the elevator should not be flush with the base of the horizontal stab. If this had been done in real life, there would have been no room for the rudder to move. According to the diagram, trimming the elevator a few millimeters outboard from the base will do the trick and then round the new inboard edge of the elevator out to the trailing edge.
Conclusions
Should you trash your Classic Airframes Sparviero? Not at all. This kit is a limited run multimedia model that may not have as many of the details that the Trumpeter kit offers (positionable flight controls/flaps, etc.), the resin cockpit and engines are still nicer than the Trumpeter versions and you won't have to re-sculpt the rear fuselage and tail surfaces to achieve the fabric covered look.
Should you run out and buy the Trumpeter Sparviero kit? If you don't have one of the CA kits or you are uncomfortable working with resin and vacuformed parts, then by all means this will an easy build. The non-multimedia Trumpeter kits (no resin or photo-etch) are usually easy builds for modelers of all skill levels. Even the multi-media versions are easy builds, but are recommended for more skilled modelers that are comfortable working with resin parts and cyano-based adhesives.
While it will take a bit of sanding and sculpting to overcome the corrugated metal look, this kit is recommended.
My sincere thanks to Stevens International for this review sample.

![]()


