Bandai 1/850 USS Enterprise NCC-1701 |  | History  The Star Trek USS Enterprise is probably one of the best known silhouettes in TV and cinema history. Somewhere in time, the original cylindrical-engined NCC-1701 that appears on TV reruns nightly was modified into the version that appeared in the first two Star Trek movies. The Star Trek USS Enterprise is probably one of the best known silhouettes in TV and cinema history. Somewhere in time, the original cylindrical-engined NCC-1701 that appears on TV reruns nightly was modified into the version that appeared in the first two Star Trek movies.
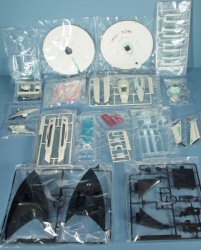
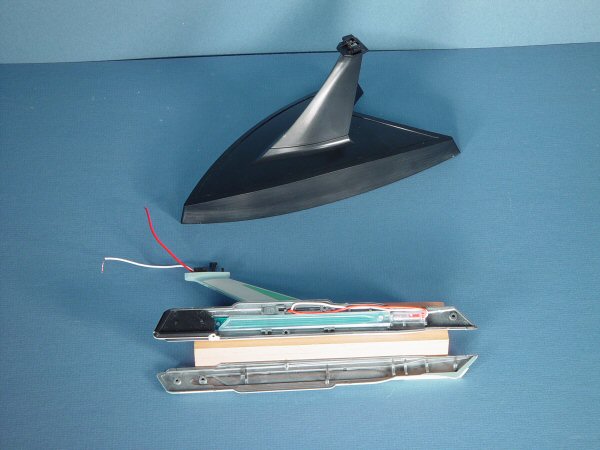
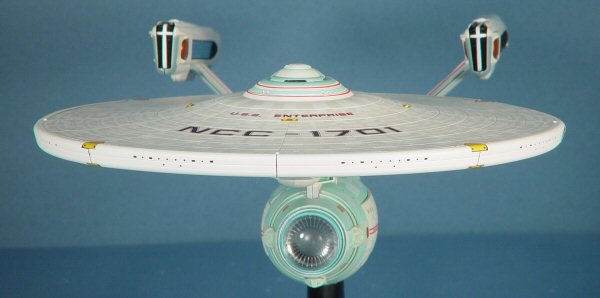
In reality, the Smithsonian National Air & Space Museum (NASM) was the proud recipient of the larger starship model and it spend a tidy sum of money to restore the model before putting it on display in the NASM for many years. When Paramount decided to finally launch production of the first movie, NASM politely declined to return the model (and given that the starship was beat up and destroyed in the second movie, this was indeed a logical decision!). This forced the designers to come up with a new version of the Enterprise that would also show some visual improvements to account for the passage of time between the TV series and the first movie a few decades later. This new look incorporated slimmer warp engine nacelles that are displaced wider apart than the earlier version as well as some other visual enhancements. One significant change was the paint job. Gone was the bland overall light gray starship - in its place was a ship that used several shades of gray in an 'Aztec' pattern across the hull along with light blue and other eye-catching details. This Aztec pattern that would appear on all future starships would become a challenging detail for modelers to replicate. The Kit When Bandai announced this kit last year, it was caused a great deal of curiosity in the industry. Of course AMT/ERTL has been the sole producer of Enterprise kits since the 1960s and the movie version was one of those released. In fact, AMT/ERTL has produced EVERY version of the Star Trek Enterprise - NCC-1701 (TV), NCC-1701 (Movie), NCC-1701A, NCC-1701B, NCC-1701C, NCC-1701D and the 'current' NCC-1701E. Up until now, the only other mainstream manufacturer that produced Star Trek kits was Monogram who produced three ships from the Star Trek Voyager series. It was quite puzzling when both AMT/ERTL and Monogram allowed their licenses with Paramount to lapse and all Star Trek kit production ceased. Actually there are two new faces in the Star Trek modeling universe - Bandai and Polar Lights! While Polar Lights are working on the Enterprise from the TV series prequel of the same name, Bandai has released the first movie Enterprise (NCC-1701) and has announced the next release will be the NCC-1701E. What is truly amazing about this kit is that it is a snaptite kit. Not only does it go together without any glue, it also comes pre-painted and marked as you can see in these photos. Before you wrinkle up your nose though, this kit is unlike any snaptite you've ever experienced. This kit is an engineering marvel, as not only does it snap together, it also is lit with six 4.5V bulbs with the light distributed through very advanced optical conduits. The resulting model appears to have significantly more lights inside! I purchased this kit from HobbyLink Japan out of curiosity as they were giving it rave reviews. At $50+ USD per copy, I certainly hoped so. The few build-reviews I've read since this kit's release did nothing to dissuade my decision and given that I haven't had time to even think about building a kit due to all of the work-related travel and stress over the last six months, I needed something 'easy'. Assembly Upon opening the box, you are immediately struck with how much stuff you're going to stick inside this not-so-large kit (about 13" long assembled). Indeed, the parts are all pre-finished and while it is difficult to see in these photos, the Aztec effect is nicely done. One of the first things that impressed me was that all of the interior surfaces were pre-painted black to prevent unwanted light from shining through the hull. While only a small detail, those of us who've built the lit AMT Enterprise kits remember how well the hull lit up! The first step in assembly was to cut the wire leads on each of the lights to their prescribed lengths. I found that these lengths were still a bit too long, but more on that later. Each bulb is a grain-of-wheat styled bulb that is housed inside an LED-like housing. While it would have been nice for Bandai to use LEDs to get longer operating life, LEDs do not illuminate uniformly in all directions as a normal bulb. 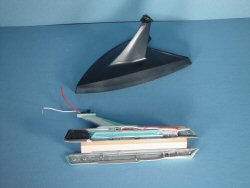 The next step is assembling the base which also doubles as the battery holder and power switch. I was extremely impressed how the metal power buses snap into place and how even after assembly the base, pedestal and model can be removed and replaced. After completing the base and installing the batteries, I decided to check the operation of the power switch as I had to slightly bend the contacts to keep the points from touching regardless of switch position. Sure enough, there was no power at the top of the pedestal with the switch on, but there was power at the contacts in the base. The problem turned out to be one of the contacts at the base of the pedestal not reaching the corresponding contact in the base. Problem solved, time to build a starship! The next step is assembling the base which also doubles as the battery holder and power switch. I was extremely impressed how the metal power buses snap into place and how even after assembly the base, pedestal and model can be removed and replaced. After completing the base and installing the batteries, I decided to check the operation of the power switch as I had to slightly bend the contacts to keep the points from touching regardless of switch position. Sure enough, there was no power at the top of the pedestal with the switch on, but there was power at the contacts in the base. The problem turned out to be one of the contacts at the base of the pedestal not reaching the corresponding contact in the base. Problem solved, time to build a starship!
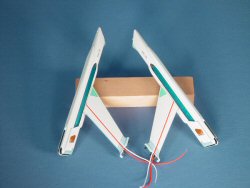 Assembly begins with the warp nacelles. One of the bulbs is placed into each nacelle, followed by a blue engine lens and a clear light pipe. With the wires routed out of the nacelle and down into grooves in the engine pylon, the nacelle halves snap together firmly. The pylon doesn't have quite as strong of a grip into the nacelle as the nacelle halves, but it is strong enough for static display (read this as keeping this thing parked out of kids and cat reach!). I found it odd that the only cover for the pylon wire conduits was a strip of colored tape that was provided (not installed in this build). Actually the white and red striped down the nacelle don't look that bad... Assembly begins with the warp nacelles. One of the bulbs is placed into each nacelle, followed by a blue engine lens and a clear light pipe. With the wires routed out of the nacelle and down into grooves in the engine pylon, the nacelle halves snap together firmly. The pylon doesn't have quite as strong of a grip into the nacelle as the nacelle halves, but it is strong enough for static display (read this as keeping this thing parked out of kids and cat reach!). I found it odd that the only cover for the pylon wire conduits was a strip of colored tape that was provided (not installed in this build). Actually the white and red striped down the nacelle don't look that bad...
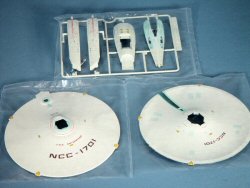
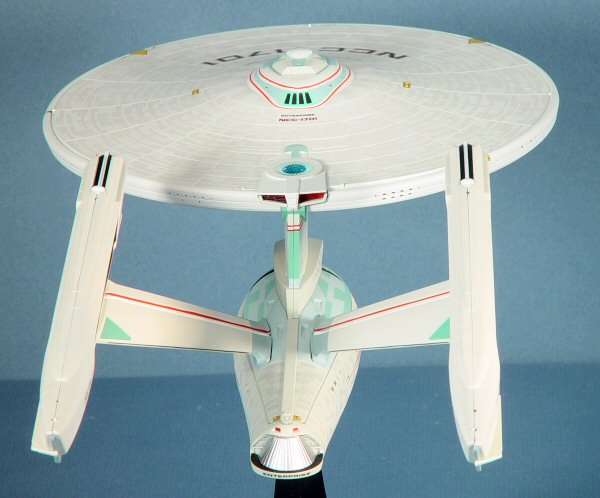
Next up is assembly of the saucer section. This time a huge clear light conduit is assembled with two light bulbs to route light to all of the 'windows' on the saucer's edge and to the lights around the bridge and lower dome. Even the blue vertical thruster and red impulse engines are lit. Assembly of this portion goes quickly once you've experienced the assembly techniques learned with the nacelles. 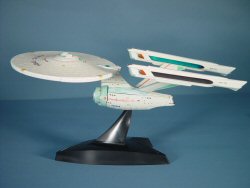 Now comes the challenge. The engineering hull is home of an interesting black mount that serves as a holder for the remaining two light bulbs, the adapter mount and power connector to the base, and the power distribution point for all six light bulbs. The saucer section and its pylon as well as the two warp engines and their pylons all snap into the upper section of the engineering hull. The wiring routed into the engineering hull is attached to the appropriate points on the power distribution bus and an ingenious wire holder is snapped over the bus to keep the wires in place without soldering. The wired black assembly is then snapped into the upper engineering hull and it is time to test our wiring. Snapping the base into position and a flip of the switch revealed good power to all six bulbs (whew!). Now comes the challenge. The engineering hull is home of an interesting black mount that serves as a holder for the remaining two light bulbs, the adapter mount and power connector to the base, and the power distribution point for all six light bulbs. The saucer section and its pylon as well as the two warp engines and their pylons all snap into the upper section of the engineering hull. The wiring routed into the engineering hull is attached to the appropriate points on the power distribution bus and an ingenious wire holder is snapped over the bus to keep the wires in place without soldering. The wired black assembly is then snapped into the upper engineering hull and it is time to test our wiring. Snapping the base into position and a flip of the switch revealed good power to all six bulbs (whew!).
 Now it is time to assemble the rest of the engineering hull - the two side light conduits and hulls sides and bottom are all snapped into place. This is where the snaptite doesn't snap so tight. Any excess wiring not properly stowed away will preclude a good fit. I wound up disassembling the engineering hull, shortening all of the wires and fitting everything back together. The fit improved but there are still gaps in the hull. Now it is time to assemble the rest of the engineering hull - the two side light conduits and hulls sides and bottom are all snapped into place. This is where the snaptite doesn't snap so tight. Any excess wiring not properly stowed away will preclude a good fit. I wound up disassembling the engineering hull, shortening all of the wires and fitting everything back together. The fit improved but there are still gaps in the hull.
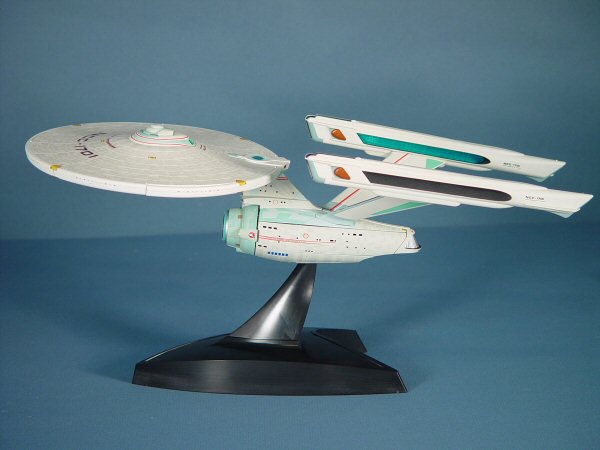
Conclusions 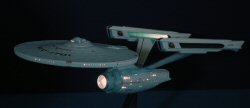 Despite the minor aggravation with the fit of the engineering hull, it is amazing how much engineering marvel went into this model! Is it worth the $50+? You bet! In fact, I suspect that I will be building another Enterprise soon and I'll be taking my lessons learned into that project. This Enterprise will look nice on the shelf until then. I am also looking forward to the release of the Bandai Enterprise NCC-1701E kit due in the next month or two. Despite the minor aggravation with the fit of the engineering hull, it is amazing how much engineering marvel went into this model! Is it worth the $50+? You bet! In fact, I suspect that I will be building another Enterprise soon and I'll be taking my lessons learned into that project. This Enterprise will look nice on the shelf until then. I am also looking forward to the release of the Bandai Enterprise NCC-1701E kit due in the next month or two.
This kit is highly recommended! 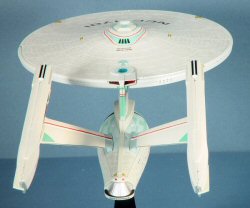
The End... | 


|