Roden's 1/72nd SdKfz 231 (8 Rad) |  | History 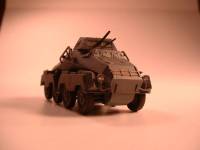 The SdKfz 231 was the first 8 Rad (Achtradwagen - eight wheeled car) to see mass production in Germany. The first reached the troops in 1937, later partaking in the early stages of World War 2. At the time it reached the troops, it was the most modern armored car of its type. Unfortunately it was difficult to maintain and repair, and was an easy target due to its height. Regardless, it served until the end of the war. The SdKfz 231 was the first 8 Rad (Achtradwagen - eight wheeled car) to see mass production in Germany. The first reached the troops in 1937, later partaking in the early stages of World War 2. At the time it reached the troops, it was the most modern armored car of its type. Unfortunately it was difficult to maintain and repair, and was an easy target due to its height. Regardless, it served until the end of the war.
The Kit 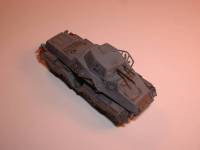 The Roden SdKfz 231 (8 Rad) consists of 99 injected parts, some in gray, the others in black. Decals exist for three different versions of the 8 Rad - one with the 15th Panzer Grenadiere Division, Italy, 1943. Another version is for a machine with the SS Infanterie Devision "Reich" on the Eastern Front, Summer, 1941 (which is the version I chose to model). The last version is for a machine with III Schutze Battalion of the "Hermann Goering" Regiment, Norway, 1940. Decals appear sharp and in register. The Roden SdKfz 231 (8 Rad) consists of 99 injected parts, some in gray, the others in black. Decals exist for three different versions of the 8 Rad - one with the 15th Panzer Grenadiere Division, Italy, 1943. Another version is for a machine with the SS Infanterie Devision "Reich" on the Eastern Front, Summer, 1941 (which is the version I chose to model). The last version is for a machine with III Schutze Battalion of the "Hermann Goering" Regiment, Norway, 1940. Decals appear sharp and in register.
Construction  Construction starts with building up the drive-train units. Each part of the suspension consists of six parts per differential with five more parts connecting each differential to make up a suspension unit. Be sure to pay attention to parts clean up as this is important for fit. Nothing to worry about, just something to be aware of. Four wheels are supposed to be added to each suspension unit to create the 8 Rad, but I left off the wheels until very last. Construction starts with building up the drive-train units. Each part of the suspension consists of six parts per differential with five more parts connecting each differential to make up a suspension unit. Be sure to pay attention to parts clean up as this is important for fit. Nothing to worry about, just something to be aware of. Four wheels are supposed to be added to each suspension unit to create the 8 Rad, but I left off the wheels until very last.
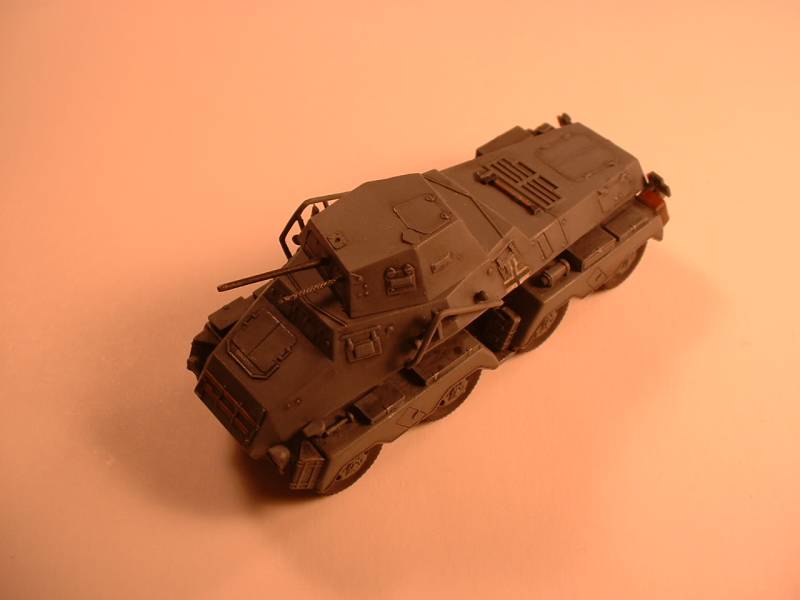
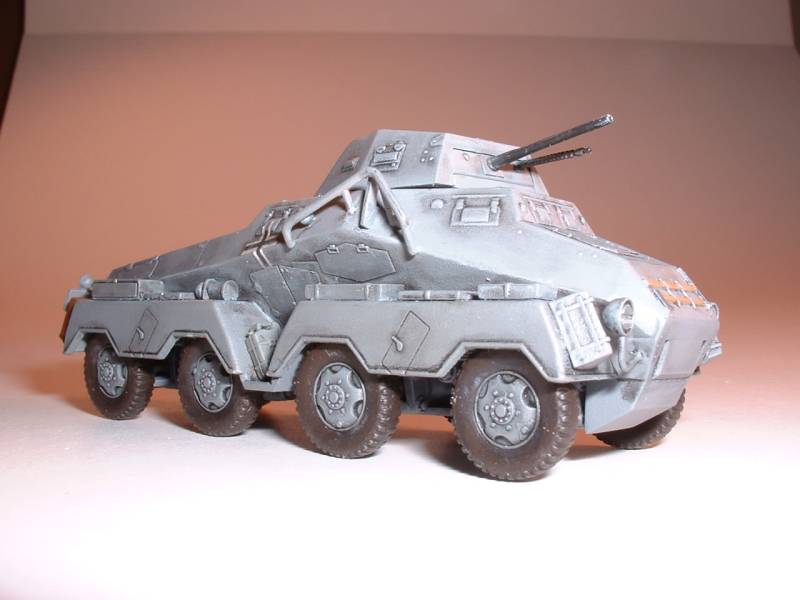
From there construction moves to creating the turret which isn't that difficult. Roden allows not only the turret to rotate, but also allows the main gun to move. A very nice touch. Unfortunately while  gluing in the barrel I inadvertently touched the liquid glue to the movement "mechanism" so my barrel stays in one place. gluing in the barrel I inadvertently touched the liquid glue to the movement "mechanism" so my barrel stays in one place. Now construction moves to adding all of the small parts to each fender. It was here that I strayed from the directions. Once I finished the turret I decided to glue the hull pieces together first, then when those were dried and any small seams taken care of, I then glued the fenders to the main hull. If you go with the instructions and glue the small parts to the fenders first, you could glue some of the small parts in such a way to preclude easy addition of the fenders to the hull. In addition, I left off any of the smaller pieces to the hull until after the fenders were attached and all of the small parts were attached to the fenders. 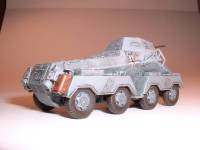 When attaching the smaller pieces to the hull, it appears that there was no standard followed. Any of the parts could be found on any side, in any location. So, you could either follow the instructions or use a photo to model from. Once all of the smaller pieces were attached to the fenders I then attached all the smaller pieces to the main hull. When attaching the smaller pieces to the hull, it appears that there was no standard followed. Any of the parts could be found on any side, in any location. So, you could either follow the instructions or use a photo to model from. Once all of the smaller pieces were attached to the fenders I then attached all the smaller pieces to the main hull.
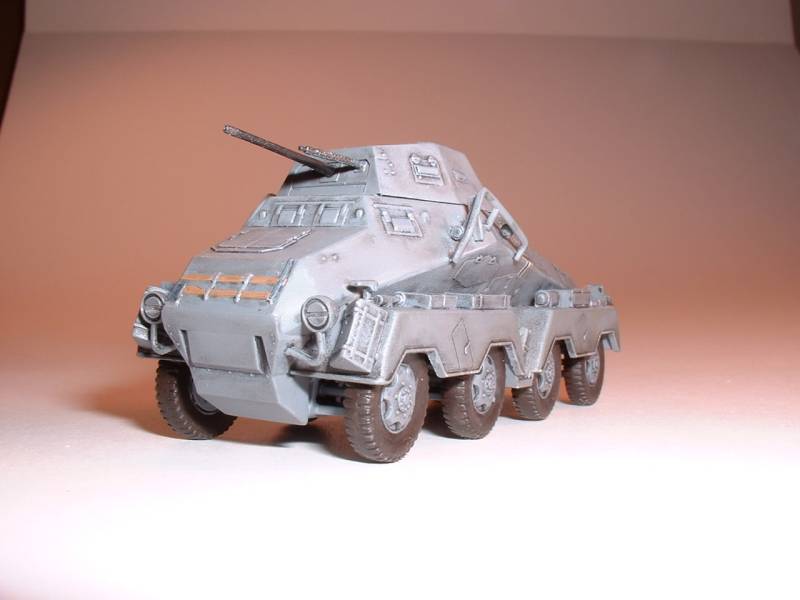
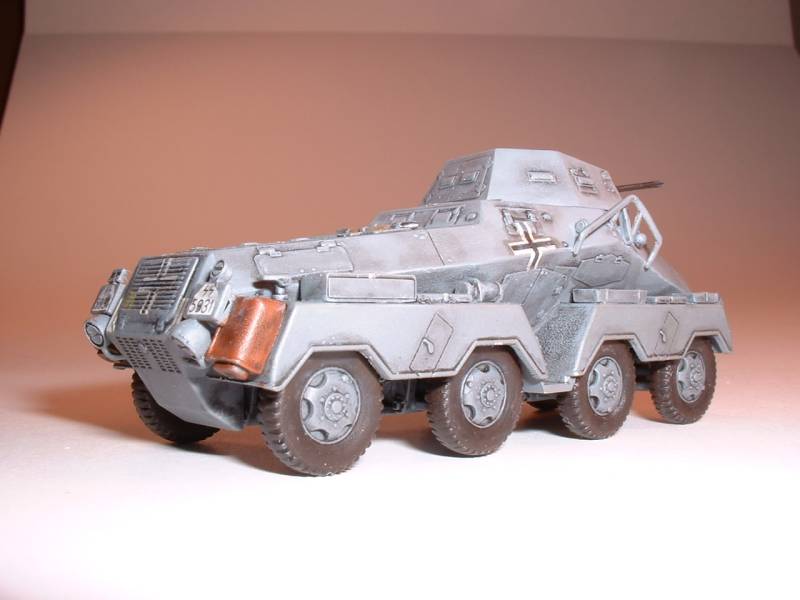
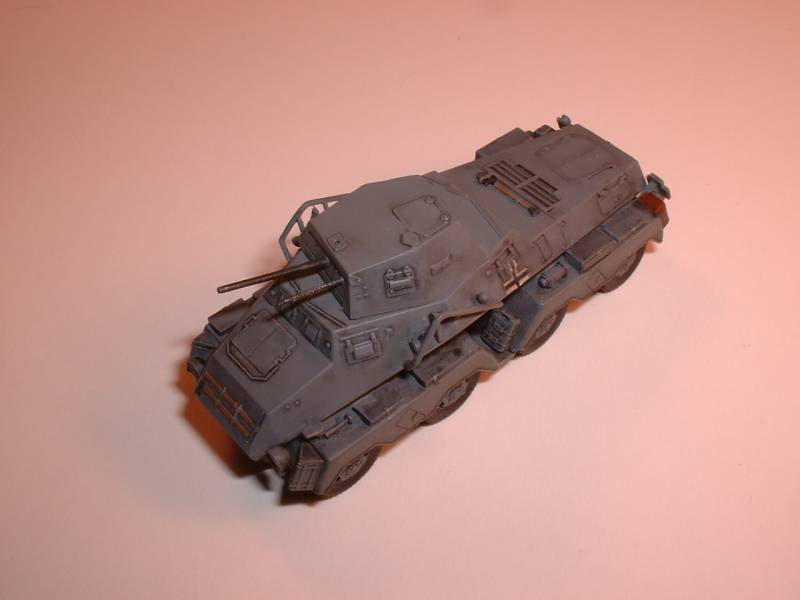
After all of the small pieces were added to the main hull it was time to airbrush Polly Scale's German Panzer Gray. I airbrushed the main parts - the two suspension units, the turret and the main hull - prior to putting them together because it would have been difficult spraying once everything was together. After airbushing the parts separately, I then glued the suspension units to the hull, placed the turret in its place so it could move, and sprayed another coat of gray on the underside to cover any areas with paint stripped due to adding the pieces Final Assembly  Now that the major assembly and painting was accomplished, I concentrated on the final finishing. I brushed Future on the areas that would receive the decals, applied the decals and brushed another coat of Future over the decals. Be aware that the decals aren't the easiest to work with. However, adding them using a puddle of Future, then followed by an application of Solvaset I was able to get the decals to snuggle down. One item I wasn't sure of was the decals that adhere to the rear of the vehicle on sepearate "plates" under the rear lights. After I applied the decals I'm wondering if the entire "plate" should be white instead of the grey background. Oh well, too late to change now. Once the Future was dry I sprayed a coat of Polly Scale Flat Finish and started weathering it. All weathering thus far Now that the major assembly and painting was accomplished, I concentrated on the final finishing. I brushed Future on the areas that would receive the decals, applied the decals and brushed another coat of Future over the decals. Be aware that the decals aren't the easiest to work with. However, adding them using a puddle of Future, then followed by an application of Solvaset I was able to get the decals to snuggle down. One item I wasn't sure of was the decals that adhere to the rear of the vehicle on sepearate "plates" under the rear lights. After I applied the decals I'm wondering if the entire "plate" should be white instead of the grey background. Oh well, too late to change now. Once the Future was dry I sprayed a coat of Polly Scale Flat Finish and started weathering it. All weathering thus far 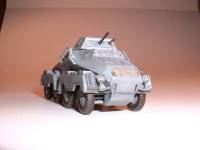 was accomplished with oil colors. Both the wash and drybrushing was done with oils, and I doubt I'll go back to using anything else for drybrushing (outside of anything that should be worn metal "silver"). With the drying time of oils you have complete control over how the colors come out. Very nice. was accomplished with oil colors. Both the wash and drybrushing was done with oils, and I doubt I'll go back to using anything else for drybrushing (outside of anything that should be worn metal "silver"). With the drying time of oils you have complete control over how the colors come out. Very nice.
Now that painting and weathering was finished I glued on the tires after weathering those and once those were dry gave the model another coat of Flat Finish. I also added the main gun barrel after drilling it out, along with the machine gun. Some thoughts on the kits' machine gun. This is an  awesome piece of injected plastic and no doubt the best machine gun I have ever seen in any 1/72nd injected kit to date, aircraft or armor. Roden could make a sprue of nothing but the machine gun barrels and sell them, they're that good. With the right amount of washes and drybrushing the machine gun looks extremely awesome. I'm having difficulty figuring out what type of base to put this on, so until I do I won't do any other weathering. awesome piece of injected plastic and no doubt the best machine gun I have ever seen in any 1/72nd injected kit to date, aircraft or armor. Roden could make a sprue of nothing but the machine gun barrels and sell them, they're that good. With the right amount of washes and drybrushing the machine gun looks extremely awesome. I'm having difficulty figuring out what type of base to put this on, so until I do I won't do any other weathering. Conclusion 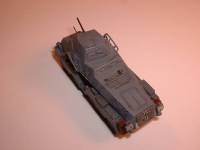 This is an excellent small scale armor model, one that doesn't require a lot of work. This is a great model to break one out of AMS, which is exactly what I did. Highly recommended. This is an excellent small scale armor model, one that doesn't require a lot of work. This is a great model to break one out of AMS, which is exactly what I did. Highly recommended.
Our thanks to Roden and Squadron for the review kits . | 


|