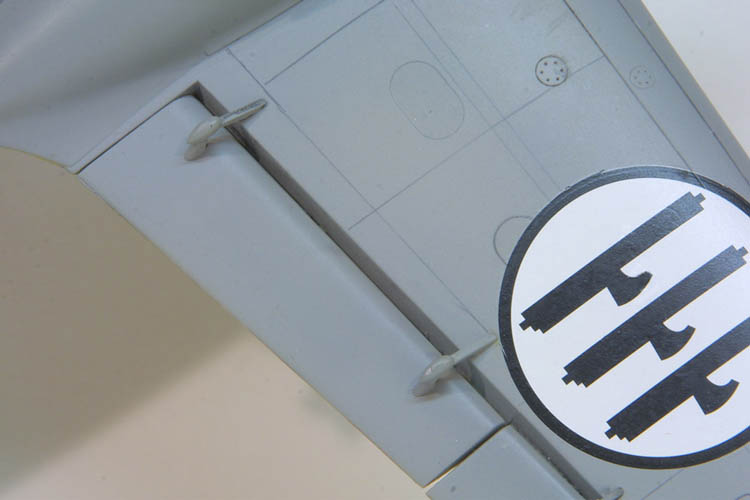
Trumpeter 1/48 SM.79 | 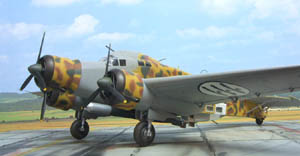 | 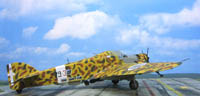 With two kits of the SM 79 out now, it was time for me to build one of the best Italian bombers of WW2. When the SM 79 was in service it was used as a bomber, a transport and a torpedo bomber. With its three engines, it was both ugly and beautiful at the same time. With two kits of the SM 79 out now, it was time for me to build one of the best Italian bombers of WW2. When the SM 79 was in service it was used as a bomber, a transport and a torpedo bomber. With its three engines, it was both ugly and beautiful at the same time. Classic Airframes was the first to come out with a kit of the SM 79 in 1/48 scale. So it went on my want list. Then Trumpeter came out with their SM 79. So which one to get?  There have been some very good reviews of both kits. They tell what is wrong with the Trumpeter kit but do not go into how to fix it. The Classic kit is a good kit too, but it also has some things that need to be taken care of. One big thing is the bottom of the wing. The Trumpeter kit best represents the bottom of the wing. They have the flaps and aileron cut out. In the Classic they just have scribe lines of the flaps and ailerons. There have been some very good reviews of both kits. They tell what is wrong with the Trumpeter kit but do not go into how to fix it. The Classic kit is a good kit too, but it also has some things that need to be taken care of. One big thing is the bottom of the wing. The Trumpeter kit best represents the bottom of the wing. They have the flaps and aileron cut out. In the Classic they just have scribe lines of the flaps and ailerons.
The Classic kit can be made out of the box. With a very nice resin interior, and some very good decals included for a number of different aircraft it will make a good looking SM 79.  I decided to tackle the Trumpeter kit. In looking at both kits, I figured the Trumpeter kit would be more of a challenge. I decided to tackle the Trumpeter kit. In looking at both kits, I figured the Trumpeter kit would be more of a challenge.
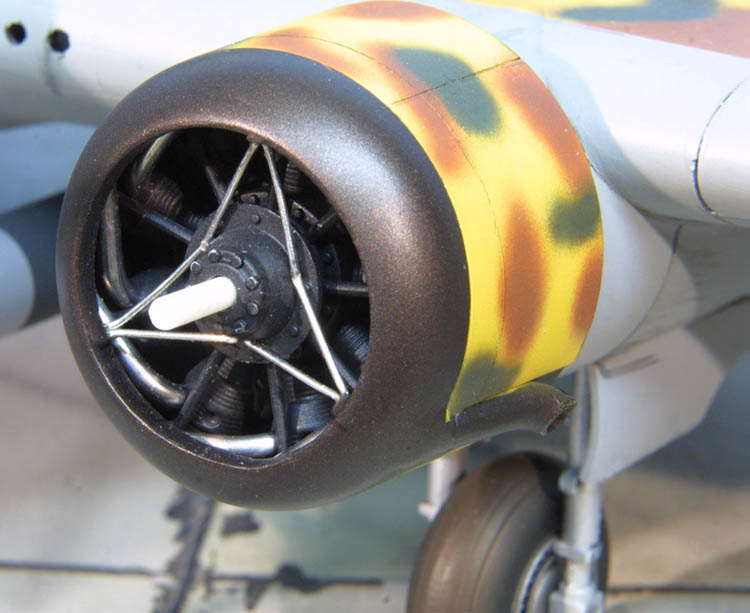
So here is what is wrong with the Trumpeter kit. Number 1 is the opening for the cowling. It is too big. In the plans from Ali DItalia they have the opening at 3, the kit is 4. Number 2 is the horizontal stabilizers. They are too short in length. The Classic has the cowling and the stabilizer right. A plus for them. 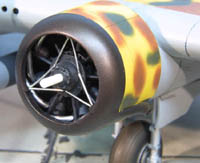 I will start on the cowling. I got some Evergreen strips styrene No 154 .060 X .080. I rolled a strip around a ballpoint pen to make a coil about 1 long. Do not overlap the strip as you make the coil. Now the next part might take some time. Take the coil and put it into the inside of the front part of the cowling (the open part). You can use some tape to keep it in and then cut it to the right length. Then glue it into the opening, I did not glue it flush with the top of the cowling, but left a little sticking up. I then put some super glue on the inside to make sure that it would not go anywhere. When dry you can file it down and shape it to fit the cowling. This will give you about 3 opening in the cowling. This was I will start on the cowling. I got some Evergreen strips styrene No 154 .060 X .080. I rolled a strip around a ballpoint pen to make a coil about 1 long. Do not overlap the strip as you make the coil. Now the next part might take some time. Take the coil and put it into the inside of the front part of the cowling (the open part). You can use some tape to keep it in and then cut it to the right length. Then glue it into the opening, I did not glue it flush with the top of the cowling, but left a little sticking up. I then put some super glue on the inside to make sure that it would not go anywhere. When dry you can file it down and shape it to fit the cowling. This will give you about 3 opening in the cowling. This was  an easy fix that did not take any time to do. an easy fix that did not take any time to do.
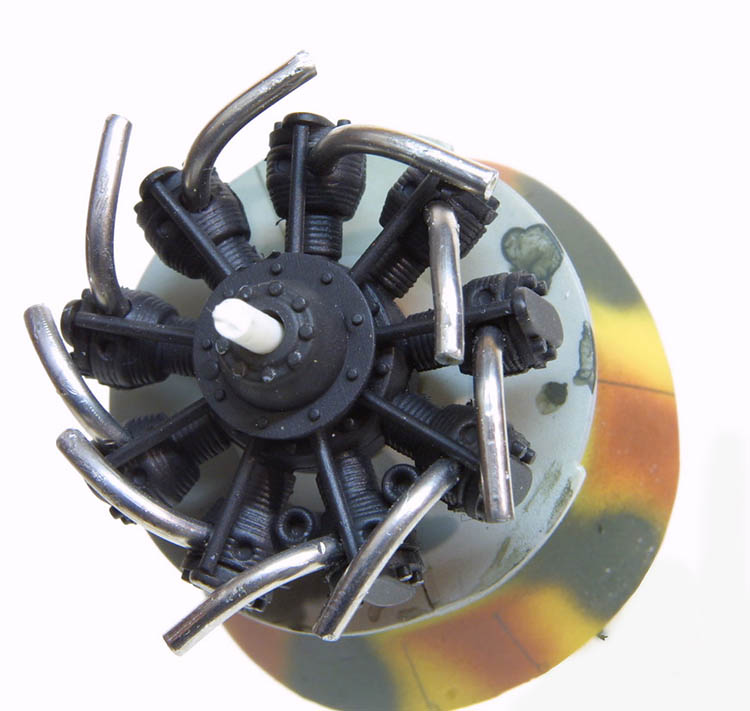
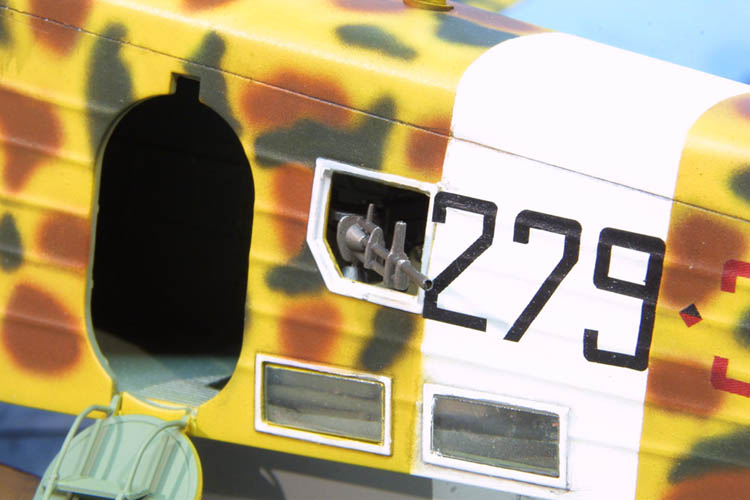
In both of the kits they do not have the exhaust stubs going into the collector ring from the engine. When looking at the pictures of the engines you can see the exhaust stubs going around the collector ring of the cowling. I made them out of some solder. I cut them to length and drilled some holes in the top of the cylinder and bent the solder down so it would fit under the ring. I then put the cowling on and moved the solder around and under the collector ring and glued them in place. Next is the horizontal stabilizers. I made a copy of the plans in 1/48 scale. I put the kit part down on the plans and you can see that all that you had to do is to slide it to the end of the plans and it will match up. So all that you have to do is add some plastic  to the end of the stabilizers where it fits into the fuselage. The same with the elevator but I did not add it in the same spot. I cut the end of the elevator off at about ¼ from the end and put the plug in there. This way you can keep the part that will go up against the fuselage the same. I then glued the parts together and sanded them down to match the kit parts. Then take some half round plastic strips and glue them down on the new parts to match up with the kits ribbing. When they are dry I hand painted some Mr. Surfacer 500 on the strips and then sanded them down. When done they will look just like the kit. Now that was easy. to the end of the stabilizers where it fits into the fuselage. The same with the elevator but I did not add it in the same spot. I cut the end of the elevator off at about ¼ from the end and put the plug in there. This way you can keep the part that will go up against the fuselage the same. I then glued the parts together and sanded them down to match the kit parts. Then take some half round plastic strips and glue them down on the new parts to match up with the kits ribbing. When they are dry I hand painted some Mr. Surfacer 500 on the strips and then sanded them down. When done they will look just like the kit. Now that was easy. There is not too much for the interior, not like 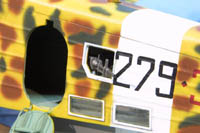 the Classic kit. But when you get the canopy on you can not see that much of the inside anyway. One thing that I like on the classic kit is the rear top gun is open. It is nicely done and looks good when open. The Trumpeter kit has it closed. There are a lot of pictures with it closed, so this isn't too bad. The Trumpeter kit has a side door on the fuselage that can be made closed or open. I have it open and I made a ladder for the door, as this adds to the looks of the door. the Classic kit. But when you get the canopy on you can not see that much of the inside anyway. One thing that I like on the classic kit is the rear top gun is open. It is nicely done and looks good when open. The Trumpeter kit has it closed. There are a lot of pictures with it closed, so this isn't too bad. The Trumpeter kit has a side door on the fuselage that can be made closed or open. I have it open and I made a ladder for the door, as this adds to the looks of the door. 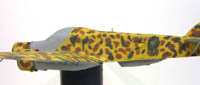 The rest of the kit went together well. I had to use some putty on the fuselage but not much. With the wings on and all the other stuff on I gave a coat of Mr. Surfacer and a good wet sanding. Now it is ready for painting. The rest of the kit went together well. I had to use some putty on the fuselage but not much. With the wings on and all the other stuff on I gave a coat of Mr. Surfacer and a good wet sanding. Now it is ready for painting.
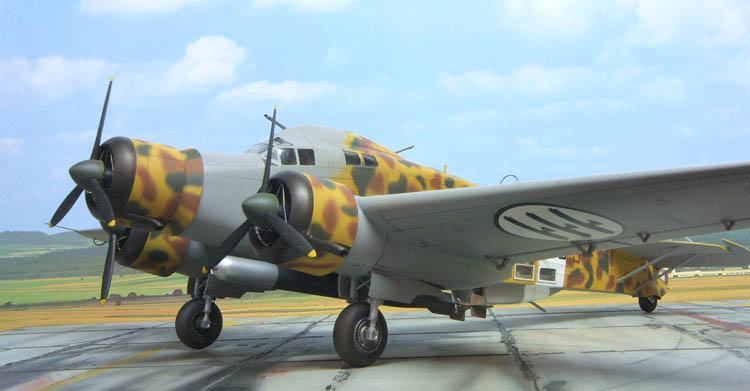
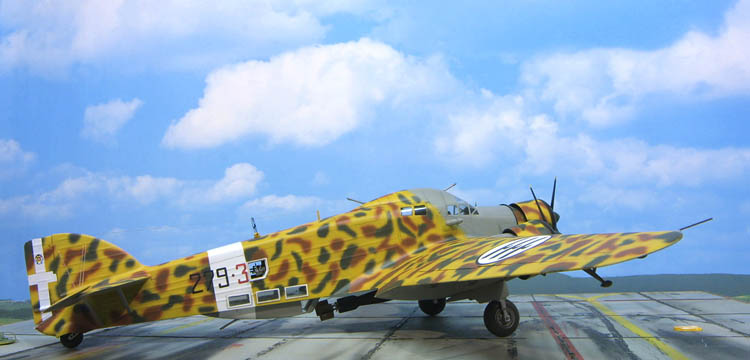
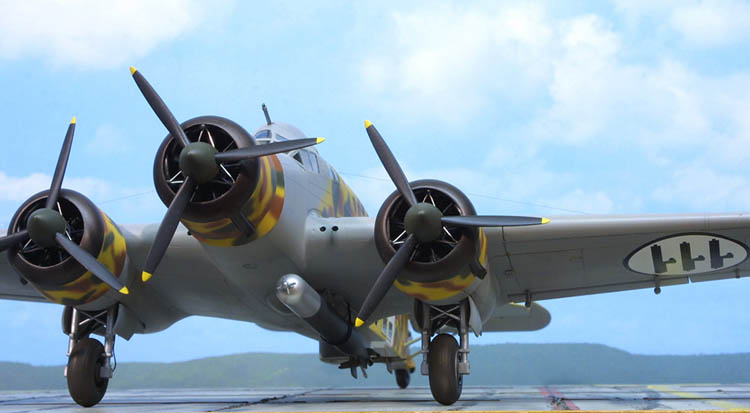
The Camouflage 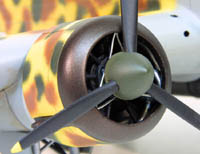 In the books on the SM 79 there are some very interesting color schemes. No two seem to be alike. The one that I picked is out of the 279°. It is in sand and brown and green, with gray undersides. What is interesting is that the gray went up the front of the nose and the front side of the aircraft. Also the engine cowlings are camouflaged and not gray. In the books on the SM 79 there are some very interesting color schemes. No two seem to be alike. The one that I picked is out of the 279°. It is in sand and brown and green, with gray undersides. What is interesting is that the gray went up the front of the nose and the front side of the aircraft. Also the engine cowlings are camouflaged and not gray.
With Polly Scale paints, I painted the white band on the fuselage first and masked it off then started on the camouflage. When I was done I gave it a coat of Future and put the decals on. I had a friend make me a decal for the numbers on his Alps printer since I could not find any decals that had the right style 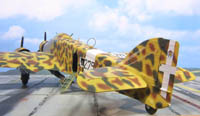 of numbers. I then mixed some Tamiya flat base with the Future for a nice flat coat. Trumpeter has only one aircraft on their decals. But SKY Decals has a nice sheet for the SM 79 with wide range of markings. of numbers. I then mixed some Tamiya flat base with the Future for a nice flat coat. Trumpeter has only one aircraft on their decals. But SKY Decals has a nice sheet for the SM 79 with wide range of markings. I then added the torpedo and antenna wires. Also in the Trumpeter kit they have a brace on the fin for the top of the stabilizers. The only aircraft that had that was some of the very first aircraft. Then they used wire in place of the strut. I drilled a hole in the bottom of stabilizers and in the fin. I started on the bottom of one side of the stabilizers. I tied a knot in one end of some fishing line and put the other end through the hole of the stabilizers. 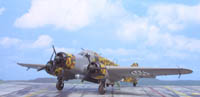 I put a drop of glue on the bottom of the stabilizers. Then put it thru the fin and back thru the other stabilizer. I then took some tweezers and pull the line taut. Then you can put a drop of glue on one side of the fin and also on the other side, then on the bottom of the other stabilizer. When dry cut the line off. Take an Xacto knife and cut the knot off of the bottom of the stabilizers. There are three wires on each side. I made the radio direction finder with some wire and then glued it in place. I added the radio wire from the fin to the mast and also on the wings. I put a drop of glue on the bottom of the stabilizers. Then put it thru the fin and back thru the other stabilizer. I then took some tweezers and pull the line taut. Then you can put a drop of glue on one side of the fin and also on the other side, then on the bottom of the other stabilizer. When dry cut the line off. Take an Xacto knife and cut the knot off of the bottom of the stabilizers. There are three wires on each side. I made the radio direction finder with some wire and then glued it in place. I added the radio wire from the fin to the mast and also on the wings. 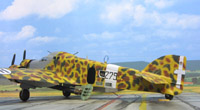 Conclusion Conclusion
So I have my SM 79 to add to the collection WW 2 bombers. In conclusion, yes the Trumpeter kit has some major things wrong. But with some easy fixes it can be made into a good kit and it is not that hard to do.
| 


|