Hasegawa 1/48 LTV A-7E Corsair II
|
 |
Background
The Ling-Temco-Vought (LTV) A-7 Corsair II was developed under a US
Navy requirement for an improved strike aircraft to replace the A-4 Skyhawk.
The engineers at LTV adapted the design of their very successful F-8 Crusader
family to meet the this requirement by shortening the fuselage (no afterburner
required), eliminating the variable incidence wing, adding additional
weapons stations, and installing new avionics. The resulting design still
bore a striking resemblance to the Crusader, but the shorter fuselage
length was the heart of the A-7’s unofficial nickname – SLUF
(Short Little Ugly ‘Fella’).
The A-7 was such a successful attack aircraft that the USAF acquired
the A-7D to fulfill its own strike and close air support requirements.
The A-7E, like the A-7D, was armed with the 20mm M61 Vulcan gatling gun,
replacing the two 20mm cannons arming the earlier SLUFs. The visible difference
between the A-7D and the A-7E (besides the paint job) was the air refueling
system. The A-7D had a hump added to the fuselage aft of the cockpit housing
the air refueling receiver, whereas the A-7E (and all other USN SLUFs)
had a retractable air refueling probe mounted on the right side of the
nose, just under the canopy.
 The
A-7 distinguished itself during the Vietnam war flying over 90,000 sorties
and experiencing the lowest combat loss rate of any Navy combat aircraft
in the theater. The aircraft would continue as the mainstay US Navy strike
aircraft until finally replaced by the F/A-18 Hornet. In fact, the last
two SLUF squadrons would delay their transition into the Hornet to deploy
overseas in support of Operation Desert Shield/Desert Storm. Upon returning
from Iraq, these last two squadrons turned in their Corsairs for the new
Hornet. The
A-7 distinguished itself during the Vietnam war flying over 90,000 sorties
and experiencing the lowest combat loss rate of any Navy combat aircraft
in the theater. The aircraft would continue as the mainstay US Navy strike
aircraft until finally replaced by the F/A-18 Hornet. In fact, the last
two SLUF squadrons would delay their transition into the Hornet to deploy
overseas in support of Operation Desert Shield/Desert Storm. Upon returning
from Iraq, these last two squadrons turned in their Corsairs for the new
Hornet.
The Kit
 The
Hasegawa 1/48 A-7E (and A-7D) Corsair II kits are absolutely beautiful.
Molded in light gray styrene, this kit features finely scribed panel and
rivet detail. A small fret of three photo-etched parts are also included
to represent the fuselage skin reinforcement for the cable conduits on
either side of the fuselage under the wings, and for the refueling probe
housing. The clear parts are absolutely clear and are molded to support
positioning of the canopy open or closed. If you’ve seen the model
built before, you’ve noticed the open avionics bays on either side
of the fuselage. These aren’t aftermarket conversions, these are
part of the exquisite detail provided in the kit! The
Hasegawa 1/48 A-7E (and A-7D) Corsair II kits are absolutely beautiful.
Molded in light gray styrene, this kit features finely scribed panel and
rivet detail. A small fret of three photo-etched parts are also included
to represent the fuselage skin reinforcement for the cable conduits on
either side of the fuselage under the wings, and for the refueling probe
housing. The clear parts are absolutely clear and are molded to support
positioning of the canopy open or closed. If you’ve seen the model
built before, you’ve noticed the open avionics bays on either side
of the fuselage. These aren’t aftermarket conversions, these are
part of the exquisite detail provided in the kit!
Assembly
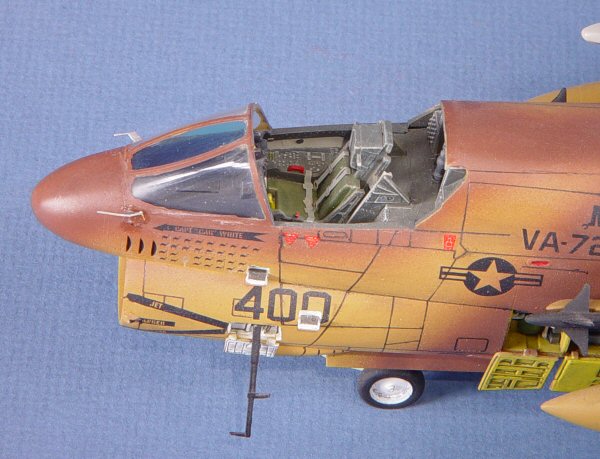
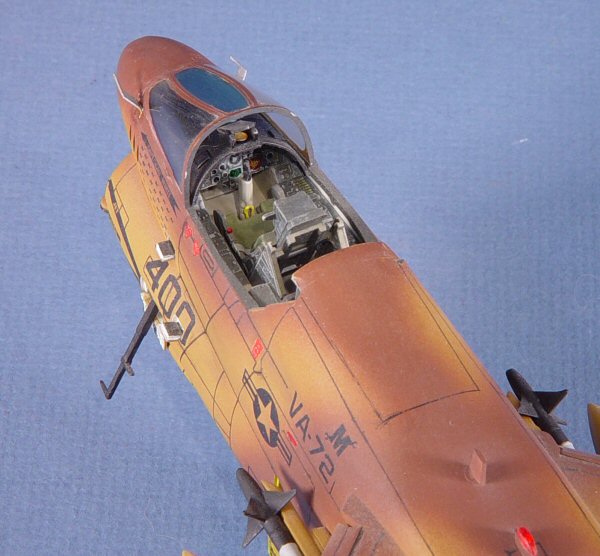
 While
there are some nice aftermarket resin cockpits available for the Hasegawa
kit, the kit’s cockpit is one of Hasegawa’s best out of the
box. I assembled and painted the cockpit per the kit instructions with
the help of Bert Kinzey’s A-7 Corsair II in Detail & Scale and
A-7 Corsair II Color & Markings titles (available from Squadron
Mail Order or your local retailer). I replaced the kit ejection seat
with the resin seat in Verlinden’s Corsair Update Set. Selected
photo-etched parts were also used to augment the kit’s cockpit. While
there are some nice aftermarket resin cockpits available for the Hasegawa
kit, the kit’s cockpit is one of Hasegawa’s best out of the
box. I assembled and painted the cockpit per the kit instructions with
the help of Bert Kinzey’s A-7 Corsair II in Detail & Scale and
A-7 Corsair II Color & Markings titles (available from Squadron
Mail Order or your local retailer). I replaced the kit ejection seat
with the resin seat in Verlinden’s Corsair Update Set. Selected
photo-etched parts were also used to augment the kit’s cockpit.
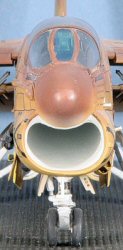 As
with any two-piece intake, eliminating the ugly seam that is visible from
any forward viewpoint is no small chore. I solved this problem using the
Seamless Suckers A-7 Intake, and the problem is eliminated. The resin
intake also had the required details for the nose wheel well and is compatible
with the kit wheel well parts. Assembly of the fuselage is very simple,
capturing the cockpit, intake trunk and tailpipe in the process. As
with any two-piece intake, eliminating the ugly seam that is visible from
any forward viewpoint is no small chore. I solved this problem using the
Seamless Suckers A-7 Intake, and the problem is eliminated. The resin
intake also had the required details for the nose wheel well and is compatible
with the kit wheel well parts. Assembly of the fuselage is very simple,
capturing the cockpit, intake trunk and tailpipe in the process.
I opted to keep the positionable ventral speedbrake closed, while having
all of the avionics bay doors open. The only required use of cyano is
installing the three photo-etched parts that serve as the skin stiffeners
and are actually sandwiched between the fuselage and other plastic parts.
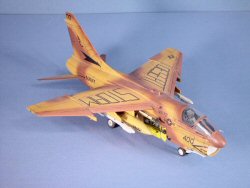
The wing assembles without any problems. You have the option of positioning
the leading edge and trailing edge flaps up or down, and the outboard
wing sections folded or in flight position. I opted for flaps extended
and wings down and locked.
 While
I painted and detailed the landing gear, I opted to leave them off the
aircraft until after painting. Decals are provided for the various placards
on the landing gear doors and landing gear struts, a very nice touch,
Hasegawa! While
I painted and detailed the landing gear, I opted to leave them off the
aircraft until after painting. Decals are provided for the various placards
on the landing gear doors and landing gear struts, a very nice touch,
Hasegawa!
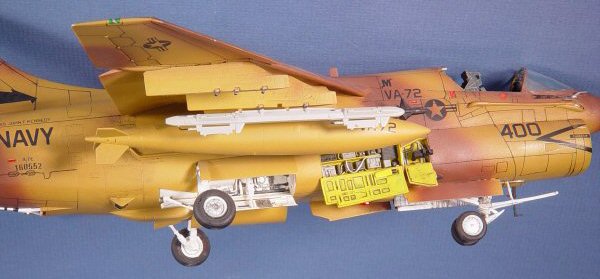
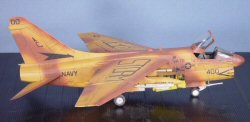
The final step before heading to the paint rack was installing the weapons
pylons and the external stores that I would use on this aircraft. I elected
to use the two 300 gallon external tanks on the inboard stations and two
empty multiple ejector racks (MERs) on Stations 3 and 7. I left stations
1 and 8 empty to show off the kit’s anti-sway braces that are provided
in the kit for these pylons, another nice touch, Hasegawa!
Painting
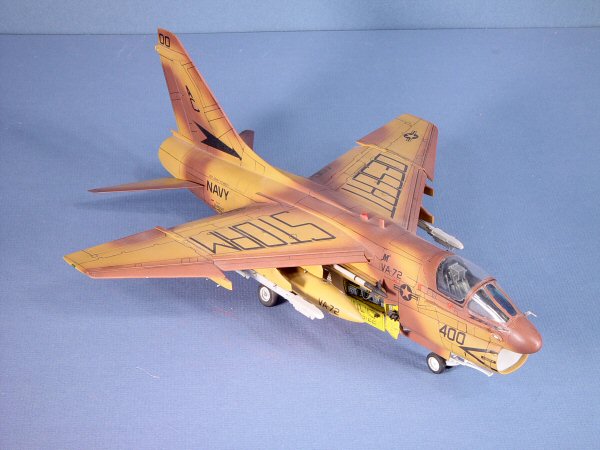
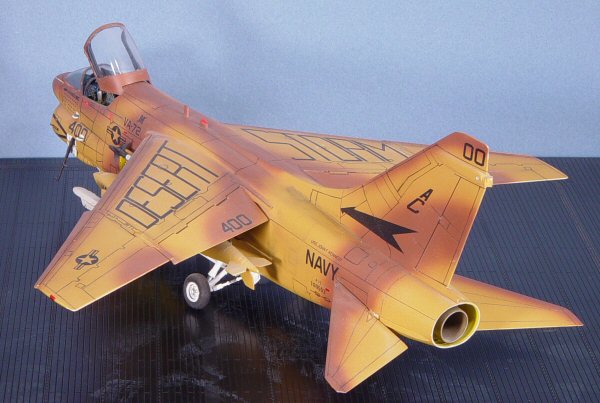
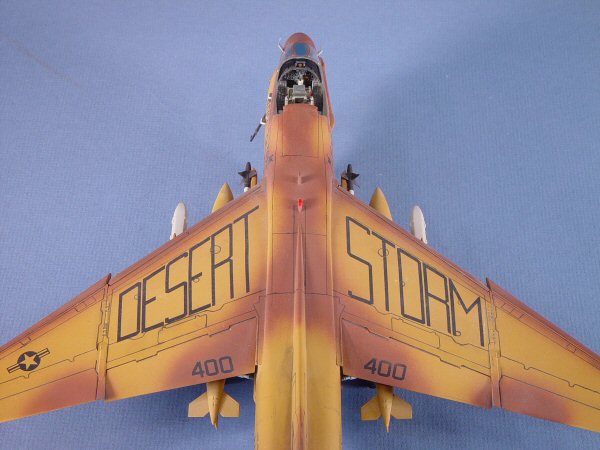
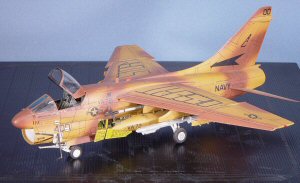
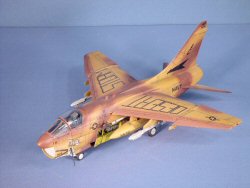
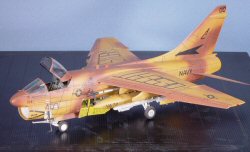
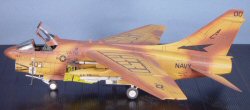
 I
was fascinated by the two-tone brown paint scheme applied to the CAG’s
aircraft after the end of hostilities in Desert Storm. A picture of this
aircraft is on the cover of Bert Kinzey’s US Aircraft & Armament
of Operation Desert Storm. Superscale had released these markings in set
48-411, which I had dutifully acquired and stashed away. Since I did not
have the equivalent FS matches, I opted to use Tamiya’s Hull Red
and Desert Yellow acrylics for the two colors. I
was fascinated by the two-tone brown paint scheme applied to the CAG’s
aircraft after the end of hostilities in Desert Storm. A picture of this
aircraft is on the cover of Bert Kinzey’s US Aircraft & Armament
of Operation Desert Storm. Superscale had released these markings in set
48-411, which I had dutifully acquired and stashed away. Since I did not
have the equivalent FS matches, I opted to use Tamiya’s Hull Red
and Desert Yellow acrylics for the two colors.
 After
a coat of Future, I applied the Superscale markings and stencils according
to the instructions. As usual, the Superscale decals respond nicely to
MicroSol and MicroSet. After all of the decals were placed, I applied
another coat of Future to protect them from the next step. After
a coat of Future, I applied the Superscale markings and stencils according
to the instructions. As usual, the Superscale decals respond nicely to
MicroSol and MicroSet. After all of the decals were placed, I applied
another coat of Future to protect them from the next step.
I decided to try using a very fine technical pen to ‘draw’
in the panel lines and details. The results were striking, if not too
bold, but given the time taken to get the job done, I’ll stick with
black oil washes in the future. The completed aircraft was treated to
one last coat of Future mixed with Tamiya Flat Base to create a dull finish.
Final Steps
Now that the painting and other manhandling are complete, it is time
to install the landing gear, anti-collision lights, avionics bay doors,
external stores, and other details. There were no surprises anywhere along
the way during assembly, even using the aftermarket accessories in the
kit. I found that the canopy would stay open due to the tight friction
fit of the frame against the fuselage, so I am able to close or remove
the canopy for transport.
Conclusions
This kit is one of Hasegawa’s best for ease of assembly and for
the level of detail straight out of the box. Using a resin cockpit or
the detail set from Verlinden will enhance the project, but these aren’t
really required unless you suffer from AMS as I do. The one essential
aftermarket enhancement is the seamless intake trunk from Seamless Suckers.
Unfortunately, they are not online but you can usually get one at IPMS
Nationals (as I did) or online from CRM
Hobbies in Saint Louis, MO.
This is a fun build and the fortunately Hasegawa continues to produce
this kit under its new business strategy of limited releases with different
markings. While the kit is an easy build, I would recommend this kit to
at least novice modelers with some building experience and experience
with cyano adhesives. More experienced modelers will have a field day
with the variety of aftermarket accessories and decals that have been
produced for this kit and the A-7D as well.
My sincere thanks to my wife for looking the other way when I go shopping
for these projects!
|
|