Mirage's 1/72 Panzer IV
Ausf. C (#72853)
Ausf. D (#72856)
|
  |
The Panzer IV (Short-barrel variants)
The Panzer IV was to the German
army what the Sherman tank was to the U.S. Army. Considered to be of sound
dependable design it was Germany's most produced tank of any in their
inventory. It was produced throughout World War II and was used in all
theaters of operation by the German army as well as other countries (Spain,
Finland). The chassis itself was converted as self-propelled guns and
mobile antiaircraft artillery platforms. The Panzer IV had crew of 5,
75mm main gun, coaxial MG and had a weight of around 18 tons. Later variants
of this tank saw longer main guns, more armor and added weight up to 25
tons.
The Kit
Rather than do two separate in-box reviews of these two kits I will
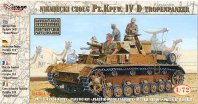
start with items that are common with both kits. Both kits are adorned
with colorful artwork depicting a Panzer IV in the field (Normandy and
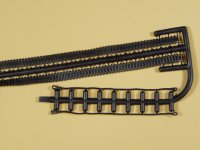
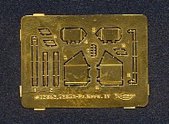
North Africa). They come with photo-etch, decals, black vinyl one-piece
tracks and multiple sprues molded in either light or medium gray styrene.
The multiple page instruction sheet is very well illustrated and written
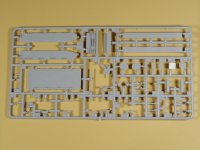
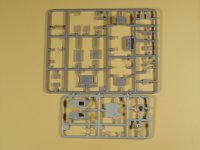
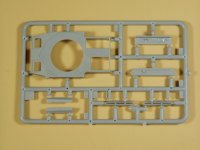
in Polish and English. The common sprues between the kits are the lower
hull, road wheels, idlers, drive sprockets, and main turret parts. The
one-piece black vinyl tracks are very soft but nicely detailed on both
sides. I would suggest using an after-market PE set or use another kits
tracks. Included in the track sprue are tow cables. Again, I would suggest
replacing these with something else. The lower hull sprue is nicely detailed
with some pretty small parts so be careful removing them from the sprue.
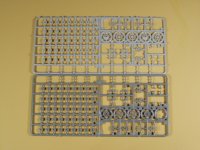
The fenders have a nice tread plate design on them. The detail in the
road wheels, especially the drive sprockets and idlers, is very nice as
well. You get two sets of drive sprockets and idlers depending on the
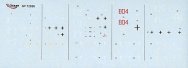
variant you are building. Decals sheets are of high quality and the film
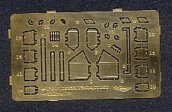
is very thin. The photo-etch sprues seem a bit thick to me but should
pose no problem. When you are ready to paint there is a color reference
chart for Kolor, Vallejo and Humbrol paints. Overall, there was no flash
or sinkholes in my review kits. Detail is crisp and well defined in scale.
Please note there is a photo-etch assembly page you should read before
you start assembly so you know which plastic part is replaced (e.g., the
fenders).
The Panzer IV Ausf. C (Normandy)
With a 'flat' glacis plate the Ausf. C was similar to the Ausf. B but
had an armored sleeve applied to the coaxial MG, 300hp engine and small
detail changes.
Instructions begin with the 5 piece lower hull assembly in steps 1 -
4. Step 3 will be the most time consuming involving 5 piece suspension
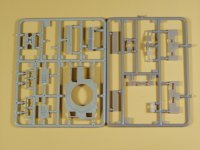
being repeated 8 times. The 11 piece upper hull is assembled and mated
to the lower hull in steps 5 - 6. The upper hull is where the ausf. C
and ausf. D kits differ. Step 7 assembles the turret. Why they molded
the short 75 mm main gun in two halves I will never know. You may want
to consider an after-market gun barrel. Step 8 is for detailing the rear
of the tank with the mufflers and fenders. The finished turret and lower
hull are mated in step 9 - 10 along with stowage attachment. Step 11 seems
out of place for tracks to be fixed to the lower hull. It seems to me
that this should be in step 4 BEFORE you attach the fenders. You will
have the choice of three Ausf. C vehicles on the decal sheet, 5th Panzer
Division (Winter, Germany 1939), 2nd Panzer Division (Balkans 1941) or
21st Panzer Division (Normandy 1944).
The Panzer IV Ausf. D (North Africa)
With a 'stepped' glacis plate the Ausf. D changes included a new mantlet
and tracks. This variant was introduced in 1940.
Instructions are the same as mentioned above for the Ausf. C. Step 4,
6 and 9 you will add lower hull appliqué armor for the Ausf. D.
The 17 piece upper hull is assembled and mated to the lower hull in steps
5 - 6. The upper hull is where the ausf. D and ausf. C kits differ. You
will have the choice of five Ausf. D vehicles on the decal sheet, 4th
Company 5th Light Divsion (North Africa 1941), 8th Company 21st Panzer
Division (North Africa 1941), 8th Company 15th Panzer Division (North
Africa 1941), 8th Company 5th Light Divsion (North Africa 1941) or 4th
Company 5th Light Divsion (North Africa 1941).
Conclusion
With the exception of Revell's 'long' barreled Panzer IVs, Mirage has
decided to add the 'short' barreled variants to the small scale kit inventory.
Both companies are comparable in quality and price. Hasegawa produced
a couple but I consider them inferior kits compared to Mirage's. You can't
go wrong with these kits. I recommend them to any Panzer IV enthusiast.
I would like to thank Squadron Mail
Order for the review kit.
|
|


