2009 Dodge Challenger Trans-Am
By Dave Lawniczak
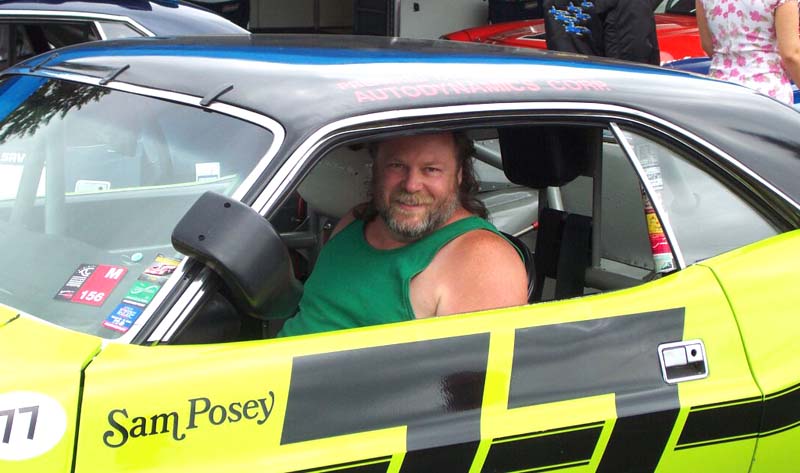
I think that most of us have a favorite car, plane, or what have you that inspired us as kids. This favorite object perhaps still influences us today. For me it has always been cars. My dad and my uncle were both car guys whom passed on that love on to me. And the car that pushed my hot button more than any other was the 1970 Dodge Challenger. Not all of them, but a very specific one. 1970 was the year that I joined the Hot Wheels® club. The poster included in the membership kit that year was a large image of the Hot Wheels® sponsored Dan Gurney #48 Plymouth ‘Cuda. Down in the corner of the poster was an picture of the #77 Sam Posey driven Dodge Challenger.
That image was burned into my twelve year old brain like no other one before or since. Because of that memory, my first car was a Challenger purchased at the age of eighteen. Although I have never owned a second one, I still talk about them and "threaten" to have one follow me home every now and then. I was captivated yet again when Dodge introduced their retro-styled Challenger at the 2006 Detroit Auto Show. And now I am also torn between wanting an old one or a new one! I guess while I am waiting to figure that out, I'll just have to be content with building them in scale.
And building them in scale gets the old mental juices flowing about seeing a whole new Trans Am style class of cars with Camaros and Mustangs and Challengers all dicing it up on the great road courses throughout America. And this is part of the mental process that led to the car you see here...
I had a choice of doing a full-detail build using the new Revell kit, or a curbside using the AMT kit. I ultimately decided to go with the curbside, given that my models spend 99 percent of the time in my case with their hoods closed. This also gave me a little more incentive to add details in other places to a relatively simple model more interesting. And finally, this was what was available on the shelf at Skyway Models when I went looking for this subject. So follow along as we build up a 2009 Dodge Challenger road racer...
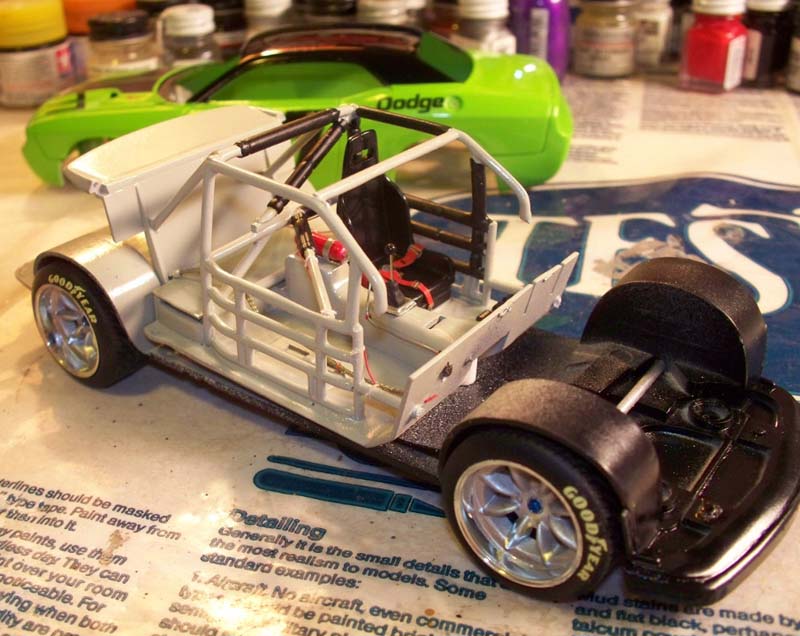
Chassis
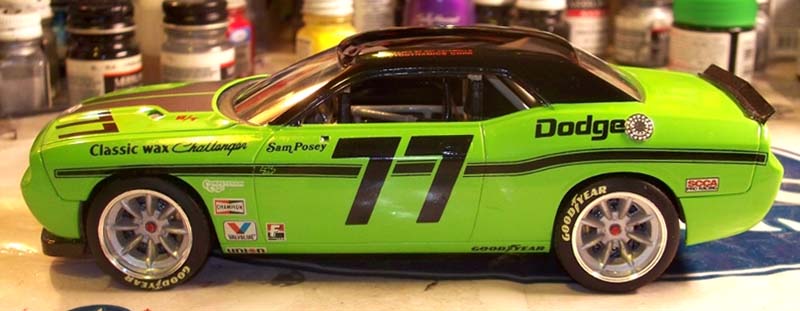
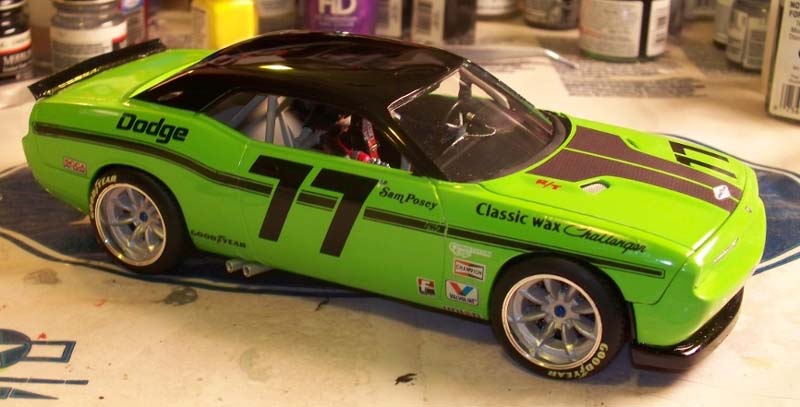
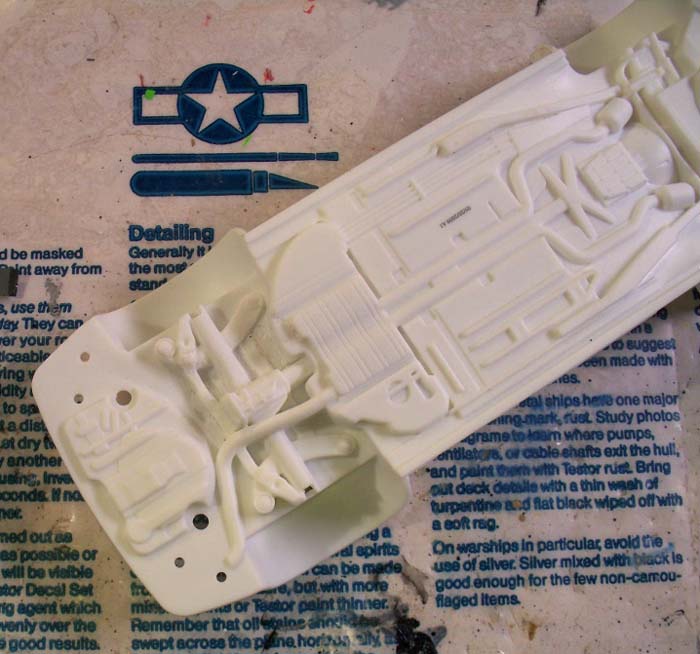
The chassis for the AMT kit is one piece containing everything under the body, except for the exhaust tips and front air dam. There are no separate suspension pieces and the front and rear wheels are attached with metal axles. I painted the entire chassis semi-gloss black and I used flat black in the wheel wells. I know that this is not prototypically correct, but it is simple and looks good for the effort expended. The first thing I modified was the exhaust system. The race version of the original #77 Challenger has a dual exhaust system and both pipes exit on the passenger side of the car. Because of the chassis pan's thickness, I was able to use my X-Acto chisel blade to remove the exhaust system from just behind the transmission to the rear. I then carved two channels exiting on the passenger side in front of the rear wheels for a new exhaust system and laid in half round styrene to create it. I detail painted it using Testors bottle silver enamel, added 1/8th inch aluminum tips and the exhaust system was finished.
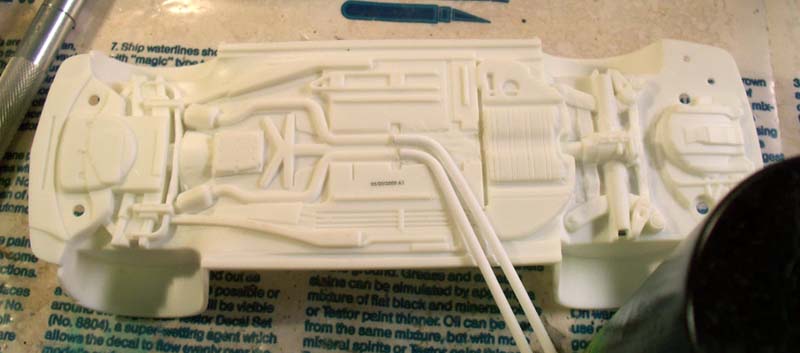
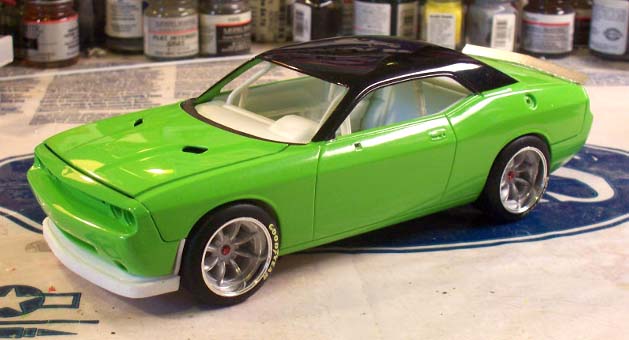
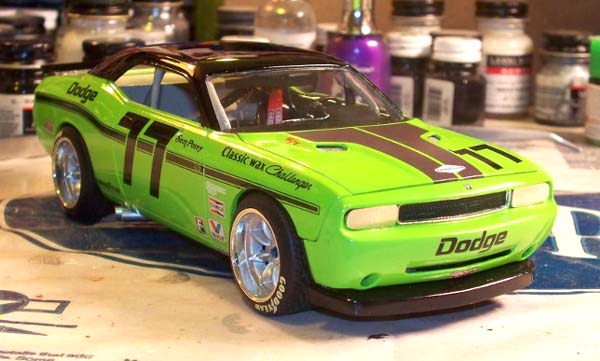
For the front air dam, I wanted something racier than the stock air dam. I discovered that the bottom section of a NASCAR air dam fit on the kit piece almost perfectly. So I cut off one from a scrap body and added it to the stock air dam. A little sanding and then I painted the entire assembly gloss black before gluing it in place.
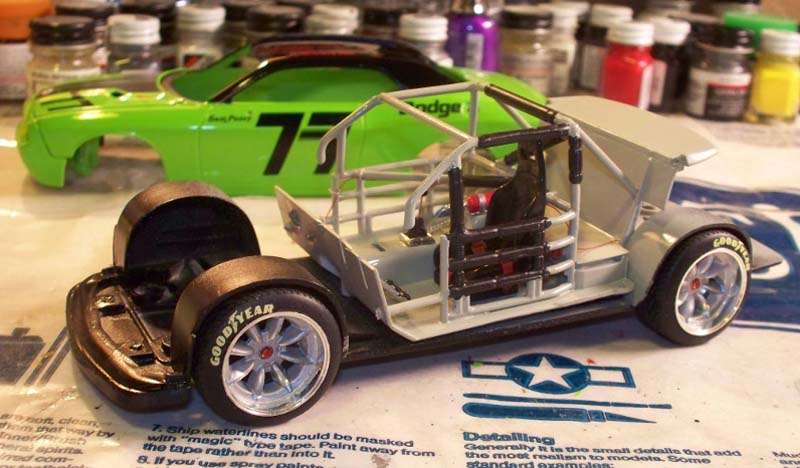
I tossed around several ideas for wheels and tires for this project. The original car has Minilite style 8 spoke wheels so if possible I wanted to keep that look. My original intent was to use 4 NASCAR racing slicks with resin Minilites inserted in the centers. That actually looked pretty good in early mock-ups. One afternoon I was looking at something for a totally different project and discovered a 1/24 scale die-cast Nissan 240Z that had the wheels and tires you see here. They are actually a bit large for this model: the wheels scale out at about 26 inches or so, but to me, they gave the car the "look" that I was after. I sanded the treads and put Shabo Goodyear dry transfers on the tire sidewalls.
Because the AMT kit lacks disc brakes I used the 4 disc brakes that came with the wheels and tires with a little paint detailing added. One problem that using the larger tires added is that the rear wheels are not centered in the wheel well and actually hit the front of the fender opening. This is the third AMT Challenger kit that I have built and they all have had the same issue. To fix this, I used my Dremel tool and cut the axle notch in the chassis to allow the rear axle to sit about an eighth of an inch further back. Once I had the axle in the right location, I clamped it in place and bonded it with super glue to hold it there.
Interior
Because this was a curbside model, I knew that the interior really had to "pop" in order to grab attention. I spent the bulk of my detailing effort on the interior. With the exception of the door panels-which were simply detail painted-I modified every other part of the interior. I started with the floor pan, adding styrene to simulate a removed back seat. I sanded and filled all of the console detail. I cut down a NASCAR roll cage, modifying it as necessary to fit and still look good. I painted all of the interior gloss gray and then detailed the roll bar padding and such in flat black. The pedals and bucket seat came from the same NASCAR kit. The seat was cut down so that the bolsters were the identical on both sides.
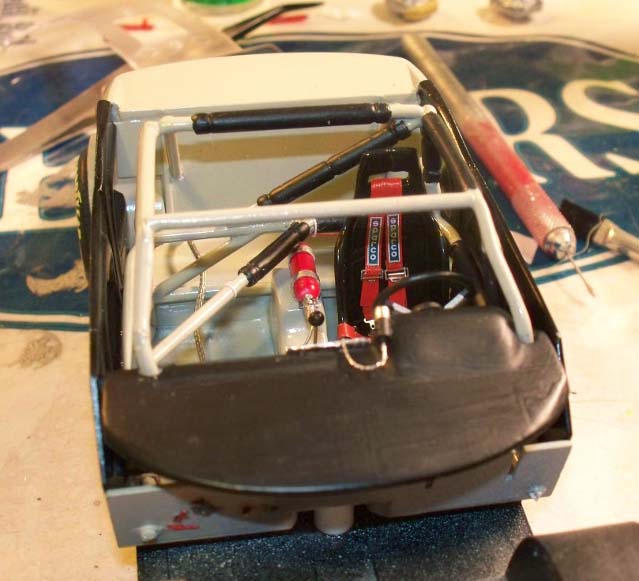
I also opened up the belt slot in the top. I used an Eduard red Sparco racing harness for the seat belts. This is the first time that I have used this product and there are some things that I really like about it and some things that I don't. Still, in the overall scheme things, it looks stunning and brings a lot of focus to the interior. Nor did I stop there. I added braided "fuel" lines, solid "fire suppression" lines and painted wires to simulate various electrical cables. I made a foil copy of the NASCAR floor shift and added it, using a straight pin for the shifter itself. I painted the dash the same semi-gloss black that I painted the door panels. Then I added a piece of styrene sheet covered with aluminum Bare Metal Foil to cover the stereo and navigation areas. I tried a pounce wheel for the first time, to simulate rivet heads on this panel.
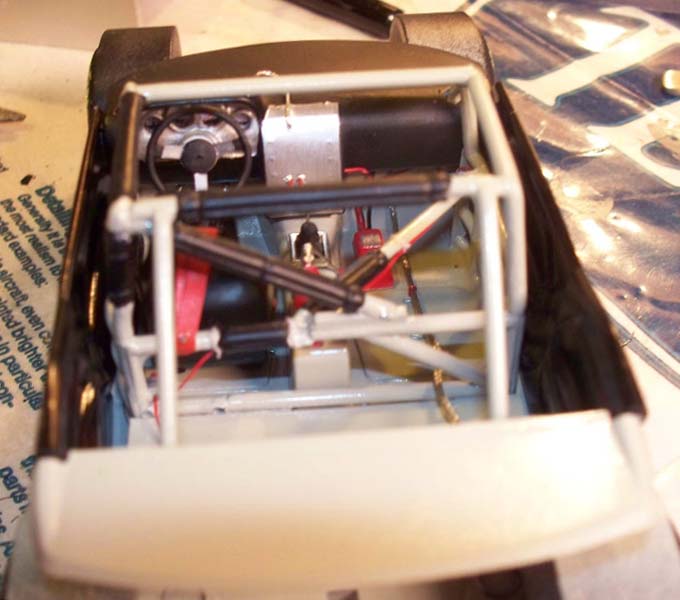
It worked out pretty well; if you look at it in person, you can see the bumps that look like the rivet heads. I used wire and super glue drops to simulate toggle switches. I finished off the dash by using the NASCAR steering wheel mounted on the Challenger column and the original Challenger kit gauge decals. I also scratch built a shift light and added it along with associated wiring. Once that was all done, I realized that there was still something missing from the interior. So I cut out an MSD ignition box from a Revell Trans Am Mustang kit, painted it and installed it on the passenger side floor and then added in some more wiring. Since I had already taken so many parts from the Trans Am kit, I also took the wide angled rear view mirror and added it to the front top bar on the roll cage. The interior all alone is a piece that I am very happy with. When you peer inside the car, the interior really comes to life and it may be the best interior that I have modeled to date.
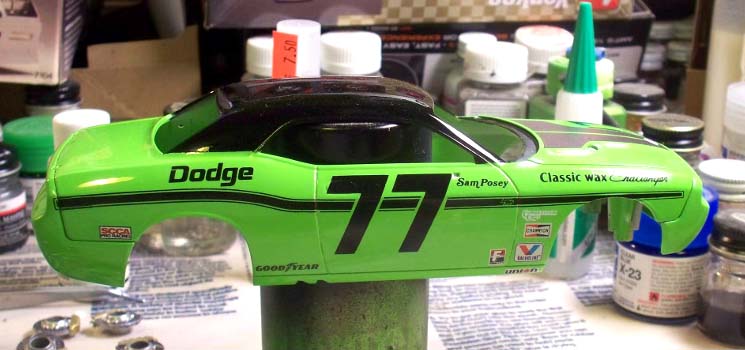
Body
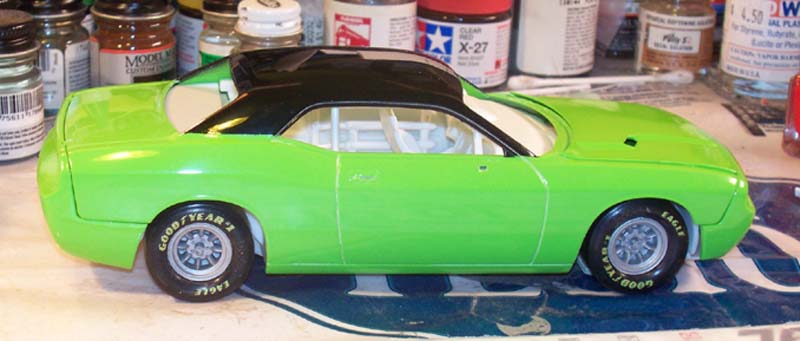
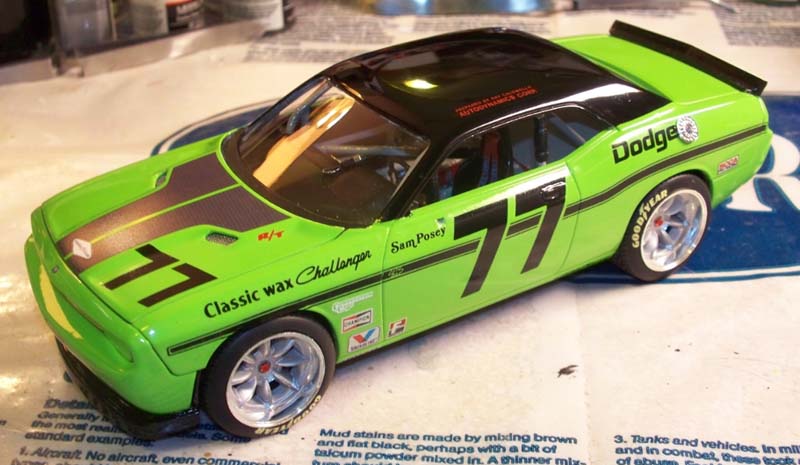
The body is actually not modified at all, except for opening up the hood vents a little bit and carving the notches on the passenger side for the exhaust tips to exit. The body was sanded, primed and then painted with Testor's aerosol Sublime Green. I let it gas out for a week or so, then masked it and painted the roof with Testor's Gloss Black, again from the can. Since this was to be a race car, I decided not to use any clear coats. I let the body gas out for another week or two and then polished it using a polishing kit.
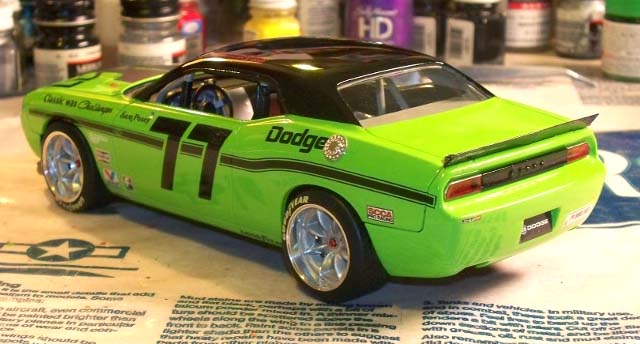
The decals are a mix of the original kit decals and two sheets from Fred Cady Decals (sadly, no longer in business), the #77 Challenger TA sheet and the RT / TA sheet. I also added various small contingency decals from a variety of sheets in my spares drawer. The kit decals went on very easy, probably the easiest of all. I fight with decals a bit anyway, although I am getting better. The Cady sheets are probably the nicest decals I have ever used, but they are so thin and fragile that a ham-fist like me had problems applying them. It took me several evenings to apply them and patch up the "problem" decals.
Once they were all on and had a few days to dry, I carefully washed the body to remove any decal residue in odd places. I followed that with a coat of a good automotive carnauba wax for a little protection and shine. I originally played with the idea of putting a cut down air cleaner under the hood for a little 3-D perspective, but it never looked right, so I ended up covering the hood openings with a silver mesh. I also put the mesh on the back side of the driving light holes to simulate brake duct openings. The original race car used polished aluminum covers over the headlight buckets. I simulated this by cutting some .010 styrene sheet to shape and covering it with chrome Bare Metal Foil. The rear spoiler is from an old NASCAR Monte Carlo kit.
I cut a notch in it so that it would bend in the middle to better follow the body contour and painted it gloss black. There are still some unfinished items on the car. I need to fill the door mirror mount holes. At one point I was going to use them but once I had the body painted, polished and the decals installed, I was not sure how to fill the holes without some serious and delicate rework. So for right now, they are just there. Perhaps I will paint Sublime Green on some clear decal carrier and cut little pieces to cover the holes. Not sure what I am going to do yet.
Final Assembly and final thoughts
Final assembly consisted of carefully putting the body onto the chassis and interior assembly and then adding the hood and front and rear fascia pieces. The wheels and tires were the last components, even though the axles were bonded in place early in construction. I carefully wiped the model down one more time to remove fingerprints and I put it in a place of honor in a display case in our family room.
There have been articles in other publications about using a new body style to build a retro race car, but these articles all concerned the new Camaro. I might do that in the future, but completing this piece sure satisfies an itch that I have had for a while. And I have to add that sometimes dreams do come true. A few years ago I was allowed to sit in the original race car, during which I took some awesome reference photos. I have visions of a full detail project that will put those photos to good use... Until then - Have Fun Modeling!!!