At the February Display at the Museum of Flight in Seattle, there will be a group build by NorthWest Scale Modelers (and anyone interested really) of North American T-6 Texans. This will include all variants.
In discussing the civil conversions of T-6's in the Yahoo group "CivilWings", the biplane conversion reared its ugly head. Ugly is the key concept regarding this plane. Why was it ever built? I heard it was a crop-duster, but don't know how true it is. When the guys ask me why it was done, I just say they probably did it for the same reason I did it: to see if it could be done. Either that or it was built on a dare.
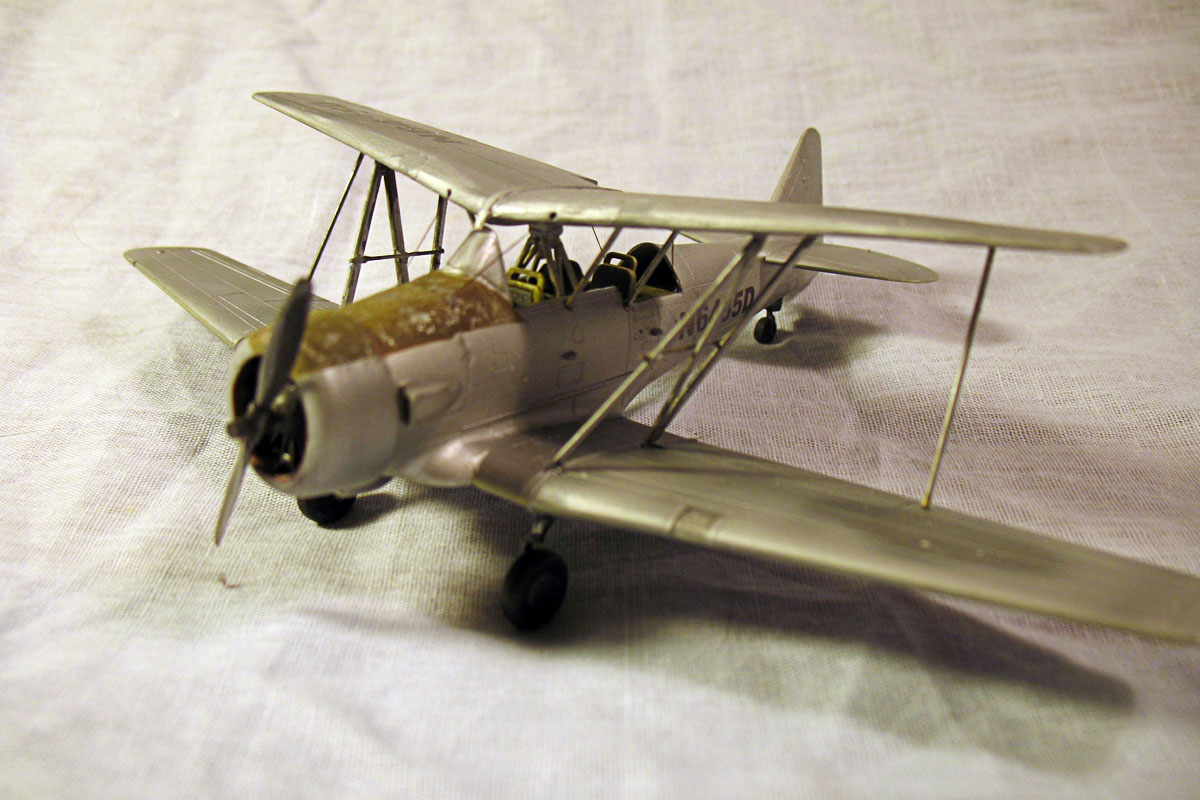
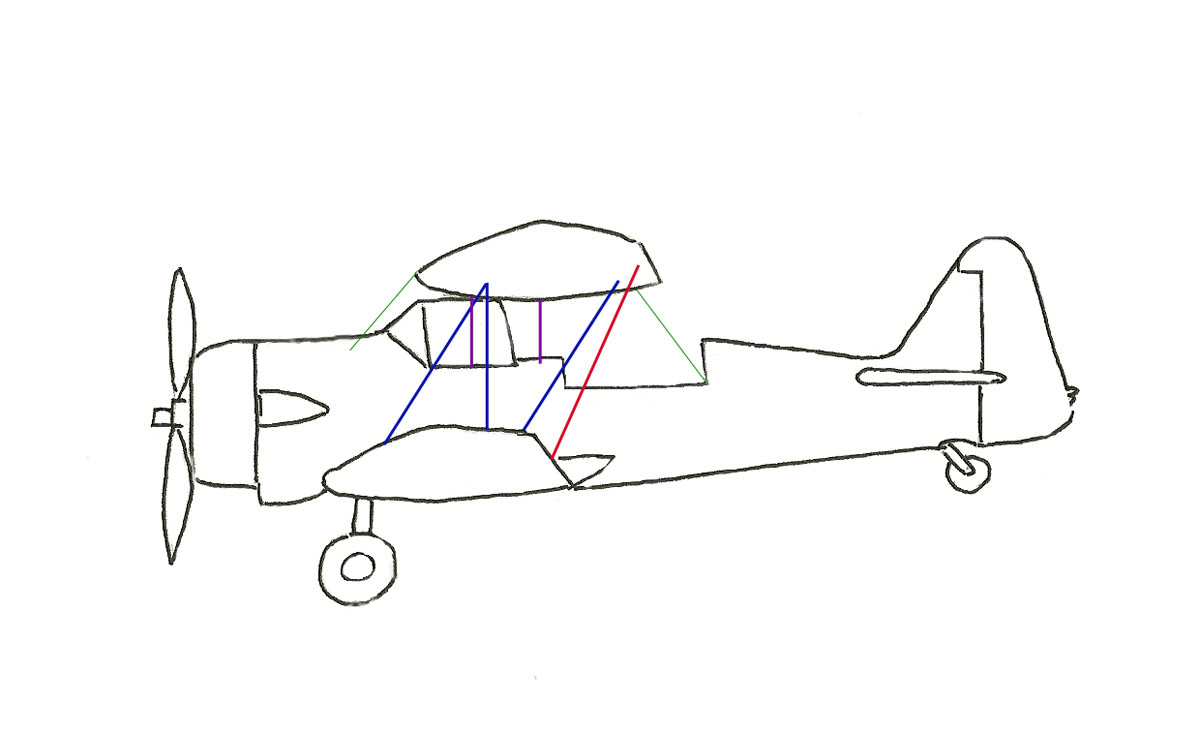
I got interested, and shelved my other projects to build this one. First, I collected as many photographs as possible of this one (I've only seen pictures of one which is displayed on this page). I was emailing Dan Hagedorn, the senior curator of the Museum of Flight, and he said that the N number doesn't belong to a T-6, but it's obviously that number in the photo. Another anomaly here. Next, it took me some time to understand what the strut configuration was; after that, it seemed like a straight-forward conversion. Frequently, understanding the configuration of things like that is the most challenging part of any project. Three-view drawings are great for helping with it, but what I usually do is study them (and/or photographs) then draw it to fully understand what it looks like.
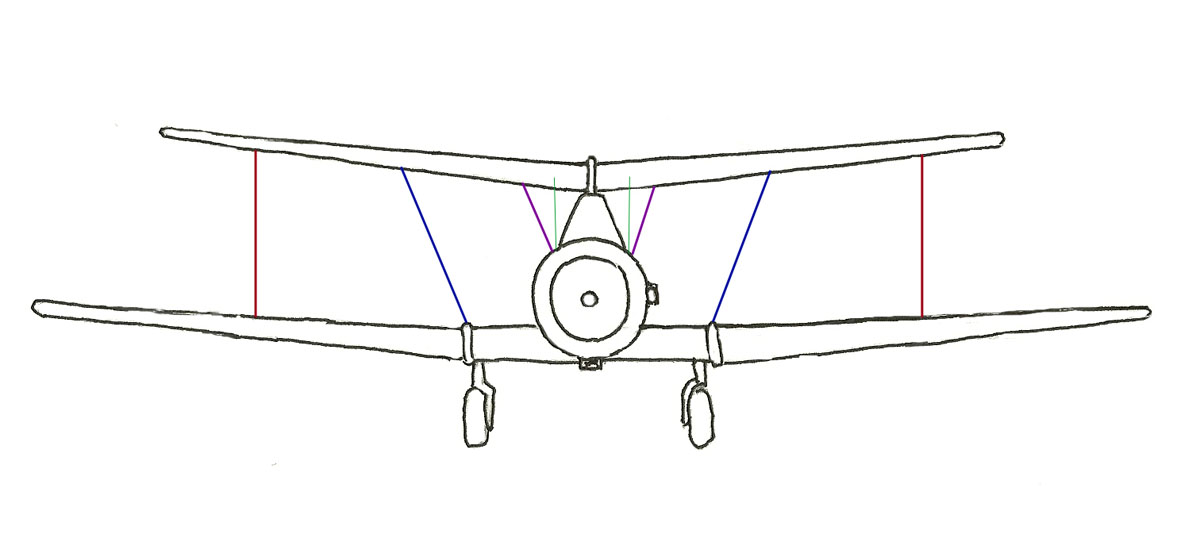
For this project, I finally got it that there were regular cabane struts, absolutely bizarre interplane struts, connecting struts between the ailerons, and wire bracing from the upper wing to the fuselage. The most important connection point as far as making the model sturdy was at the fuselage pylon.
The first thing I did as part of the construction was to saw the wings off at the kink, and discard the inboard sections. I then glued the outer sections together at the flange. I preserved the dihedral of the original from the kink out. I then cut out the portion above the pilot's head; that's a square cut, so it's really simple to do. The fuselage also needs to have a square cut to open that up around the rear seat. I used the Academy kit for the lower part of the fuselage and the Heller kit for the upper wing. Since the Academy kit has recessed panel lines and the Heller raised, I rescribed the upper wing for consistency. I drilled holes to take all the struts and wire bracing; it's important to do that that prior to attaching the upper wing.
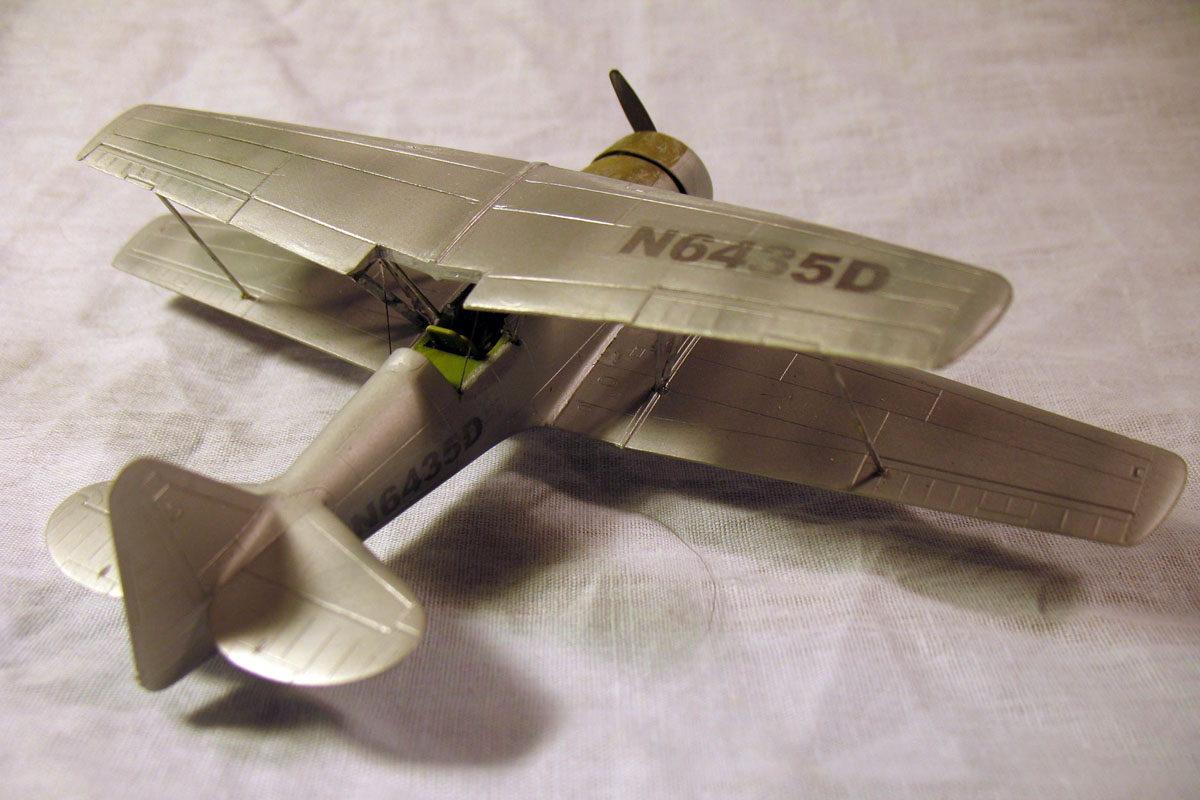
Once all that was done, I simply built the fuselage as usual and went on to painting/decaling of the major components. I printed the decals on my inkjet printer, and shot them with Microscale decal film. The font I used was Arial Black but I don't recall the point that I used. I just compared the photo using my Mk V eyeball. The decaling was very frustrating. I used Microset and Microsol with no results, so stepped up to Solvaset. This really attacked the decals and I wasn't able to touch them to press them into the panel lines. As a result, they tented over the panel lines, and the edge of the carrier film is very visible. When dry, I lightly overshot the decals with ultra-thinned silver to fade them as well as to hide some of the nastiest carrier film.
I should have painted the anti-glare panel first, masked it, then sprayed the silver (I used Floquil bright silver, by the way) but I simply forgot to do it! I ended up shooting the OD anti-glare panel AFTER the upper wing was on, and masking the silver with Post-Its to not mar the delicate silver. Once the anti-glare panel was on, and not fully cured, I produced paint chips by scraping at the OD with a scalpel and even my fingernail.
After attaching the upper wing to the pylon, I fit and attached brass rod for the cabane struts. I worked inboard to outboard for good access. Moment of honesty: I didn't measure any of the struts. I just cut them to size by nipping off a bit at a time. For the interplane struts, I used Contrail Strutz. I didn't attach them until I had drilled holes and inserted brass rod into the ends. That was dicey. The linkage between the ailerons is brass rod. The strut configuration is remarkably strong. When all was done, I attached the wire bracing to the upper wing using Tippet line.
That is the long and the short of it. I apologize for not taking pictures along the way, but didn't plan on writing an article. Conversions like this one, where it's a heavily weathered jerry rigged plane, is pretty forgiving of errors. Ater all, the real thing is a mess!