
CMR 1/72nd De Havilland DH9A
By Pedro Nuno Soares
CMR’s 1/72nd De Havilland DH9A, was reviewed some months ago in your favorite modeling e-zine by none other than a true DH9A specialist – Modeler Extraordinaire, John Alcorn - so all that that had to be said in this respect is thoroughly and systematically laid out in that article.
Still, a kit is only a model when someone goes past putting it together, so here's what I thought of my experience with this excellent multi-media kit.
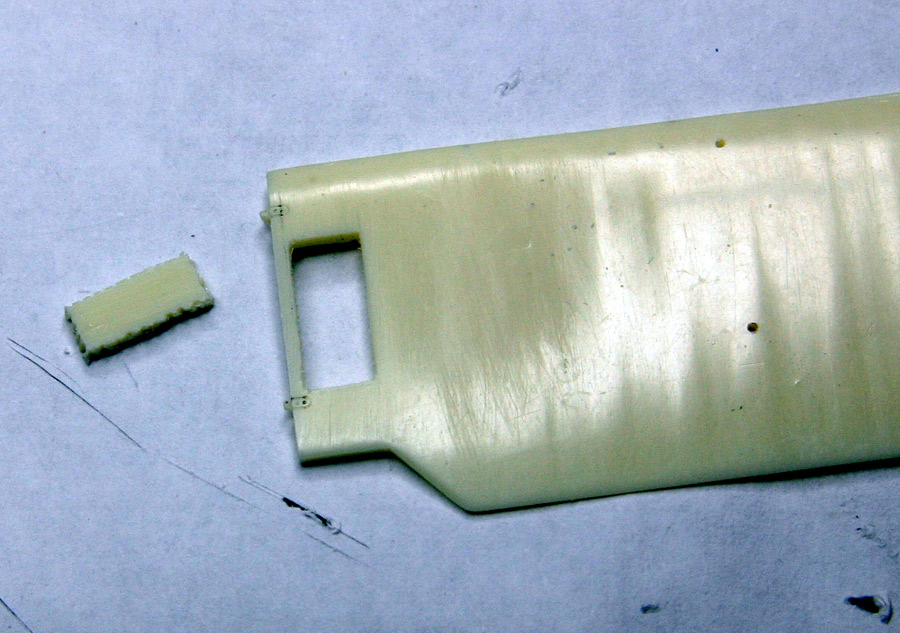
Having set my mind to build the sample I was generously sent by CMR, the first thing I did was, of course, to read the above mentioned article to see if there was something that might require special attention and, lo and behold , yes: the top wing, as mentioned in the review was absolutely flat, and that really needed correction. Apart from that, I noticed the lower starboard wing didn’t have the cut out panel at the root that is prominent in the DH9a at the RAF museum at Hendon. Now I’m not sure is this was a standard feature of all DH9as, but all the pictures I’ve seen where this area was visible seemed to corroborate this, so I decided this too would need modification.
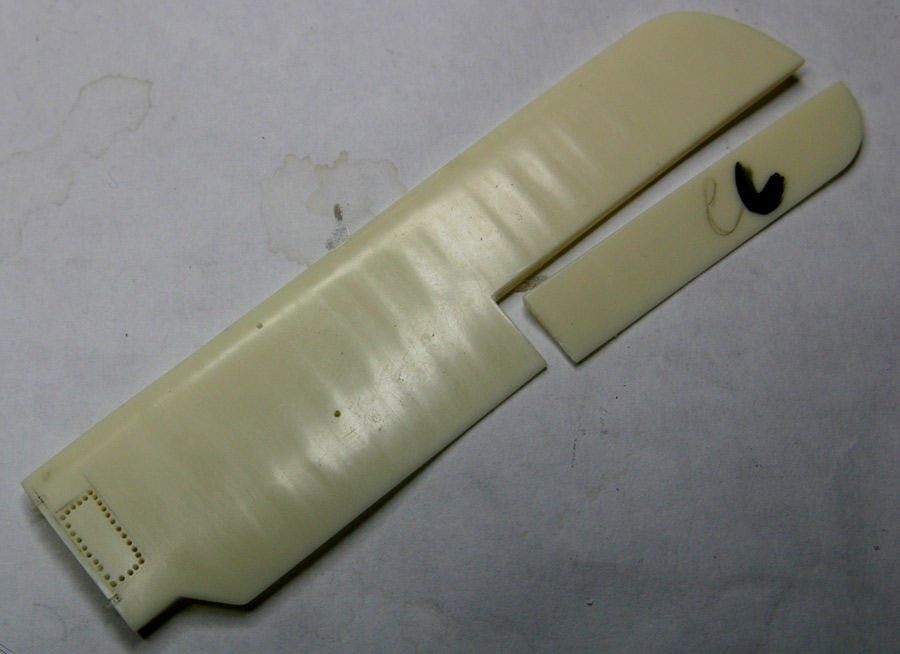
To correct the wing dihedral I was going to do as Mr. Alcorn suggested in his review, that is, separating the outer panels form the narrow central section and reglueing them at an angle but in the end I tried to fix the wing by heating it with a heat gun and bending the wings into shape. It seems I chose the wrong strategy though, because even if I did manage to impart the necessary upward slant on the outer panels, a bit of a strange curve developed on one of the sides (I think the culprit here was also a wing strut that should have been a bit shorter, coupled with the tension of functional rigging). Incidentally, I was told by CMR that the next batch of DH9As should have this problem solved, since it seems it’s due to a problem in the molding process that will now be revised.
Corrections done (well at least I can say I tried….) and I turned my attention to the actual building process, starting inside the cockpit.
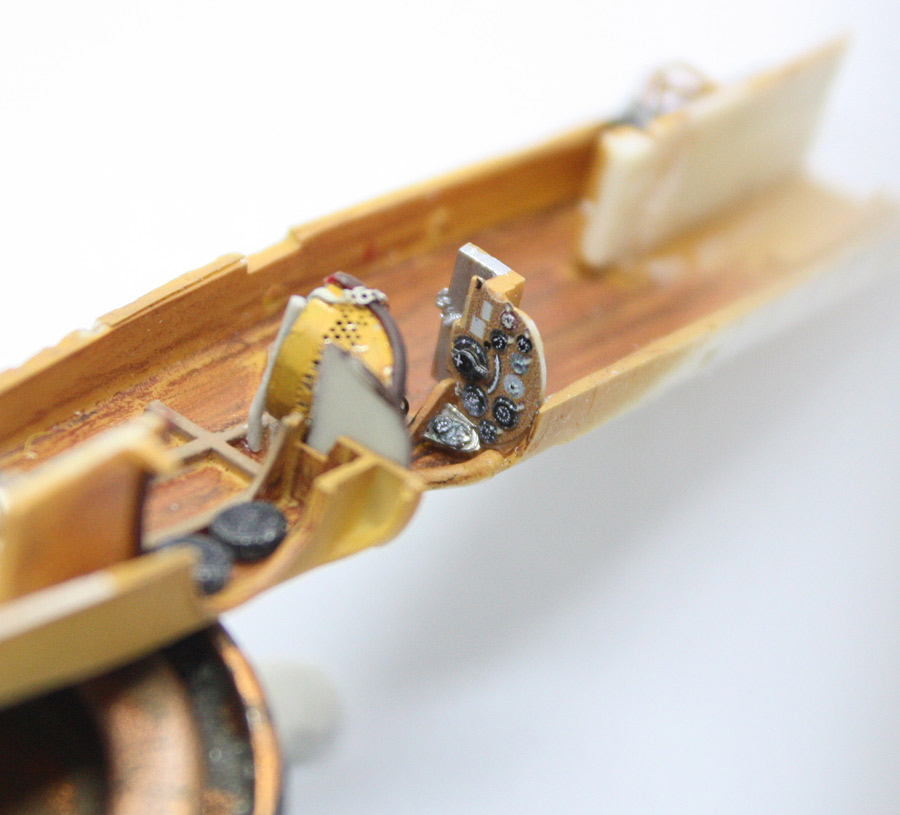
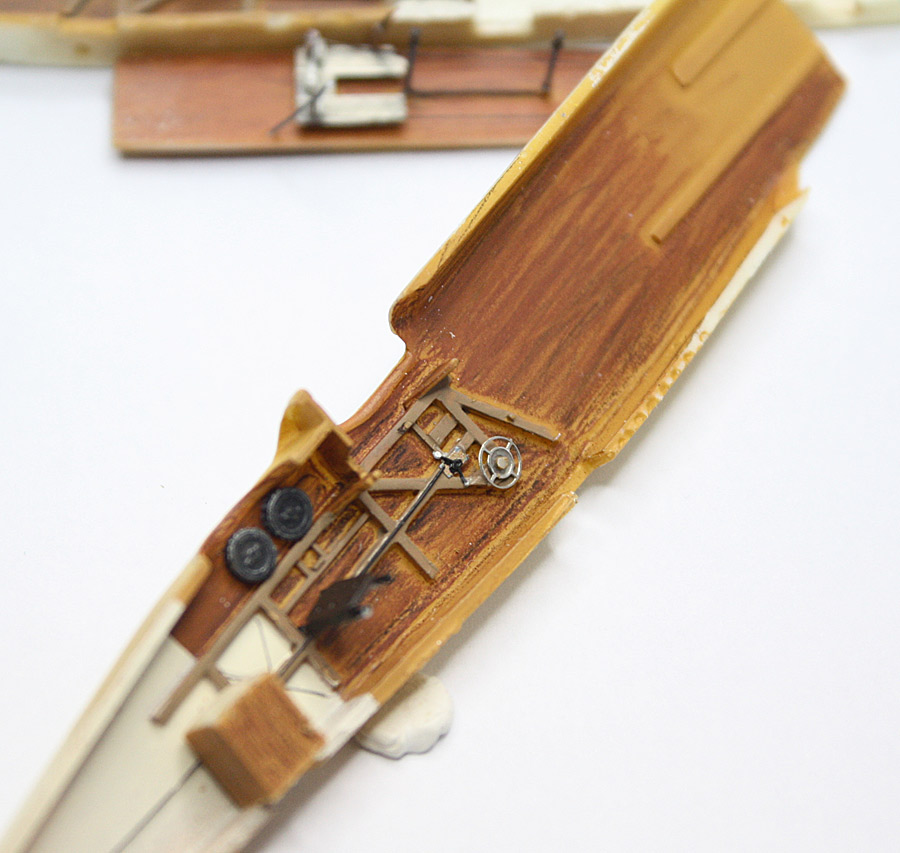 This has to rank as the most comprehensive kit that has come across my hands in terms of interior detail, so in order to have a very realistic and busy office for pilot and gunner all you have to do is to carefully paint the structural details inside the fuselage and glue on the excellent PE parts, some of which are already pre-painted, like the seat-belts (even though I think pre-painted PE is for spoiled children … ;-)). In the end, all I added by way of extra detailing here was covering the rim of the pilot’s’ seat in insulation from thin telephone wire, to give it some volume.
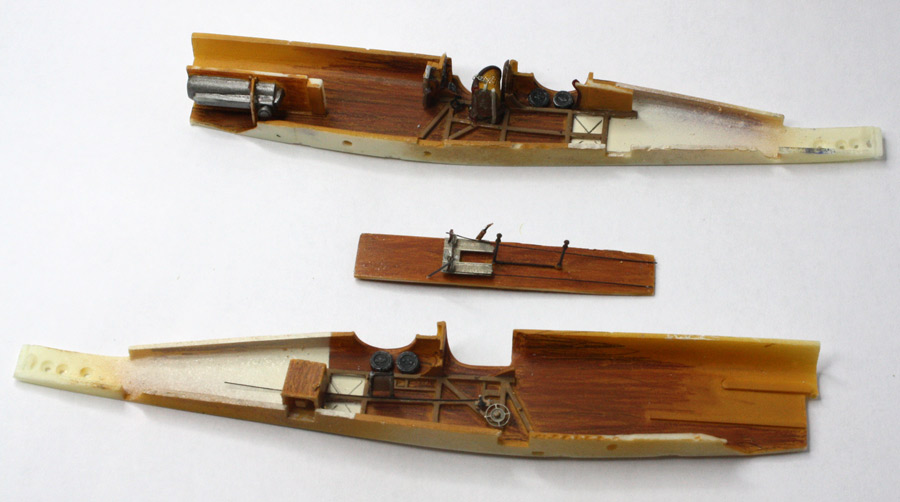
The internal areas were painted wood and CDL (wood: base coat of humbrol 63, plus buffed watercoulour pencils in various shades of brown) and the fuselage was closed with the help of epoxy glue (which allows much more control and last minute adjustments than CA, while setting fast and hard).
 After dealing with the central fuselage seam with a touch of milliput and a swipe of wet and dry, I installed the lower wings. These, in reality, should leave a gap, between the root and the fuselage, but since the wings are so thin and I wanted to ensure a good bond, I chose to glue them directly onto the fuselage and I reinforced the joint by means of copper wire pins inserted into the wings and the fuselage.
Meanwhile I had previously separated the ailerons and elevators and onto these I also inserted pins of copper wire to later assist their gluing in their appropriate locations.
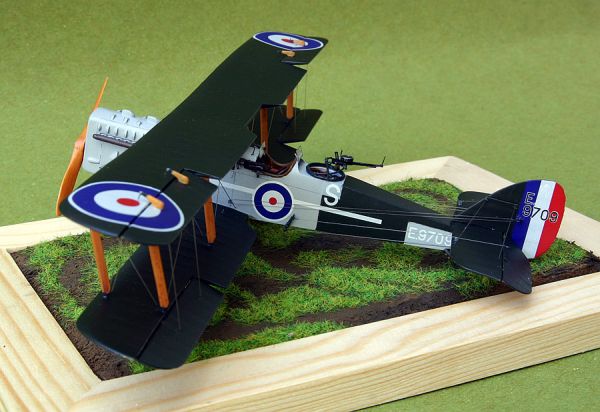
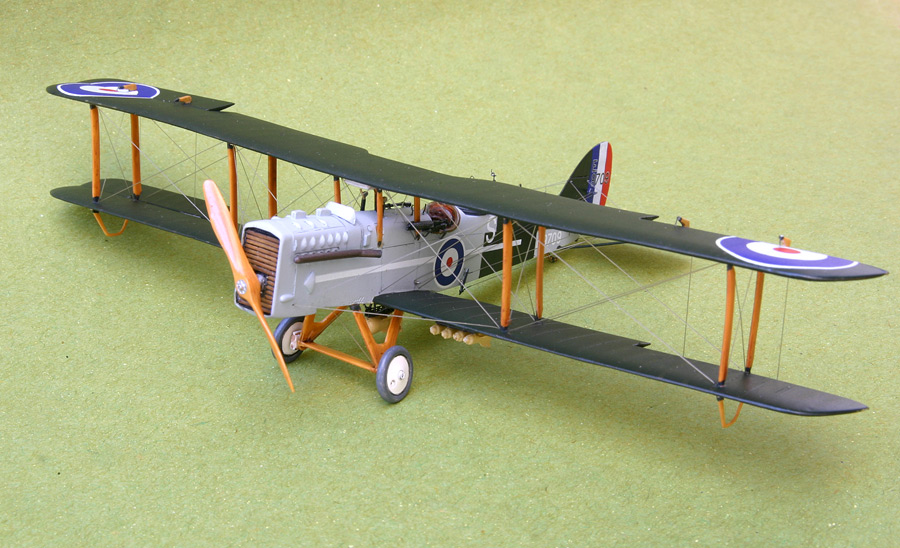
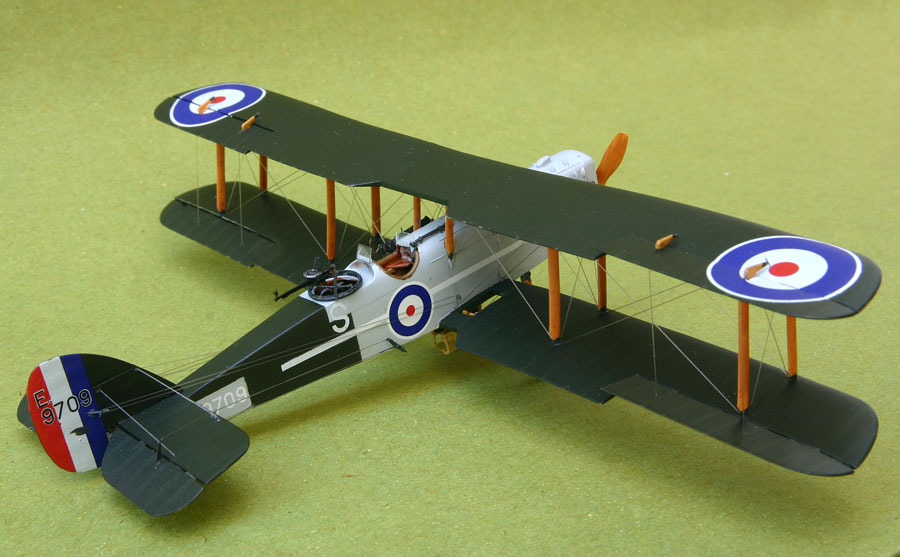
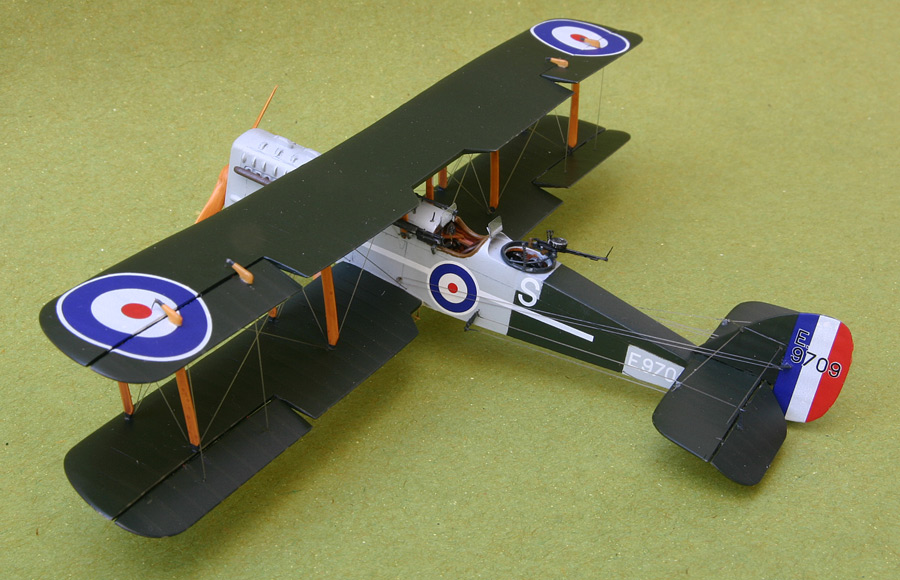
With these preparatory tasks successfully accomplished it was time to start painting and I chose one of the several painting schemes presented in the excellent instructions that are part of the kit package: Dh9a F9709. This called for gunship grey and PC10 fuselage, with PC10 on the uppersurfaces of the wing and CDL for the undersurfaces.
I painted the model with semigloss Titanlak enamel from the local hardware shop that yielded a perfect battleship grey (1421 – pearl grey) while the PC10 was the result of mixing together “enough black with enough yellow” resulting in a quite convincing PC10 on the green side of the specter.
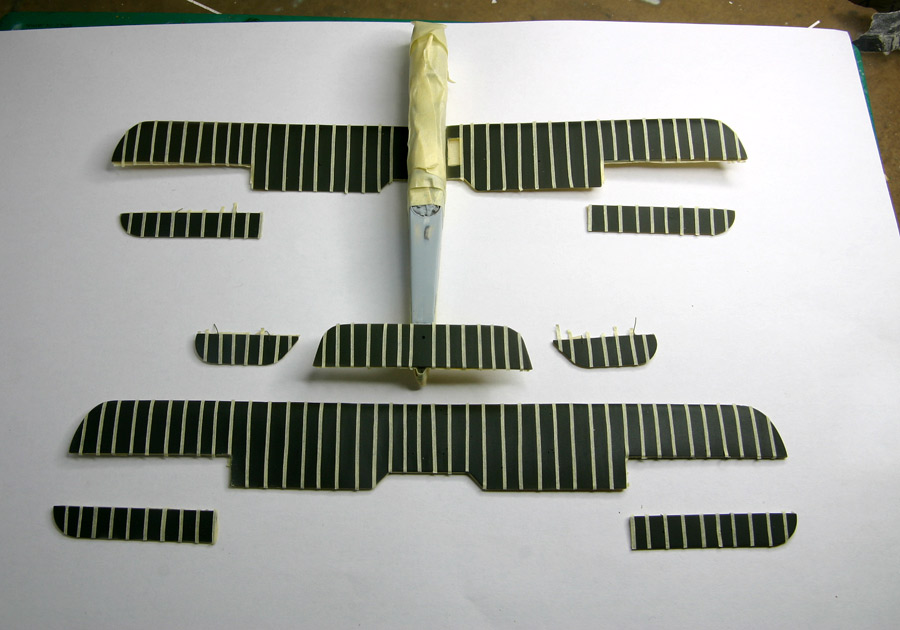
The undersurfaces of the wings were treated the same way, this time using 2 shades direct from the Tintanlak line: 1434 Vanilla and 1424 Cream.
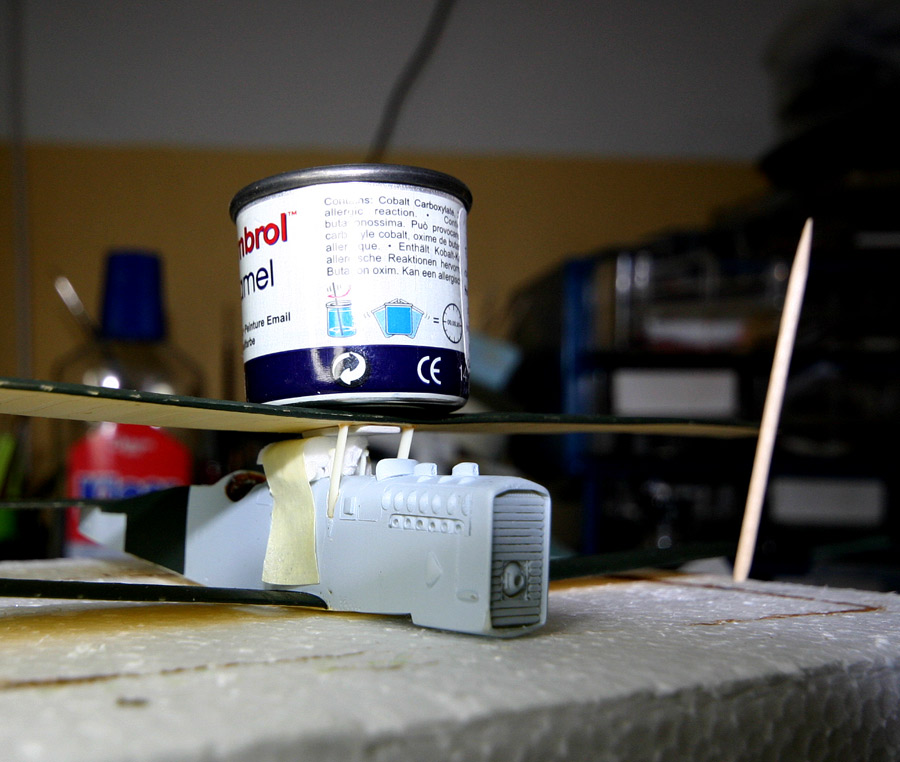
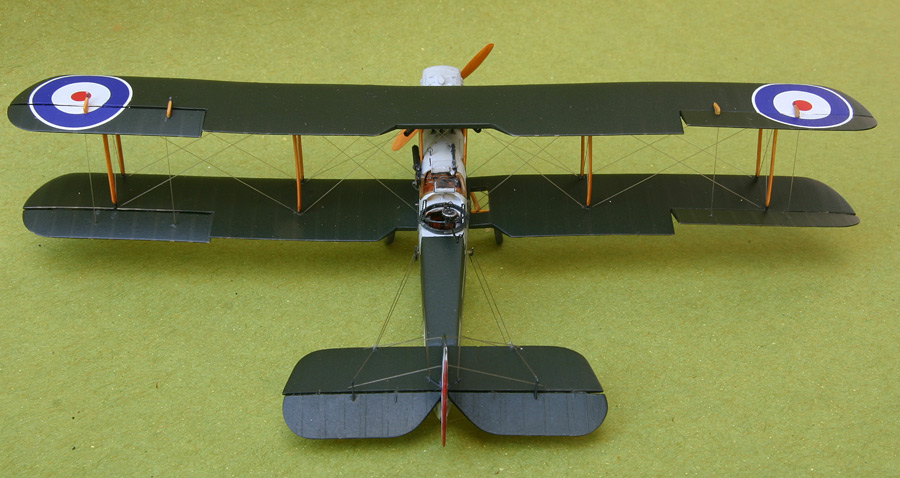
 The next day, the interplane struts were popped into their places (and this is where I think I should have trimmed one or two a bit more, because a longer than needed interplane strut ended up putting too much upward pressure on the top wing, that coupled with the downward pressure of the flying wires, imparted a slight but strange enough gull wing effect on the starboard top wing). Rigging as usual was by means of smoke colored monofilament and much patience and stubbornness was needed to manage to glue all the control cables on the supplied control horns, especially those on the underside of the downward positioned elevators. It took me quite a few hours and a number of tries, but in the end I managed to do it.
If you look at the pictures of my model and at the kit’s painting instructions you’ll notice that the latter calls for painting the u/c and the central section of the propeller battleship grey. Since I was constantly referring to the excellent photos and plans in Windsock international (ser refs. below) that has a number of detail shots of the magnificent rebuilt aircraft at the RAF Museum, I finished my u/c and prop entirely in wood finish, just as the one at Hendon. Correcting this would be simple but it did look nice that way, so I let it be.
Decals were the usual excellent stuff CMR provides so there’s nothing in this respect to report.
The last parts to go on board were the windshields (PE parts with acetate glazing) the nice scarf ring and gun, and the 8 little 20 lb. cooper bombs, plus the bigger 100 lb. bomb. Since quite a number of them had their fins broken I had both to reglue those that I managed to find and do quite a few other out of thin sheet plastic.
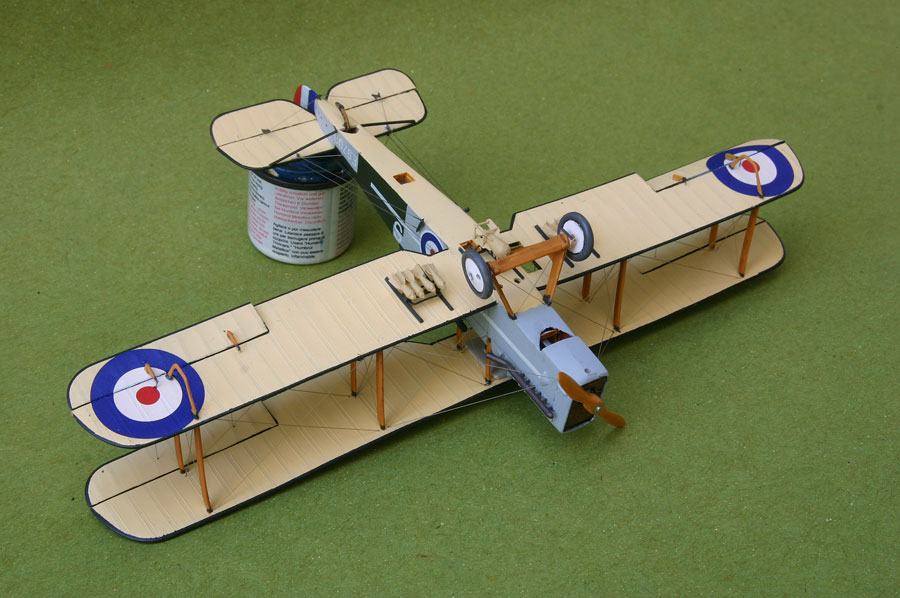
Gluing the cooper bombs onto the racks is tricky and I could have done better in this department. All that is needed is to cut off the little locating pin and glue the surface of the bomb directly onto the very thin rack. I might yet improve this on my model.
A couple of coats of satin varnish from a spray can were added as a final touch and the model landed on a little unpretentious display base made with a cheap photo frame.

As I said in the beginning, this has to be one of the most detailed 1/72ns kits around and it just go to show the care that CMR has been putting on the re-editions of their line of excellent of WW1 kits. If they manage to get the top wing right (and they say they’ll do it) then the kit will be absolutely perfect.
If you like the subject I can only recommend it and I’m sure you won’t be disappointed. But I also think that this is not the best kit to be offered to a beginner in the art of multi-wing models given the somewhat difficult task of getting the top wing on, account taken of the missing locating holes on the wing and of the difficulty in getting the 4 individual cabane struts glued at the correct attitude and separation.
In spite of the problem with the wing, I do like my model and I thank CMR for the pleasure of puyting together this sample kit.
References
In the internet you’ll find a lot of information about the DH9a including very useful pictures of the Hendon machine at the WW1 modeling page
De Havilland aircraft of WW1, Vol. 2, Colin Owers, Flying Machines Press
Windsock International Vol.20, ns. 3 and 4