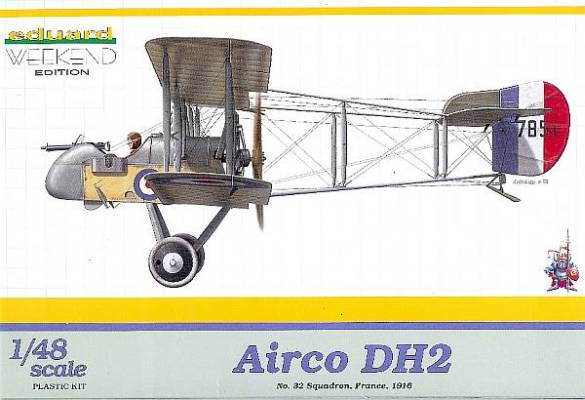
Eduard 1/48 Airco DH-2 Weekend Edition
By Gabriel Stern
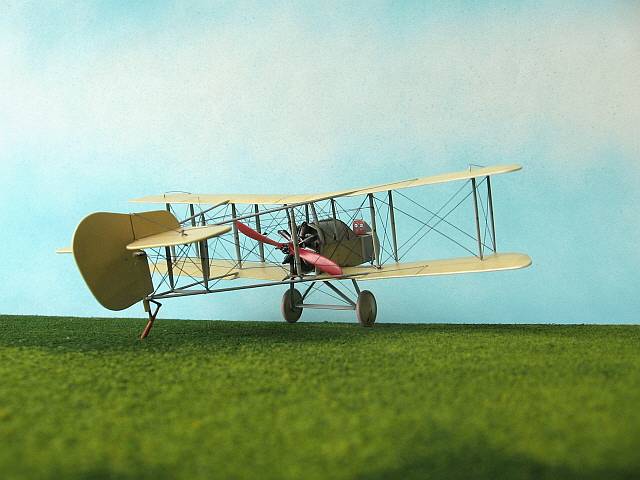
The unusual configuration of the Airco DH-2 (pusher, “twin” boom arrangement) was the product of a design solution adopted by plane makers at that time; among them the FE2b, the Farman F20 and F40, the predecessor of the DH-2 –the DH-1-, the AGO B and please check out the Thun Haefeli DH-1!
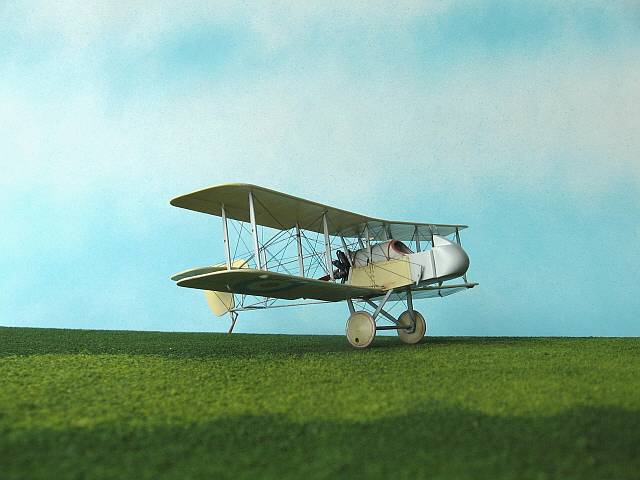
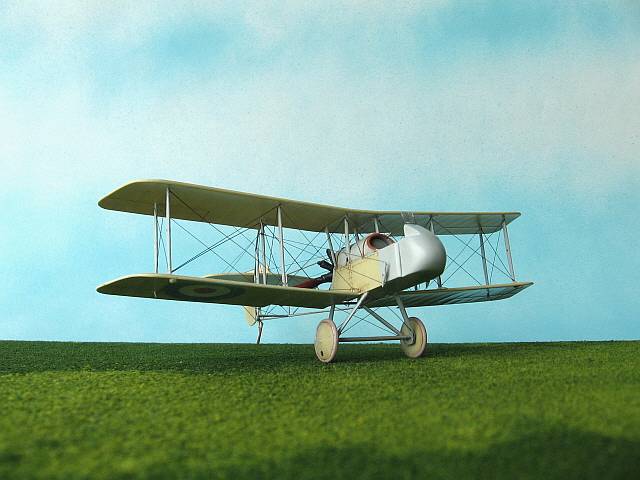
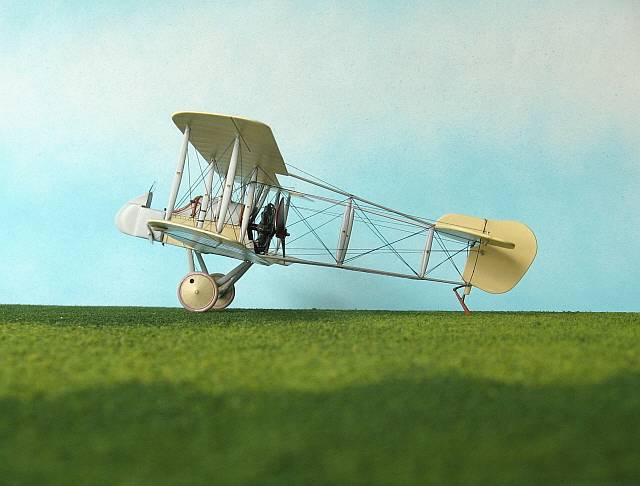
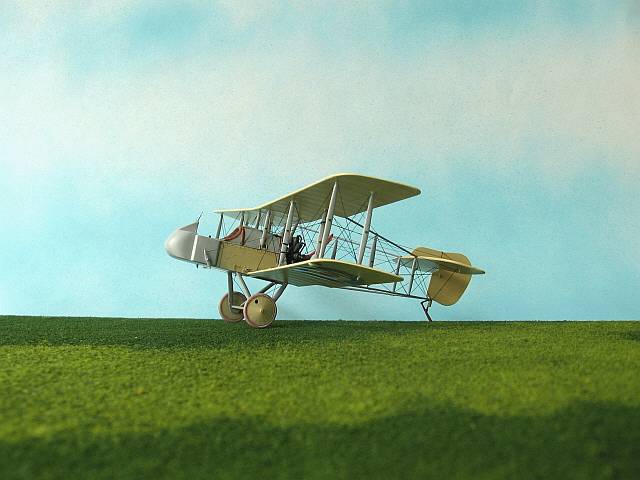 The strange shape of the Airco DH-2 was too much for me to resist, in spite of being at a scale -1/48- which I don't model in and being a military plane.
The latter was circumvented by adapting the kit to the prototype version.
In this review of the Eduard weekend edition I made only the necessary changes to represent the above-mentioned prototype version, since this is indeed a “weekend” edition supposed to provide with a quick but convincing build; and for the sake of the mainstream modeler who usually builds things as they come in the box.
 Eduard DH-2 appears as a fair kit, very reasonably detailed, with good instructions –although they tell you to eliminate part C23 which is later required during construction, among just a few minor things- and only one decal option. No “extras” and no rigging notes, although the latter can be seen in Eduard's website.
The engineering is sound and the sprues have a “clean” feeling to them.
The only items that raised a red flag were the tail booms. Intelligently molded, but yet to be seen if they will hold the weight of the model and building stresses.
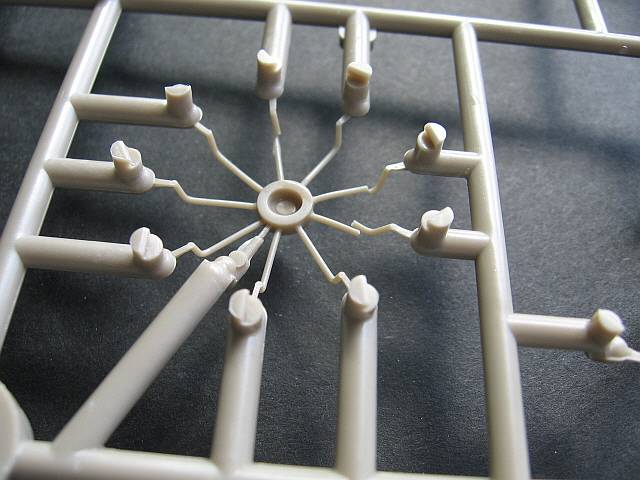 One part that came pre-crushed was the engine pushrod arrangement (part B13). As you can see in the accompanying images Eduard provided a “cage” for the delicate part, but later apparently installed the part inside the cage upside down. The result was an all-exposed fragile structure that collapsed during transit.
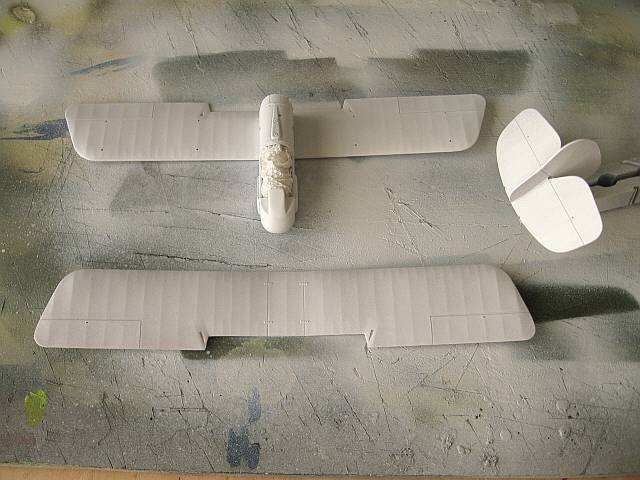
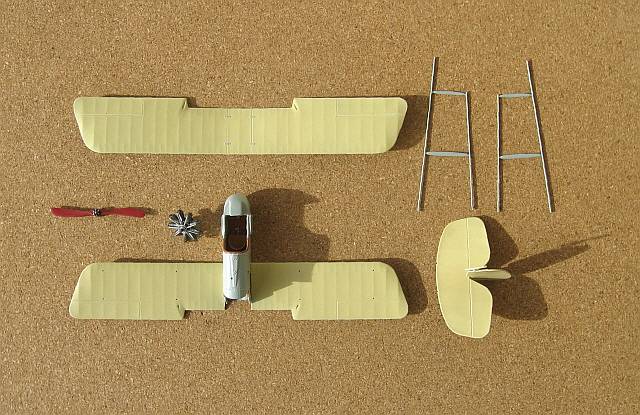
This kit is not totally new to the market, so a number of reviews with sprue shots and comments are already around. I would like to emphasize that the parts are very crisp and the molding is precise; no flash whatsoever and very faint mold lines, if hardly any. The parts count is reasonable and the detail and finesse are remarkable. Of special note are the ribbing and the fasteners, subtle, pleasant and realistically replicated. The clear part that is sometimes visible on some photos is not provided, although it is present in the color references on the box lid.
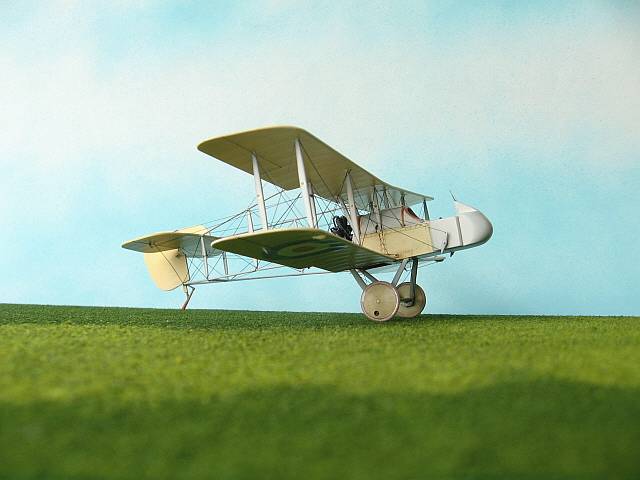
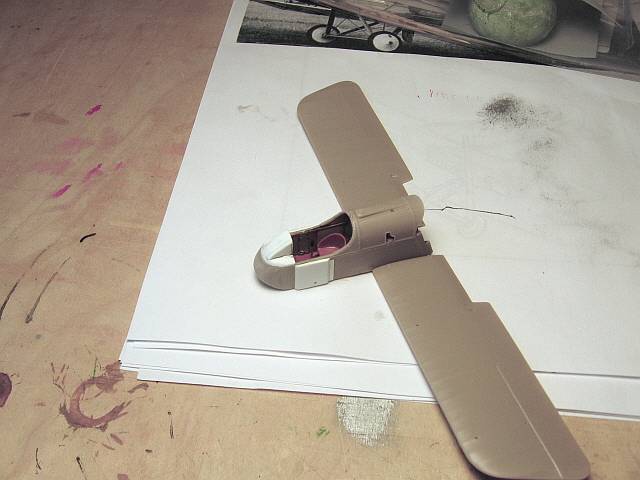
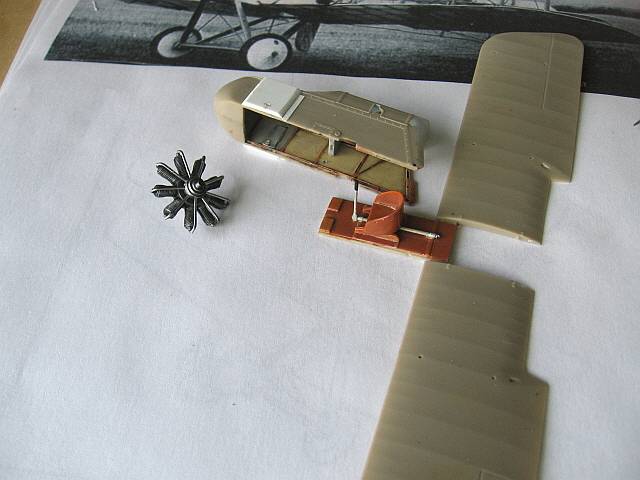 Before I started construction I gathered some references, but on the prototype I only got one shot. I modified the external sides of the cockpit which show a difference in the area, being it covered by metal (including the panels were the elevator horns exit). They seem in the photo a bit “pushed out”. Styrene sheet parts were made for those, and the upper front part of the pod was removed, since there the prototype offers another shape too. Later on styrene sheet parts were created for that area. No armament-related parts were used, and the instruments were rearranged, although speculatively, since I don't have documents regarding that. The only other detail I was tempted to add was a prominent Pitot probe that had some plumbing running down the strut where it was located, over the leading edge and entering the fuselage pod. I may say that color cues are missing for some details, although they can be “deducted”; a common problem with many instructions.
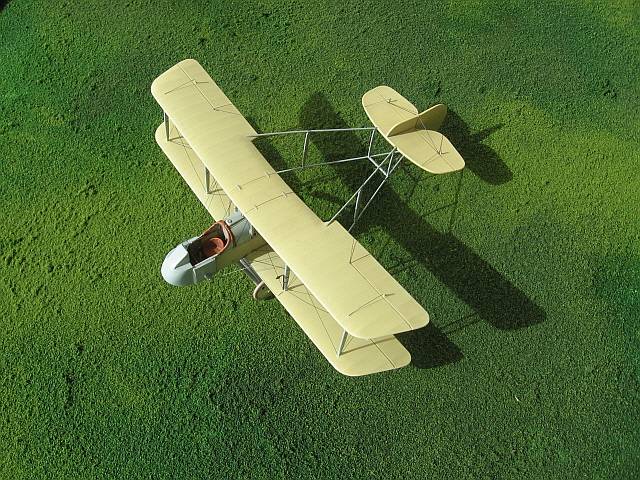
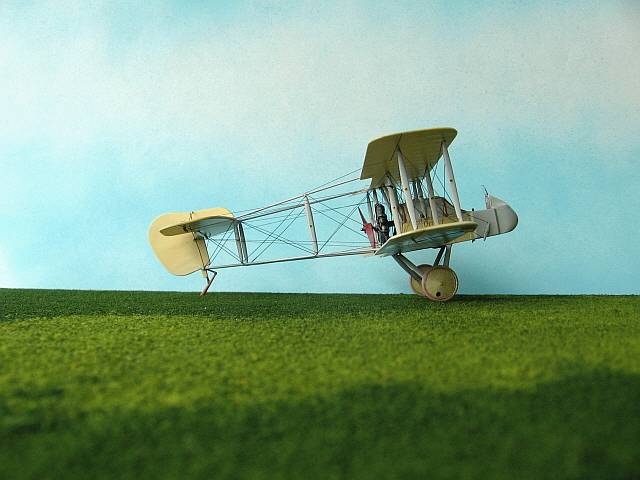
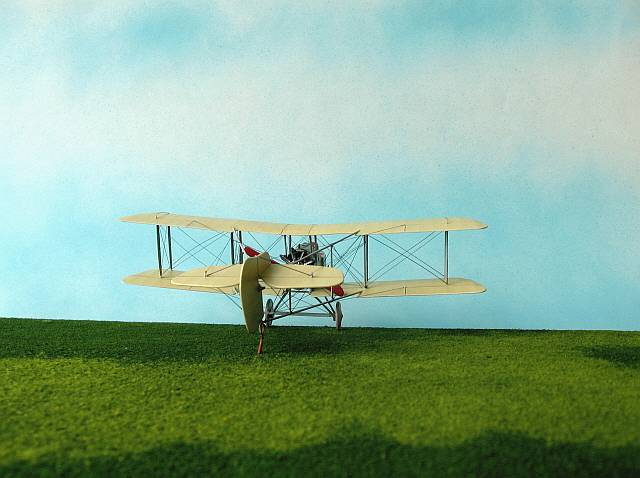
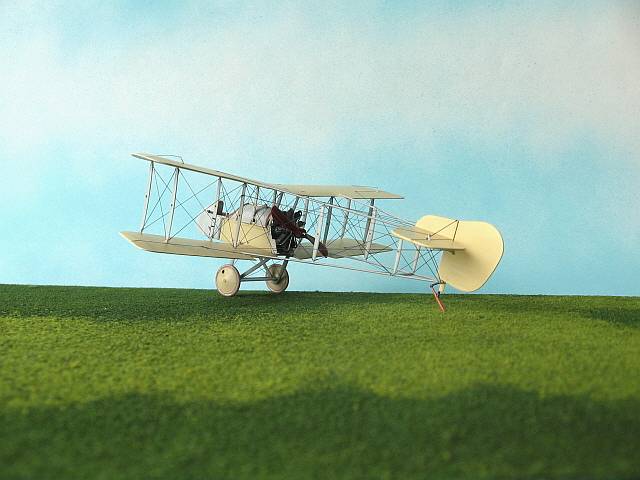
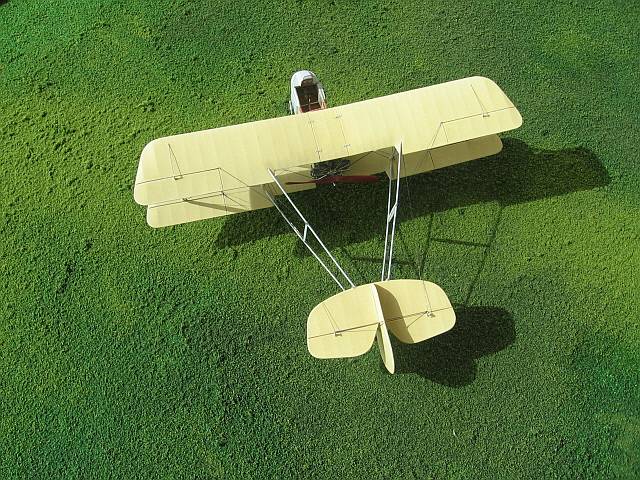
 The fit of the parts was very good in general, but in this particular case alignment, struts and rigging are the real challenge. I glued the lower wing to the fuselage pod. Then the wing struts to the lower wing and when everything was set I added the upper wing. Central struts were added later. Fiddly, yes, but the fit is good, and so far patience and care were the only ingredients needed. Now the real tamale: the booms. I opted for gluing them to the wings first. It worked. BUT then I had to glue the stab/rudder group to the booms. This was a bit tricky, but after half an hour it was done. The use of a jig may alleviate this task. A simple horizontal strut was then added to the booms as per the plan. It took me seven attempts to get it in the right place. The group now was holding, but in a flimsy way that required caution and dexterity.
 Now, this is not my fault nor is it Eduard's. It is the nature of the beast because of the design of the real plane. Eduard's engineering worked, but you will need your skills.
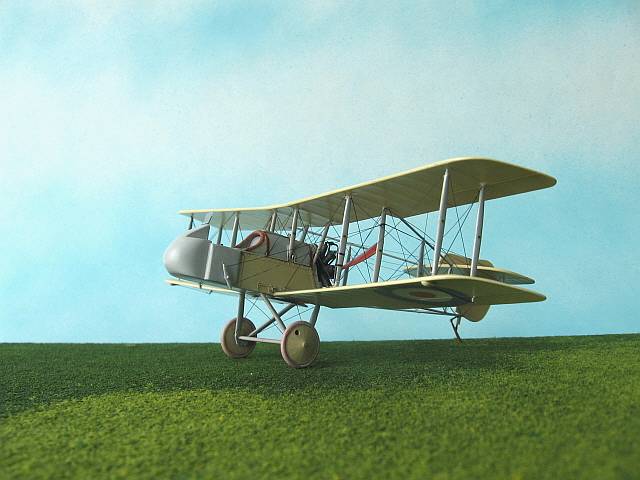
Rigging began, and due to the flimsy nature of the structure I wasn't able to apply here my preferred method of one long strand of monofilament that is threaded through as many attaching points as possible gluing with a tiny dot of superglue as you go. The fact that you actually have to pull the rigging tense was warping everything. So Plan B it was. Stretched black sprue in individual spans. I worked these with white glue, so I could adjust or pull them out if needed. Then a point of cyano glue is used to fix them. Even being careful, and due to the flexibility of the structure, some will tend to snap or buckle, depending, for example, if the model was
 upside down or right side up. Then all my training at the Shaolin temple came back to me, and I heard Master Po saying “-Little grasshopper, is it you or the model that sag? Are not the model and yourself one and the same thing?” That helped a lot, because by that time I was indeed tense like the atmosphere that precedes a storm. Nevertheless, I had to pull out a bunch of the rigging at some point because I wasn't satisfied at all. As I struggled to get a decent rigging some glue spots started to appear. Trying to correct them seemed to initiate the well known downward spiral of doom, when the remedy ends up being worse than the problem. At some point during rigging you start to realize that there is hardly any place from where you can actually hold the model without destroying something. Of course, this has nothing to do with the quality of the kit; again, it is the complex nature of the subject. Other moment of colorful modeling vocabulary arose when one of the tiny injected control horns went to the great beyond, soon to be followed by a companion. Now, Eduard molded no spare control horn. Thanks, Eduard, for going the extra yard and give us the exact number of the minutest parts in the sprues. These ones you want as a sturdy photoetched after-market item, no doubt.
 I started to apply the decals, which were good although somewhat indifferent to the usual decal solutions. The roundels are presented as faded color items. I think that somewhere in the middle between Eduard's rendition and the bright ones seen around a good compromise can be found. Eduard's looked too faded for my taste. Tiny decals are there too for your struts, a nice touch, together with the tires' lettering. These tiny decals required a bit of setting solution again, because they were very reluctant to follow curves. It would be better if you add the struts' decals before rigging – I had to make a post-it about that for future reference-. No seat belts were added since the kit has none, but as you know those can easily be fabricated.
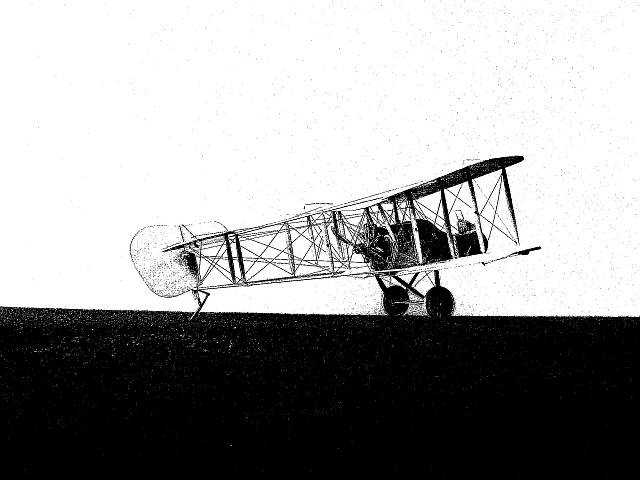
The photo of the prototype shows the roundels only on the undersurface of the lower wing, in a different position than the one shown in decals' instructions, and accordingly I followed. A blurry number is barely visible on the rudder on the prototype photo, but I didn't put anything there waiting for some better photo that may appear in the future. Neither fuel tank on the wing (it was located in the fuselage pod) nor step are visible in the same photo.
 Now, is this a “weekender”? I doubt it. And why such complex plane is presented as a “weekender”? I mean, if you are an average modeler, and you choose this plane, chances are a weekender this will be not, which seems to defy the concept. What I think we got here is a very reasonably priced, precisely molded model that will require your skills; probably for more than a weekend, but not too much more anyway.
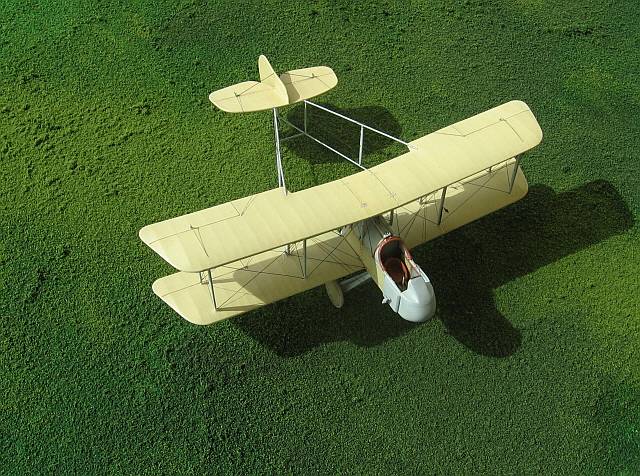
Once finished, the DH-2 is a very attractive model and the kit detail makes it stand out. The complex rigging and unusual configuration add to the wow factor. If you can, hire a spider.
Thanks to Eduard for the review kit.