Eduard 1/48 Albatros D.Va
By Lance Krieg
Eduard is rightly recognized for their contributions to WWI aero-modeling, as well as the great strides their products have made since the first offerings in the early 1990s. Not having built an Albatros vee-strutter since a laborious re-working of the old Aurora offering almost thirty years ago, I was due for some R ‘n’ R with a modern kit of this German mainstay.
Kit Corrections
 I used Eduard kit number 1107, one of their most recent pressings, and augmented it with their after-market photoetched set. Commendably accurate in shape and generally complete, the kit would build into a presentable replica straight from the box, but benefits from some tweaking to address a few shortcomings:
-
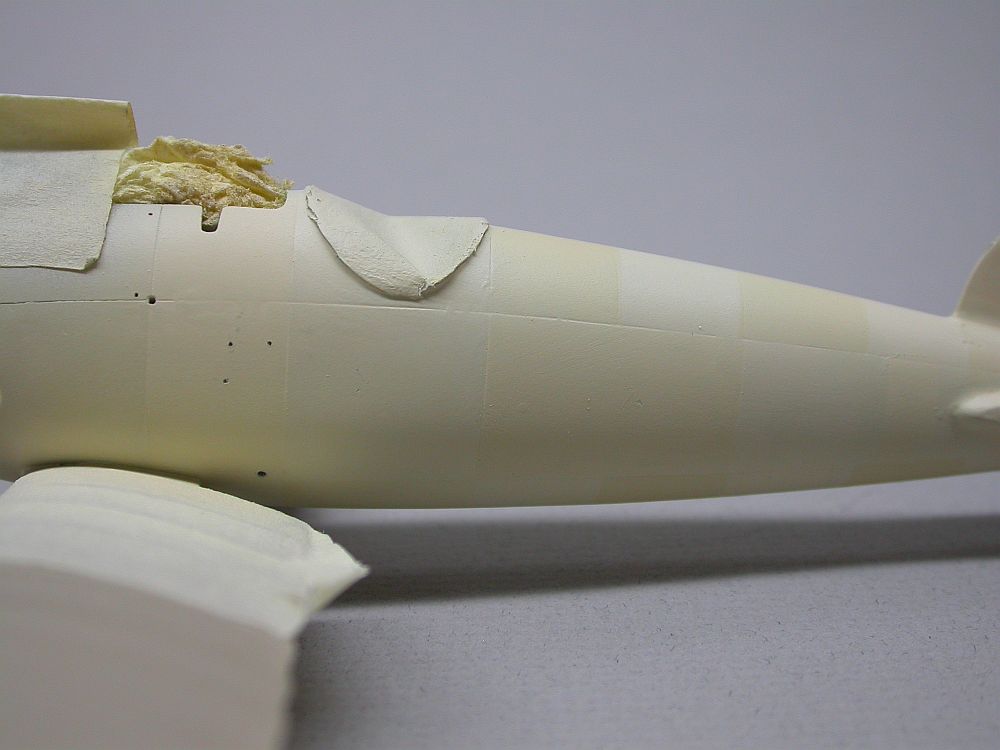
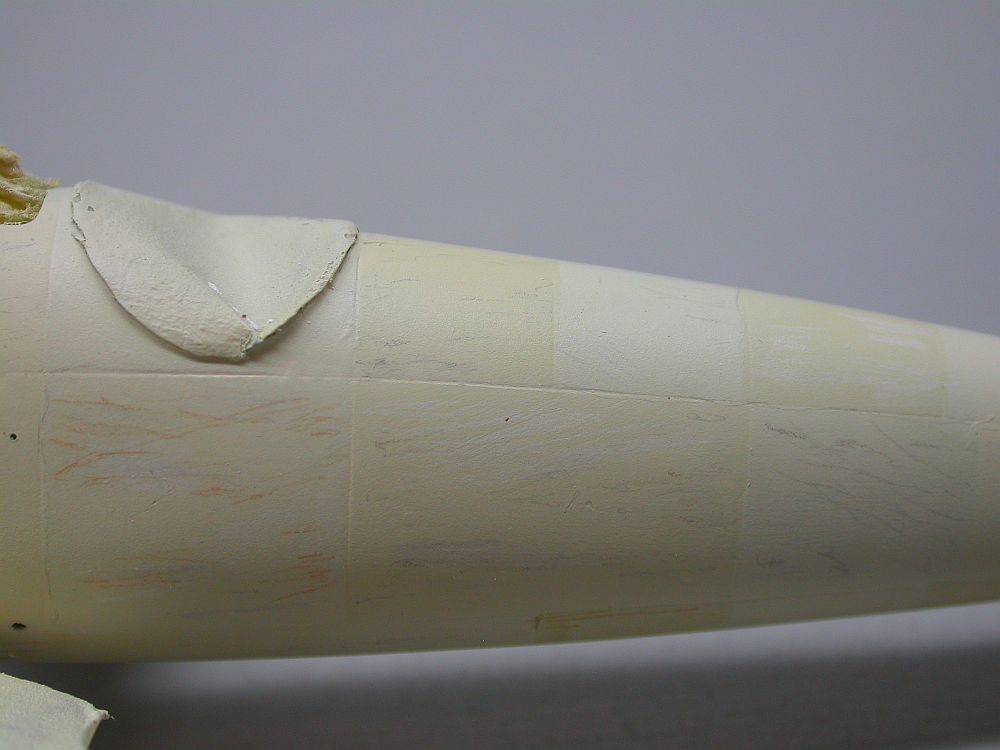
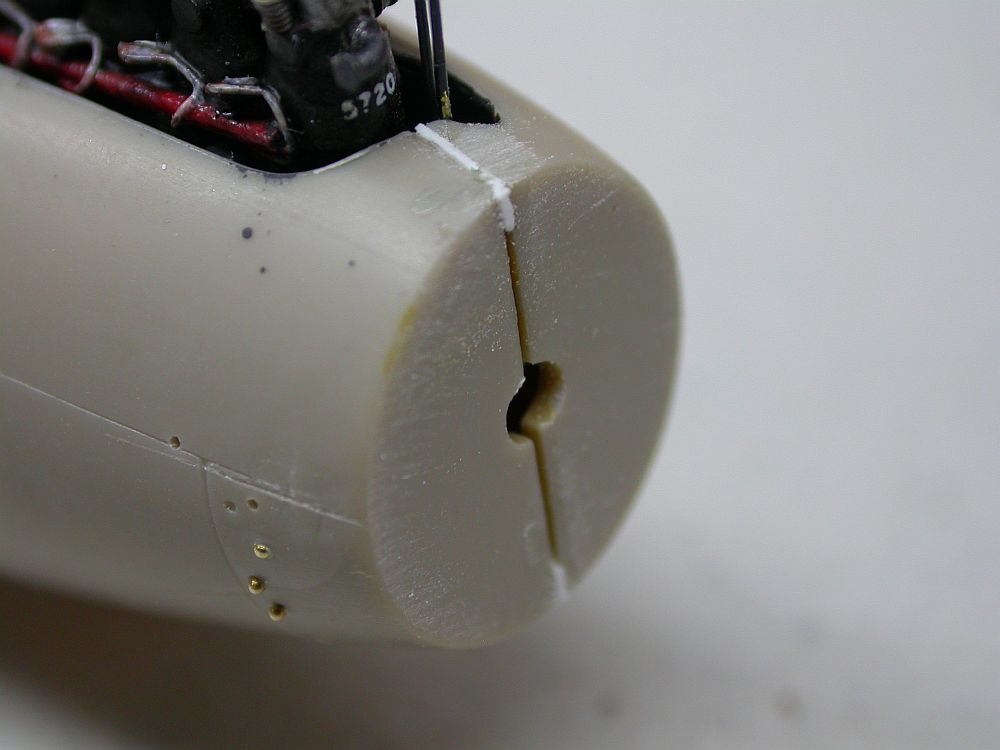
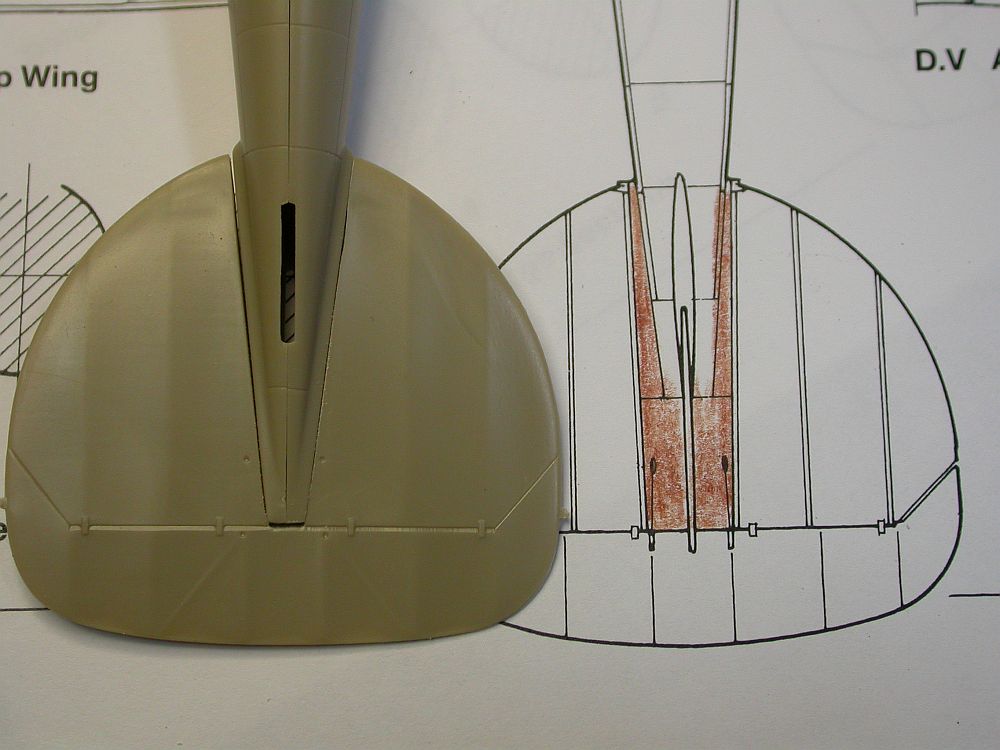
The horizontal stabilizers fit the fuselage with an inaccurate taper, no doubt to simplify construction of the model. I corrected this by sawing the stabilizers along their proper joint line, and cemented the off-cut wedges onto the fuselage to become the plywood stubs. At the same time, I replicated the neatly faired plywood of the original machine by generous applications of body putty to produce a flowing, rounded transition between fuselage and fin/stabilizer.
-
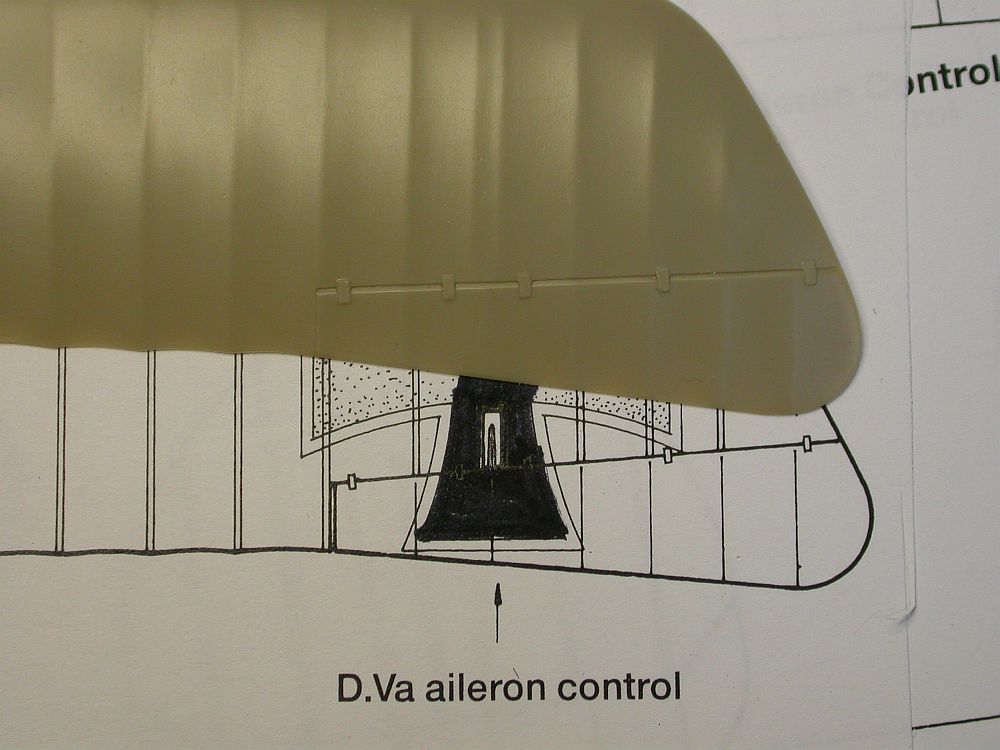
The aileron actuator arms are missing from the top wing, necessitating removal of the ailerons to allow the proper slot to be sawn into the wing. I used parts of photoetched turnbuckles to create the actuators, and glued them into the leading edge of the ailerons.
-
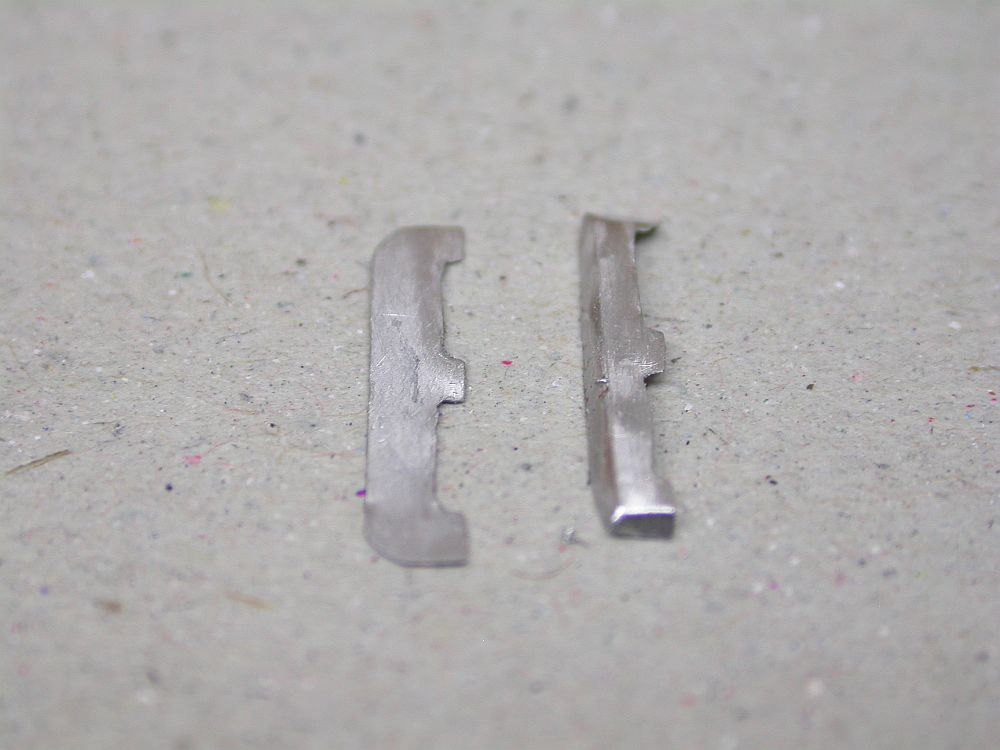
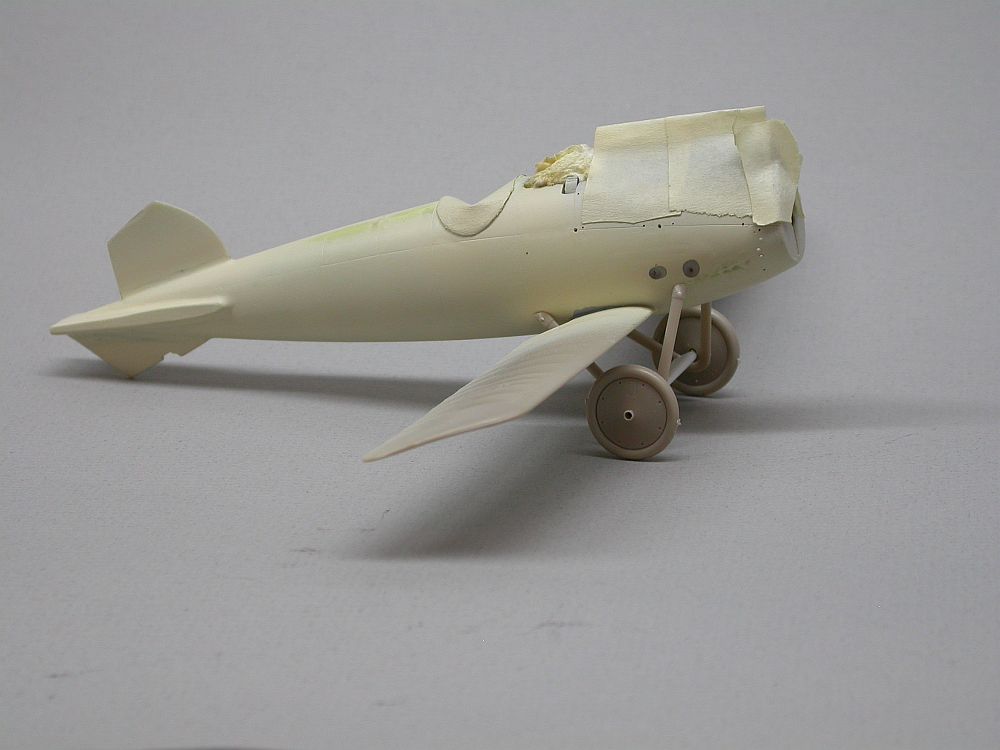
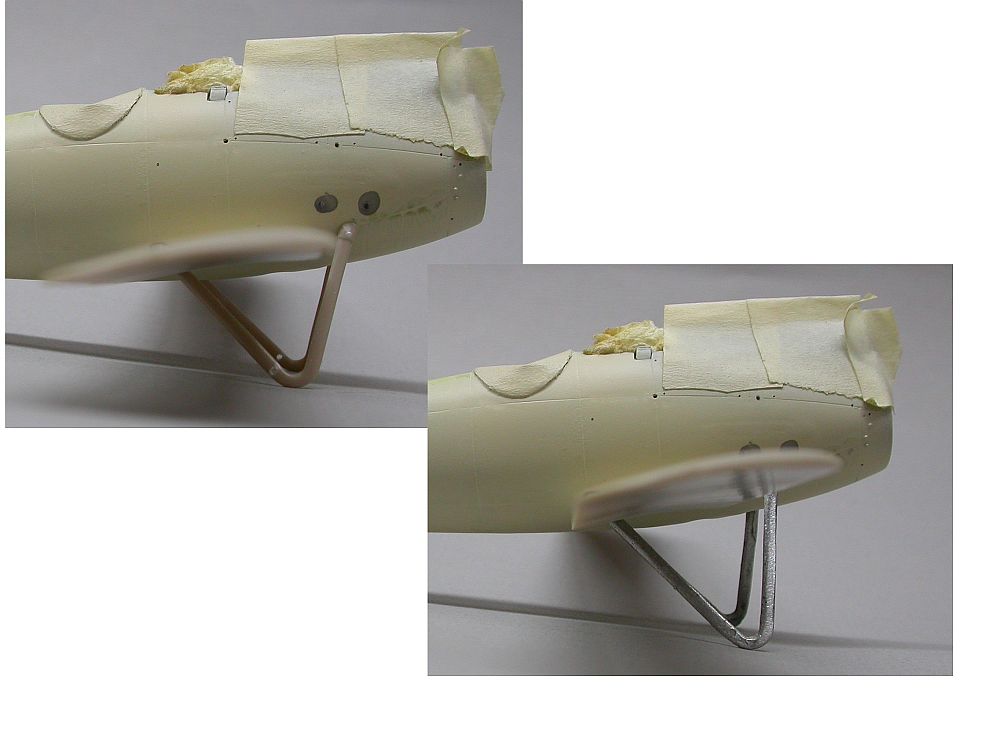
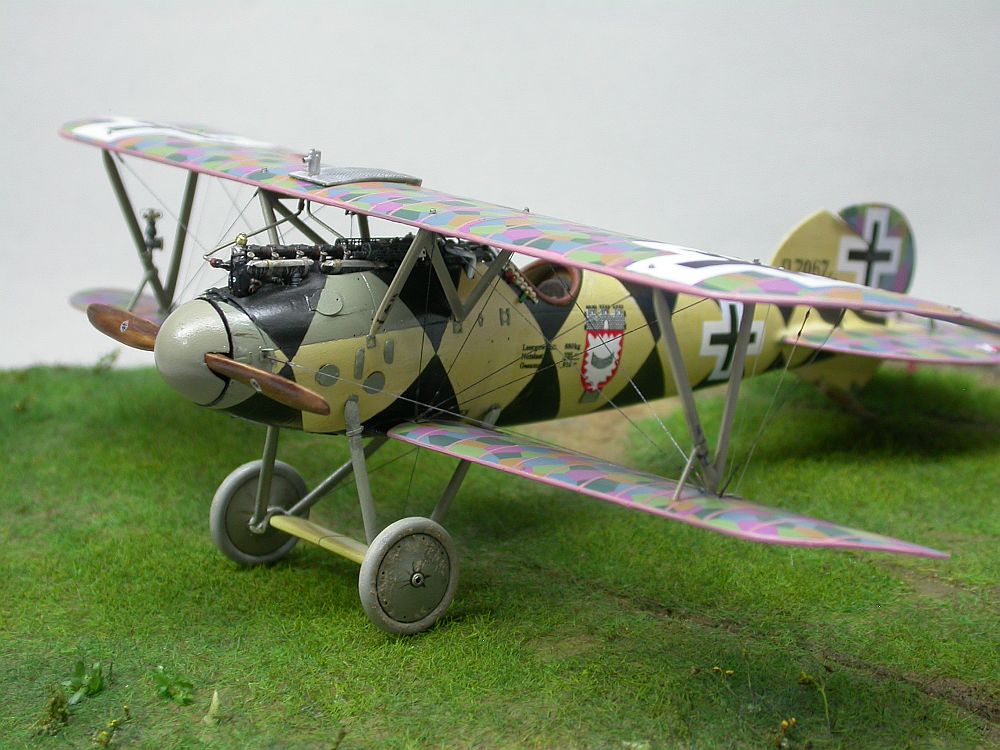
 The undercarriage legs are too short, a mistake that ruins the sit of the model and cries out for correction. I used some white metal castings I bought years ago, though I cannot remember from whom (Dale Beamish? Mike Franklin?). The problem is also easily corrected with streamlined strut material in plastic or brass.
 -
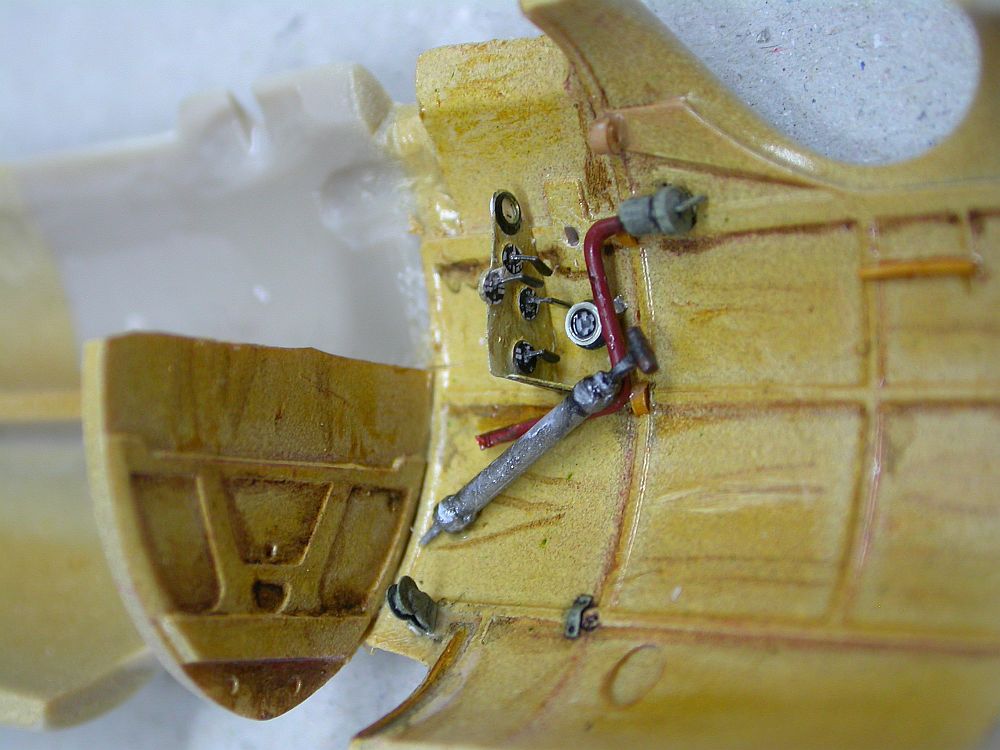
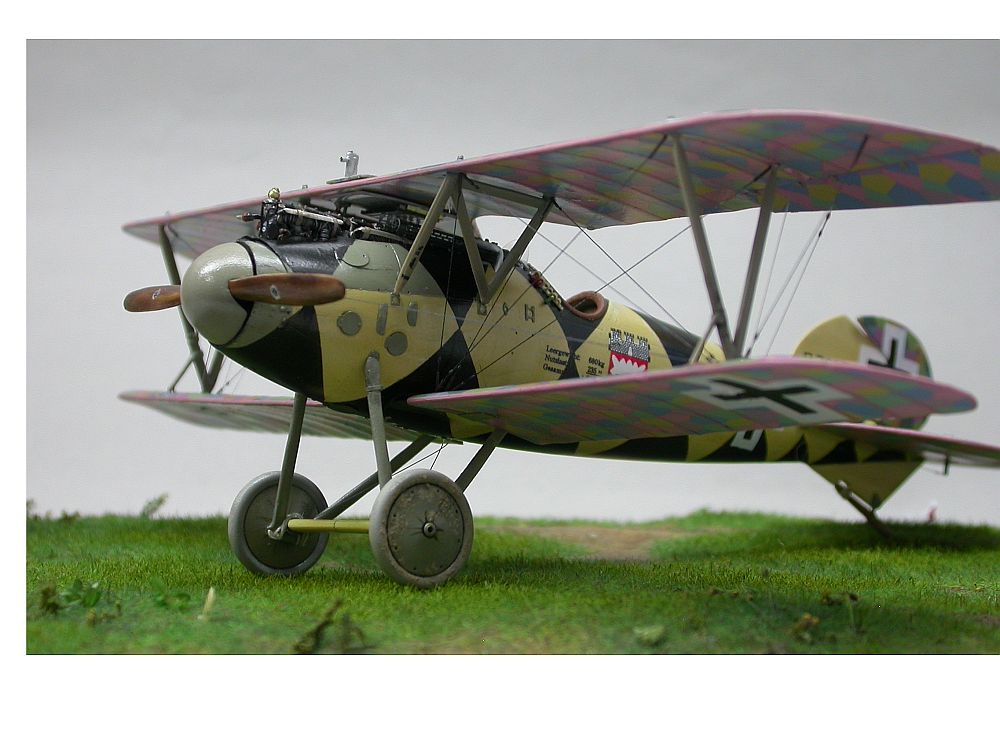
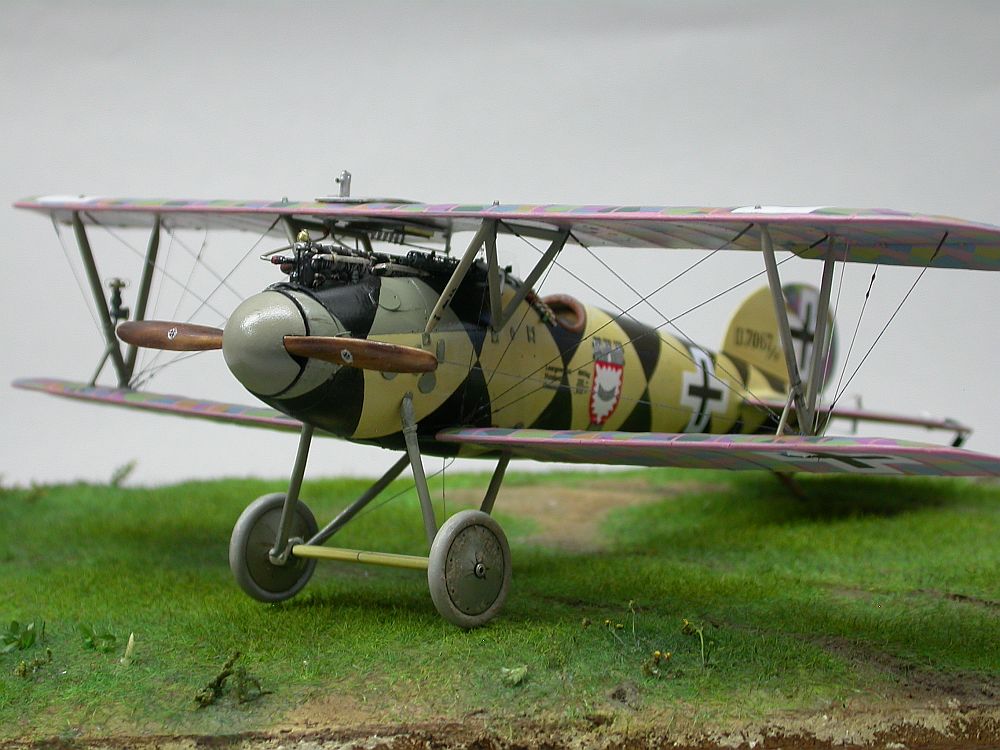
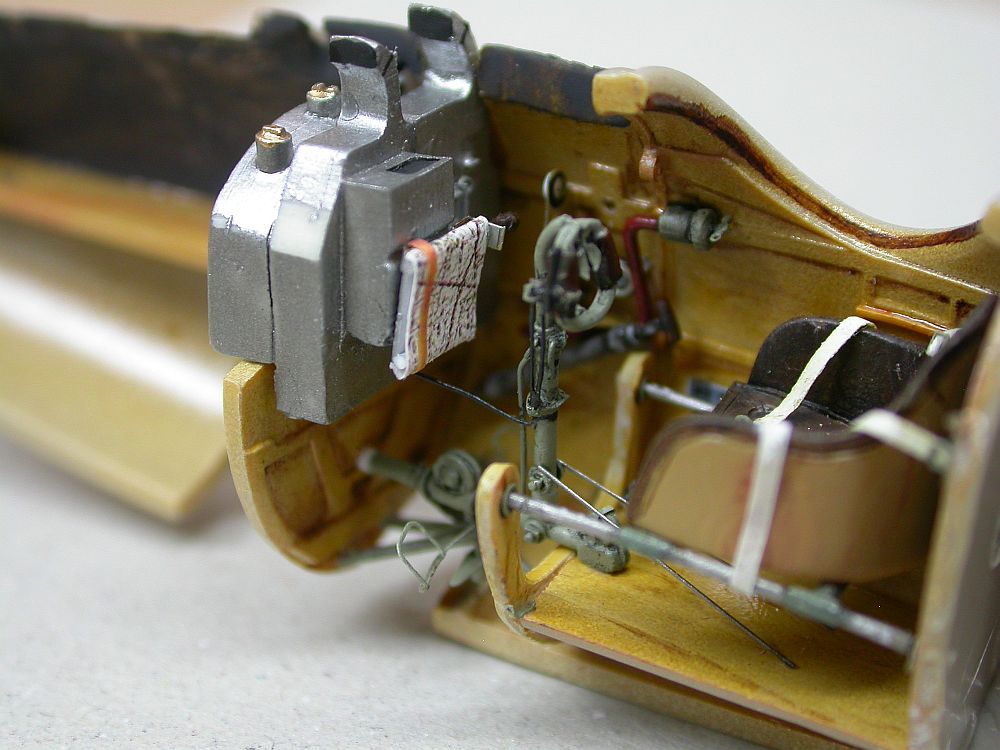
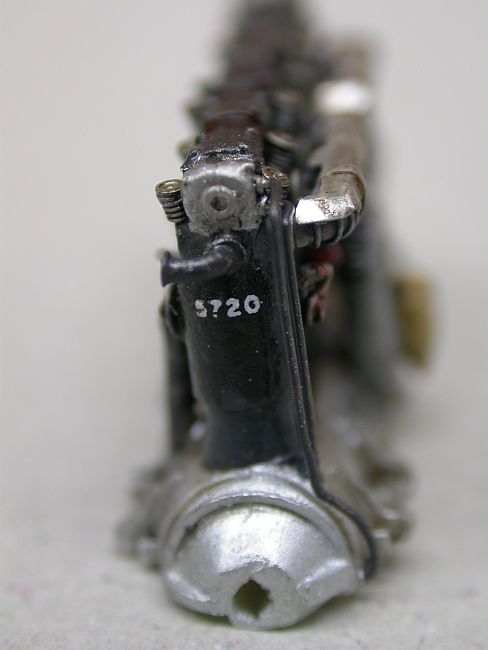
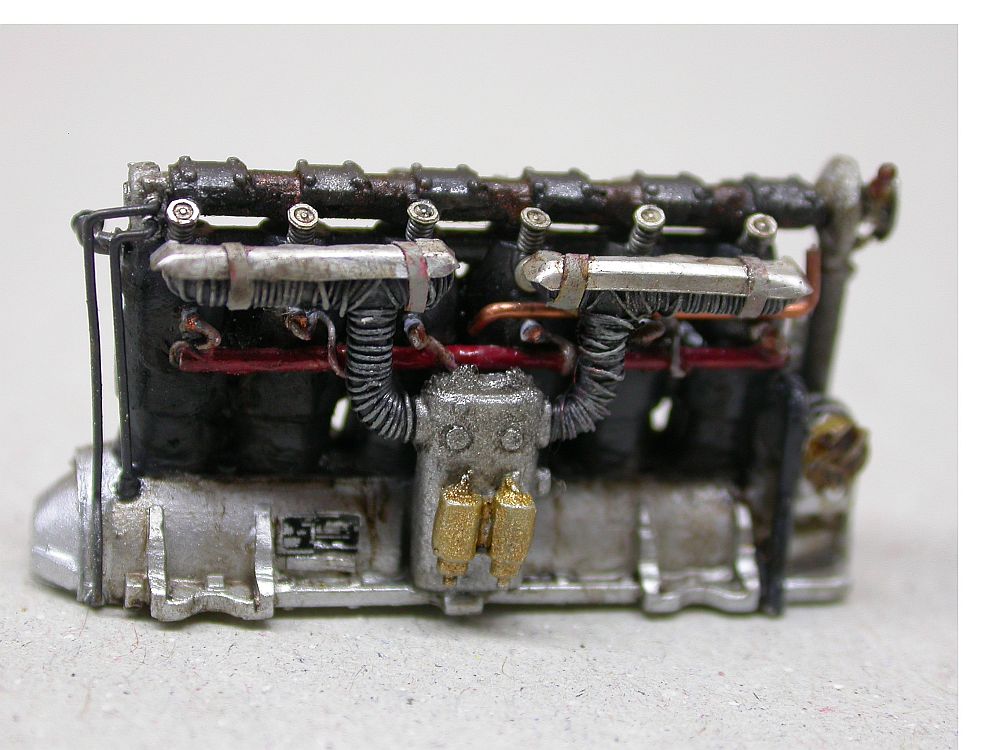
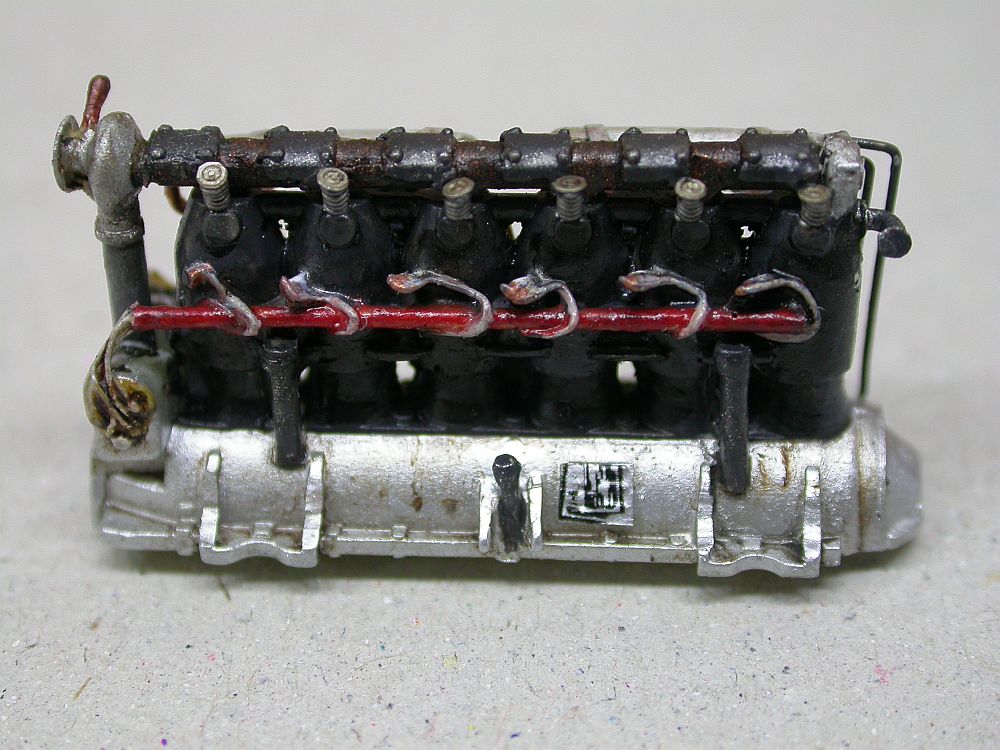
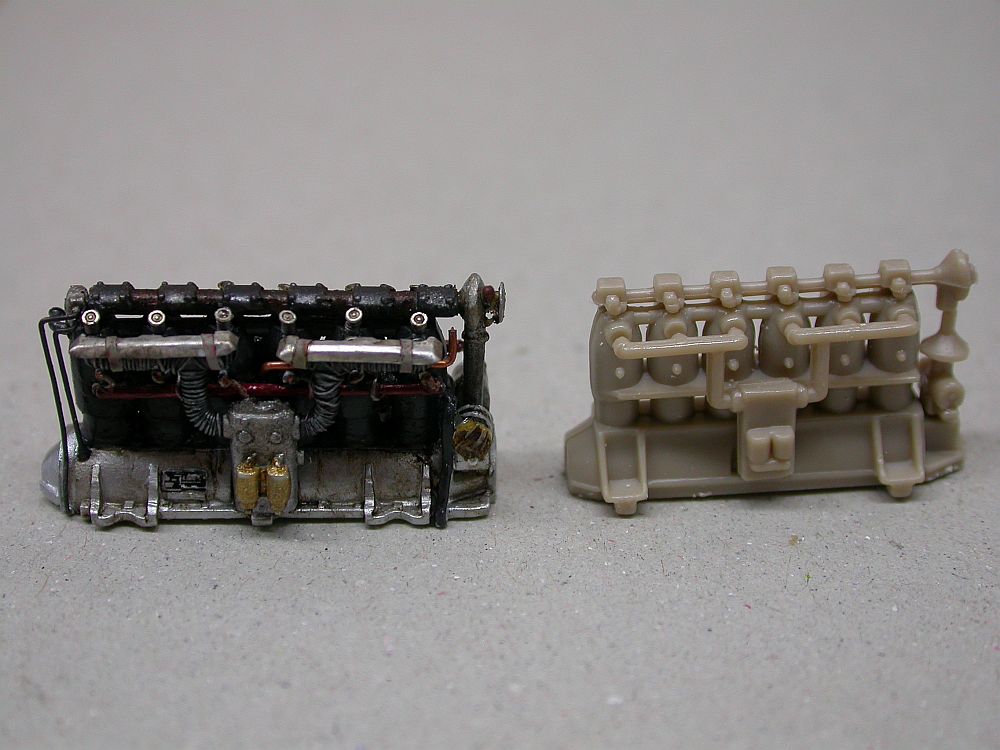
The engine is undersized by almost ten percent, another concession to ease of construction. Left uncorrected, the finished model looks rather puny in the front end. I used the upper half of a Pavla Mercedes, but a frugal modeler could have easily beefed up the kit engine to sit higher and imitate the necessary bulk. Improvements to the closely-cowled motor was limited to those oil and water lines that appear above the line of sparkplugs, along with new valve springs, rocker boxes, and air pump.
-
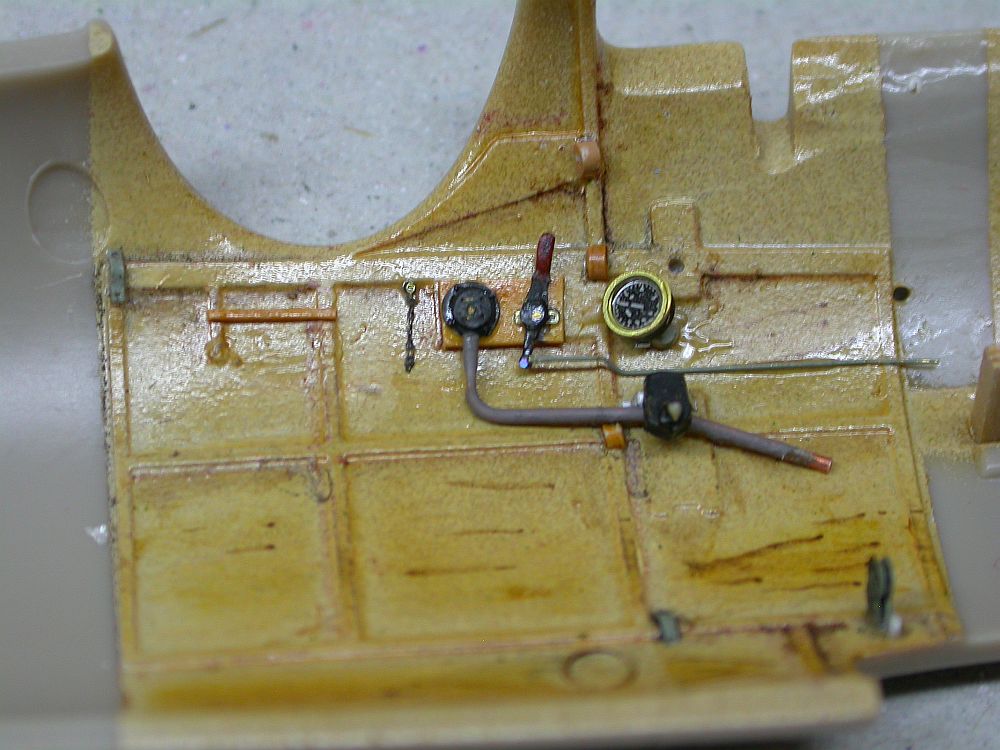
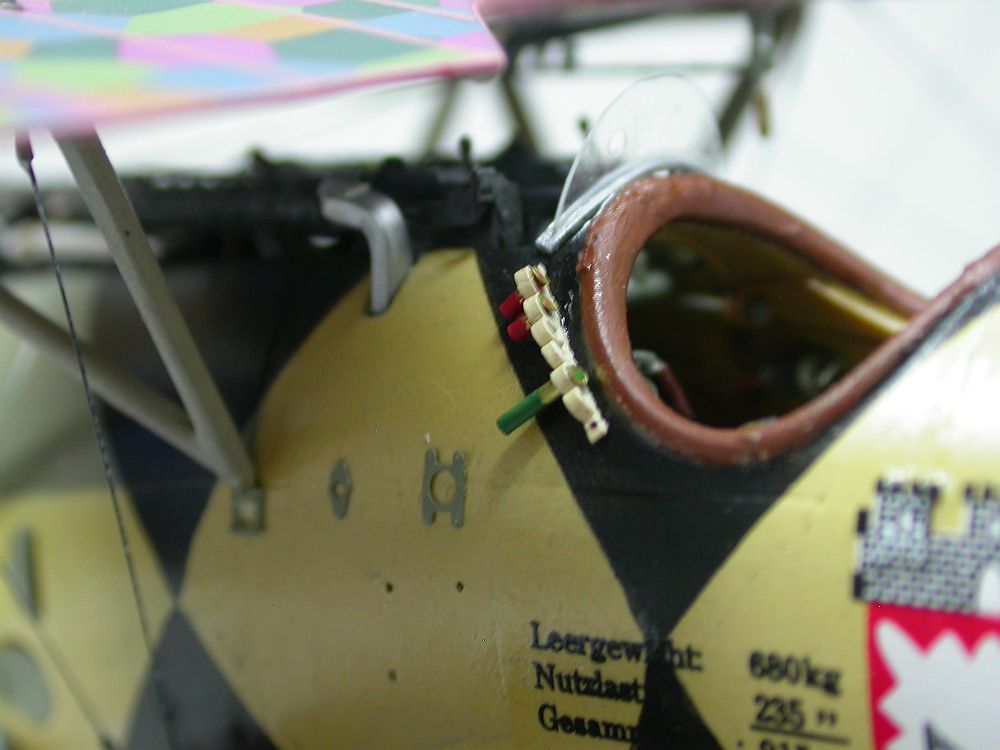
 The cockpit is adequately furnished but needs the joystick-mounted throttle and a few control cables and conduits to represent an accurate basic “office”.
Additional Details
Between the Profipack etched parts and the aftermarket set, most details are amply provided, though of course there is always room for the obsessive to make improvements. Being an obsessive, I made a few improvements:
-
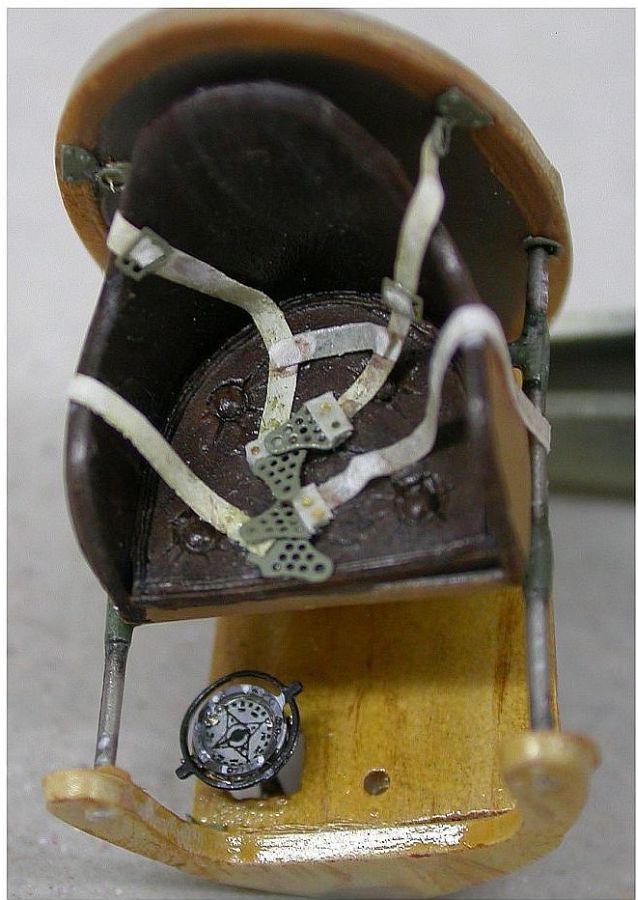
 I added a roller-mounted map to the ammunition boxes, and provided the pilot with an altimeter and a flare pistol. The control cables from rudder bar and control stick were attached, and small fasteners and other details were incorporated in the seat, ammunition boxes, and cockpit walls.
 -
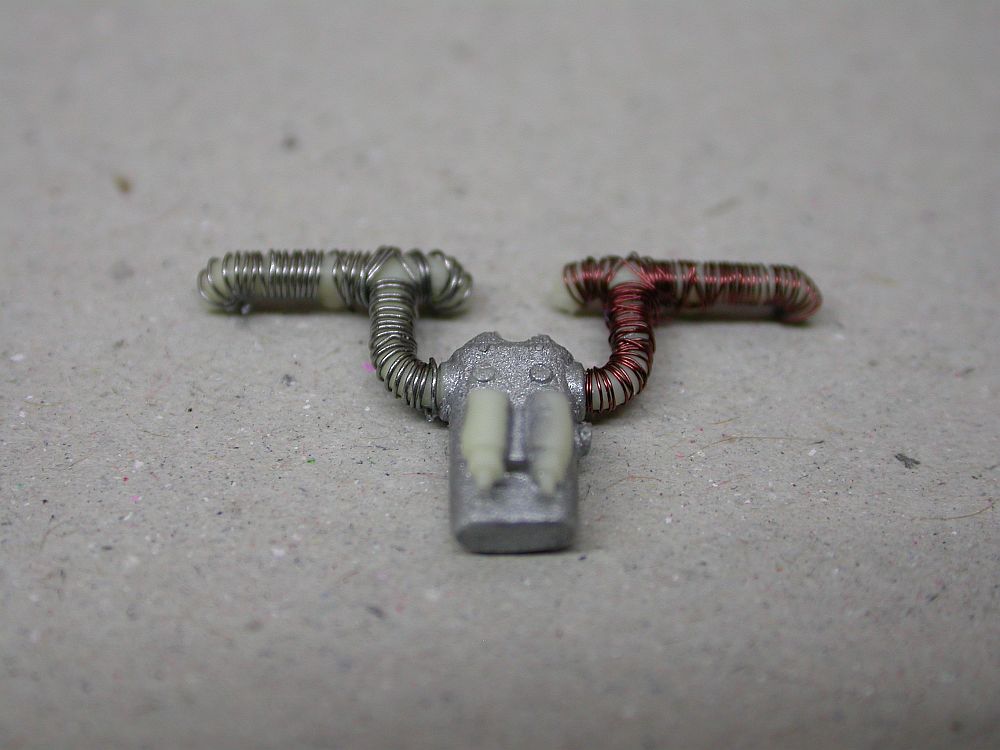
The intake manifolds were lagged with .003 inch wire to represent the asbestos thread insulation commonly found on operational engines, and aluminum shields were strapped over tops. The modeler needs to be aware (as I learned to my sorrow) that these additions will raise the manifold height to the point that they interfere with the machine gun line-of-fire, so shave a little off the top of the manifold before adding the insulation.
-
 Eduard’s ammunition feeds and empty belt chutes are a little undersized and lack a few details, so I replaced them with heat-molded rectangular plastic rod. Tachometer and synchronizer cables were added to the back of the engine, but this is an exercise in futility, as these improvements are invisible under the top wing.
 -
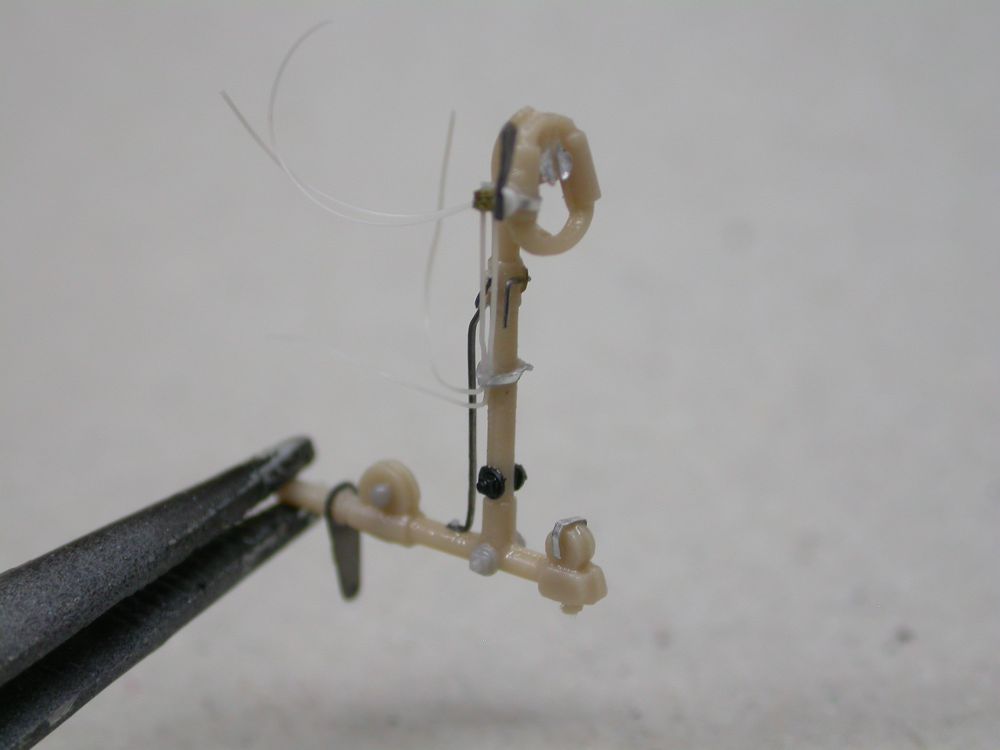
Strut mounting brackets were made from sheet aluminum, and the small angle braces to the wing leading edge were improved by detailing their straps and fasteners. An elaborate anemometer was made from brass and added to the starboard interplane strut.
-
 I scratchbuilt a Daimler-Mercedes airfoil radiator, as it provides a change from the ubiquitous Teeves und Braun; the Canberra survivor is so equipped, and excellent scale plans are available.
 -
A new windscreen was bored for the small sighting aperture, and fitted with aluminum mounting straps.
-
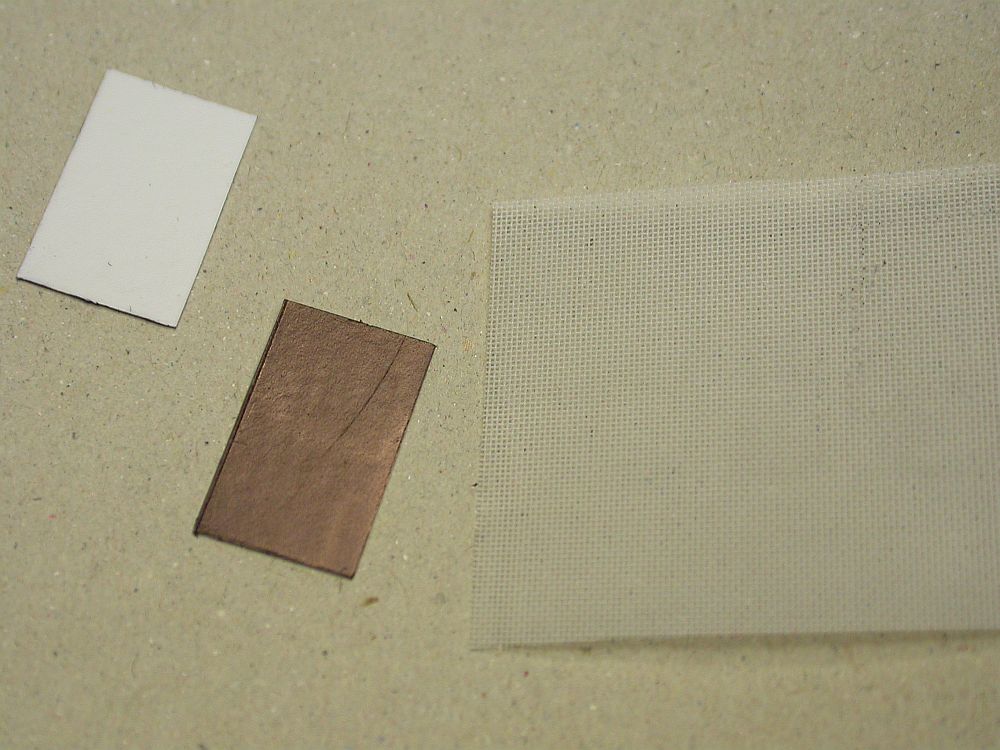
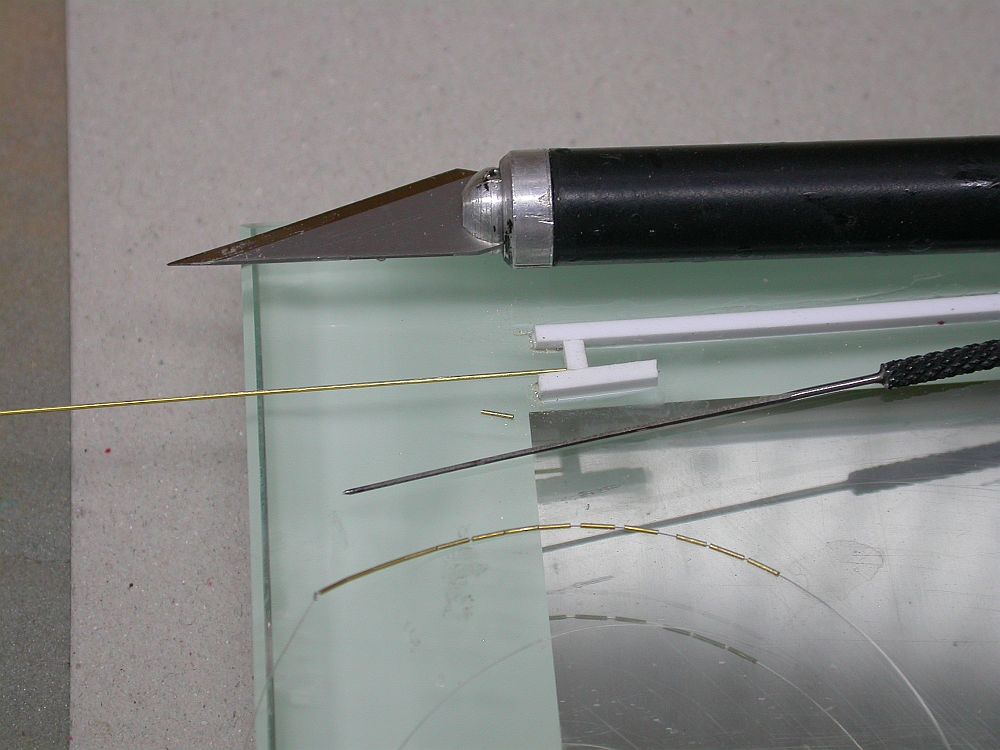
A flare rack was made from plastic; this is easily done by heat-forming plastic loops, cutting them in half, and gluing them to a strap. Flares are made separately from brass rod, and then slipped into their loops.
-
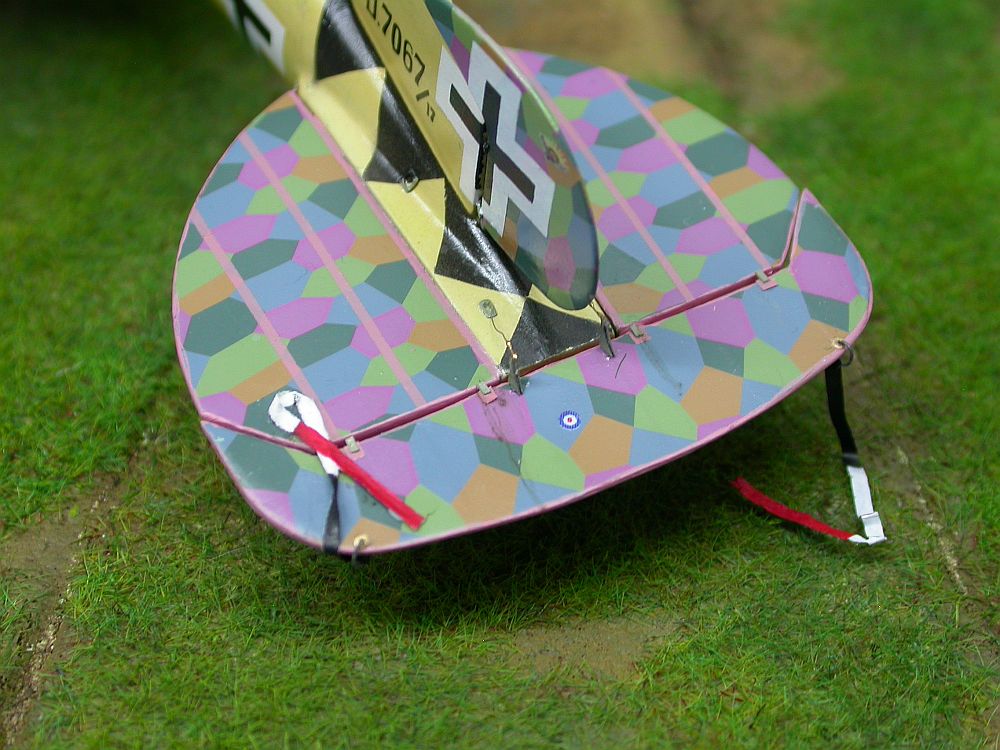
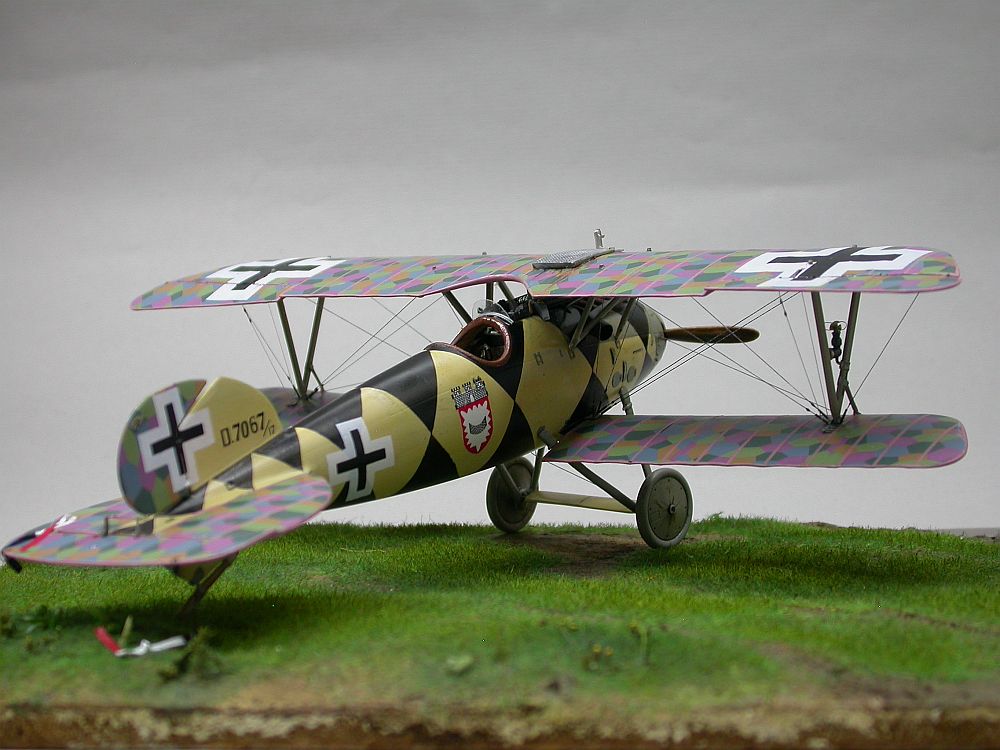
 Leader’s streamers were prepared in two ways. The port one thrown across the elevator is made from a strip of tissue, wetted with thinned white glue, and teased into position to harden. The starboard streamer is made from kitchen foil, draped and folded like fabric. Neither method is difficult, nor does either offer particular advantage.
Paint and Decals
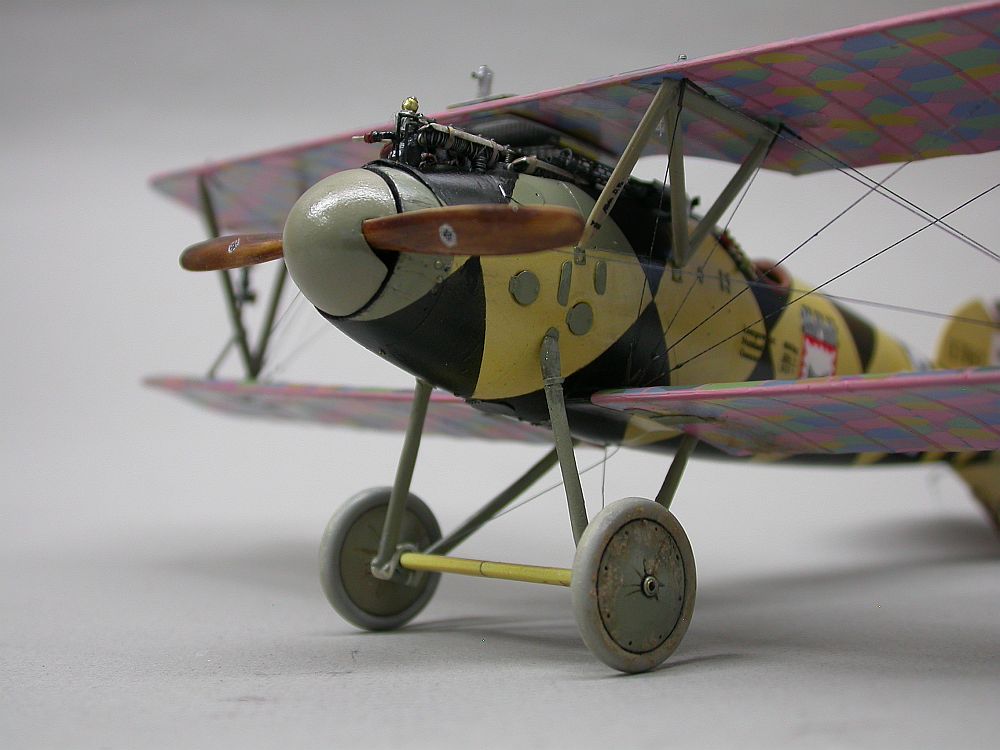
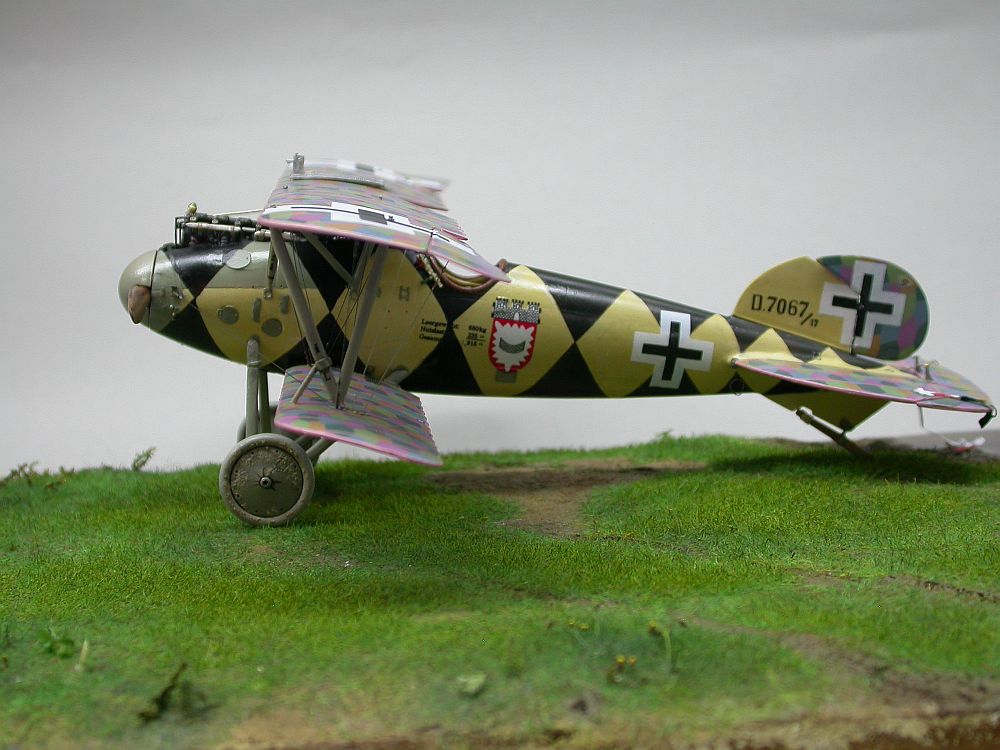
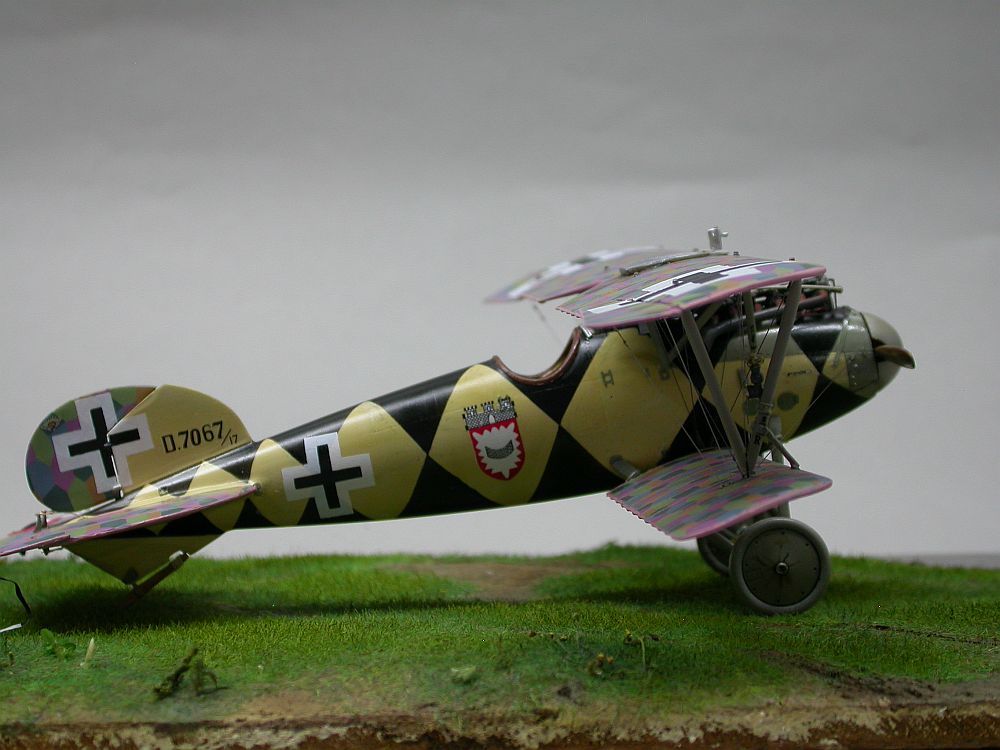
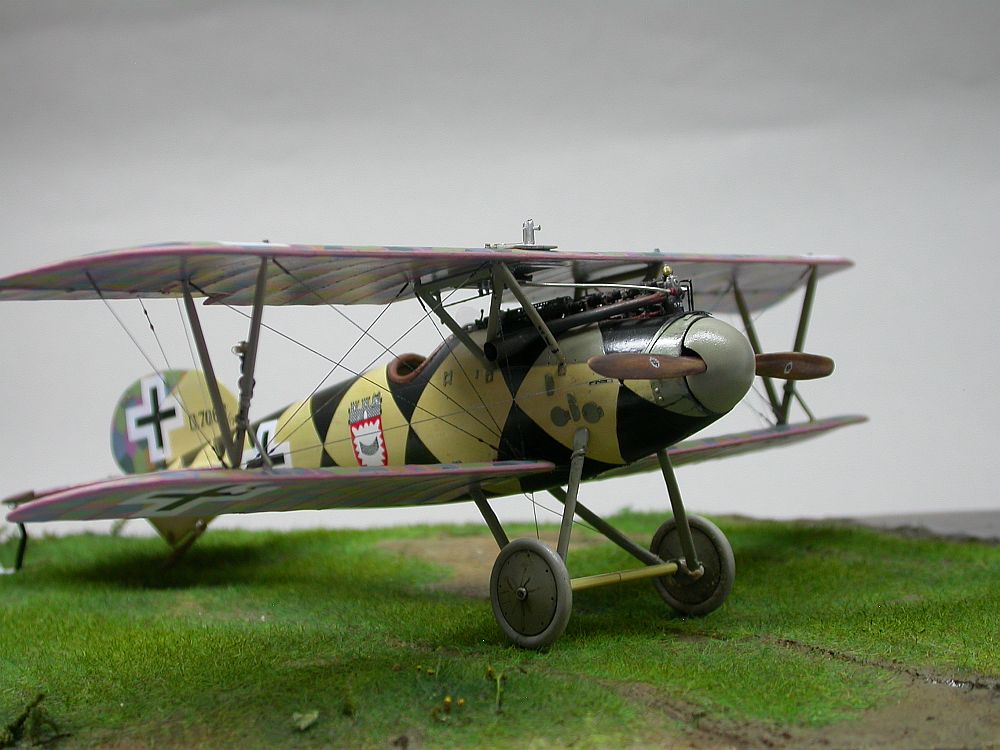
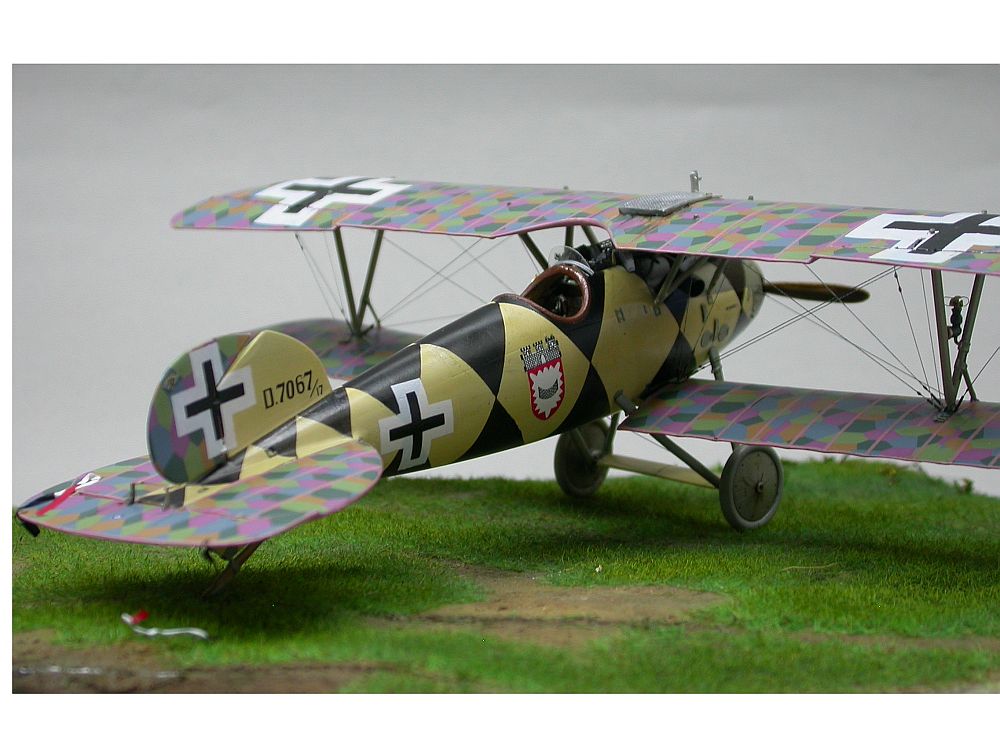
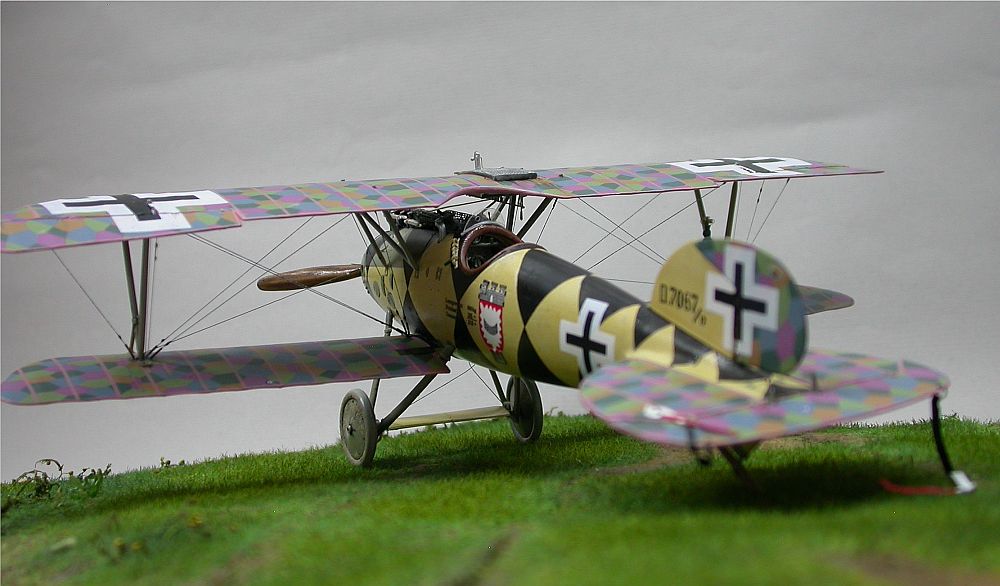
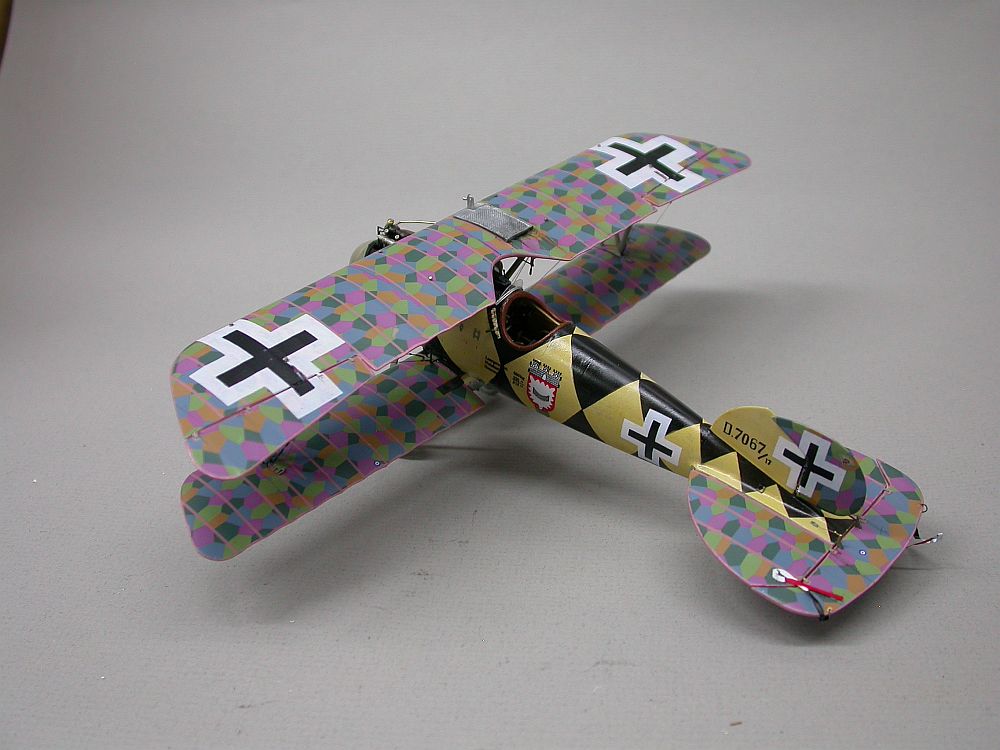
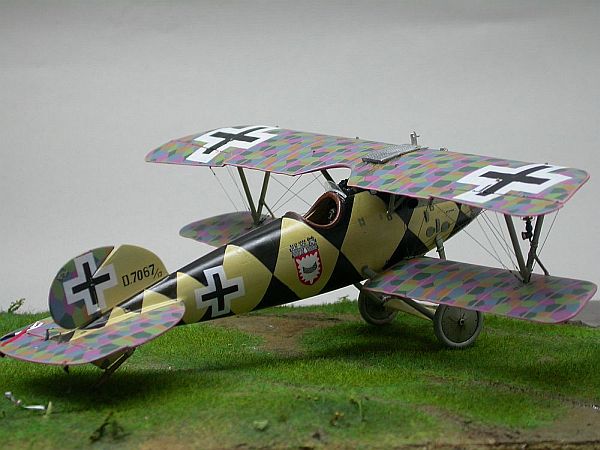
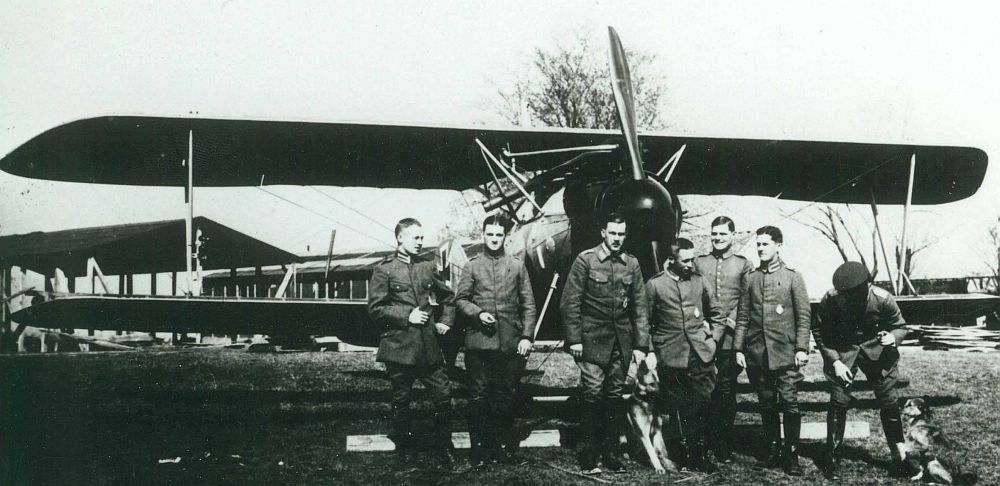 I had been determined to build Hermann Leptien’s Jasta 63 machine since the late 1970s when I first saw a partial profile in Alex Imrie’s Osprey monograph on German fighter units. While I am generally very reluctant to undertake a model for which I have no documentary photos, this one is too attractive to pass up. The marking practices of this unit are well known, but I have still never seen a photo of jastafuhrer’s machine; no doubt one will surface now. Because Jasta 63 used the Albatros to a late date, I made my model representative of the last production batch, and provided an arbitrary serial number; I hate to omit a marking. I had been provided the crucial Kiel coat-of-arms decal many years ago through the good offices of a benefactor, whose name I am ashamed to admit has vanished from my memory (Mike Franklin? Dale Beamish? Sorry, guys.)
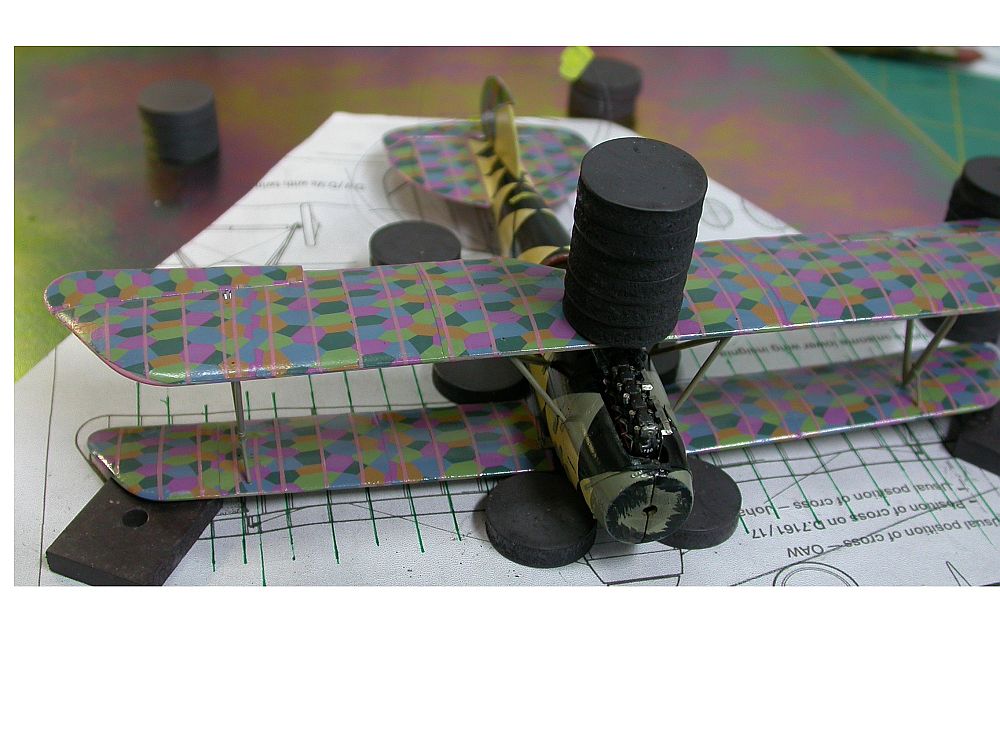
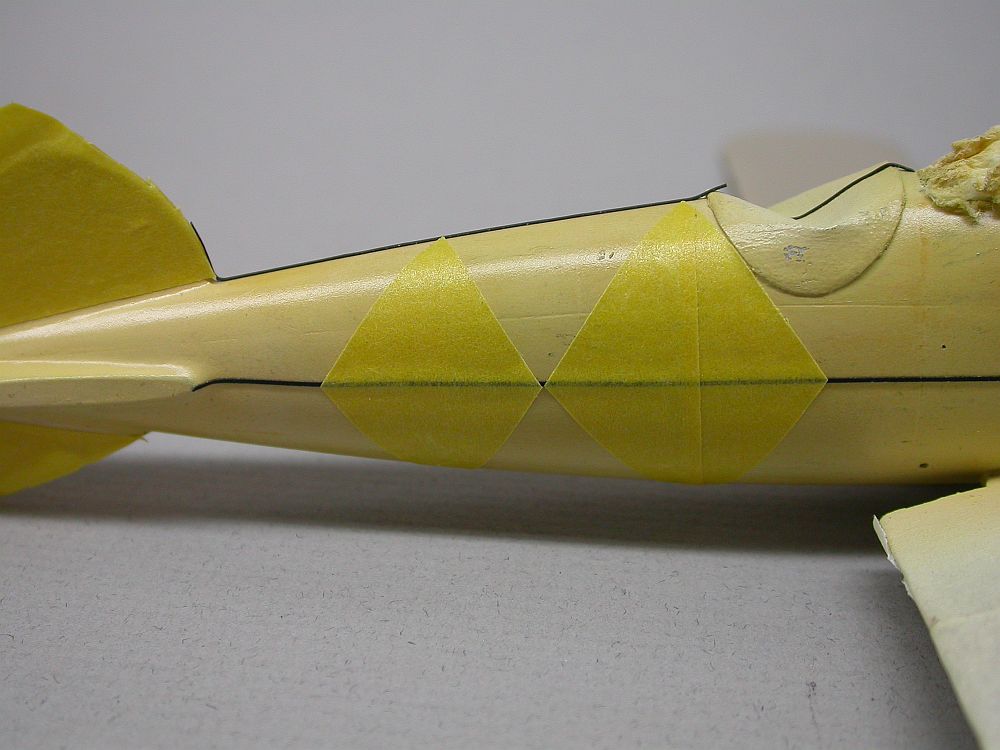
 The fuselage plywood was represented with an off-white base coat, over which were drawn grain lines and faint panel variations. The whole was over-sprayed with multiple coats of tinted Future to add depth and represent the protective varnish. The wood was rendered a little too subtly, the panel variations getting lost under the bold diamond pattern. The diamonds themselves are not the easiest painting I’ve ever done, either, and those that rely on the numerous profiles of this machine should be aware that what works in a two-dimensional representation doesn’t necessarily work when transferred to a three-dimensional model. All fittings were pre-painted and added after the fuselage markings were complete; the numerous coats of clear gloss would have obscured the crisp details.
The lozenge is the excellent new five-color product from Microsculpt, which is very easy to apply and conforms well to curves. It also wears well and reacts appropriately to the various decal solvents available. Rib tapes were cut from painted decal film.
 A note for airbrush snobs; this model was painted with a $15 airbrush. Though I have multiple Aztek/Modelmaster double action brushes, the only one available to me gave up the ghost, and I refused to wait for either its repair or the arrival of its stable-mates.
Final Assembly
The quality of the kit is such that a jig is not really necessary, though I erected the upper wing on a steel plate and used magnets to push
 everything square while the epoxy dried. Rigging is .004 inch Dai-Riki, pre-colored a medium gray. Aileron and elevator control lines were made from .003 inch monofilament, stained, stained light gray. Turnbuckle barrels are snippets of brass tube, chemically darkened, while the turnbuckle eyes were dots of white glue, painted when dry.
The ultimate reference for this plane is the Smithsonian monograph on the restoration of their original, as well as documentation on the Australian trophy. Close study of period photos reveal enough variance among operational machines to provide inspiration for individual touches, including details like the placement of flares in Jasta 63, gun sights, windscreens, and cockpit fittings.