Overview
Hasegawa is the latest company to add an F-22 Raptor to their product line. This is a production F-22, with a detailed cockpit and weapons bay. Here's how it goes together.
The Build
 I started the build with the instrument panel. No instruments on this one - it's "glass". I applied foil over the raised bezels and a wash of flat black. I also did that to the sides of the tub—it's an easy way to show switches and other raised detail. When dry, I applied the decals, one for each monitor. I found the decals to be delicate and tore the main one. A stroke of clear blue paint brushed on fixed that.
The seat is made up of seven pieces plus decals. Unfortunately, belts are not included. I added some fabricated from champagne bottle foil. (Sometimes I REALLY enjoy this hobby.) Seat rails and a few more bits are added to the cockpit tub and then it is installed from below.
 The next area in the instructions is the main weapons bay. I elected to pose the model with the doors closed, so skipped this section and glued the bays to the lower fuselage.
Next in the instructions is the installation of the landing gear bays and tail pipes. Part G-23 mates with the upper fuselage and there is just enough slop that you should clamp the upper half in place to ensure a proper fit. There are 14 more structural pieces to add and I assume they are for glue points. Given the slop of the fit I only glued F-5, F-1, F-4 and F-6 in place.
 Parts F-2 and F-3 are part of the intake splitter plates and the instructions are vague about there placement. To figure out their placement, I assembled the intake ducts. Here Hasegawa did a great job of hiding the seams. I do wonder why they include the compressor fans, as they are past the curve and you can't see them. (This is a stealth design feature as no radar reflection bounces off the blades.) I laid one duct in place, aligned the upper half and discovered that the forward edge of F-2 (marked with a leader arrow) mates with the trailing edge of the nose section, with the channel of the top overlapping top edge of the nose. I also discovered that structural parts F-1 and F-4 were too tall and I ground them down with a rotary tool. Do yourself a favor and don't bother installing them in the first place. Having learned that, I skipped installing the rest of the structural components.
 The instructions call for the intakes to be painted white and apply some decals, and then install them. I'm sure it's easier to do this step before installation, but I discovered later that the intakes are painted gray, so don't do as I did and wait until the rest of the markings are applied to apply these decals.
With the main gear bays built up and the intakes installed, the fuselage halves can be glued together. I had some interference with part E-25 and the inside wheel well wall on one side but not the other. I used a rotary tool to grind down the wall and the halves fit nearly perfect with a touch of filler used by the intakes.
I skipped ahead in the instructions and glued the doors on the weapons bays. The fit on the main bay was pretty good, but the side bays required some filing to get an acceptable fit.
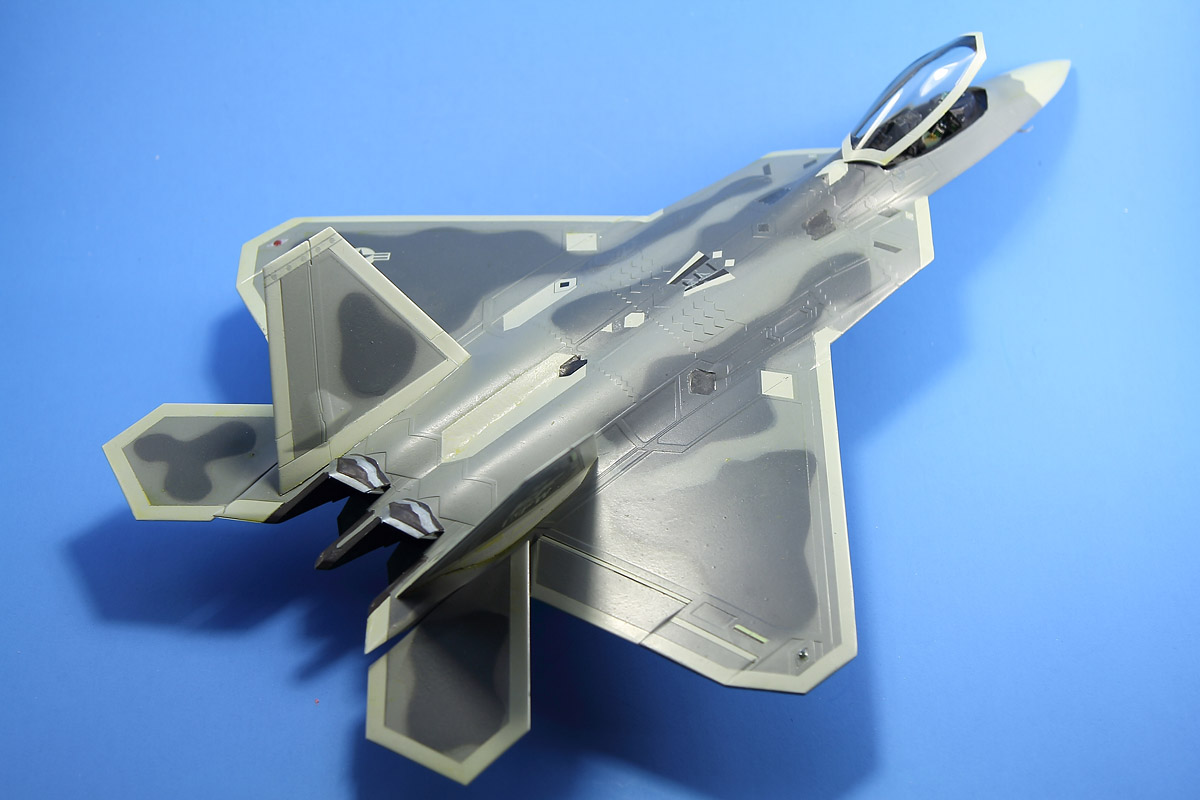
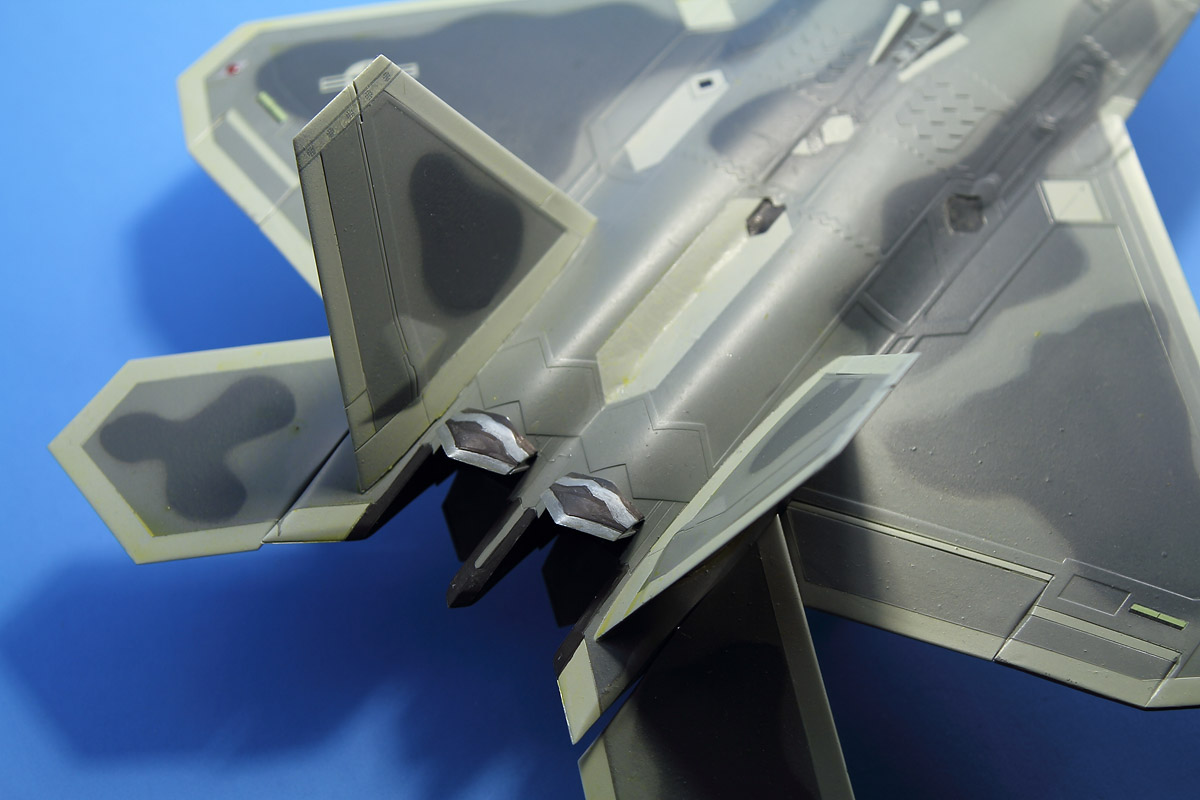 Once that was done, I added the exhaust nozzles, flaps, stabilizers, and fins. The fins attach via a tab and slot. The bottom of the fins match the compound curve of the fuselage, but the fit of the tab and slot is very sloppy and you must hold the fin still while the glue sets. You may want to paint the fins before gluing as masking them in situ is difficult. The stabs are pressed into retainer rings and are movable. I'm confused by this as none of the other control surfaces articulate, but can be posed. There are a lot of photos on the web of the F-22 and I didn't see any with control surfaces outside of neutral, so that is the way I glued them to the model. I did see nozzles open, so I did pose them that way. Here again, you may wish to paint and mask them before installing.
With the main fuselage done, it was off to the paint booth. The instructions call for the colors as a mix of one to one paints. One color is indentified in the color key and the other is something called SMO3 OR SMO4. I don't know what theses paints are, as they are not called out in the paint key. I opted to use acrylic Pale Blue Gray, Neutral Gray, and Haze Gray.
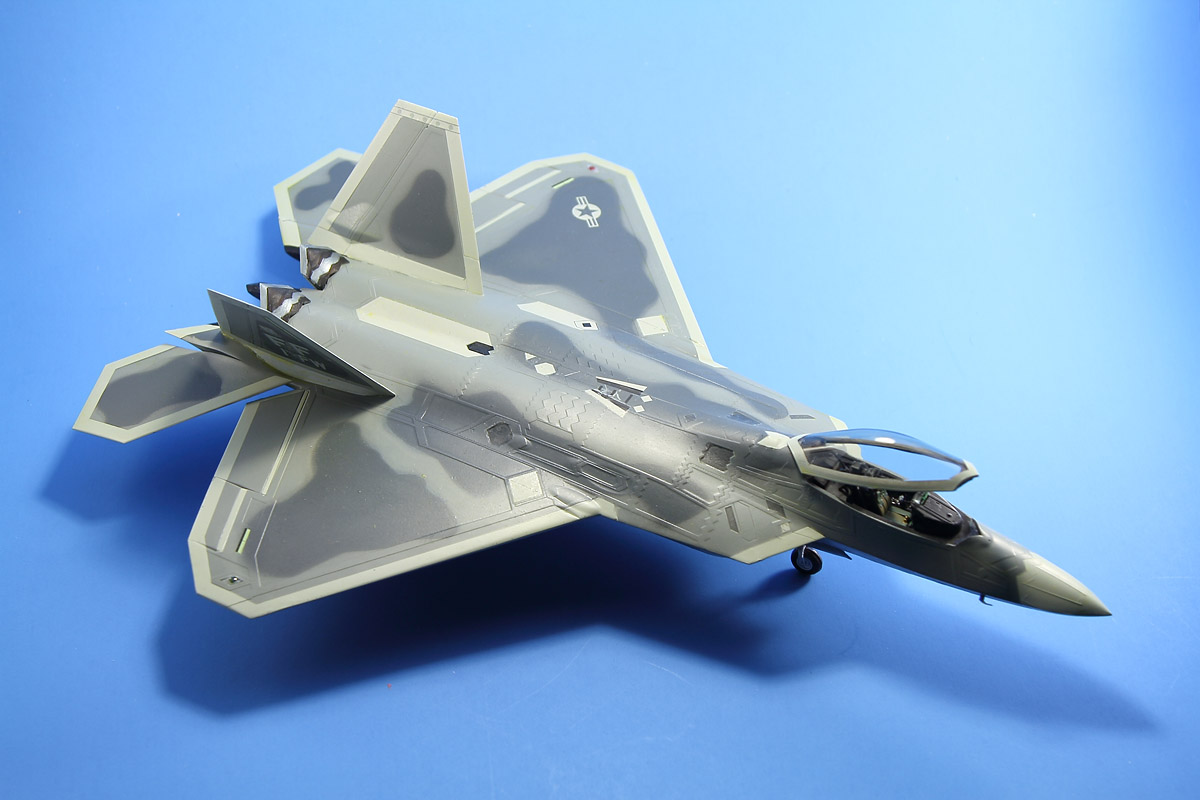 I sprayed the lightest shade first and masked that off and sprayed the neutral gray next. Even though there are not any compound curves to mask, I spent over five hours masking the first stage. As it turned out, the neutral gray is too dark and the gray decals that go over this shade can barely bee seen. You may want to use a shade 10 to 20% lighter. I photocopied the paint guide to make masks for the dark gray and used Blue Tack to raise the mask and get a feathered edge.
Everything was unmasked and a few touch-ups done and a coat of Future was applied in preparation for applying the decals. I applied the decals over the course of three evenings. They are not the robust prints I am used to seeing in Hasegawa kits and tore easily. Decal #38 fits over a bump. Mine did not settle down so I hand painted that marking. Decal #35 broke apart after I got it in place and did some touching up later. There is an odd sheen to the finish of the real aircraft and I replicated this by sealing the decals with an overcoat of Future, Clear flat and a couple drops of Turn Signal Amber. I am very happy with the final effect.
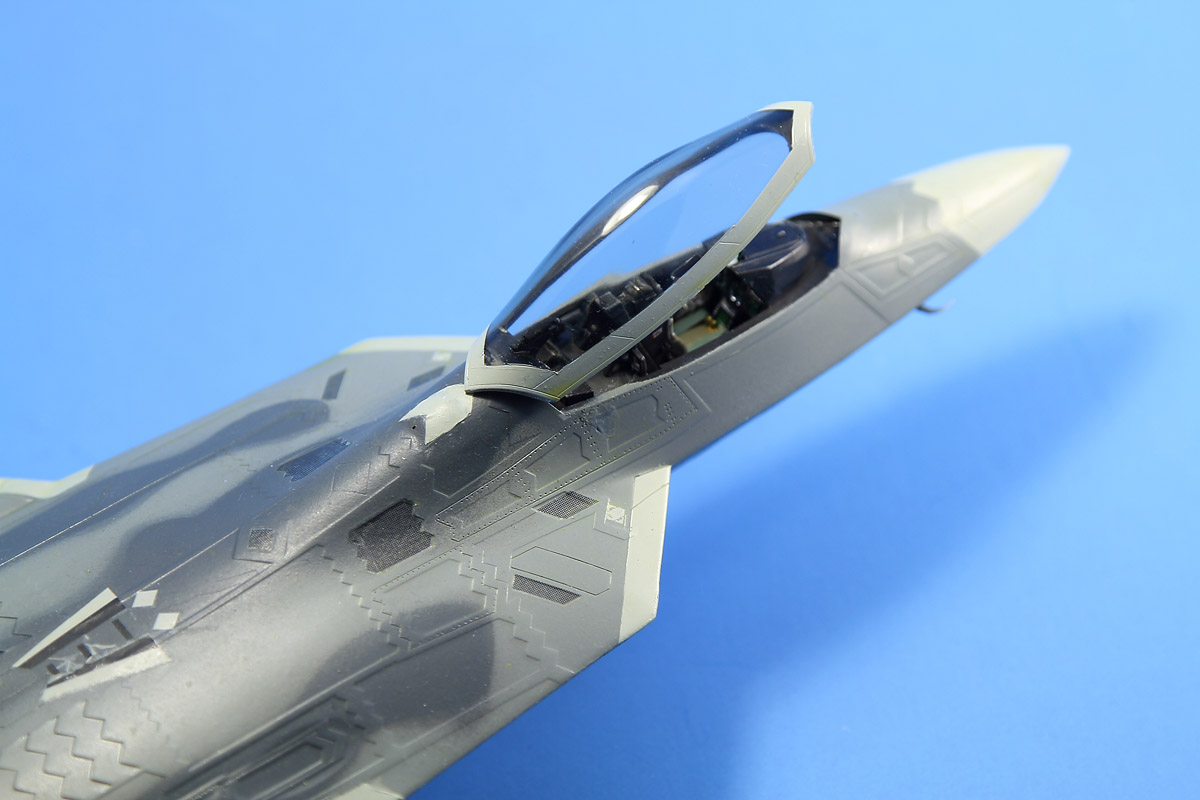
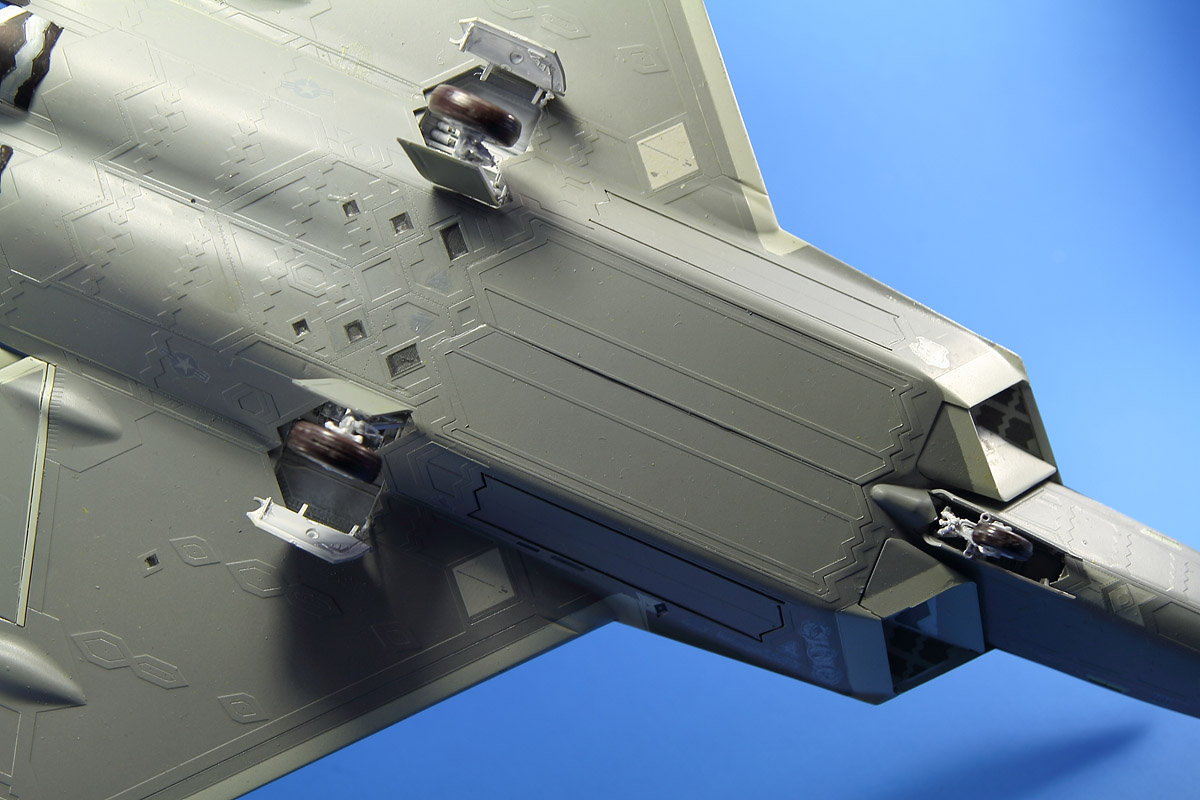
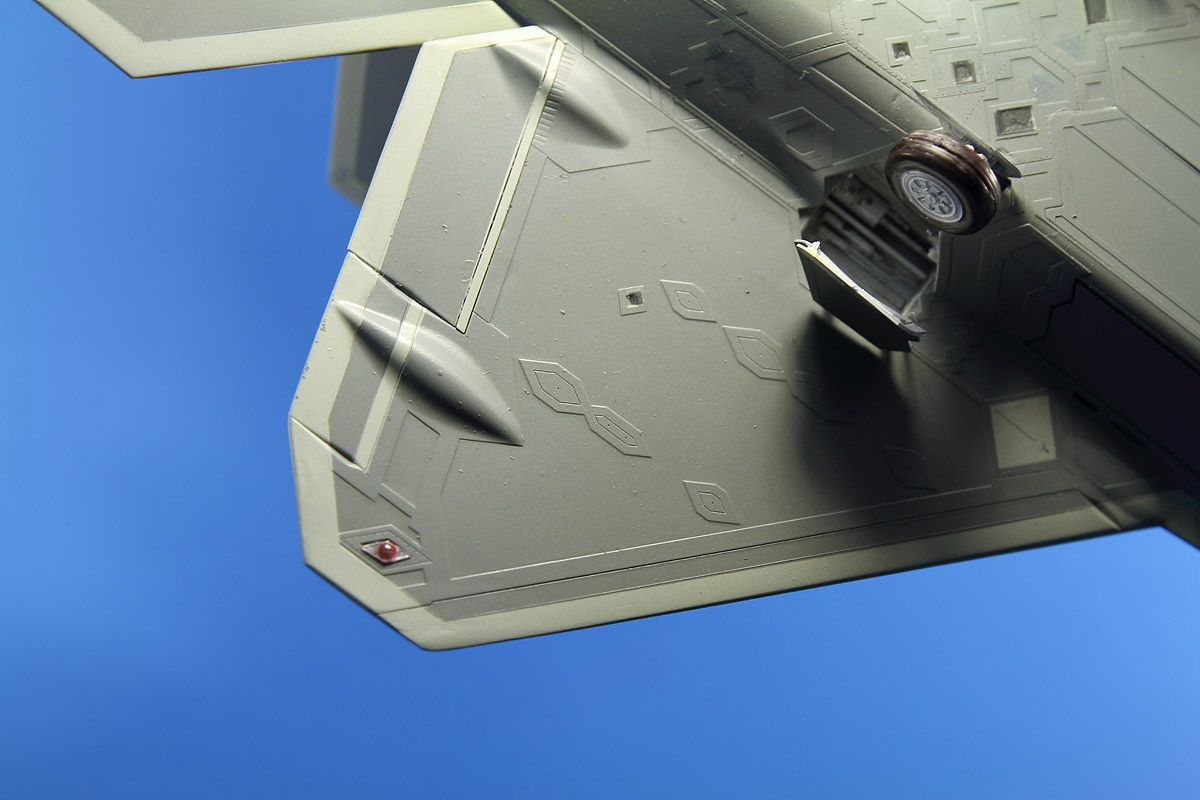
 The landing gear was tackled next and is very well detailed, so much so that it is a bit "fiddly" but is straight forward. Placement of the gear into the bays is vague in the instructions. Hasegawa could have helped by keying the ends of the various arms with square pegs and holes. The last area worked on is the HUD and canopy and again these went on without any problems. You can also add a pilot figure if you wish. I left it out of mine so you see the detail.
Conclusion
The last Hasegawa kit I built was as close to a "add glue and paint, shake box, model complete" as I have ever come and feel spoiled by their quality. This kit wasn't as easy a build and some of the instructions and engineering has left me befuddled, but this is still a Hasegawa kit and better than many manufactures. I spent about 26 hours building the F-22, (not building the weapons bays or missiles) about half that time masking and decaling. I'm sure even a patient beginner can build a model that is a delight to the eye. My thanks to Hasegawa USA for the review sample.