
Airbrushing 202: Masking Multi-Color Camouflages
By Chris Banyai-Riepl
With some experience behind us on painting solid colors, the next step is getting more than one color on a model. While the advantage of an airbrush is that it is basically a miniature of the spray guns used to paint full-sized aircraft, the first camouflage we'll tackle is one with a hard edge. This will give us more practice with laying down good color coats and continue to increase the comfort level with using an airbrush.
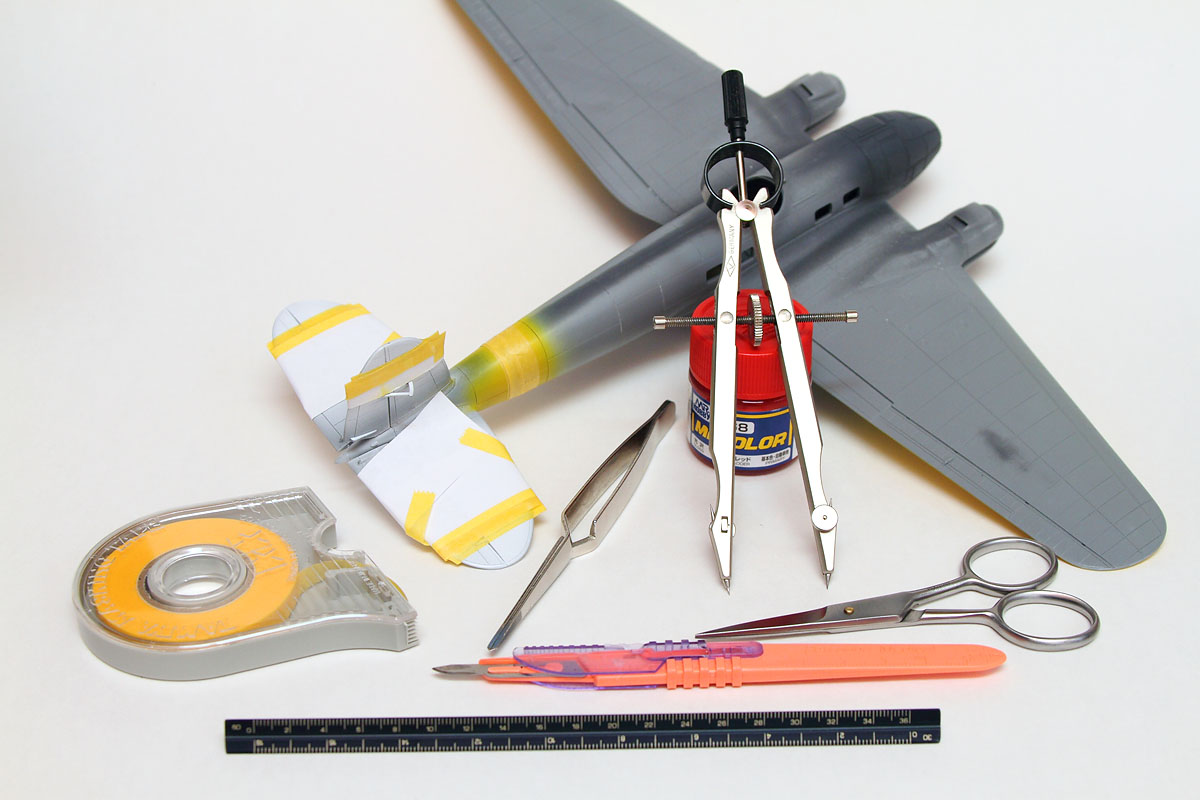
Materials & Equipment
Airbrush: Harder & Steenbeck Infinity double-action gravity feed
Compressor: Harder & Steenbeck Euro-Tec 10A with pressure regulator
Spray Booth: Model Expo Compact Spray Booth
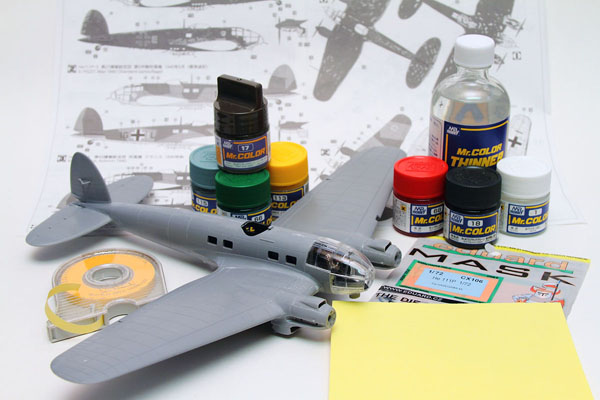
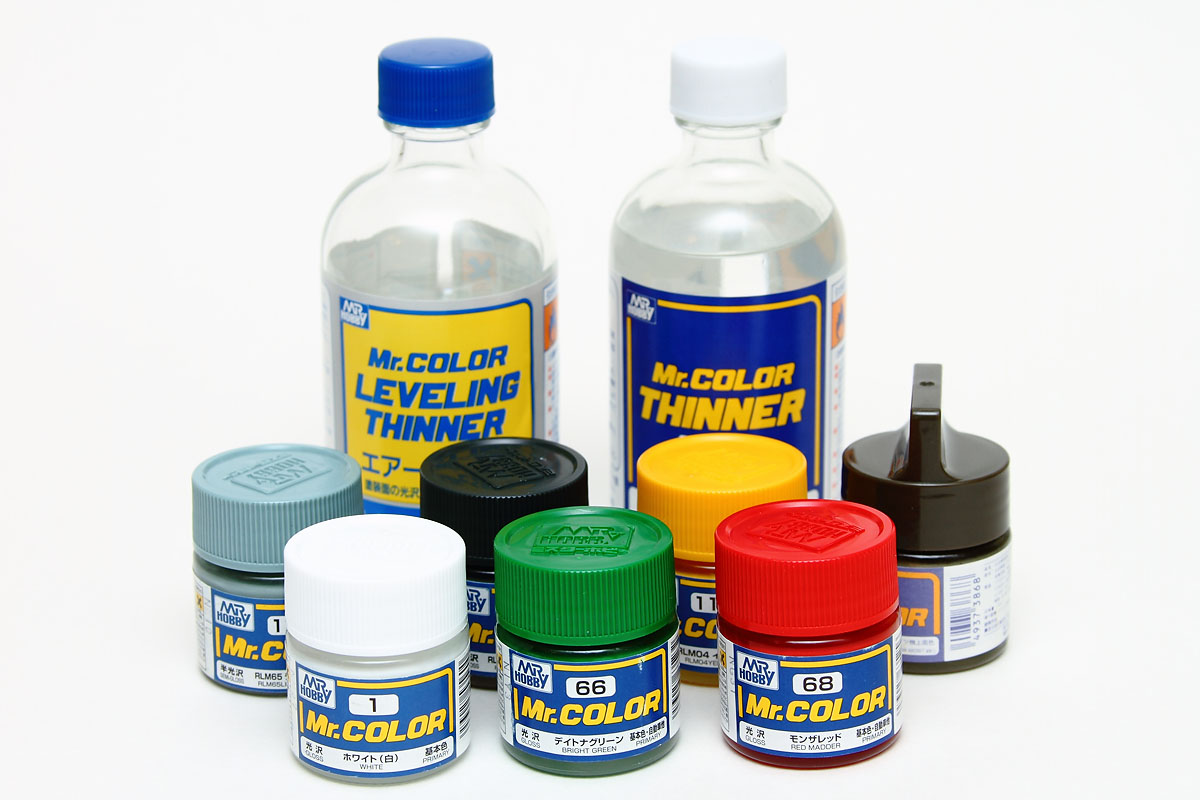
Paint: Gunze Mr. Color acrylic lacquer
Subject: Hasegawa 1/72 Heinkel He 111P
Masking Materials: Eduard EZ Mask & Tamiya Tape
Planning the Painting
The move from single color schemes to multi-color schemes means that there needs to be some sort of planning involved, in order to get the best results. The main rule here is to build up your paint coats from lightest shade to darkest (though there are exceptions that we will cover in future articles). For this article, I decided to build the kit as a Hungarian He 111P, which means that in addition to the camouflage, I will also need to paint the Hungarian markings on the tail. Jotting down the various colors, I came up with a total of seven: white, red, and green for the national markings, RLM 04 yellow for the fuselage band & underwing sections, and RLM 70, 71, and 65 for the Luftwaffe camouflage.
The most common problem with masking colors is the build-up of a ridge between two colors. This generally occurs when you have to cover a darker color with a lighter one, so the plan with this model is to paint the white first, then the yellow fuselage band and wing undersides. This will be followed by the tail stripes, and then finally the camouflage colors. In this manner I will always be putting a darker color over a lighter one, which means there is very little likelihood of a paint ridge building up.
The Paint
In the last article, we used Polly Scale water-soluble acrylics, which were very useful in that they did not need to be thinned. For this aircraft, we're going to move to a paint that needs to be thinned, and one which has a different drying method. Because we will be masking extensively on this subject, I wanted to use a paint that is durable and not likely to pull up with tape. Curative water-soluble acrylics tend to be weak in that regard, while solvent-based paints tend to be stronger in surface adhesion.
Thinner evaporating too fast shows up on the model in the form of fine spiderwebs extending off the edges of surfaces. While interesting (and I'm sure the physics behind their creation is quite fascinating), they can be rather annoying when they fold over and land on your freshly painted model. Luckily, fixing them is a simple matter: just spray a light coat of thinner on the model and the strings will reconstitute and form a regular part of the paint coat. Still, it is better to solve the problem beforehand, and that is through using the right kind of thinner and making sure the paint is thinned properly and thoroughly.
Mixing and Spraying the Paint
When it comes to mixing paint for the airbrush, there are lots of methods out there. Some modelers will create bottles of airbrush-ready paints, thinning the entire bottle to the proper proportions. Note that this only works with solvent-based paints, as curative paints can be ruined using this method. Another popular method is to just mix the paint right in the paint cup of the airbrush. This can work pretty well, although with gravity feed brushes you run the risk of getting unthinned paint sealing around the needle and clogging the airbrush, especially with thicker paints.
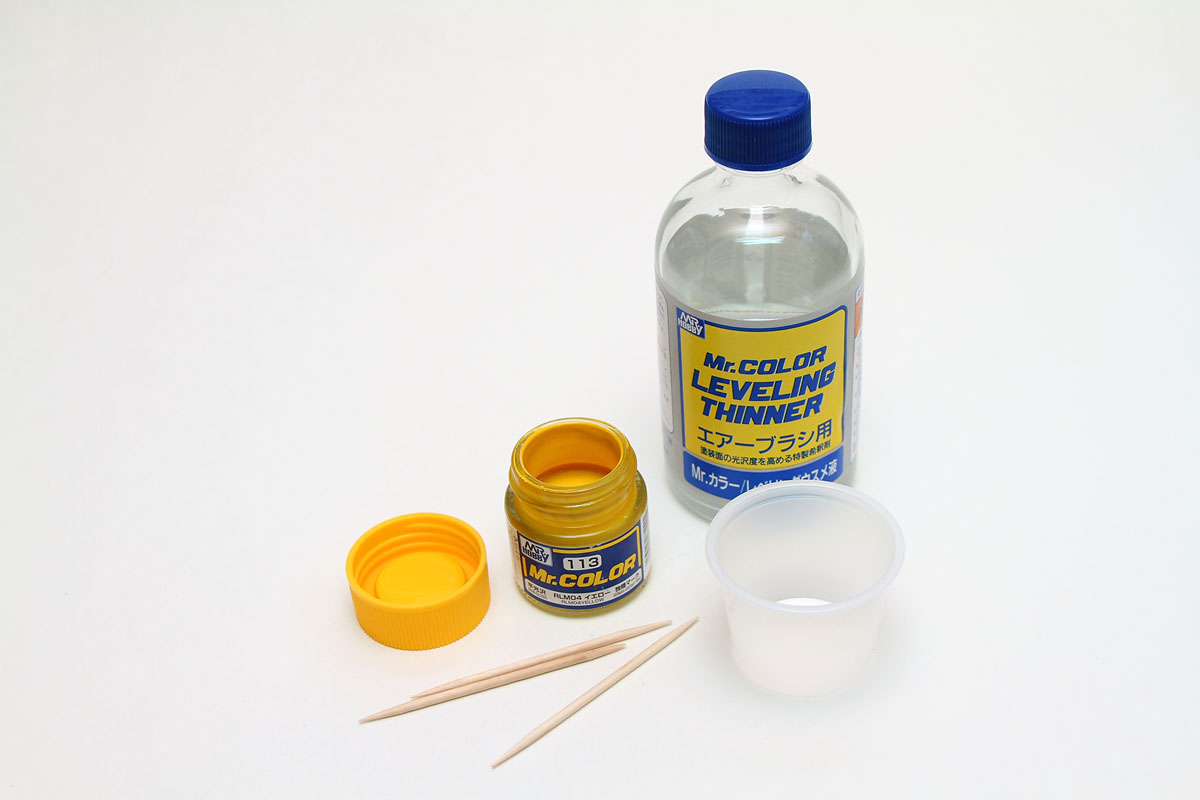
Filling the airbrush from the mixing cup is the same as from a paint bottle, in that I used a toothpick to control the flow. For these lacquers, I will keep the cups for later use, as future mixing will just reconstitute the dried paint in the cups. If I used the cups for enamels, I would discard the cups.
When it comes to the actual painting, experiment on a scrap model every time you move to a new paint. What may work with your last paint may not be the best setup with a new paint. Work with both thinning ratios and air pressure until you find a comfortable setup that you can consistently maintain. In my case, I found that spraying at around 28psi gave me the best results for this painting scenario. If I was having to spray fine fade lines, I would probably drop the pressure another 5psi and thin the paint more. The primary thing to take note is that there is no hard and fast rule here, and it is going to take some trial and error to dial in a new paint.
The First Masking
The first step is to prepare the model for paint, which in this case means masking all the clear parts. The Heinkel He 111 has a lot of clear panels on the nose, and the Eduard EZ Mask makes short work of this complicated job. These masks are simple to use and are precisely cut to match the kit pieces. Given the amount of masking already planned for this model, any little help in speeding things up is greatly appreciated. Once those masks are in place, a base coat of interior color over those clear parts was sprayed on, and then the model was ready for the actual exterior colors.
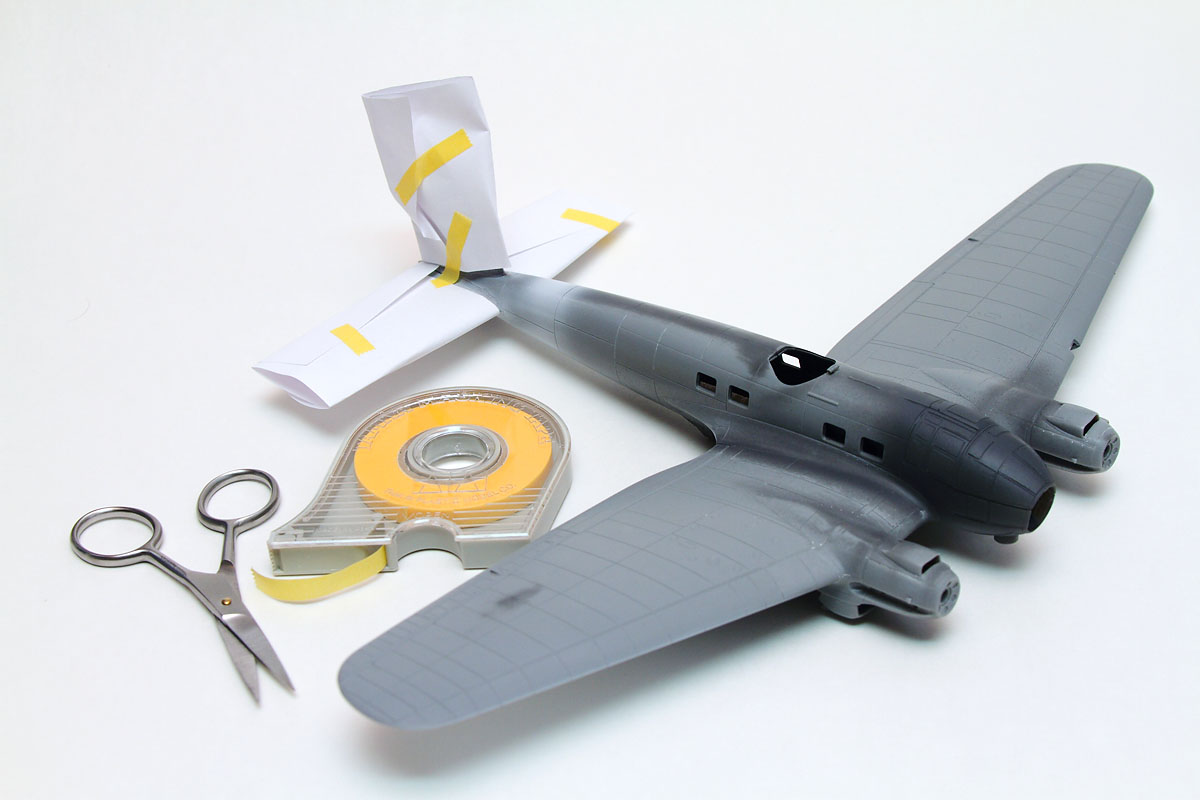
By using simple paper masks here, I both protected the paint and gave myself a little boost in time, as I did not have to wait for the white to dry fully (although, given the thinness of the coat, it probably had at that point; that's a major benefit to lacquers, their drying time is very short). While the initial thought is to use masking tape for everything, it is often wise to think outside the box and contemplate other options to achieve the same result. In this case, a sheet of paper is significantly cheaper than a bunch of Tamiya tape, and it was also much faster to put in place.
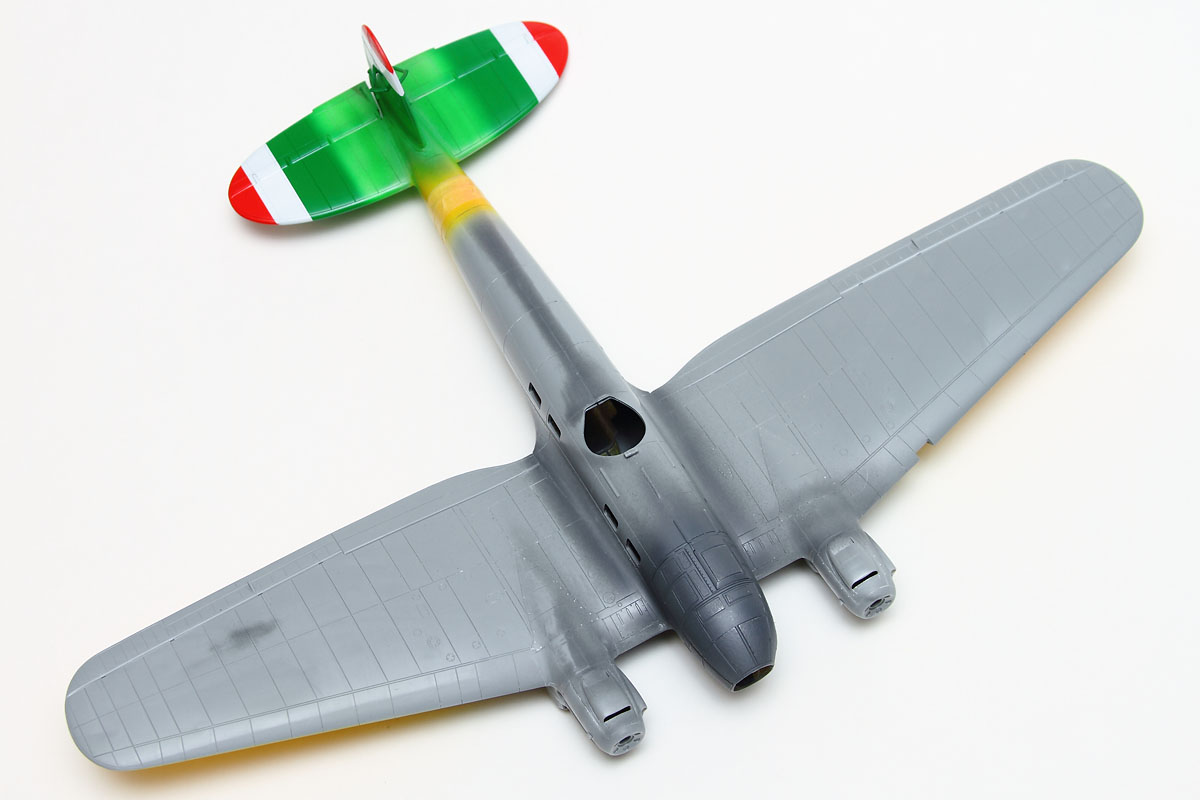
Masking Simple Straight Lines
With the yellow on, the next step is to paint the tail bands. These are all straight lines, sort of. I say sort of because, while they are straight lines when viewed straight on, the gentle curve of the tailplanes means you can't just slap a piece of tape on there and have it match up. That said, after careful measuring I discovered the vertical fin's stripes were, indeed, the width of the Tamiya tape I had. That makes masking VERY easy, as I did not have to overlap anything.
To maintain a straight line, though, I needed to carefully massage the tape over the airfoil curve. I did this by attaching the tape at the rudder point and gently pulling the tape downward as I moved forward. I started at the rudder point for two reasons. First, that is the flattest point on the tail, and second, I needed to press the tape into the rudder trough. This latter point is very important. At any point on your model where there is a deep indentation, make sure that the tape is firmly pressed into the trough. The paint will seep under any gaps, and in the case of these stripes, that would result in some rather glaring red and green fingers extending into the white band.
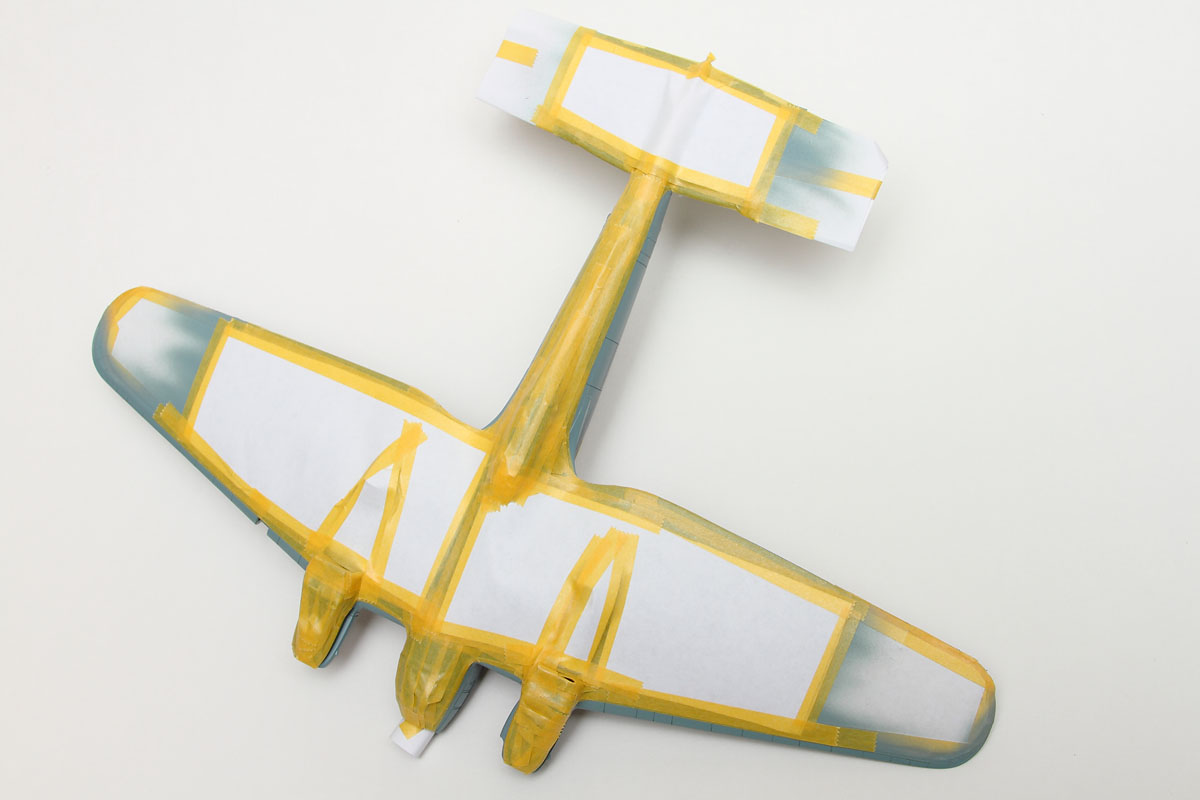
With the three colors on the tailplanes and the yellow in place, the next step is to mask off all those straight lines and work on the camouflage. For the fuselage band, this is a simple straight line again, but it is challenging because the fuselage tapers. The leading edge of the stripe is easy, as the tape will hold its edge nicely. On the trailing edge, though, to keep a straight line will require some careful stretching and bending of the tape. To make this easier, cut a narrower strip of tape. The thicker the tape, the harder it is to work around complex curves. By working with a thinner piece, you can get a good edge and then fill in the rest with the leftover pieces of tape.
More Complex Masking
While the various bands are simple, the Luftwaffe camouflage adds quite a bit of complexity. The first step is to paint the undersurfaces RLM 65. Knowing where the demarcation falls and where I will be masking, I want to make sure that the color goes well beyond that to ensure solid color. For the underside demarcation, this is a combination of small curves and fillets and long straight stretches. The small curves are best done with thin strips of tape. In this case, using the 6mm Tamiya tape, I further reduced that down by slicing that into three 2mm strips, and then worked those around the curves. Using tweezers is a big help here, as they can help nudge the tape around some of the tighter curves better than fingers could.
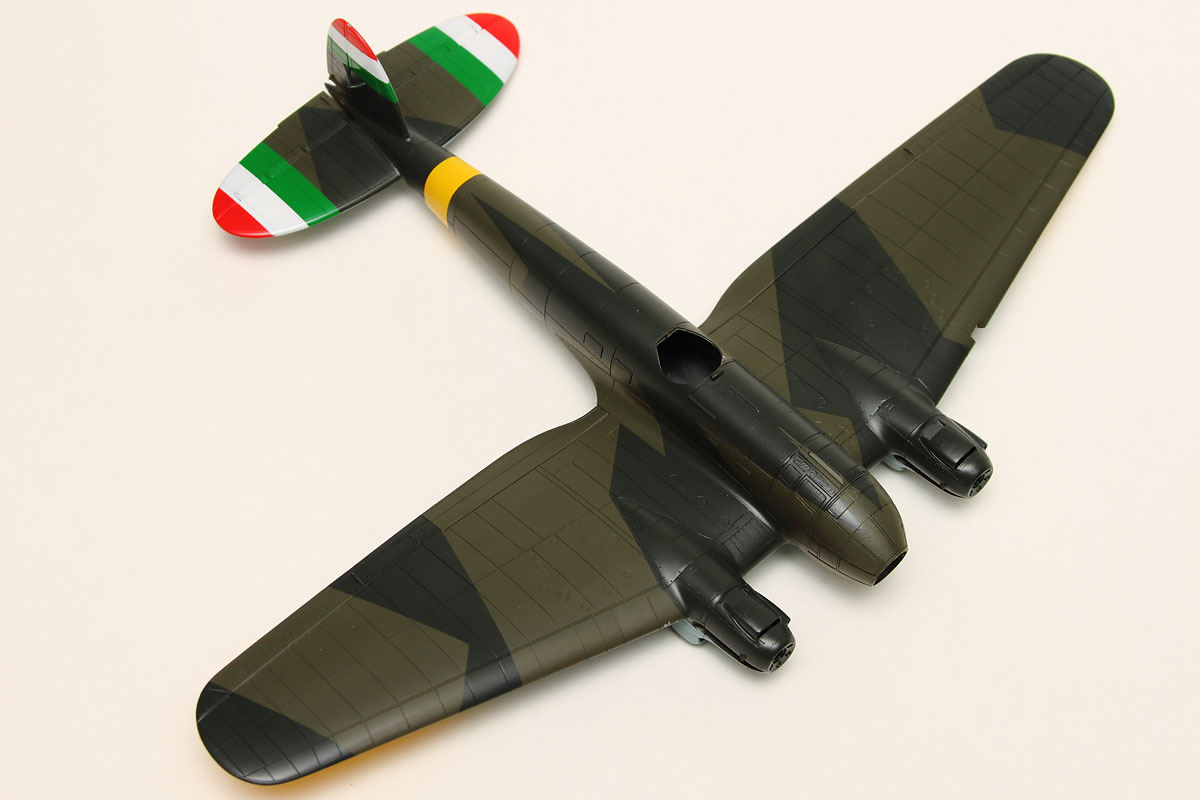
Once it was all covered, I airbrushed on the lighter of the two upper surface greens. Like before, I paid close attention to the leading edges of the flying surfaces. One challenge is getting around the tight corners between the nose and engine nacelles. Here is where solid masking is important, as I have to have the airbrush far enough away from the target area that the risk of overspray in other areas is quite high. Since everything is completely masked off, though, there is no worry.
Painting Around Masks
The key to painting masked camouflages is to keep paint from creeping under the mask. The first step to preventing this is to burnish the edge down completely. Any slight lift on the mask will allow paint underneath, so a tight seam is essential. The second step is how you airbrush around the masked edge. Your first coats should angle away from the masked edge, with subsequent passes slowly moving towards the vertical. At no point should you airbrush into the masked line, as that can push the paint under the masked line or at the least push it up and create a sharp ridge. It is better to build up light coats here, rather than laying on a thick, wet coat.

Conclusion
Masked camouflages offer some new potential for the fledgling airbrush artist, as it forces the builder to think well ahead of the process in order to achieve the best results. Luckily, there are plenty of options out there for the scale modeler. Early WWII British aircraft had hard-edged camouflages, for example, and pre-war US Navy aircraft had colorful markings that would be easy to mask and airbrush. Invariably, a model will require at least some form of masking, whether it is the camouflage or just the canopy, so it is a good subject to experiment with and practice.
Next week we will tackle a camouflage that the airbrush was made for: that of the freehand feathered edge camouflage.