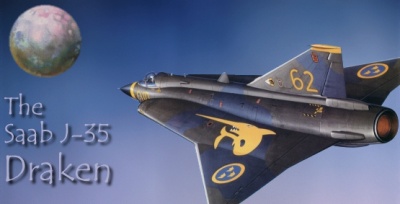

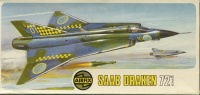
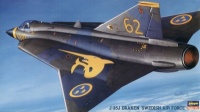
The history of the Saab J-35 is long, with the first J-35A taking to the air on February 15, 1958, and the latest versions still in active service with Sweden and Austria. Other countries that have flown the Draken are Finland and Denmark. The are a number of J-35 variants out there, ranging from fighters to trainer and reconnaissance types. Building models of these different variants can be done with what’s out there now, albeit with some cutting needed on some of the marks. We’ll start with an overview of the available kits and their good and bad points.
Once you have the insides done, you then get to have a go at the outside. Revell went a little rivet crazy on this one, but instead of doing it like the early Airfix kits and have the rivets raised, they recessed all of them. They also recessed the panel lines (!) which was a nice touch, but those rivets have to go. When you’re finished filling them all in and sanding it down, you can then move towards the other big omission: the tailwheel fairing. This is completely absent on this kit. The only ones that didn’t have this fairing were the early J-35s without the lengthened tailcone. So, grab a couple of pieces of 40 thou card and start carving. While you’re working the rear end of the kit, you’ll also want to cut back the spine fairing. The Revell kit has it going all the way back to the end, while the real one actually stops short. Check pictures of the plane and chop accordingly.
Once those few changes are done, you have a fairly decent-looking J-35B. Sitting it next to a Heller or Hasegawa kit will make it look funny due to the scale differences and the problem with the nose contour. Overall, about all this kit would be good for is collecting purposes, as you can make a more accurate J-35B out of the Airfix kit. But, if you have one of these, and don’t want to buy another kit, it can be made into a good representation of the Draken.
Once that area is worked over, all that remains is putting the rest of the kit together and finishing it up. Since the kit most closely resembles a J-35D, I would leave off the IR sensor and paint the requisite canopy frames, relying on good photos for placement. To do a J-35B, the only extra step you would need to do is remove the bullet fairing from the tail. With some work, this kit can be made into a very nice example of the early J-35s.

Once you have the basics together, you get to make the choice of variant. A word of warning: out of the box this kit can only be built as the Danish two-seater. To do a Swedish two-seater, you will need to convert the body to J-35A standards, which consists of removing the lengthened tailcone and repositioning the cooling vents, removing the tailwheel fairing, adding a tail bump, and adding ventral fins to the outboard wings. It’s not a difficult conversion and makes up into a different looking Draken in the end.
Straight out of the box, you cannot make a J-35F, as the J-35F only has one cannon in the right wing. The Danish J-35XD can be modeled, however, as they had both cannons. Also, the Danish RF-35s had both cannons, while the Swedish S-35E had no cannons. For any of the trainers, all the gun ports will need to be filled. With that little bit of work, you can make a Draken fighter from Finland, Austria, Sweden, or Denmark; a reconnaissance Draken from Sweden or Denmark, or a two-seater from Denmark. Not a bad selection for just one kit.

Construction is typical Hasegawa, with near perfect fit throughout. As you build this kit, the differences between the Draken variants are quickly made apparent, as Hasegawa has engineered this kit to fit all the variants of the Draken. Even the tail doesn’t escape their attention, with the bullet fairing being made as a separate piece.
The canopy is beautiful, accurately capturing the look of the later blown style. Underwing stores consist only of two fuel tanks, which can be converted into rocket pods fairly easily. As for other weapons, such as Sidewinders and Falcons, you’ll have to dig them out of one of the Hasegawa Weapons Sets.
If you want to build a Draken fighter, this is the kit to get. It builds up nicely, has beautiful surface detail, and accurately captures the look of a Draken. I only hope that Hasegawa is not slow in coming out with other variants, especially the Sk-35C and J-35B.
Saab J35 Draken, Aerfax Minigraph 12, R. Dorr, R. Francillon, J. Miller, 1987 Aerofax, Inc.
Flygplansritningar 1, Björn Karlström, 1983 Allt Om Hobby.
Flygplansritningar 2, Björn Karlström, 1985 Allt Om Hobby.
From 17 to 39, a Saab Half Century, Air Enthusiast Number 33, 1987 Chevron Press.
Saab Story, Geo. John Geiger, Wings, Vol 4, No 2, April 1974, Sentry.