
An SB2C-5 of the French Navy in Indochina.
It's great that ProModeller has finally given us an accurate Curtiss SB2C Helldiver, and smart on their part to make the SB2C-4, the most-produced sub-type of the line. However, you don't have to limit yourself to this single variant. If you've considered modifying a kit, but the thought of taking a razor saw to the parts leaves you afraid of what happens if you mess it up, here are two very easy conversions of the Helldiver, the SB2C-1C/early SB2C-3, and the SB2C-5.
These conversions are proof of the old saying, "Waste not, want not." Never, ever throw away parts you don't use from a kit. Put them in your spares box and guard them with your life. Using easily-available "spares," these conversions are almost as easy as making the Helldiver right out of the box.
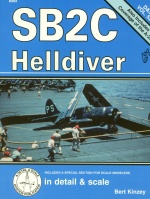
It helps to have "The SB2C Helldiver in Detail and Scale" or "Helldiver in Action" when doing these conversions, but it's not crucial.
The SB2C-1C:
The Helldiver at its best was never all that carrier-compatible. Its dive-bombing ability wasn't anywhere near as good as the SBD Dauntless it replaced. There was serious thought given to discontinuing production, and only the political clout of Curtiss-Wright, combined with the fact that Douglas was so involved in production of other aircraft, kept the Helldiver program going. The SB2C-1 series was the object of all this "sturm und drang."
There are only two places here where you need to take a razor saw to the kit. One is mandatory, the other is voluntary: The mandatory cut is to create the windows behind the pilot's cockpit. Take the forward section of windows for the gunner's cockpit and measure them; use that to cut an equal area from the structure immediately to the rear of the pilot's cockpit. You will need to have a sheet of clear styrene or butyrate (I recommend the latter), which can be cut to fit the area. Roll it with a paintbrush to get the proper curvature. The windows here look from photos to be exactly the same as the forward windows of the gunner's cockpit, so use that as your guide. You will then need to make a deck of sheet plastic for the area behind the pilot's cockpit, and a bulkhead to block off the rest of the fuselage to the rear. Measure the areas and cut the plastic sheet to fit. Cut off the pilot's headrest and replace it with a piece of sheet styrene cut to resemble the pilot's headrest of a P-40N, only made to the proper size for this cockpit. There are two braces that run as an inverted "v" from the rear top of the headrest to the far end of the decking behind the pilot's cockpit.
The voluntary cut involves the dive brakes: The Helldiver only acquired the perforated divebrakes with the late SB2C-3 (which is virtually indistinguishable from the -4 other than it didn't always carry radar, and only got the rocket launching stubs at the very end of the production run). You don't even really need to take saw in hand if you want to use .015mm plastic sheet and glue it over the existing interior structure. However, if you take these sections out, you can use .010mm or thicker plastic, which will look better. Here, all you do is scribe the perforated dive brakes onto plastic sheet for size and shape, cut them out and put the replacements in the obvious places.
The early Helldiver didn't have the rocket stubs, so cut those off, put the parts in their proper places on the wing and putty over them to create a smooth surface. Rescribe any panel lines you filled in or lost when sanding down the putty.
The SB2C-1 and the early run of the SB2C-1C did not have the rollers on the gunner's canopy, so file off the small bulges on the canopy. Leave it alone and you have a late productuion -1C. If you elect to do an SB2C-1, do not use the 20mm cannon and rescribe the armament panels in the wings for the 4 .50 caliber weapons used.
The major visual distinction of the early Helldiver is that it had a three-bladed prop, and here is where the parts box comes in handy: if you purchased a Tamiya Beaufighter and did a Mk. VI version, you didn't use the prop spinners. They're three-bladed, and the proper size and shape for the early Helldiver. Cut off the blades of an old 3-bladed prop and set the hub inside the spinner, as a surface on which to mount the new prop blades. Now then, if you ever did the Monogram P-47D Razorback and didn't use the early Curtiss Electric prop, take that out of the spares box and cut off three blades right at the hub, keeping the turning mechanism. Glue these to the prop hub you have inside that Beaufighter spinner, and voila! there's the early Helldiver prop. If you don't have that prop, use the Helldiver kit prop, but narrow the blades slightly, since the -1C didn't use a paddle prop. And if you haven't bought a Beaufighter yet, you'll have to modify the kit spinner from 4-blade to 3-blade. Since you're likely to get a Beau anyway, just wait on this until you do; that's the easy way out.
You have now done all the modification necessary, unless you elect not to have radar, in which case you will need to remove the top row of "black boxes" from the stack in the gunner's cockpit.
Markings: if you did go all the way back to the SB2C-1, you can do VB-17, the first squadron to take the Helldiver into combat, at the Rabaul strike on November 11, 1943. Do the tri-color scheme. The aircraft on the "Bunker Hill" still had red-surround national insignia, and numbers in the 40s were carried on the rudder. There were no individual markings designating a particular carrier at this pointt. If you do one in the Spring of 1944, as Helldiver squadrons proliferated on the carriers, you could do the single white stripe across the upper rudder of an "Essex" VB-15 bird, or the white dot below the rudder number that denoted the "Hornet." Past that, you're on your own. There are a few readers who I know limit their modelling to a particular naval air force, and for them, the SB2C-1C is also known as the Helldiver DB.1; do it in dark sea grey/slate grey/sky unders and you have one of about 50 aircraft the Second World War Fleet Air Arm was intelligent enough not to use.
Curtiss SB2C-1C Helldiver
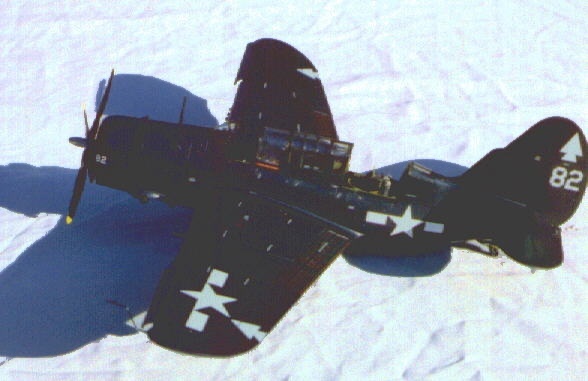
The SB2C-5:
The SB2C-5 was closer to the divebomber the Navy originally wanted, in terms of overall performance, and eliminated many of the shortcomings of the earlier versions. it had more fuel, an enlarged bomb-bay, and a more powerful R-2600, which meant it was less likely to go into the drink on takeoff due to inadequate power, one of the earlier Helldiver's disconcerting little oddities. If you do this one, you could do French Aeronavale markings for the first Indochina War, or Greek markings from the 1947-49 civil war. You can also do postwar US Navy markings, both operational and weekend warrior. I elected to do mine as a VB-82 Helldiver off the "Bennington" in May 1945, the squadron that got the "Yamato." The arrowhead markings for "Bennington" are available on other US Navy sheets.
Again, the major conversion work here is involved in getting things out of the spares box. There are two major visual distinctions for the -5. The first was the Curtiss-Electric paddle-blade prop without a spinner. If you bought a Hasegawa P-47D and did it with the Hamilton-Standard prop, and didn't throw the Curtiss-Electric blades away, you have the blades you need. If not, well - why haven't you gotten a Hasegawa Thunderbolt yet? Use the spinner from the Monogram kit left over from the -1C conversion, put those blades on it, and you're fine. Alternatively, cut off the front section of the hub on the kit prop, put in a 1/16" plug to extend it, and use that hub with the blades taken off.
The other distinguishing feature of the SB2C-5 was the clear canopy on the pilot's cockpit. Take a fine grit file and file off the bars of the kit canopy. Then use fine and extra-fine wet-or-dry sandpaer (very wet and keep it wet) to sand out all scratches. Rescribe the frame, then polish the canopy. I use Turtle Wax polishing compound, avauilable at your local Pep Boys (or equivalent) whenever I sand plastic, as it will fill any small scratches I might have missed. After that has smoothed the plastic, use Brasso polish to clear it up. Dipping it in Future Floor Wax will finish the process and no one will know you had to work on the canopy.
Internally, the pilot's cockpit of the -5 finally got rid of the clutter of the earlier versions. Here, you do not use the kit sidepanels as provided. Cut off the upper sections that fit along the cockpit sill and use them as instructed. Then make side panels - like in the Hellcat cockpit - and set in the other parts of the side panels as panel faces. You use the dive brake and bomb release levers and the control stick as provided.
The -5 has a bigger bomb bay than the -4, which has two solutions, one easy, one difficult. I solved this the easy way: I closed the bomb bay doors, sanded the area smooth, and rescribed the doors with the forward extension, which is 1/4" by 1/4" (a scale 1 square foot) measured from the forward edge of the doors, from the centerline. If you want to go nuts on this, do the difficult solution, which is to cut and file and add pieces to the bomb bay doors to keep them open.
The -5 also got rid of the Yagi antennas, opting for a radome on the starboard bomb rack. This was a bomb-shaped pod. I opted to use a 1,000 lb bomb from the Accurate Miniatures TBM-3 kit, sanded and shaped without the fins. Use one of the exterior bomb racks from the Helldiver kit as the attachment, and you're okay. Do look at photos here.
The -5 Helldiver only came in overall Midnight Blue, and quite often carried rockets on operations. The USN used a 5" that looks very much like a British RP. If you have the Hasegawa F6F-5 Hellcat and didn't use the rockets that came with it, you're set. Alternatively, you could get away with using the rockets from a Monogram Typhoon, or the rockets from an Airfix Mosquito. They're dark green in Navy service, just as they were with the RAF.
Now you have two more Helldivers to catch dust in your collection, and if you haven't done a conversion before, you've taken a dive in the medium-deep part of the pool and it wasn't that bad, was it?
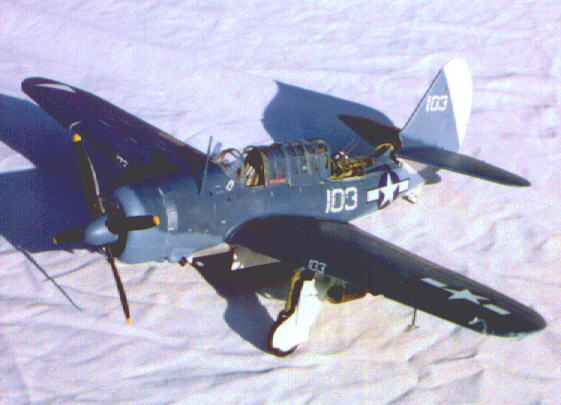
Curtiss SB2C-5 Helldiver
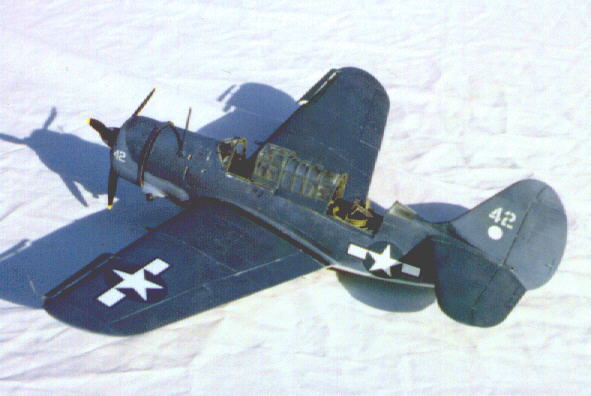
Let's Drop The Turtledeck:
Getting the rear gunner's weapons out for use involved lowering the turtleback, a Curtiss invention that went back to the SBC and SOC biplanes of the 30s. A Marine divebomber pilot I know says that the turbulence over the tail that was set up by doing this was so bad he told his gunner to close everything up when they dove, so he could achieve some accuracy with a divebombing attack.
You can do this with any of the three versions of Helldiver: SB2C-1C, SB2C-4 and SB2C-5. It gives the airplane a very different look, and got me an award at the Plastech show for doing it to the VB-3 SB2C-4 pictured here.
This work is most easily done by referring to the photographs in This simple conversion involves cutting out the section of turtleback on each fuselage half before assembly. Be careful cutting around the horizontal stabilizer fairing to keep it completely. You sand it flat afterwards so that the the turtleback could go up beside it. The rear fuselage will be blanked off, as will the opening in the rudder.
You will use the upper part of what you have cut away as the most visible part of the turtleback. The sides are done with 10mm sheet styrene, cut to fit. You will see the hinge on examining the turtleback before you cut it. That folds inward. Cut the inner braces and bring them together, then fit that per the instructions. Paint the sections of turtleback prior to assembly and assemble them together after you have painted the model.
Curtiss SB2C-4 Helldiver