Tristar 1/35 Panzer I Ausf.A
By Dave Manter
 |
Background
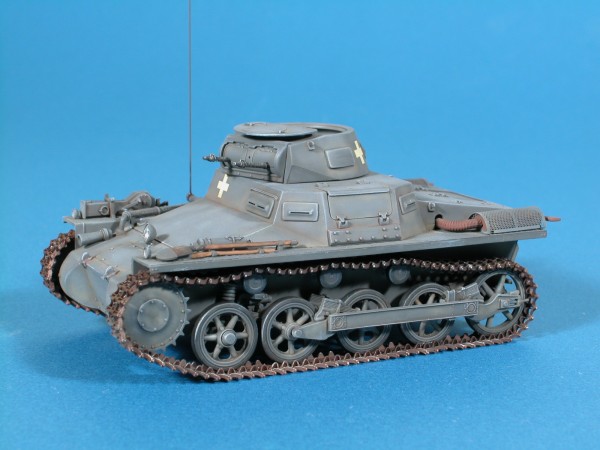
Designed primarily as a training vehicle, the Panzer 1A saw combat action during the Spanish Civil War between 1937 and 1939. Over 1500 of these vehicles took part in the Polish Campaign, and in steadily decreasing numbers they saw action in France, Norway, Africa, Greece, the Balkans, and a few were used during the opening months of the invasion of the Soviet Union. The Panzer 1A was not an exceptionally good combat vehicle, suffering from lack of power, inadequate armament, and very thin armor. It did however train thousands of new panzer crews to drive fully tracked vehicles.
The Panzer 1A weighed 5.4 tons and measured 13’3” in length, height from ground to top was only 5’9”, and its overall width was 6’9”. A Krupp M305 air-cooled engine that produced 60 horsepower at 2500 RPM powered it. The maximum speed was 23 mph. It was crewed by only 2 men, a driver and the commander/gunner. It was armed with a pair of rifle caliber machine guns mounted side-by-side in the turret. A total of 3125 rounds of ammunition were carried.
The Kit
The kit is molded in light gray plastic and consist of 154 parts on 7 trees. The parts are very well molded with virtually no flash. Also included is a full set of Model Kasten workable tracks, adding another 356 parts, and a set of photo etch muffler guards from Aber. The instruction sheet is divided into 16 steps and is very well laid out and easy to follow. Decals for 4 vehicles are included and are very well printed and in perfect registration.
Construction
Step 1 begins with the assembly of the drive sprockets and some of the suspension components. All parts fit well.
Step 2 is the suspension and road wheel assembly for the right side of the vehicle. Again no problems were encountered and all parts fit very well.
Steps 3 and 4 are identical to steps 1 and 2 except they are for the left side of the vehicle.
Step 5 is the assembly of the lower hull and one curious parts is C6 which is an interior bulkhead that has detail on the inside surface. As this is not really visible on the finished model unless the hatches are opened I wonder if an interior set is in the works? We can hope!
Step 6 in the construction of the upper hull and it is here that I encountered my only fit problem. Part C19 was about 1/16th of an inch to narrow front to back on my kit but was very easy to fix with a small amount of filler.
Steps 7 and 8 consist of the turret assembly and there are several very small parts involved, but again detail and fit are superb.Steps 9 to 13 are all assembly of upper hull detail parts and this is what sets this kit apart in my opinion. The detail is fantastic! There are many small parts so take your time.
Step 14 is the construction of the superb Model Kasten tracks. The tiny track pins will scare many of you, but they really are not that bad to assemble. I removed all of the track links first and then assembled them with the pins. I used 88 links per side and this allowed a nice amount of “track sag”. Please keep in mind that there are right and left hand links, so I would suggest doing one side at a time. I had about 2 and a half hours of assembly time in mine. The photo-etch muffler guards were cut out and folded next but I left mine off for painting. Also included in this step is the installation of the rear fenders. I left mine off because the majority of my reference photos show the tanks that were in combat had them removed to keep the tracks from fouling with mud.
Step 15 is the installation of the final details on the front of the vehicle and again I left off the front fenders.
Step 16 is the installation of the optional armored covers for the air intakes. These were fitted on the later vehicles.
Steps 17 and 18 is the assembly of the 2 wonderful figures supplied with the kit and these can be built with either the Panzer Berets or the standard side cap.