From Internet Modeler
'Cleared for Launch' An F-14 Tomcat Diorama
By Gary Meinert
Feb 1, 2002 - 1:10:07 PM
Photos by Will Riepl
|
 |
Introduction
The F-14 Tomcat is a well-known member of Grumman's famous "cat family" of fighter aircraft. It has served as the U.S. Navy's premiere fleet air defense fighter since the 1970s, and the advanced F-14D version is scheduled to remain in service until 2008. In recent years, the Tomcat has been upgraded with new capabilities to allow the delivery of air-to-ground weapons, thus making it a versatile multi-role fighter.
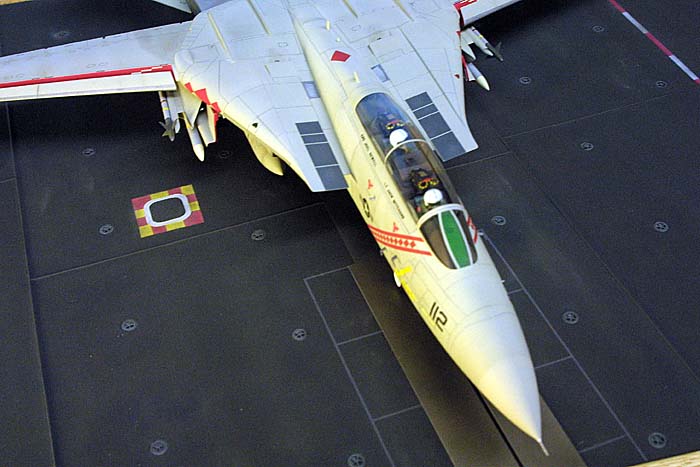
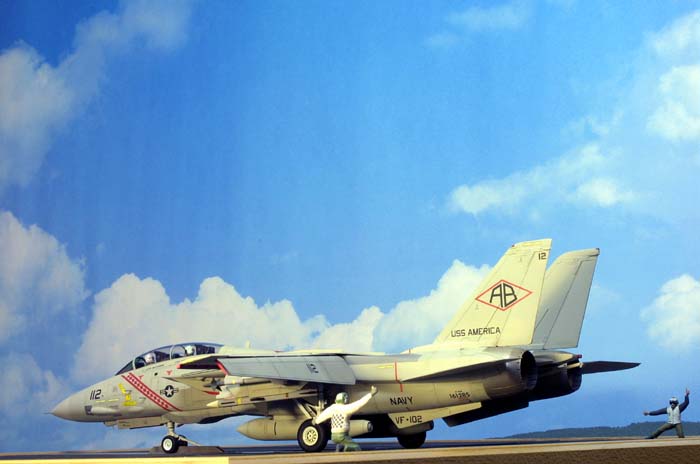
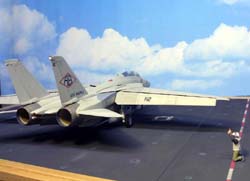
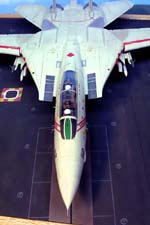
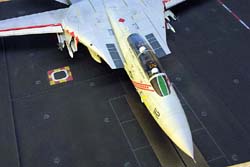 My 1/48 scale carrier deck diorama " Cleared for Launch", depicts a scene in 1982 aboard the USS America (CV-66). The F-14A Tomcat is attached to the No. 1 catapult (starboard bow cat). The two safety troubleshooters have just completed their final inspections of both sides of the aircraft and are signaling each other that all is ready and the launch sequence can proceed.
The Kit
Hasegawa's 1/48th scale Tomcat was first released in 1989 and remains the best 1/48th Tomcat in terms of accuracy and detail. Excellent recessed panel detail, metal wheels, vinyl tires, photoetched parts, and many optional parts are all there. Options include compressed or extended nose gear strut, turnable nose wheel, open gun bay, steps and stepladder, open or closed speed brakes, and positional wings, wing slats, and flaps. External drop tanks and a TARPS (tactical air reconnaissance pod system) pod are also included. No ordnance is provided; so if you want to arm your Tomcat, go to the Hasegawa Weapons Set as I did for Sparrow and Sidewinder missiles.
Construction
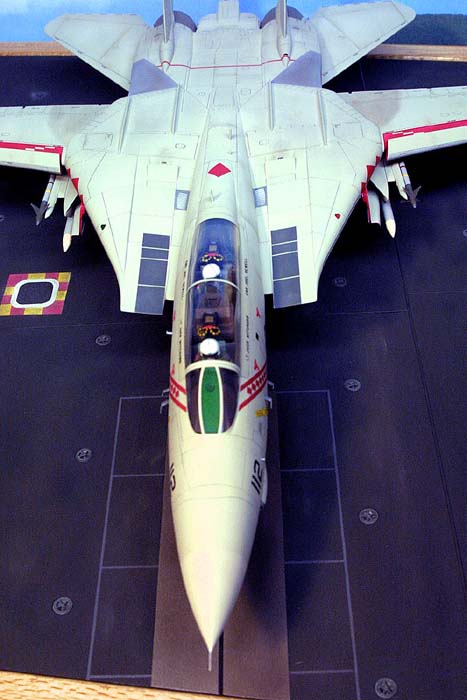
The building process is extremely slow and arduous due to many bad fitting components. I won't list all the fit problems, but among the worst are: forward fuselage to main fuselage, wing sealer bags, air intake units, and the canopy in the down position. I also discovered and 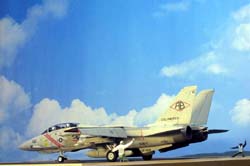 corrected several errors: all three landing gear are angled back too far, the tail hook is too long, the air intake ramps are in the incorrect position for an aircraft on the ground, and there are no engraved lines for the glove vanes. Curiously, there is no HUD (head up display), so I scratch-built one.
Several times during construction, I gnashed my teeth and wondered if I should be in some other hobby. Sword fighting? Wrestling with lions and tigers? But I persisted and finally finished the construction phase and went on to painting and decaling, which is my favorite portion of the modeling process.
Markings
After painting the aircraft with Testors Model Master and Humbrol enamels, I was ready to apply markings of a specific aircraft of the VF-102 Diamondbacks squadron. I had a photo of this aircraft and was able to read and verify both the BuNo. (Bureau of Aeronautics Number) and the aircrew names, which I spelled out on the canopy sills one letter at a time with decals. I used Superscale Sheet 48-122 and portions of several other decal sheets to obtain the most accurate possible markings. I measured and cut the large red diamonds from a red area on one of these decal sheets. Diamond cutting was therefore a new skill I learned for this project.
 Figures
I have always been dissatisfied with the lack of quality 1/48th figures of modern air and ground crew for the diorama builder. I decided to use the kit figures of the pilot and radar intercept officer, but I replaced their misshaped heads with heads from a Hasegawa F-4 Phantom kit. I also replaced two arms. Of course, the figures would not fit into the Tomcat's cockpit, so drastic surgery was required on several legs and at least one arm to get the proper fit. For the two troubleshooters on the deck, I had big problems finding correct postures and arm positions. But I managed to mix, match, and modify many body parts from the Hasegawa US Navy Pilot/Deck Crew set and a similar Fujimi set.
Diorama Base & Flight Deck
The diorama base is a 24" X 18" cork bulletin board. This was advantageous to use because it was lightweight, it already had an attractive wooden frame, and of course it was the right size for my diorama. The support base for the deck is a sheet of 3/16" clear plastic from a hardware store. I had the store clerk cut the plastic to the proper dimensions so that it would fit inside the bulletin board. I later filed and sanded the edges of this plastic to get a more precise fit.
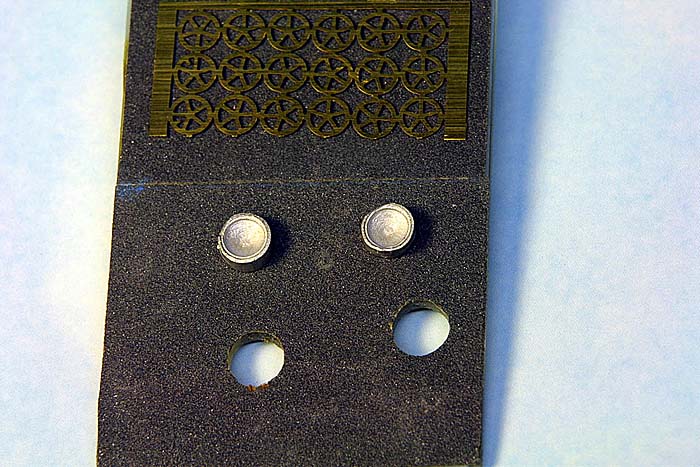
I measured and marked the locations of the metal tie-down wells and stars (from Flightpath's U.S. Navy Carrier Deck Diorama Set) on the plastic base and then drilled all the required holes. Some test fitting and tweaking of the holes with a rat-tail file was necessary to achieve a good fit of all 52 wells.
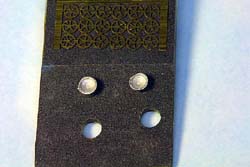 The deck surface material consists of sheets of 220 grit sandpaper, which I positioned, trimmed, and glued with contact cement onto the plastic base. Then I flipped over the plastic base and used a number 11 X-Acto blade to cut out the layer of sandpaper from the top of each hole. Later I glued each of the metal wells in place.
Deck Details
The lines where the sandpaper sheets join were covered with .040 half round plastic rod. These rod strips represent the slightly raised weld lines where the real deck plates join. The catapult track was made from strips of .005 sheet styrene, while the catapult shuttle was built from styrene block and sheet.
I built a "long" shuttle of the type that was in use during the 1980s. The Tomcat's nose landing gear already had the shuttle bar which attaches to the front of the shuttle. I scratch built the holdback bar, since this was not provided in the kit. (The holdback bar attaches the rear of the landing gear to the back of the shuttle).
The deck was painted with Floquil Grimy Black and lightly weathered with pastels. The tie-down wells and stars were painted an appropriate shade of gray and some were stained with a dark wash.
 Conclusion
The Tomcat was not permanently attached to the base, as I wanted to be able to remove it for travel. I also had a clear plastic dust cover custom made to fit over the diorama.
Many references were used for this project, including various photos clipped from magazines over the years. Particularly helpful were Detail & Scale No. 34, USS America, and F-14 Tomcat, Shipborne Superfighter, by Jon Lake.
After a long journey, I can finally say that my Tomcat and I are cleared for launch.
© Copyright 2023 by Internet Modeler