Introduction
This kit is a limited release "Dual Combo" edition of Eduard's Fokker D.VII MAG (kit 1147). As the name implies, there is plastic, PE and decals to complete two models, and markings for no less than 11 different subjects. For more information please refer to my First Look article.
First steps
As a first step, I sprayed both sides of each sprue with Tamiya primer, and left them for 24 hours to dry thoroughly. This is because I use cheap, craft store, acrylics for my top coats and they don't seem to "bite" into the styrene very well, and tend to make a mess and require many coats, and it can look awful. I then sprayed the exterior and interior of each fuselage part and all of the wings, tail, flying surfaces etc. with my chosen linen, actually labeled "Almond", followed by a a couple of coats of Future to seal it and provide a base for the decals. Although I would be doing one for the aircraft in lozenge pattern I wanted a good surface onto which the lozenge decals would be applied.
Almost immediately I was faced with the choice of markings, as there are a variety of parts applicable to each option. A good tip here is to choose your option and mark on the instructions pages in a different colour which of the part apply to your models, and similarly mark the sprues for your options with the same colour of paint. I wanted to do a lozenge covered one, and a linen one, and after that my choices were easy, A and J, my daughter's initials! Strictly speaking these can't be built, but option J only required that I mask and paint white background rectangles on the upper and lower wings and give option A the decals for that.
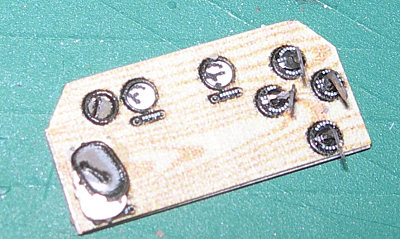
Interior
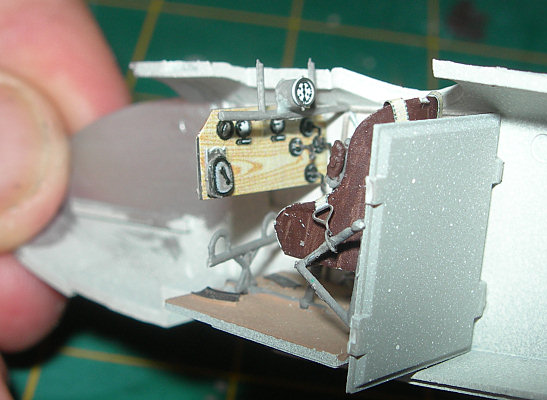
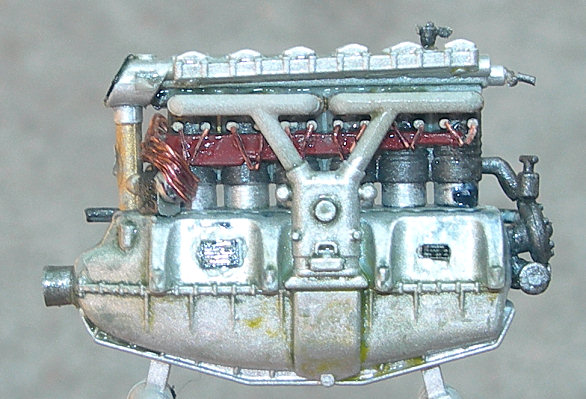
Engine
The engine is a completely new molding from Eduard and a detailed description can be found in my separate article on the Austro-Daimler 200HP engine.
Assembly
If you are doing a lozenge marked option I wouldn't follow the instructions at this stage. I would add the stitching strip to the fuselage, assemble upper and lower wings and the tail plane/empennage. At this stage dry fit the lower wings and empennage, ensuring that the fit isn't too tight. Then spend a day or so applying the lozenge and the rib tapes to all surfaces. A point to note here is that the axle fairing needs to be trimmed a little before you put the lozenge on it, and you have you use the spare lozenge section to cover that. It needs to go on with the pattern perpendicular to the pattern on the wings, but that is what the instructions tell you to do! Once all the lozenge is settled, Future glossed and dried, you can follow on with the rest of the assembly.
When I had to add the long barreled guns, I found the barrels difficult to trim and keep straight, so I lopped them off and replaced them with a length of brass tube.
Parts C8, the semi-circular handles on the rear of the fuselage require a little clarification. According to Marek's excellent booklet accompanying the kit, the original six aircraft that were delivered from Fokker, and were lozenge covered had these handles facing downwards, like other Fokker-built D.VIIs. However, further aircraft built by MAG had those handles facing upwards, similar to Albatros and OAW-built aircraft.
Painting and Markings
Once you have made your choice, check that you have enough of the required decals to do the job. Like I said, I had to mask and paint a white area, because there were only one set of those particular decals supplied, but I had planned for that and it didn't come as a surprise. I did think that
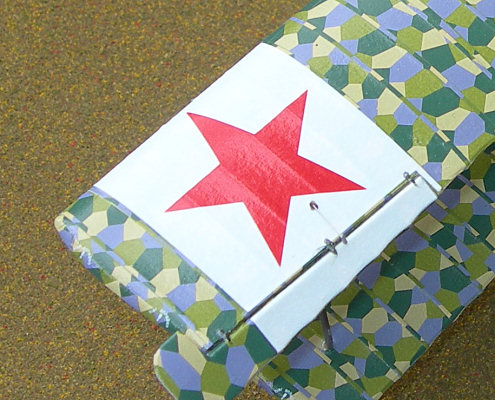
Decals went on very smoothly and took the setting solution without difficulty. They are quite thin, and only required a few seconds of wetting before being usable. The white background areas are very thick, and don't require and undercoat of white to be applied. The lozenge on mine does not show through.
Rigging
There was hardly any rigging on this aircraft, and what there is is not too tricky. I used stainless steel wire of 0.005" diameter (0.127mm). The control cables from the cockpit to the upper wing are the only really fiddly bit, since there are supposed to be 2 of them very close to each other.
Conclusion
All in all, two stunning kits. The molding is superb, the detail is perfect and the marking options are tremendous. All that is backed up by a beautiful and thoroughly researched history and markings booklet. You may not think that we really need another D.VII kit, but these ones are historically important and fit in well to the existing series, having the beautiful A-D engine as well.
Thanks to Eduard for the review sample, and to IM and Matt Bittner for letting me build it.