
RS models 1/72 A.V.I.A. FL.3
By Andrew Bertschi
Introduction
The former A.V.I.A (Azionaria Vercellese Industrie Aeronautiche) company, based at Vercelli in northern Italy, was formed in 1938 by F. Lombardi, a well-known pilot of the day. Their first project was a small, two seat light touring-training aircraft known as the A.V.I.A. FL.3. The FL.3 was of mixed construction and intended to fill duel roles; an economical sport tourer and a tandem seat basic trainer, so both open and closed cockpit versions were developed. The fuselage was made from wired braced steel tubing covered by aluminum coated wooden panels with metal engine and fuel tank covers. The entire wing assembly was constructed of wood with fabric-covered control surfaces.
 The prototype FL-3, powered by a 45hp Czech built Persy II 4-cyl opposed air-cooled engine, first flew in late 1938. The design fulfilled specifications issued by the Italian Air Ministry for a low cost aircraft suitable for use with Italian Aero Clubs and the Regia Aeronautica selected the FL.3 as an initial trainer. Versions of the FL.3 produced up through 1944 were powered by an uprated 60hp C.N.A. D/IVS engine, derived from the Persy II.
Military flight instructors criticized the FL.3's unconventional (for the day) side-by-side seating as well as its lesser durability compared to standard military trainers so in Italy most ended up being utilized by aero clubs. All together, 355 examples were built during the war. In 1941 Croatia ordered 20 examples that were used for training and anti-guerilla operations. Following the Italian armistice of 1943, German officials confiscated 250 examples from the RSI government to be used in French and Austrian based Luftwaffe flight schools.
 Production resumed again after the war and A.V.I.A. was taken over by Lombardi during 1947. At that point the name was changed to the Lombardi FL.3. During postwar production, a limited number were also built using Continental, Lycoming and Walter Mikron III 4-cyl engines. By the time production ended in 1948, A.V.I.A. and Lombardi had built around 700 aircraft in total. A fascinating side note is that during 1947 pilots training for the clandestine Israeli Air Force flew FL.3s at a flight school set up at Rome's Urbe airport.
The Kit
 This kit is one of a series of three limited-run injection FL.3's issued by RS Models several years ago. This is the only version to feature a closed canopy - the other two can only be built with open cockpits. The flimsy, open ended box contains a single sprue of pale brown plastic parts, a small photo-etched fret, a pair of finely detailed cast resin engine cylinders and a resin nose section, a single vac-u-form canopy and a nicely printed decal sheet with four options; two Italian ANR aircraft, one Luftwaffe and one Croatian machine. The 38 injected parts are crisp and accurate with good detail throughout though some of the more fiddly parts such as the control columns are overscale and clunky. The plastic used is easy to work with and everything fit pretty well.
Typical of limited run kits, all joints are of the butt variety so pinning them during assembly is strongly suggested to enhance structural integrity - I did this on every major joint during my build. In addition, most of the landing gear parts are extremely fragile and as the plastic was so weak, I ended up reinforcing the main gear legs with hypodermic tubing and also replicated several of the landing gear braces with metal wire.
There isn't a lot of published material on the FL.3, at least in English, but I was able to find a number of useful reference photos and factory illustrations of the cockpit and engine areas for detailing. As the instruction sheet is quite basic, all of these helped a great deal.
Fuselage Construction
Before going any further, I want to mention that I built this kit several years ago and have unfortunately forgotten some of the minute details. That being said, as with most of my builds, I start with the smaller sub-assemblies first.
 In this case I cleaned up the wheels, propeller, resin engine cylinders, tail surfaces and wing sections, thinning the leading and trailing edges of the latter two items. The engine cylinders where cleaned up, dry fitted and then pins were attached so they would seat in the resin nose section. At this point I also reinforced and pinned the tailskid, which is small and very fragile. Then I made and fitted a set of four tiny ejector exhaust pipes (the kit provided parts were for a different version of the FL.3) and I painted the cylinders Gunze Metal Black. After drying, the cylinders were cleared, given a wash and then set aside to dry. Later they were dull coated in advance of some light dry brushing to bring out more of their finely cast detail. Once the other parts were prepped, all were sprayed with a few light coats of primer and set aside to dry.
Now it was time to join the fuselage halves. As this is a limited-run kit, a lot of dry fitting and careful sanding of both halves and the nose section were required to make everything line up correctly. One thing I did not like was the kit seats; their shape and cushion detailing made them look like small chaise lounges. I replaced both with a pair of DC-3 passenger seats from the spares boxes that I ended up heavily altering to fit. After modification and thinning, they looked much better than the original parts. The new seats were then primered, painted a dark Tamiya brown, sprayed with clear and then washed with artists' oils before being put aside to dry.
 Next step was the wings, which are simple, one-piece items. I sanded and dry-fitted them where they attach to the fuselage but since it was a butt joint, two brass pins per side were required to strengthen the joint and a few small alignment shims were needed to maintain the correct dihedral. All in all a lot of careful sanding and trial-and-error dry fitting was required before everything looked right. Filler was also required to smoothen everything out, as the fit of the wings was the worst part of the kit. I also ended up having to rescribe the wing-fuselage joint line and redrill a few holes. Once that was done, I masked the main fuselage off and sprayed several light coats of primer on the wing joint area before moving to the next step, the cockpit.
Cockpit Construction
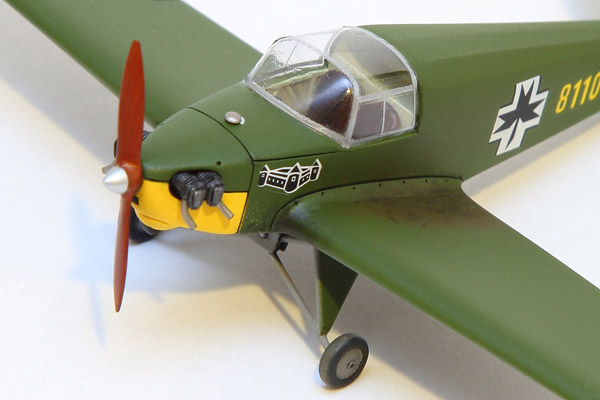
 The FL.3 was one of the first primary trainers to feature side-by-side cockpit seating. That and a broad canopy mean the entire cockpit area is open and many small details are clearly visible. In this area the kit falls down somewhat as the seats do not look right and the control columns are thick and decidedly out of scale. As mentioned above, to rectify the former I replaced the seats. I also scratch-built replacement control columns, added a throttle control, revised the rudder pedals. Some careful painting and a few washes were also used to bring out more of the molded-in detail. After that was dry, the seats were installed and I added a pair of dry-transfer seat belts to them to provide a bit of extra detail and color. All these steps made a difference and cockpit came out quite nice. Once everything had dried for a while, I carefully sealed off and masked the cockpit area in advance of priming and sanding the fuselage exterior.
Fuselage Painting
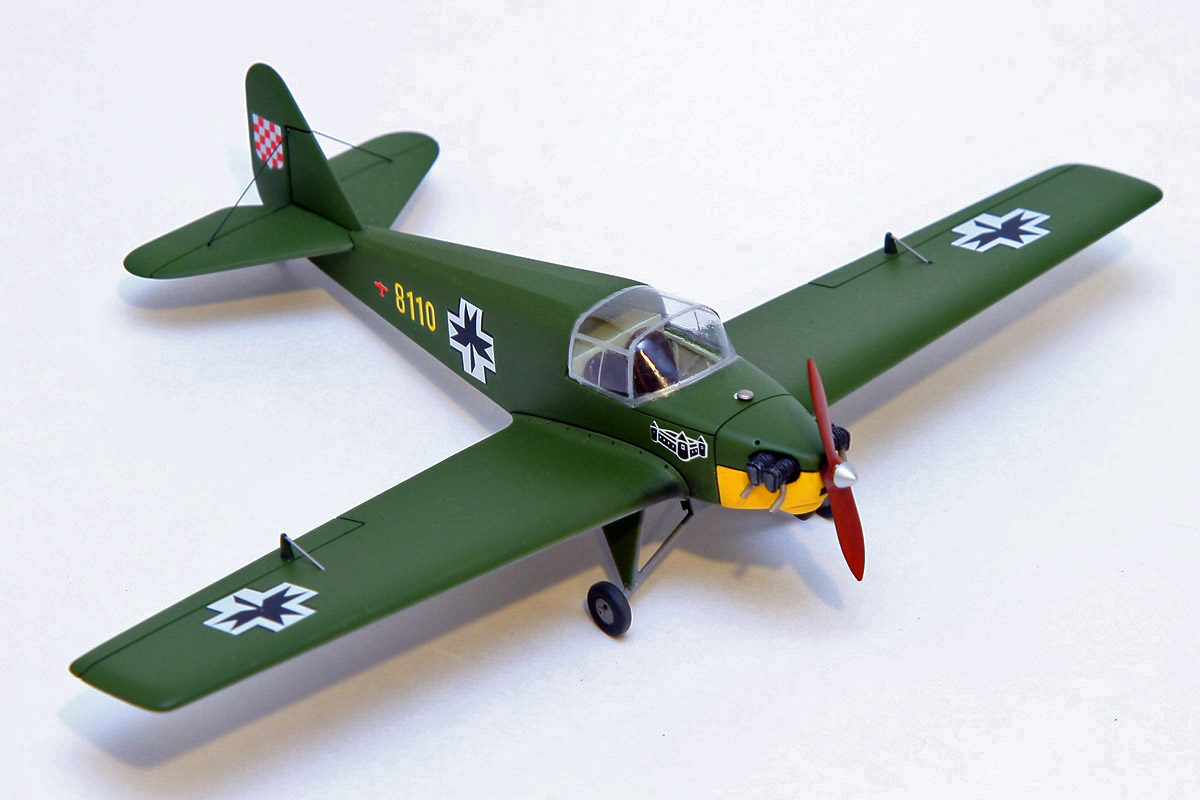
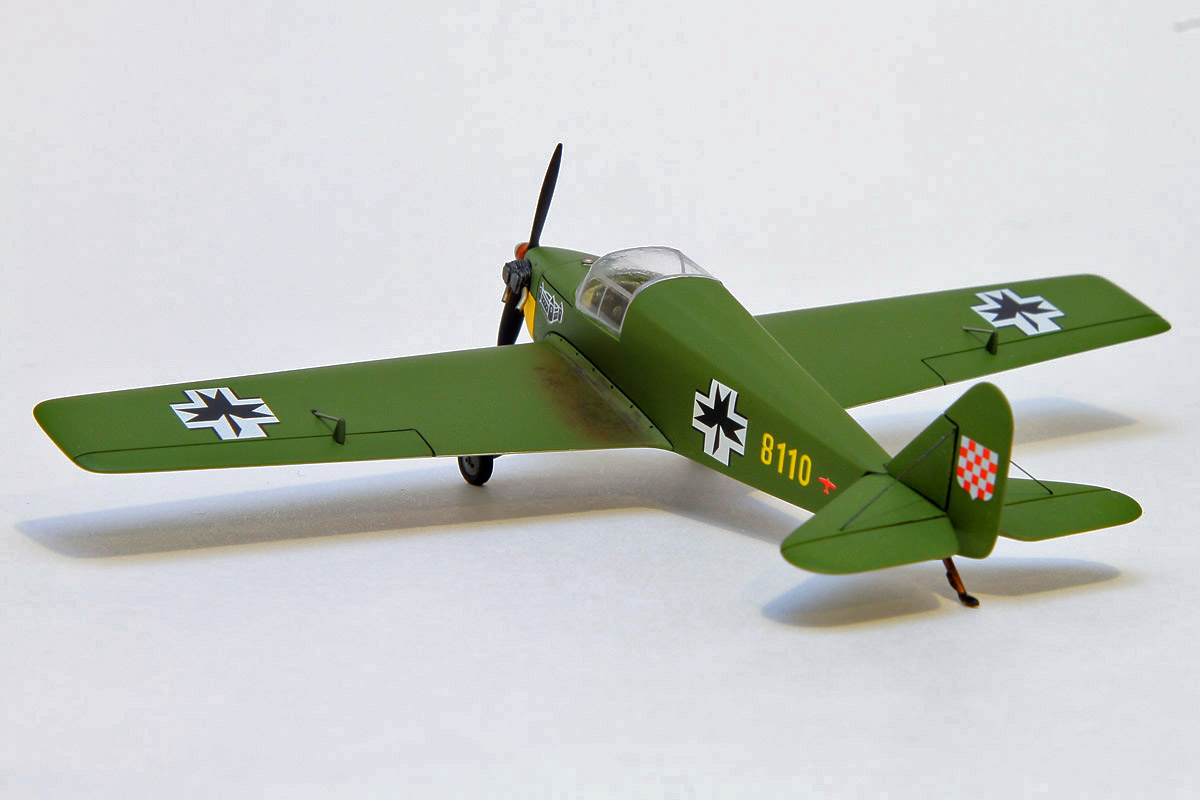
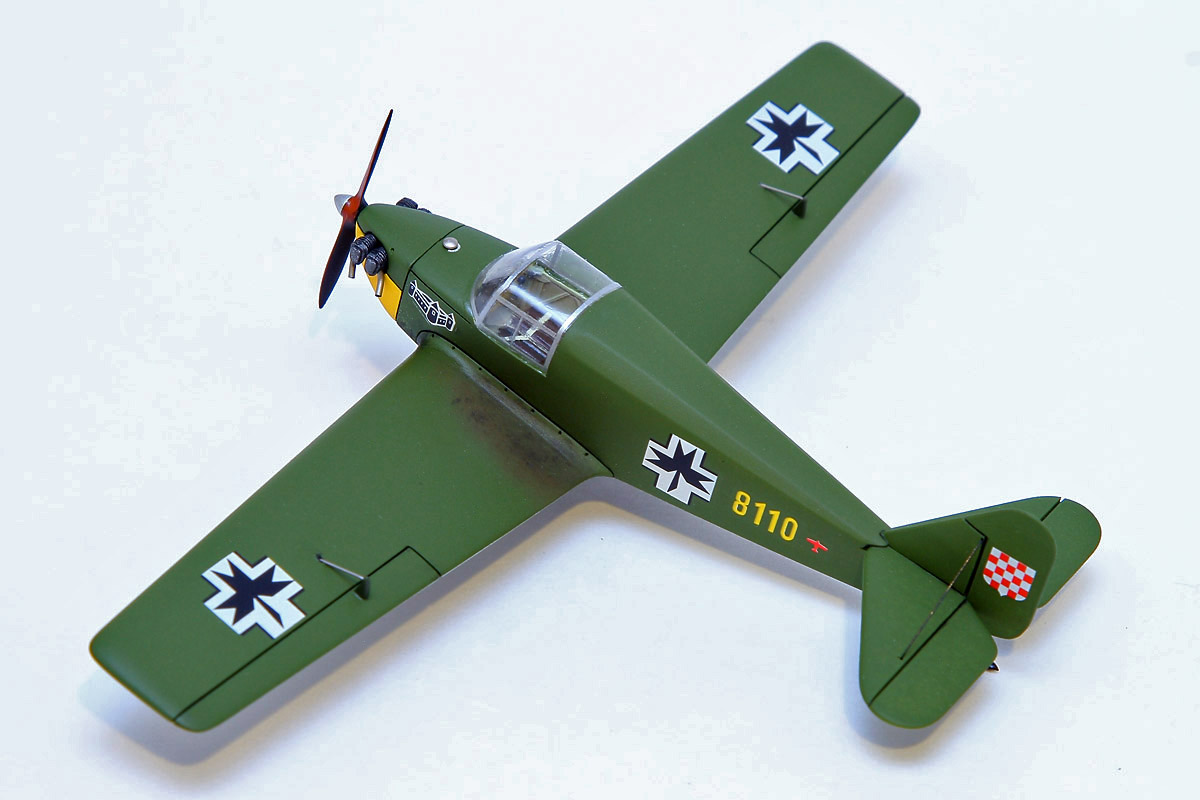
 After laying down grey primer as the base coat, I used lightened Model Master WWII Italian Olive Green and WWII Italian Blue Gray as my primary colors. Both were altered to match ZNDH (Zrakoplovstvo Nezavisne Države Hrvatske – "Air Force of the Independent State of Croatia") color callouts I that came across. After allowing them to dry, I went over everything lightly with a Scotchbright pad and then applied a few coats of clear gloss to seal the paint to apply decals. The canopy was left off during this stage but shortly afterwards, I ran into a completion roadblock. Unfortunately, I damaged the single vac canopy that came in the kit to the point were it became unusable. This meant I had to make a wooden buck to thermoform a replacement piece. I had not worked much with basswood before, so it took time to master working with but after some helpful input from a fellow modeler, I was able to get the buck to the level needed for a suitable replacement. The new piece came out quite nice; thin and clear, with excellent fit that was actually tighter than the kit piece.
Decaling and Final Assembly
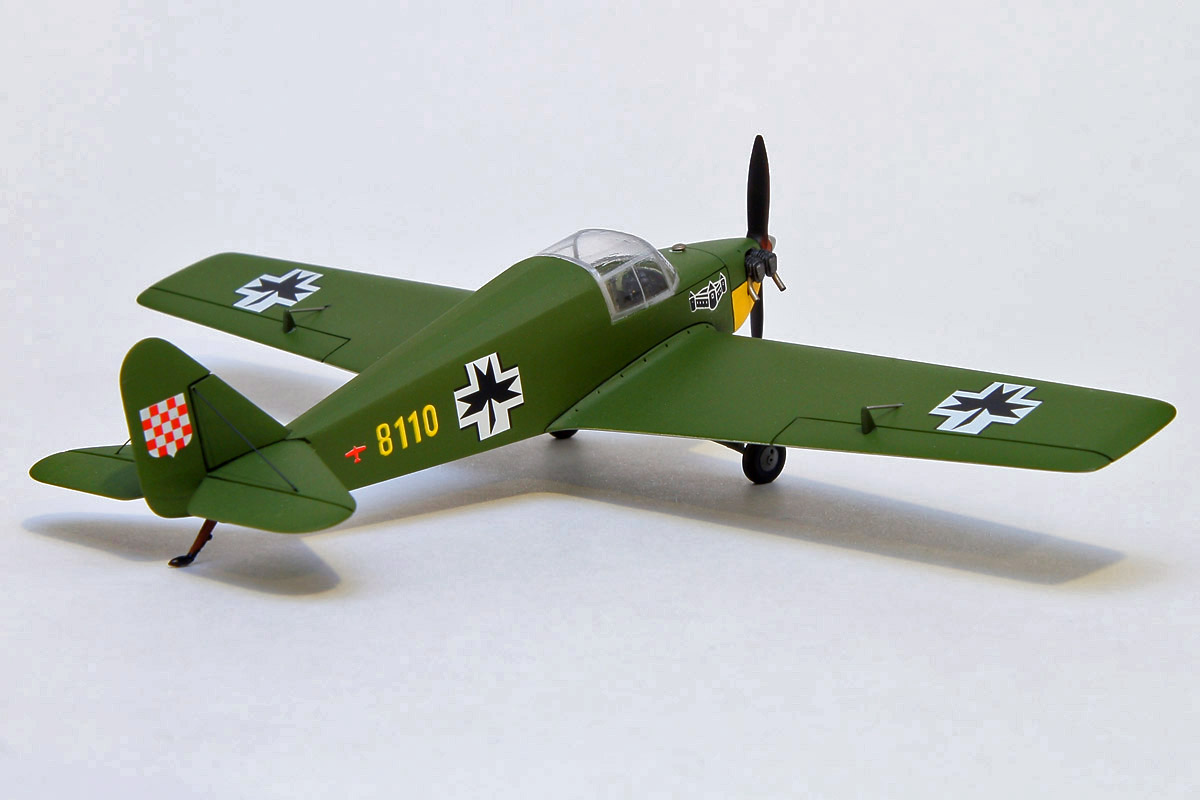
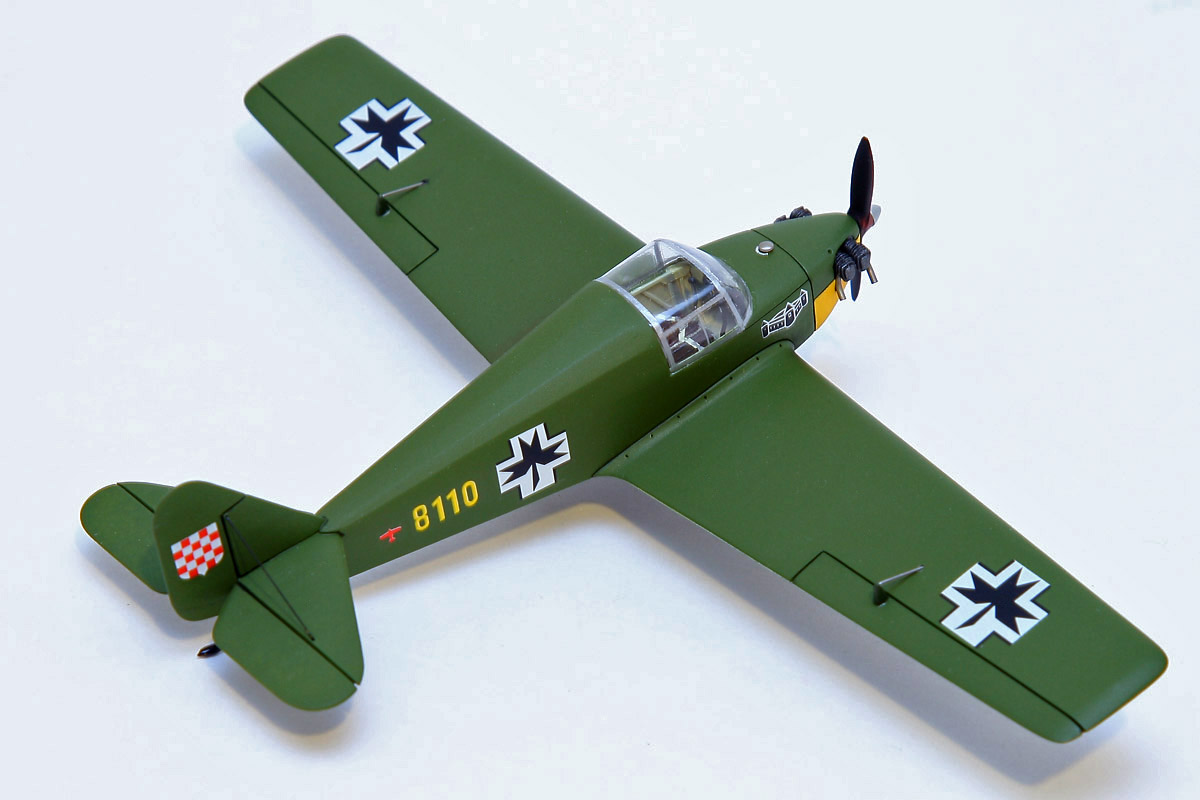
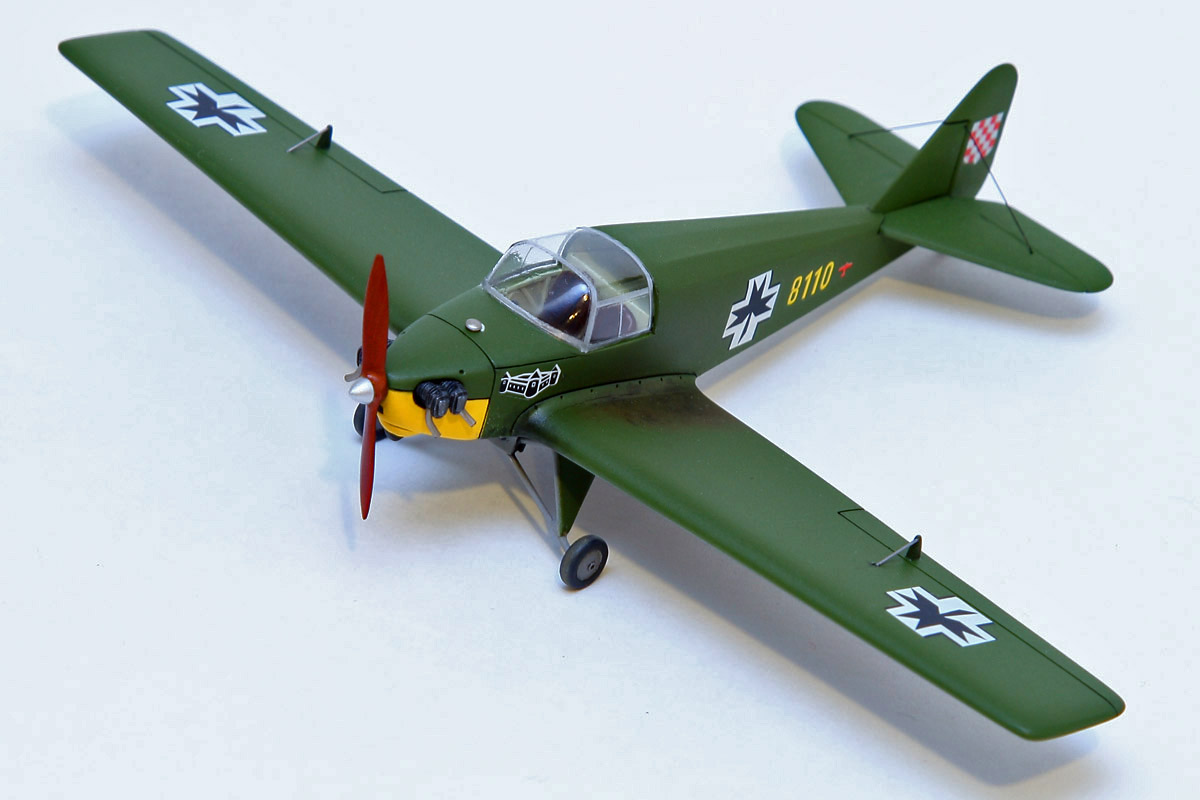
The decals went on with no problems though I chose to trim the clear carrier film in a few places, since some clearances were tight. After applying decals, everything was sealed with flat clear and I lightly weathered the aircraft to give it a used but maintained look. I focused on the wing leading edges and roots, the wheels/tires, fuselage underside and in areas were personal would typically stand while entering or servicing the aircraft. As far as markings go, I went with the Croatian option for several reasons; firstly, I like small air forces and did not have a ZNDH marked aircraft in my collection. Besides that, the castle nose art, colorful tail markings and the slightly odd, armor-like shade of green the ZNDH painted these aircraft all appealed to me.
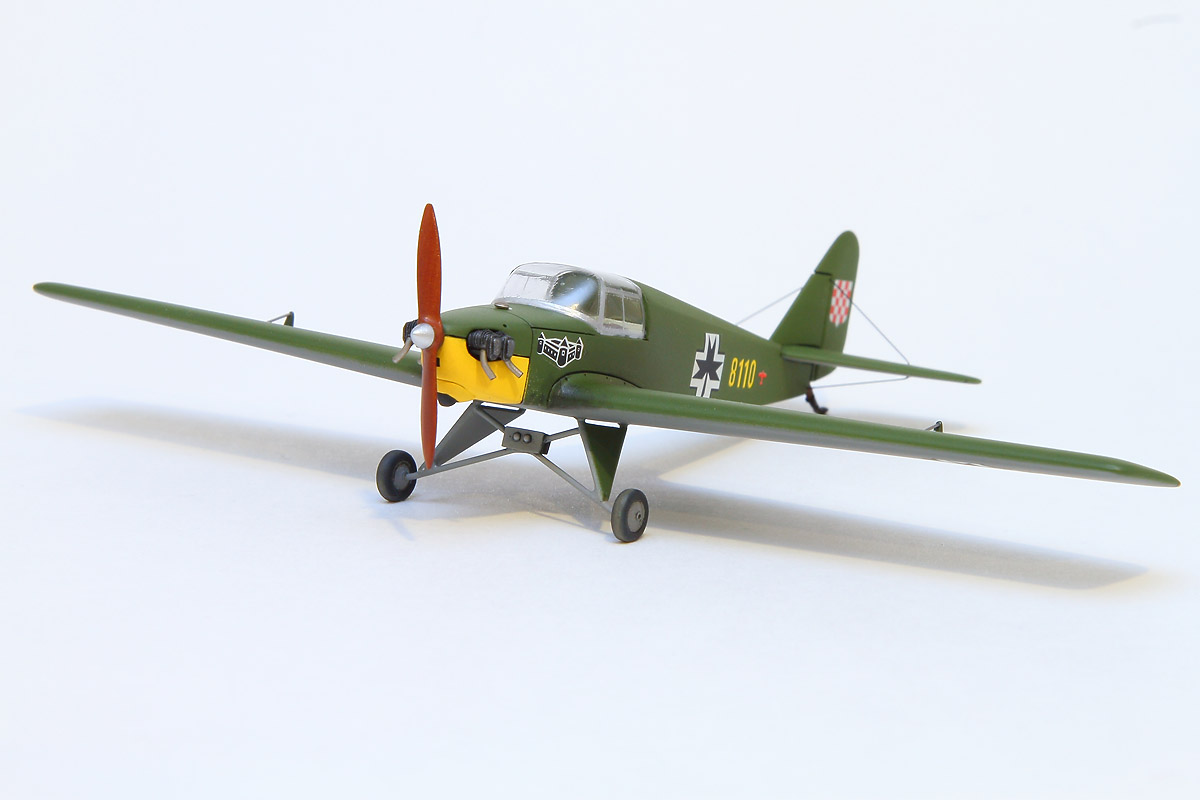
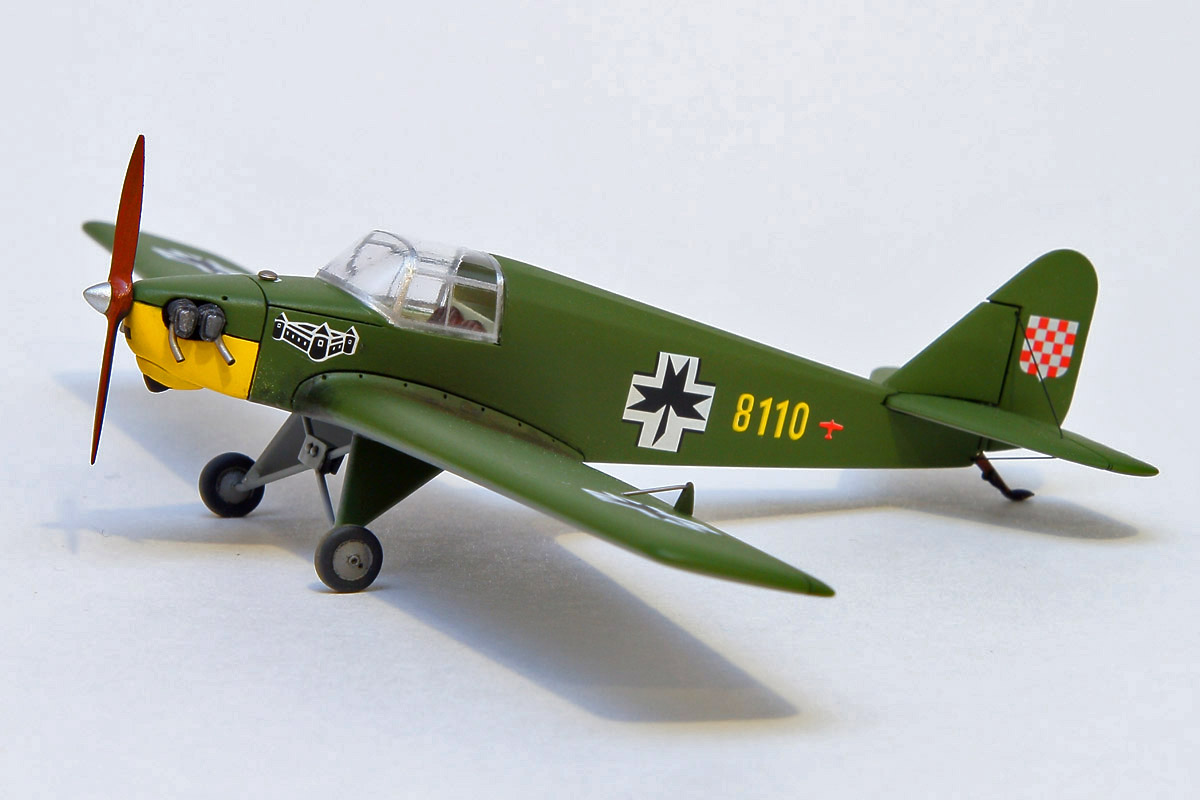 Clear trim glue was used to attach the canopy to the fuselage and once it had dried, I attached and adjusted numerous small pieces of silver decal film that were used to represent the metal canopy framing. Though I felt it looked a little odd, several period color photos taken at a ZNDH flight training school during the war clearly showed the framing to be bright, unpainted metal. After this I attached the remaining external detail parts; the tailskid, exhaust stacks and metal fuel tank cap. The final addition before completion was building and attaching a pair of control horns and cables for the ailerons. While clearly visible in reference photos, they were not included in the kit.
Conclusion
Overall, I am quite happy with the outcome here. Despite a few minor limited-run related issues, I can highly recommend this kit, especially if you like obscure aircraft or small European touring/ training aircraft as I do. My sincere thanks also go out to master modeler and good friend Jim Schubert - his advice on the finer points of mold making and the use of his thermoforming machine were invaluable in the completion of this project!