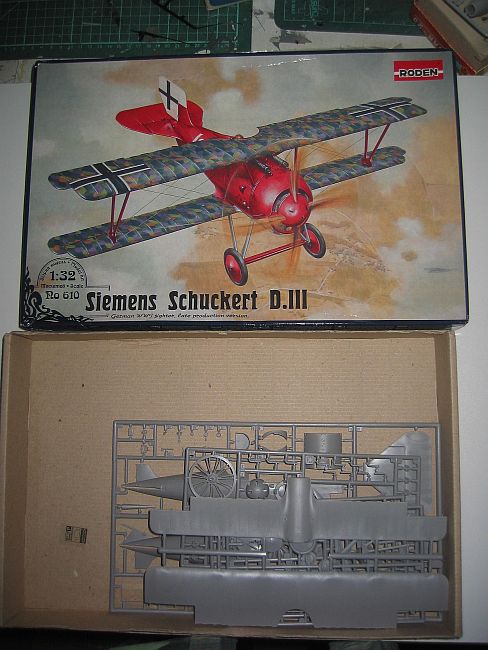
Roden 1/32 Siemens Schuckert D.III
By Paul Thompson
What Is It?
 In 1916 , the Siemens-Schuckert Werke (SSW) was one of a number of companies asked to base a fighter on the much respected Nieuport 11. They came up with SSW. D.I, more or less a direct copy but with a better climb rate due to their own counter rotary engine, the Sh.I. The prop went counter to the engine, with a whole rake of advantages, and the engine was also over compressed. The aircraft wasn't a great success, but eventually SSW came up with the vastly improved D.III, powered by their ShIII engine. This was a very speedy effort with excellent rate of climb and made a very effective fighter, going into service in early
 1918. However, it was very nose heavy and the big airscrew meant landing was a very tricky nose-up affair, so it was best appreciated by good pilots. More to the point, the engine had a distressing tendency to disintegrate after 7 or so hours cumulative use. This lead to withdrawal to iron out the problems, with return to service, fixed, in July 1918. The fixes are reflected in the kit, so don't try to make an early D.III without some surgery. The subsequent D.IV was better still, but a combination of the teething troubles and the end of the war meant that only 41 D.IIIs and one D.IV got to the front before the Armistice.
 Well, that's the salient points extracted from the Windsock Datafile and paraphrased into oblivion by me. If you want to know more, find a copy of the Datafile (out of print as write this in early January 2010). Or have a look at Wikipedia, for a quick and sketchy fix. The history on the Roden instruction sheet is actually quite good. A lot of the aircraft's popularity with modellers has, I think, to do with the fact that Ernst Udet had one, and it was painted red. All over. Probably. In any case, it's a pugnacious looking beastie and would probably have acrued quite a reputation had the war gone on much longer.
Deep Philosophical Moment
 This is a build review of Roden's new 1/32nd SSW D.III. I'm already aware of a lot of moans from various quarters, and I have to say now that I don't believe that most of them are should detract from what is a very fine effort. There are several issues of varying severity, but not enough to have spoiled my enjoyment of the build. Bear in mind, please, that my point of view for this particular kit is based on how well, and (since it's a hobby and not a punishment) how enjoyably it makes up into a reasonably accurate representation of the subject. This is an aircraft I find interesting enough to want a model of, but not enough to spend serious money traveling to far off archives to research. I had at my disposal the Windsock Datafile, and what can be gleaned from the Internet (which included a peek at the maybe-less-than-100%-true-who-knows? Wylam plans). And so, to the build.
What You Get For Your Dosh
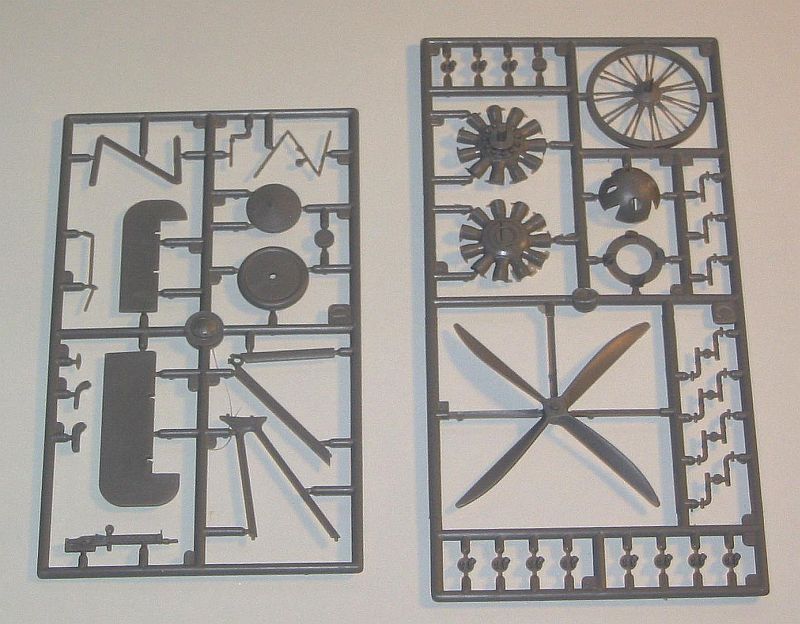
 Rattling around inside a huge box are a number of plastic-bagged sprues, some decal sheets and a film with a printed windscreen. Plus instructions. The instructions were generally easy to follow, and although there's been some complaint about vague placement diagrams, such as for the ammo tank, I found that if you taped everything up and dry fitted, some of the lumps and bumps turned out to be guides which sorted it all out. Steps were logical, and no errors except for on the decal guide, of which more later.
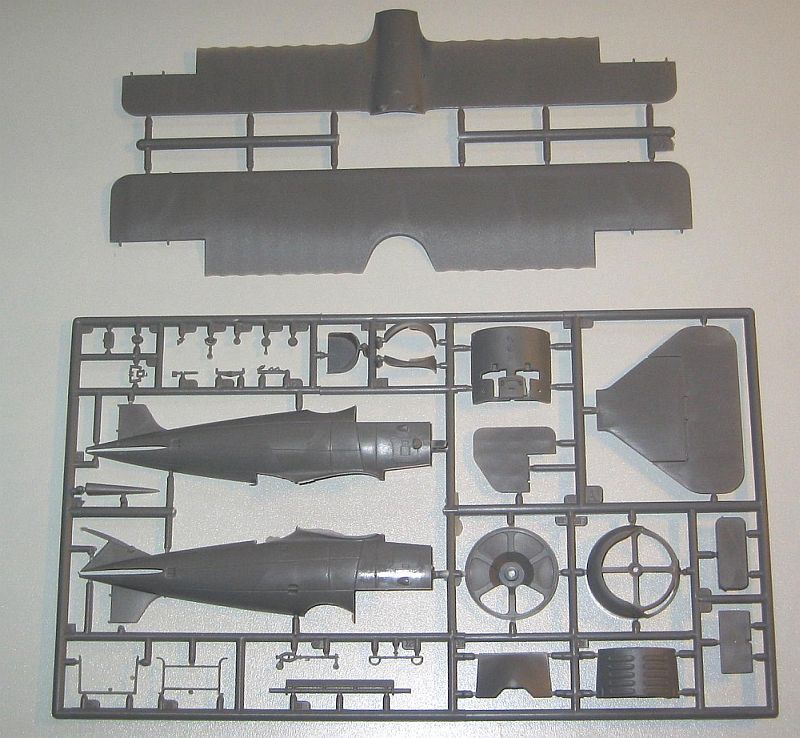
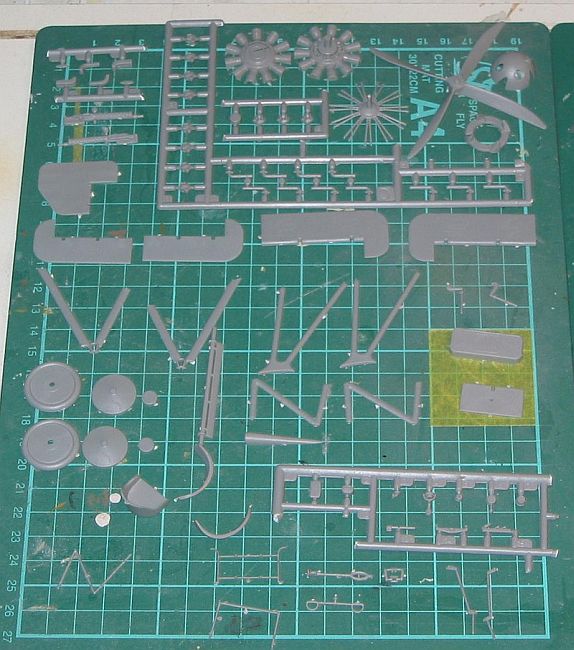 The plastic was soft but well detailed, easy to clean up and with minimal flash in most places, but a trap for the unwary because unless you check really carefully you can miss that on the mating surfaces of the lower wings and fuselage parts. I've heard that at least one person had dihedral warped into the wings. I can only say that in my sample the wings were perfect. The only sink marks were on the Spandau bodies, and placed so as to be hidden after installation. I did have a minor hissy fit over the small sprues with the finer parts, because these suffered mould mismatch by something over 1 millimetre. For controls and fuselage structure this is enough to make a lot of non-rewarding cleanup and restoration to the round that you shouldn't have to do. Just within the limits of correctability without needing to use rod or sprue. Struts so affected needed a fair amount of paring with a blade and then sanding, but still look in scale.
 Nothing was short shot or broken, and because the plastic wasn't too brittle I even managed to cleanup all the pushrods with no breakages.
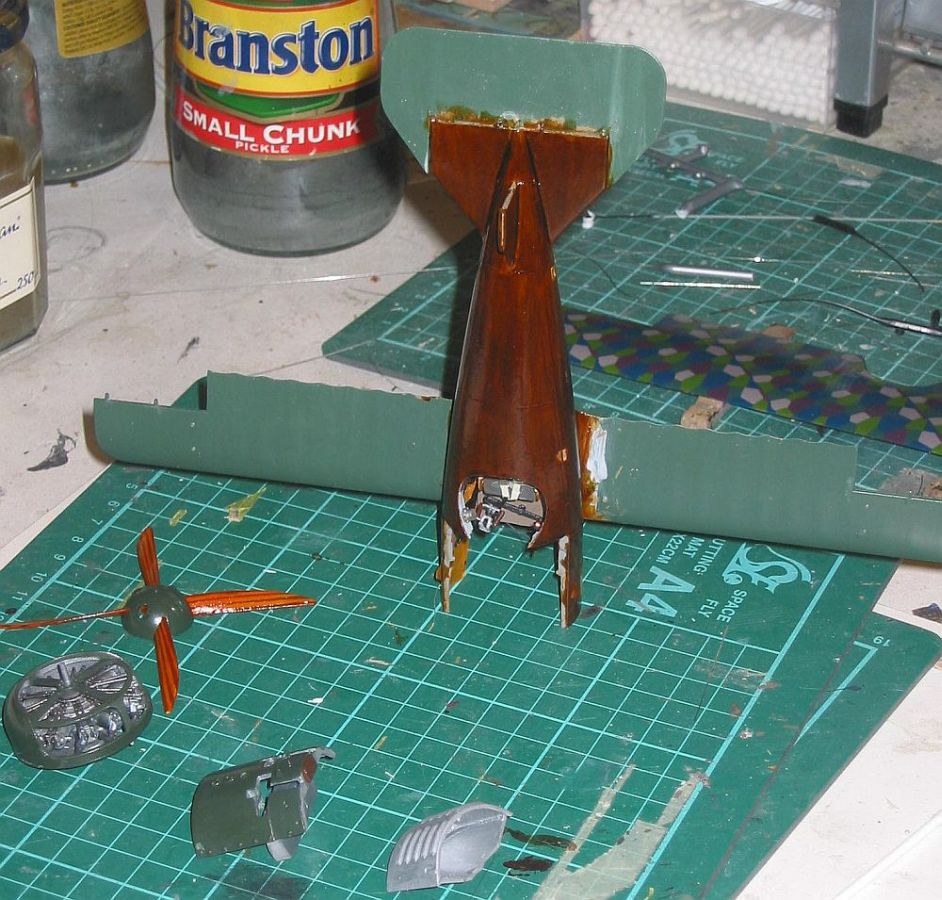
There are two problems with the fuselage that I can see. The glaring one is the enormous trenches where the panels on the real deal are lap jointed. These should be filled and lightly re-scribed. Then there are the 3 hand-holds. Positionally a bit iffy, the main trouble is that they aren't deep enough, and the handholds themselves are just ridges in the recesses. To do a proper job you should drill and file them out, then box the holes with a semi-circular section of tube. The grips can then be re-instated with plastic strip. I attempted neither fix because I wanted to see if it was enough to fill the panel grooves with paint, and suspected that the handholds could also be fudged with paint. Having done so, I suggest that the panel lines are worth taking the trouble to fill properly. Still not sure about the handholds, but I will attempt them if I ever build another.
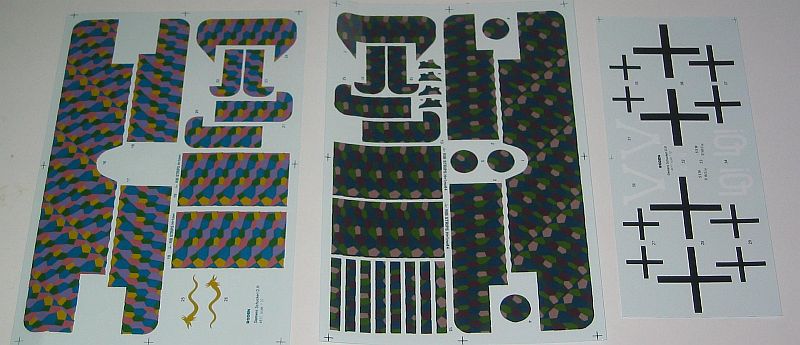
 The decals look good enough. Personal markings and a choice of crosses for 3 aircraft, plus sheets of top and bottom 5 colour lozenge. Each surface has a single decal to cover it, including the wheel covers and the separate ailerons. There are also 8 strips for the interplane struts (only 4 were needed) with separate sections for where they meet to form the vee, and 2 small panels of both top and bottom lozenge out of which to cut rib-tapes.
Accuracy? I don't know. I'm not getting out a tape measure for this one. For the decal options offered, it looks to have all the right features.
Construction
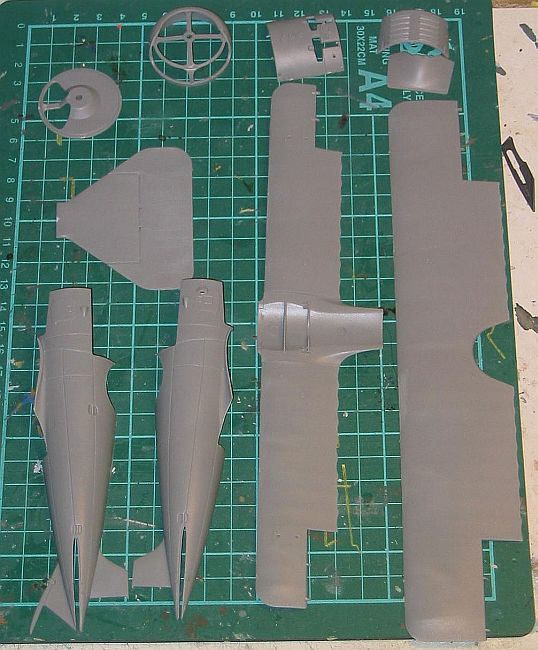
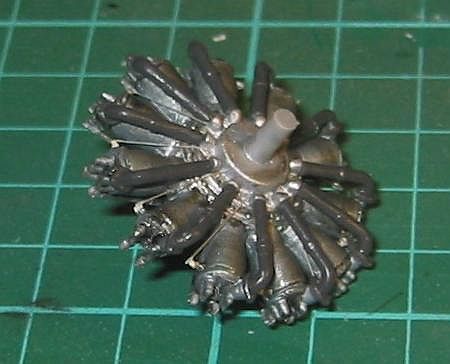
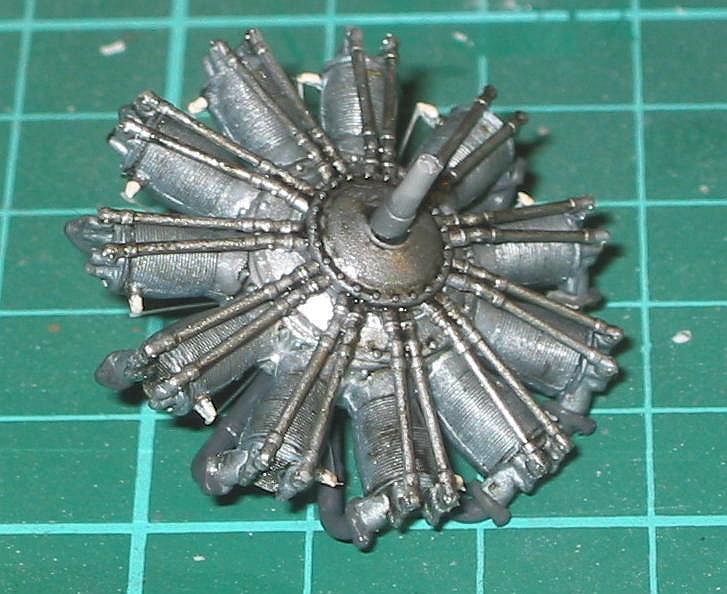
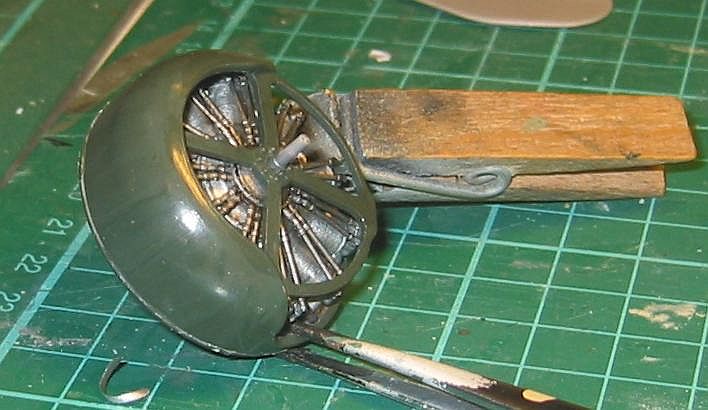
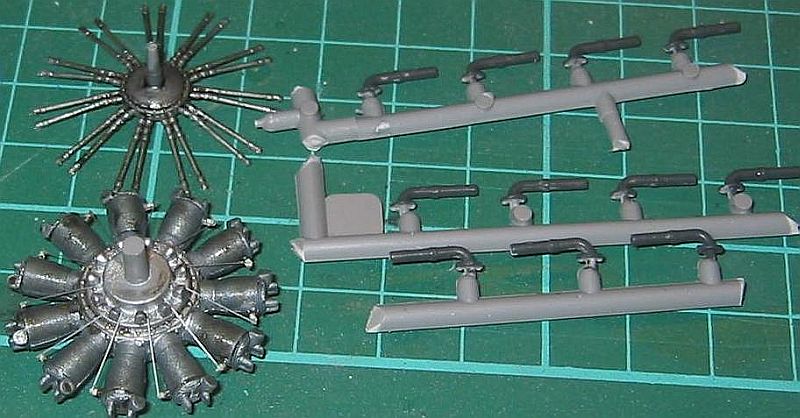 I started with the engine - a bit of care joining the two halves and I avoided having to try to do something about the join line across the cylinder fins. Good enough for me may still need working on for a lot of people, but having taken care to get as close a fit as possible I'm happy with it. I just added HSP as sparkplug leads. I painted this, and the cowling parts, then fitted it all together. It's tight, but the engine does fit without trimming, although if you insist on turning it I suspect the intake manifolds will soon drop off. Looks accurate enough compared to photos on the internet. One pain in this section was that the cowl was moulded with the attachments and seam on the sharpest part of the curve, seen in profile. This meant a fair amount of sanding needed in preparation.
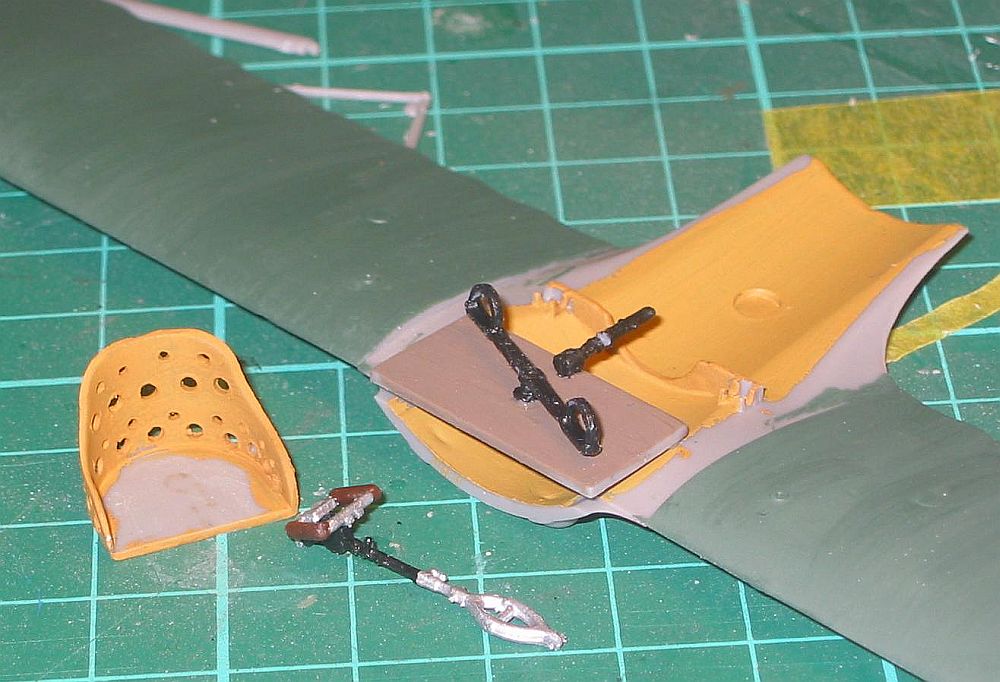
 Next I tackled the cockpit. I don't have much idea how accurate it is, but Roden attempt to supply most of what you see in the 2 Datafile cockpit photos, whose view forwards is good but down and sideways/backwards is limited. Unfortunately they misinterpret the instrument dial and throttle on the port side as a round knob with downwards pointing handle. Found out after it was in place. Sugar. The colour callouts are questionable, and there are no instrument faces supplied as decals, or as raised detail. I found spares to fit. The pushrod system was bent and adjusted to reflect the positions I intended for the ailerons. The rudder bar in the photo has no obvious wires attached. Wylam thought there was a pushrod system here too, but if so it's under the panel the bar mounts to. I did notice two thin wires visible running from under the panel - maybe they're attached to a capstan underneath.
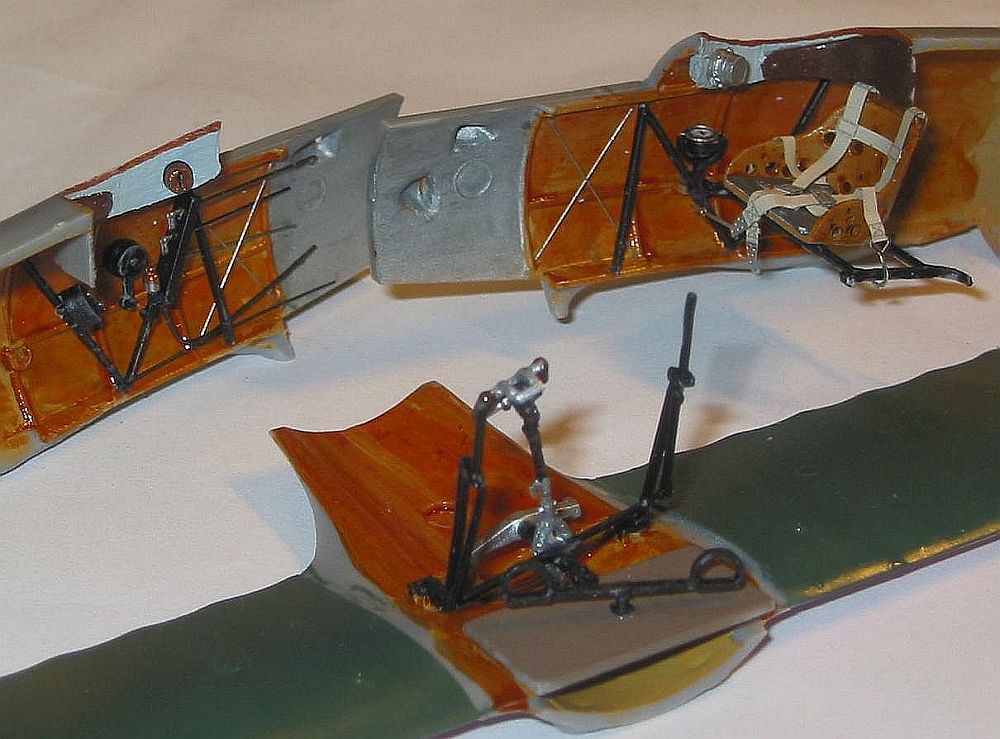
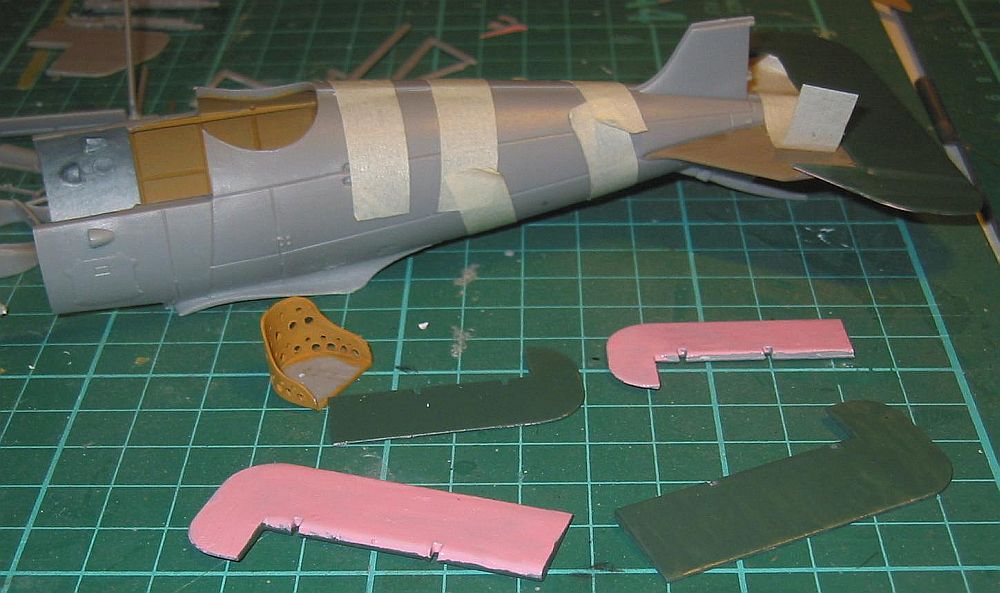
 The seat is supplied as a solid item - maybe it was upholstered in use, but it only takes a few minutes to mark out and drill 2 sizes of holes to show it as in the Datafile. The cockpit shots don't show the seat but you can see thin seatbelts thrown over the edge of the cockpit, and since this is a late-war fighter I've assumed a 4 point harness and used one from the Eduard coloured set. The fairing around the back of the cockpit opening comes in two parts and is hard to attach cleanly. I've filled the join with white glue and painted it as brown leather. The two fairings at the front which carry instruments and switches I've painted grey since I can't tell if they were metal or wood. Photos show something light, no obvious grain.
 The only other cockpit work was to add a couple of trigger cables to the control column, some of the more obvious wiring from fusewire, and the crossbracing in a couple of the forward bays from rolled copper wire. Initially I'd painted the foremost bay, up to where the firewall goes, as aluminium, but later realised it was wood and repainted it. At this point you can close the fuselage. There are 4 holes to be drilled for rigging that Roden point out in the wing root fairings. Before beginning the gluing I
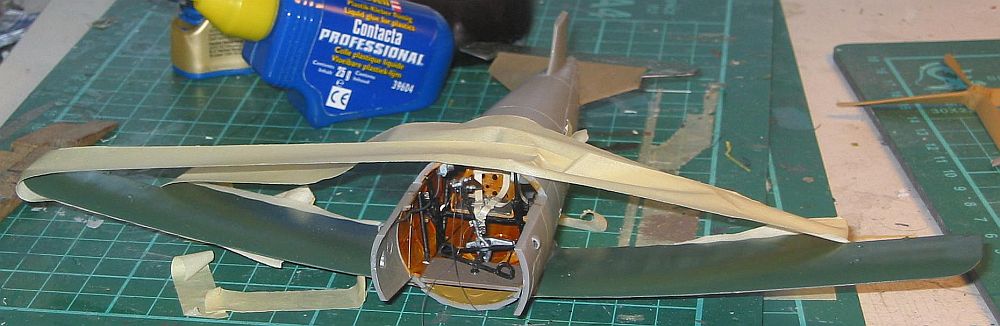
 had spent a lot of time with the fuselage taped up together and with the tailplane in the slot for stability so I could adjust the various panels and the lower wing for fit without damaging anything. I was never very happy with the wing roots, but with some trimming you can get a fairly good join. The forward fuselage decking, and the corresponding be-louvered lower part, don't quite fit well enough when also allowing for the cowling. There is a slight step out to the wooden side panels they fit to, which I couldn't quite eliminate.
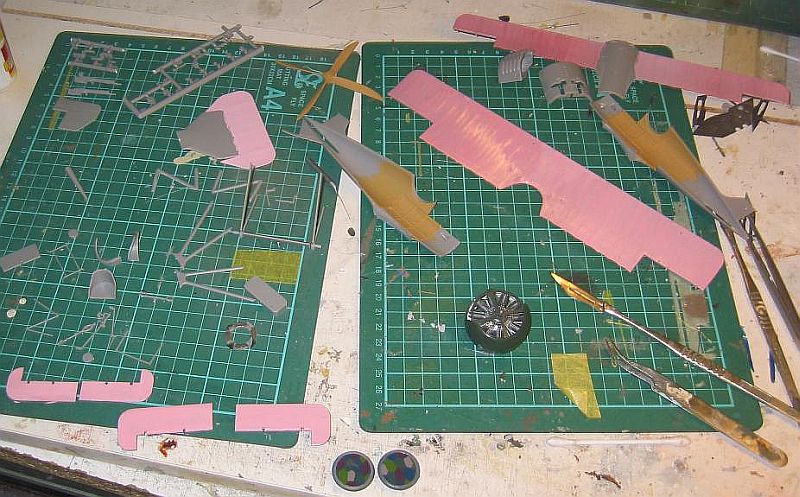
 Okay, enough already, it's supposed to be a quick build, so I joined the fuselage halves and added the tailplane, having adjusted the slot a tiny bit. There was a deep groove left around the tailplane, so I filled it with Tamiya putty and smoothed it off with a cotton bud/Q-tip, then removed the fuselage joint (which only needed a spot of filler). There's a headrest fairing as a separate piece, but it wasn't used on this aircraft. Having primed the lower wing with suitable paint for the lozenge decals it was then added. I bound it all up hysterically with tape to ensure a no-filler joint with the fuselage. On removal of the tape, there was no residual dihedral to bend away and the joint was as desired, but despite my machinations the underside of the wing jutted down 1mm further than the fuselage. This took a fair bit of filler and sanding to obliterate.
 Final step here was to drill out all the rigging holes, and bend the tailplane to the desired angle (easy because it was moulded almost separately, and the hinges stretched rather than broke). I widened the control horn slots a little so that I wouldn't damage the decals later.
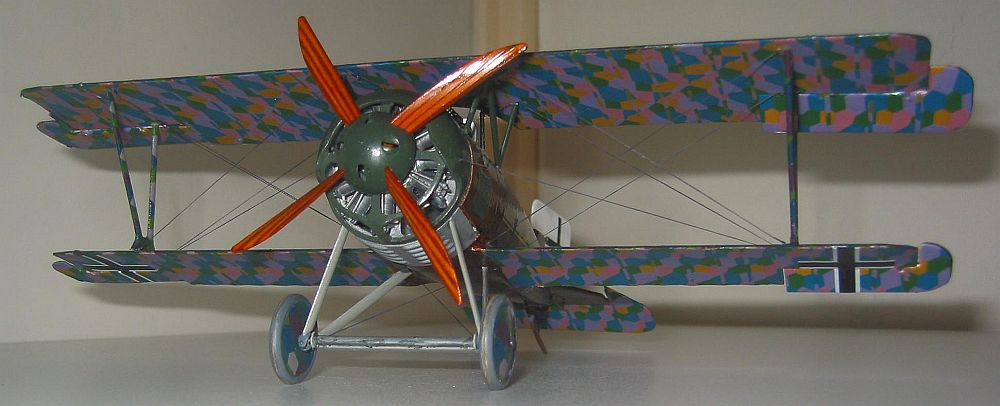
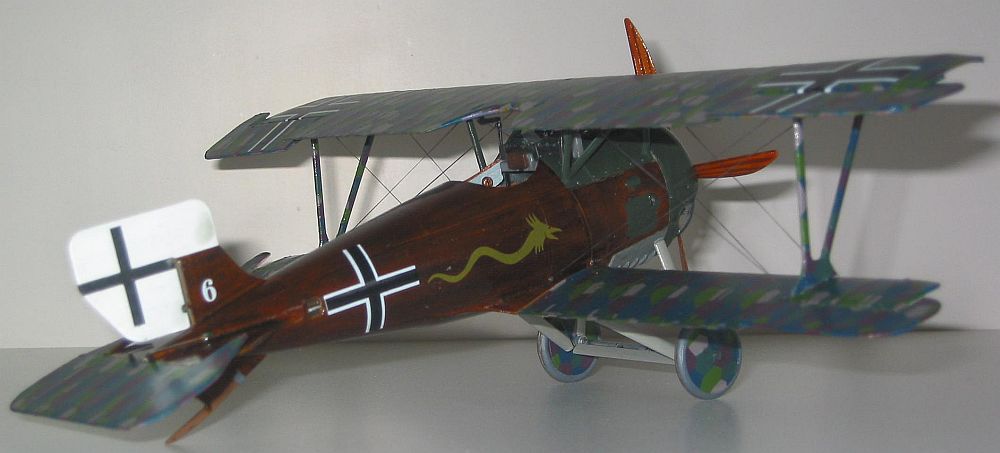
The airscrew and the louvered spinner were painted and joined. Fit was perfect. I also painted, assembled and decalled the wheels at this point.
A Bit Of Paint and Decalling
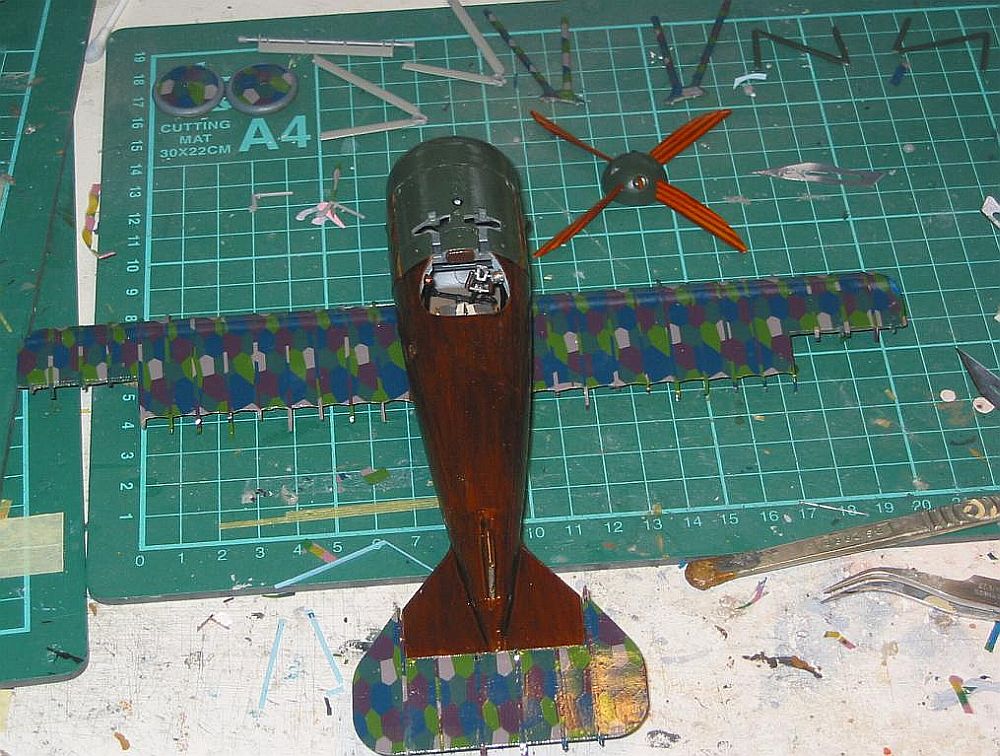
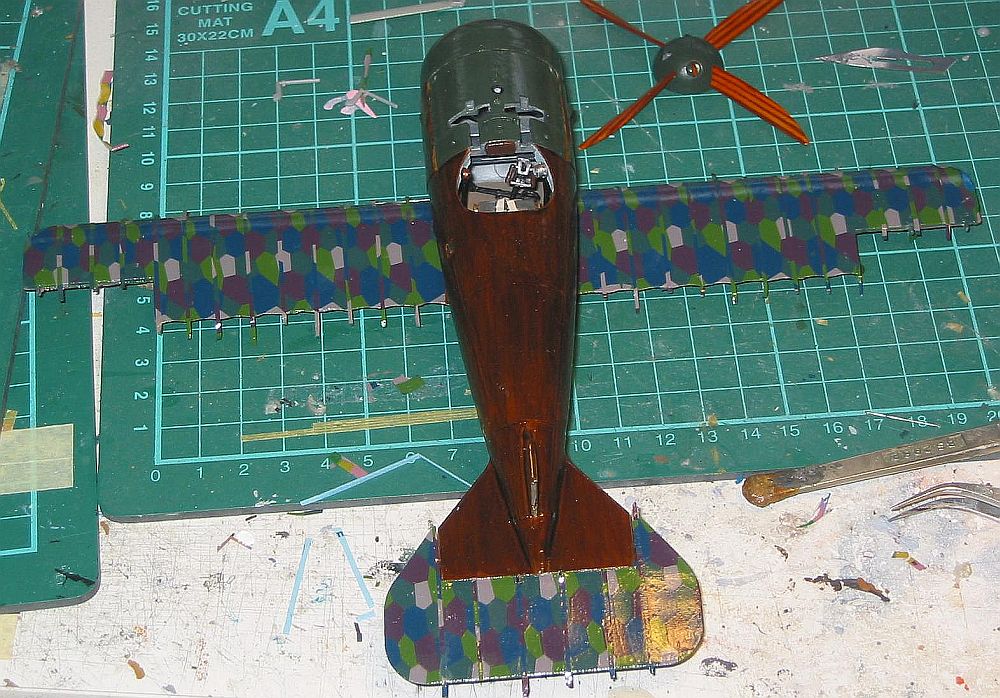
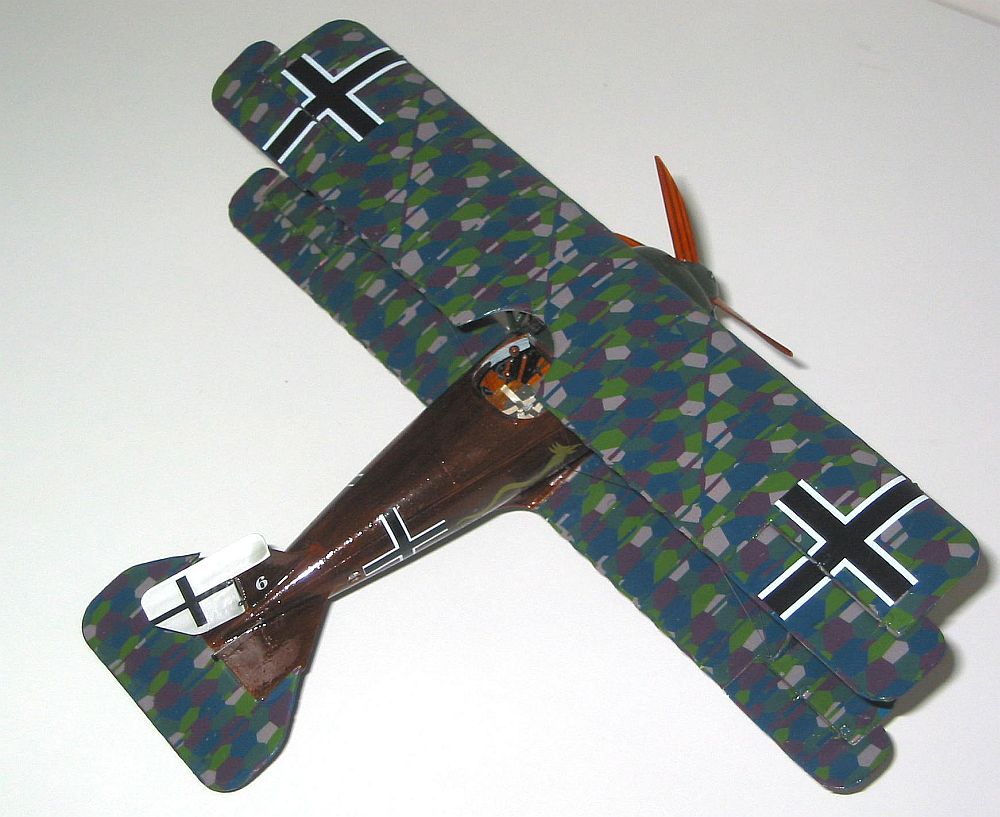
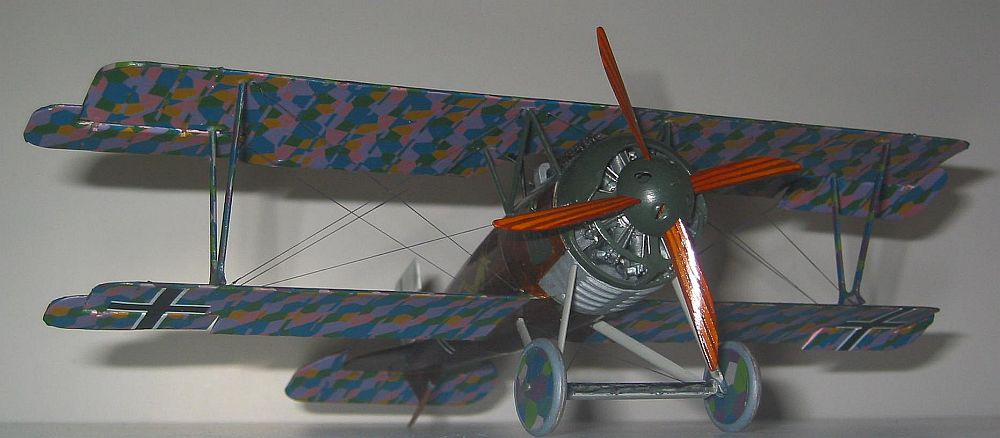
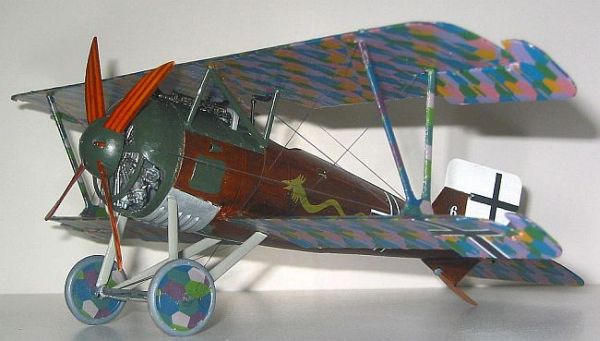
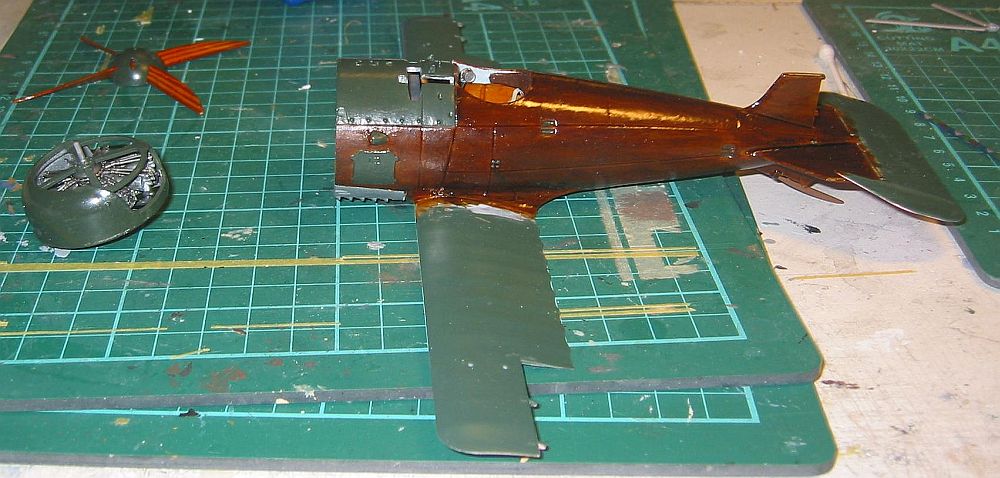
 I wanted to do a very dark wooden finish on the fuselage. The other two options were Udet's ubiquitous red jalopy, and a blue fused one of Ltn. Vallendor, so I took number three, an aircraft of Kest 4b, piloted by Kessler in May -June of 1918. A base coat of Humbrol 110 wood was allowed several days to dry, then individual panels were scribbled over with a darker brown watercolour pencil. A coat of Tamiya clear orange was messily brushed on in order to blend the pencil work into something less scruffy, then followed by 3 overcoats of a mix of the clear orange with green (Shane Weir's idea) and smoke (Bucky Sheftal's idea). I may be an idea thief, but I'm an honest one. I wasn't sure whether or not to add another coat, but decided not to at the last minute. So many brush coats had evened out the panel lines enough that I'm not ashamed of the model, but it wouldn't win any prizes.
 Once thoroughly dried I painted the metal panels with Xtracrylic German black/green, then added the remaining fuselage panels and the cowling/engine assembly.
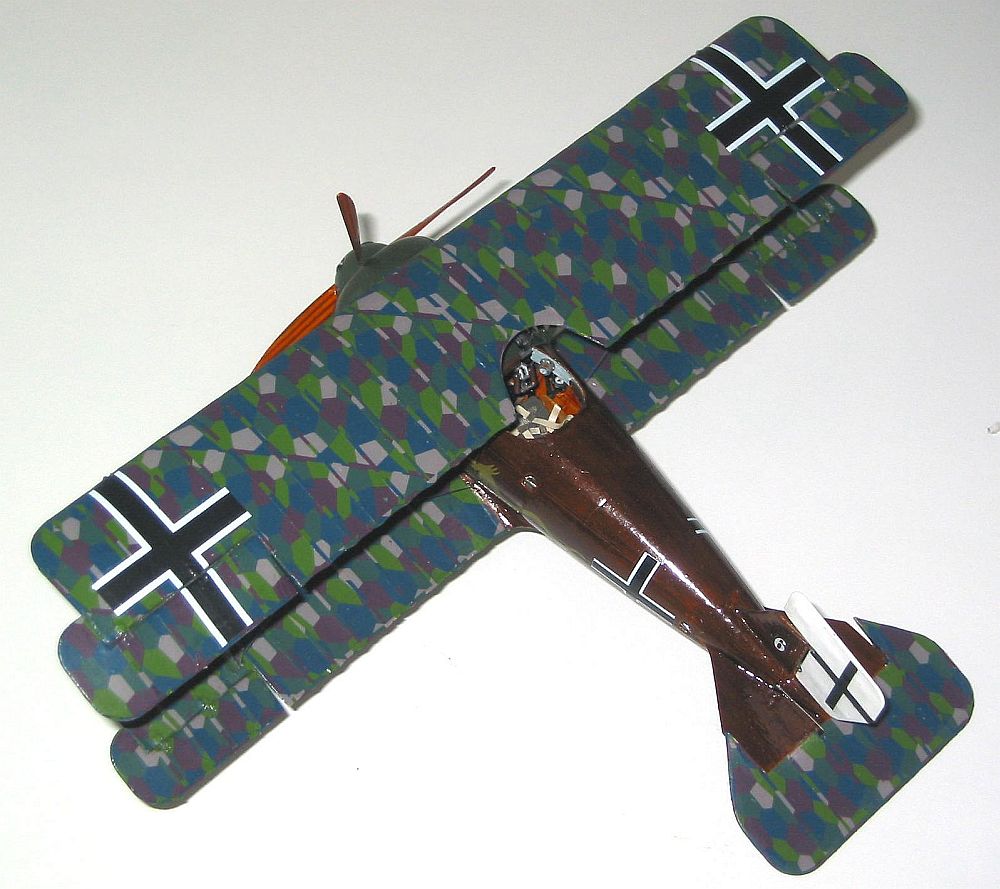
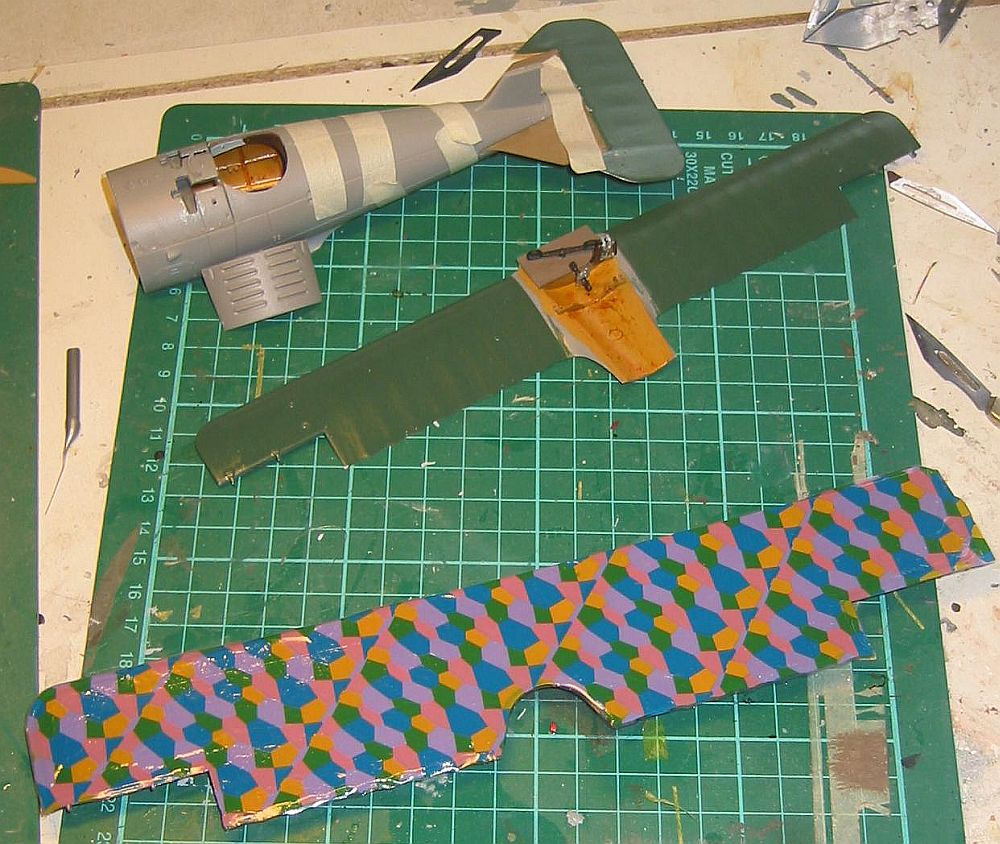
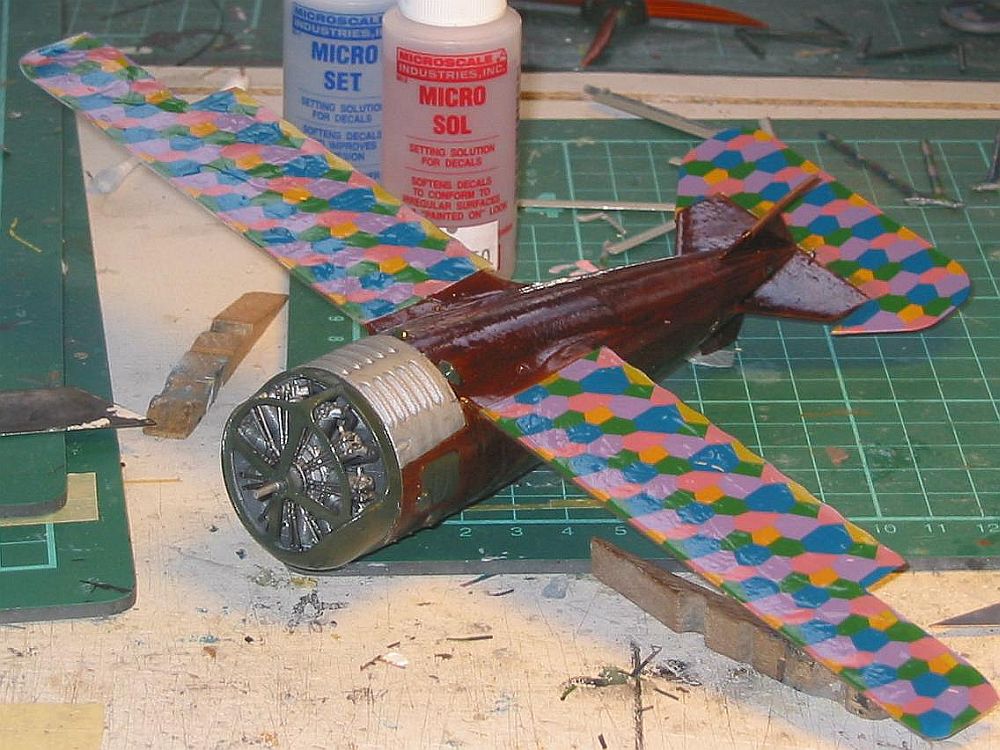
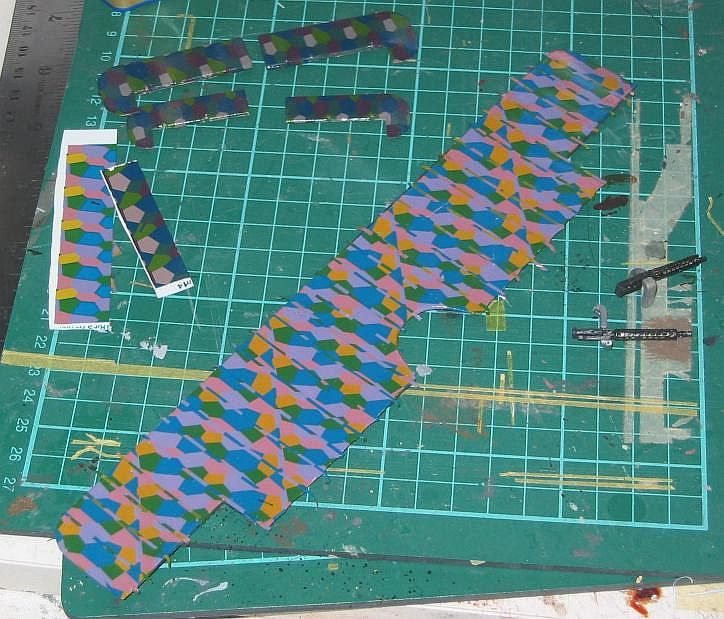
While all this was going on I decalled the top wing. Can't remember the order now, but anyway, the phenomenally important point to make is that the decals worked like - well - normal decals. Roden seems to have finally cracked it with these. Mostly. I used Microset to get them on, but most of this probably washed off as I needed to flood the area to prevent premature sticking. The decals themselves are about 5mm oversize, so position according to the edges you're most comfortable with trimming
 around. 2 coats of Microsol got them to conform perfectly to all surfaces, and with both sides on I trimmed with a knife (didn't fancy sanding the scalloped trailing edges). The same happened with the wheel covers and, wonder of wonders, the interplane struts. The only trouble with the latter is that the real struts may have been painted with larger lozenges, rather than covered with fabric.
 Next up was rib taping, which is tedious but went okay. You're asked to cut 1mm strips yourself. Fortunately the decal is fairly strong so nothing tore, and even when having taped the edges with upperside strip (in small pieces) there was a comfortable amount over. In fact, I did the edge taping once the model was almost finished. Be warned though, although the colours look nice enough to my eye (I'm no expert), the density is a little too low for comfort, so choose your base coat carefully. When all was done I sealed everything with 2 brushed coats of Klear/Future, then drilled out the rigging holes and deepened and tested the strut holes until they fit without a hitch.
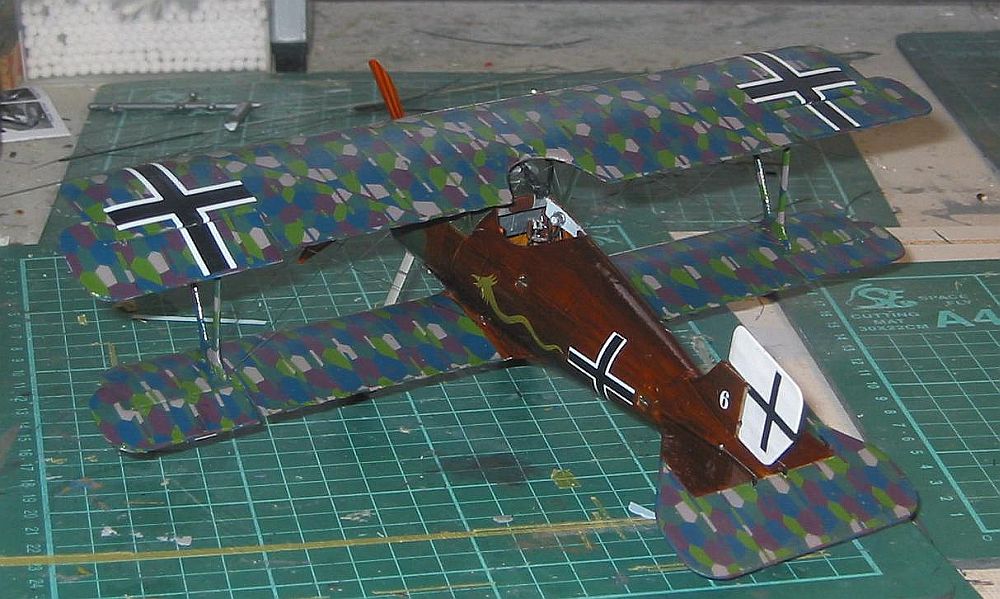
 One thing you'll have to decide yourself, the top wing lozenge is depicted as made of diagonal bolts, which where they were joined have been covered with wide rib tapes. These are printed in place, and they look too wide for me. On the photos I've seen they're not in evidence at all, although I agree with the bolt direction.
The fuselage now being dry, I repeated all the decalling stuff with the tailplane, then added the control horns. The lower wing was also lozenged. Roden provide this as spanwise, which IMO is a good bet.
The Biplaney Bit: Final Construction
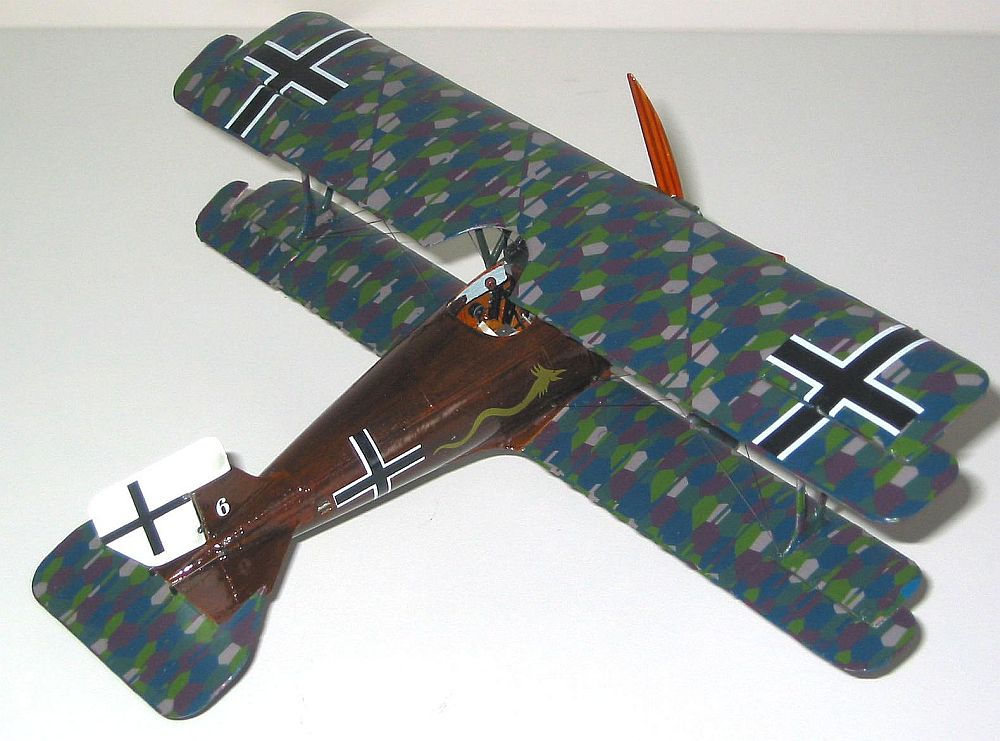
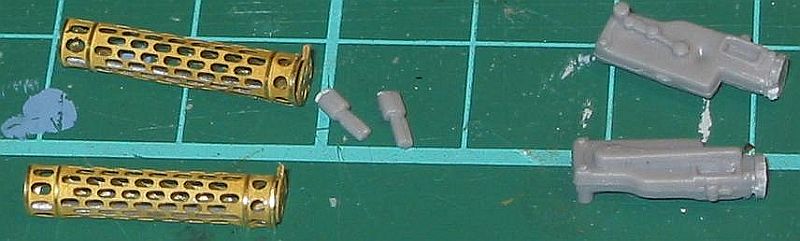
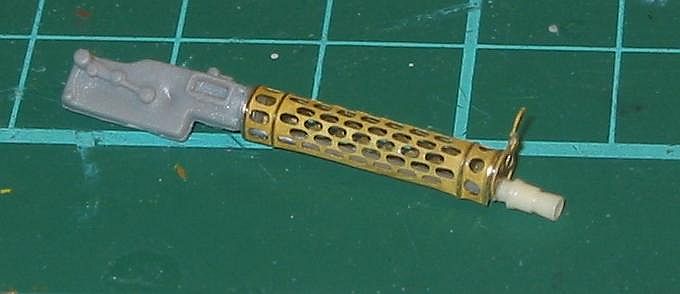
 For the guns, not having any 1/32nd fretted PE cooling jackets to hand, I stole some from a Battleaxe Albatros. I used the Roden bodies, and the muzzles were cut from the bleeding corpses of the Battleaxe resin guns. I used their PE gunsights. It took 3 gravity-induced trips to the floor before I managed to knock them off irretrievably, and I couldn't find suitable replacements. One day I can add them because access on the completed model is good. The completed guns fitted okay in the slots, but the ammochutes were the worst fitting bit of the kit and need a fair bit of butchery. I haven't done it very well and hopefully you can't see them in the photos. I added the windscreen and the little instrument between the guns, with a suitable decal face, and that was that. Top wing time.
 First I faffed around and sorted out the rigging. This time I've used charcoal EZLine, an admirable strechy thing like Aeroclub lycra, but pre-coloured. I cut some over-length pieces, then threaded and glued one end of each to an Eduard 1/48th turnbuckle, cut in half to act as an anchor hook. These sections where then glued into the holes I thought I wouldn't be able to reach later, such as the fuselage under the centre section of the top wing. The top of the lower wing, and underside of the top wing, were than painted with a satin mixture of Revell acrylic matt varnish and Klear/Future (also used on the tailplane, rudder, interplane struts and wheel covers).
 What I did next was to glue each interplane strut to the top wing and let dry after checking they sat plumb, then glued the struts to the lower wing. I think it's easier to do the other way around since the weight of the wing tends to topple it, whereas if you glue first to the lower wing it should be more stable. The fit is positive enough if you deepen the holes. Either way, it's painless. I then trimmed the centre section rigging to just short of length, attached a half turnbuckle, then implanted them in the top wing. Next, I bent the aileron pushrods a bit to reflect the aileron positions, and glued them to the top wing with the rod ends resting in the fuselage holes. The centre-section struts were than slotted into place.
 After a days drying out I added the rest of the rigging, and rolled copper wire for the tailplane control lines. Two bits of EZline were positioned in the rear undercarriage locating holes, and after the axle and legs had been push fitted and bent so they'd locate easily in place the assembly was added, trapping the lines. When dry I stretched the wires over the terminating points in the axle/leg juncture, glued and trimmed. Wheels were then popped in placed, having had the tyre well enough weathered that it looks like I've left a seam down the middle. I haven't, honest! I've not added bungee axle securings because I think the Roden mouldings try to simulate them. Just not very well, which is a pity.
Final Final Bits
 After adding the ailerons( whose slots and hinges fitted with no excavation needed) I added the rest of the decals. They all worked fine, and the white of the national markings (from a separate sheet to the lozenge sheets) was adequately dense, but the instructions have some of the crosses misnumbered. You need to trim them to get the unequal vertical and horizontal arms only for option 3, this one, but they forget to tell you that for the top wing crosses. 4.5mm from each end. Well, that's what they say for the lower wing. In the end I used the wrong ones for that, but matching the positions to the ribs it looks okay, The top wing crosses I also trimmen by 4.5mm per end, and they also look okay. A coat of the satin mix on the remaining fabric surfaces, and one of Klear over the fuselage wood, popped the prop on, and done. Weathering? I didn't.
Conclusions
Well, what do I know? Personally, despite some errors in the kit, I think it makes up nicely into a good looking model, certainly for the price which, ordered from someone in the Ukraine and posted to the Netherlands, was 28 Euros including the postage. It seems accurate enough for a later series D.III, and provides a good basis for those who know more than I to go to town on. I've left the fuselage much glossier than on e.g. an Albatros, because to me that's how they look in the photos. They did, after all, get a high gloss top coat at the factory.
Total build time was about 2 weeks, half of which was waiting for paint to dry.
References:
Windsock Datafile 29, SSW D.III~D.IV by P. M. Grosz.
That Interweb thingy.
Photos and opinions from the World War One Mailing List, https://www.wwi-models.org.