
Special Hobby Lloyd C.V in 1/72 Scale
By MIchael Kendix
Following my review of this kit in 2006, I had always meant to build this wonderful-looking model. For some reason, work and other things just got in the way. Finally, about a year or so ago, I started to build it. However, during that time, I lost interest then finally, about a month ago, I resumed and finished the build.
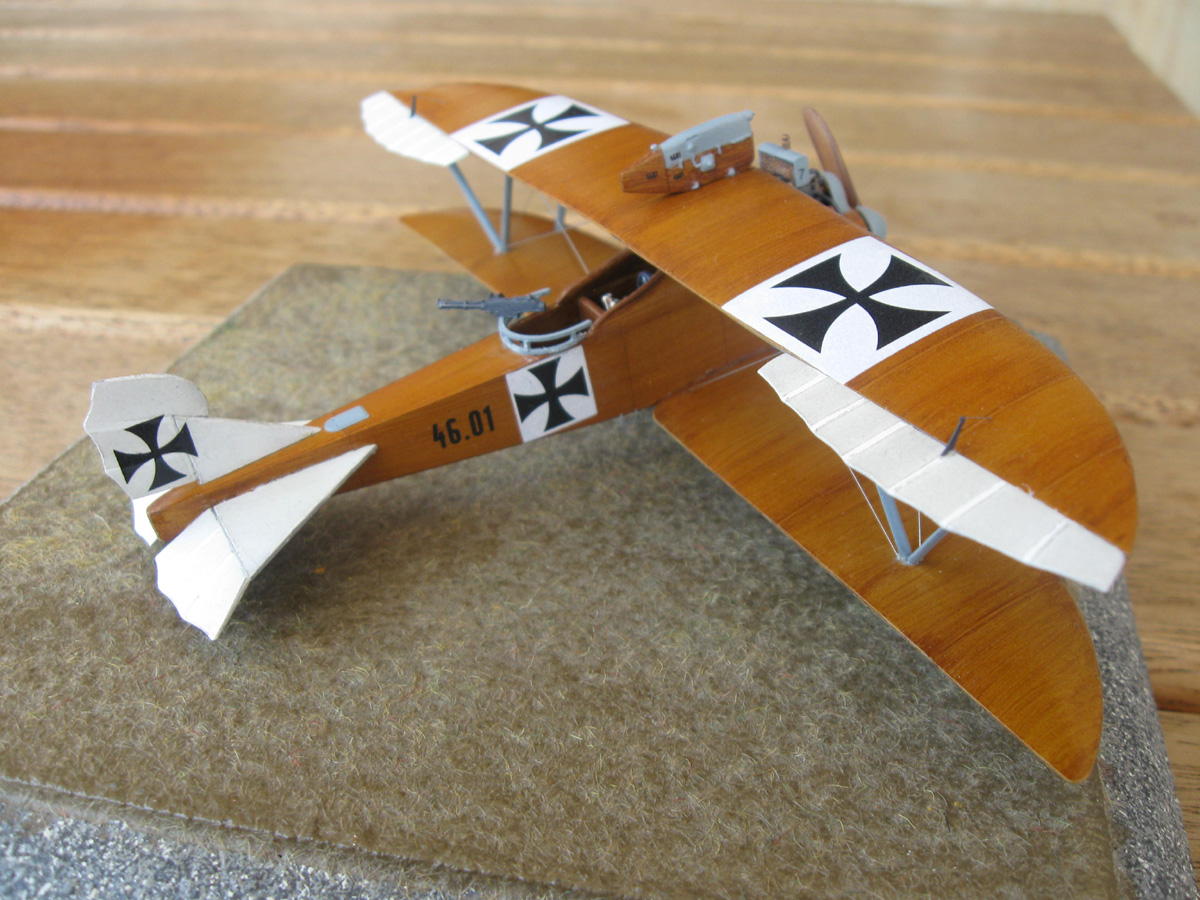
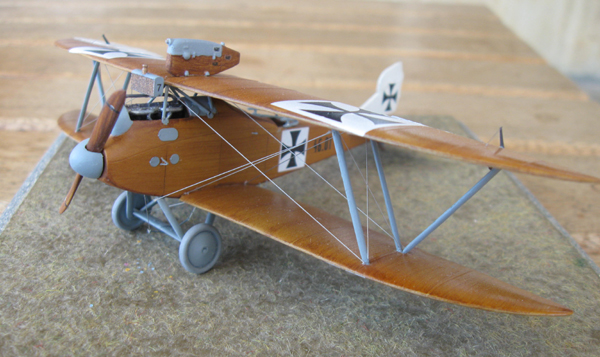
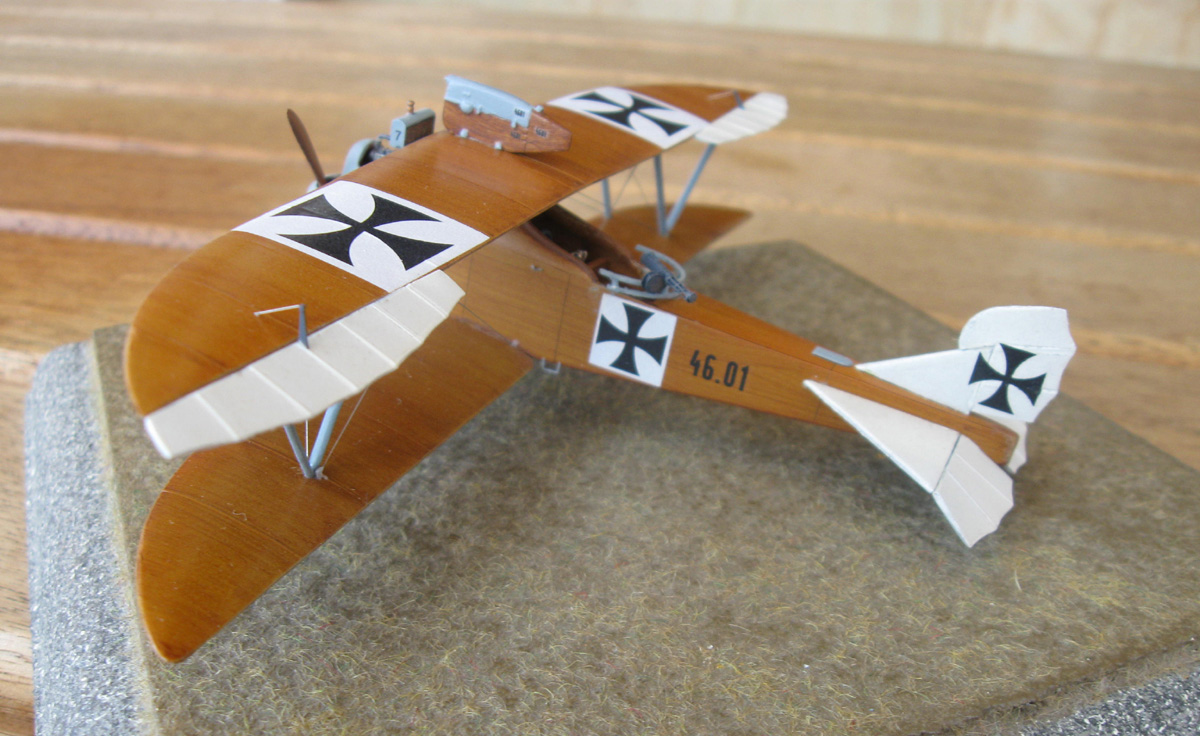
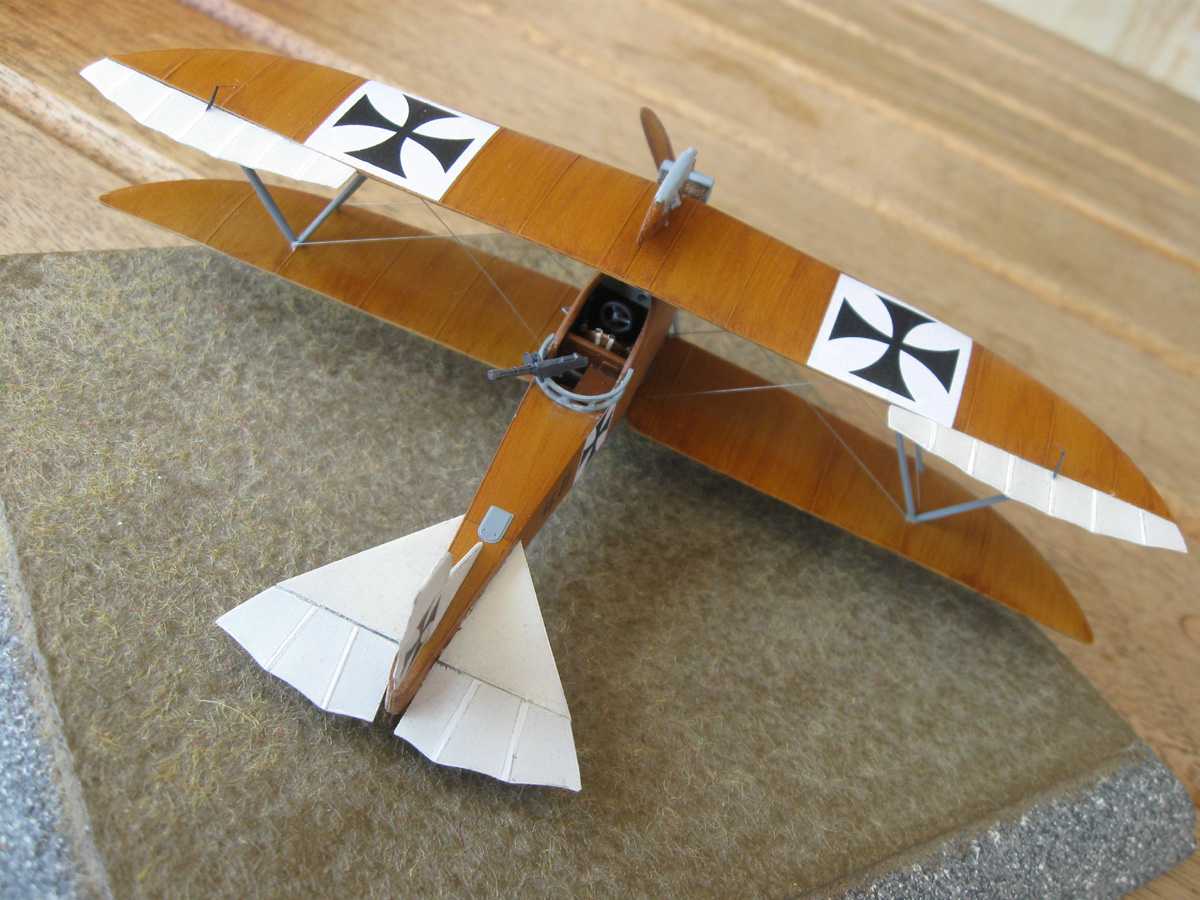
Essentially, I followed the instructions with a few deviations. First, you need to decide which version you want to make. I selected 46.01, which has the gun mounted on the top wing rather than a fuel container. There are also small differences in the color schemes such as the ailerons, which might influence the sequence of assembly – I left the ailerons off till almost the end – they kept on getting knocked off. The 46.01 scheme has the all-over wood veneer. If you want the autumn leaves pattern for the top wing, you should make 46.04.
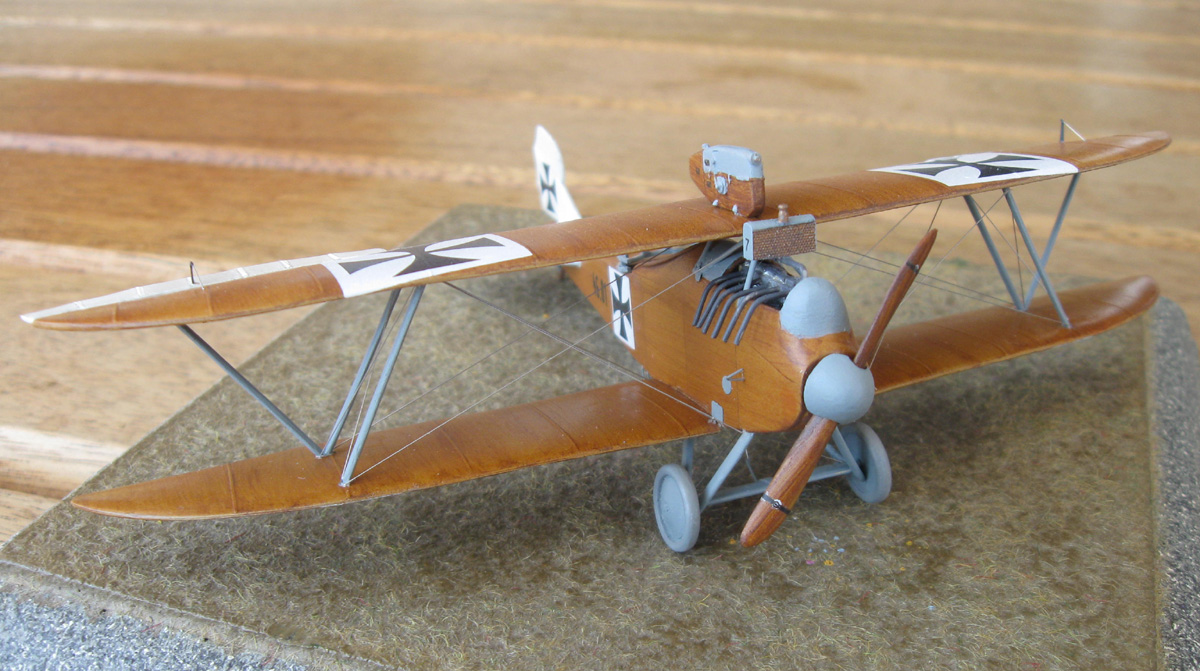
Once the fuselage seams were filled, I began making the wood veneer surfaces. I used my usual method:

(ii) Combine various yellows, browns and reddish browns of gouache watercolor paints on a palette (beer bottle cap) and apply with a damp Q-tip, which gives the wood-grain effect. The received wisdom is that the wood grain on the wings runs chord-wise, not span-wise. (Not everyone knows that, you know.)
(iii) Spray a light coat of Tamiya’s clear yellow and clear orange, which gives further depth and variation.
Next, I glued on the top wing, which went on fairly easily but the cabane struts were too long, so I made my own. I checked at this point, to make certain I had the angle of the interplane struts correct and that the interplane gap was the correct size. Things did seem a little crowded under the top wing so I may have made a mistake but it looked okay to me.
Acknowledgement: my sincere thanks for advice and support from Peter Plattner. Also thanks to various members of the World War One Modeling list, supported courtesy of the University of New Hampshire. Thanks too, to Sandle Hobbies for supplying the review kit and my apologies for taking 7 years to build it!