History
(Edited from Wikipedia)
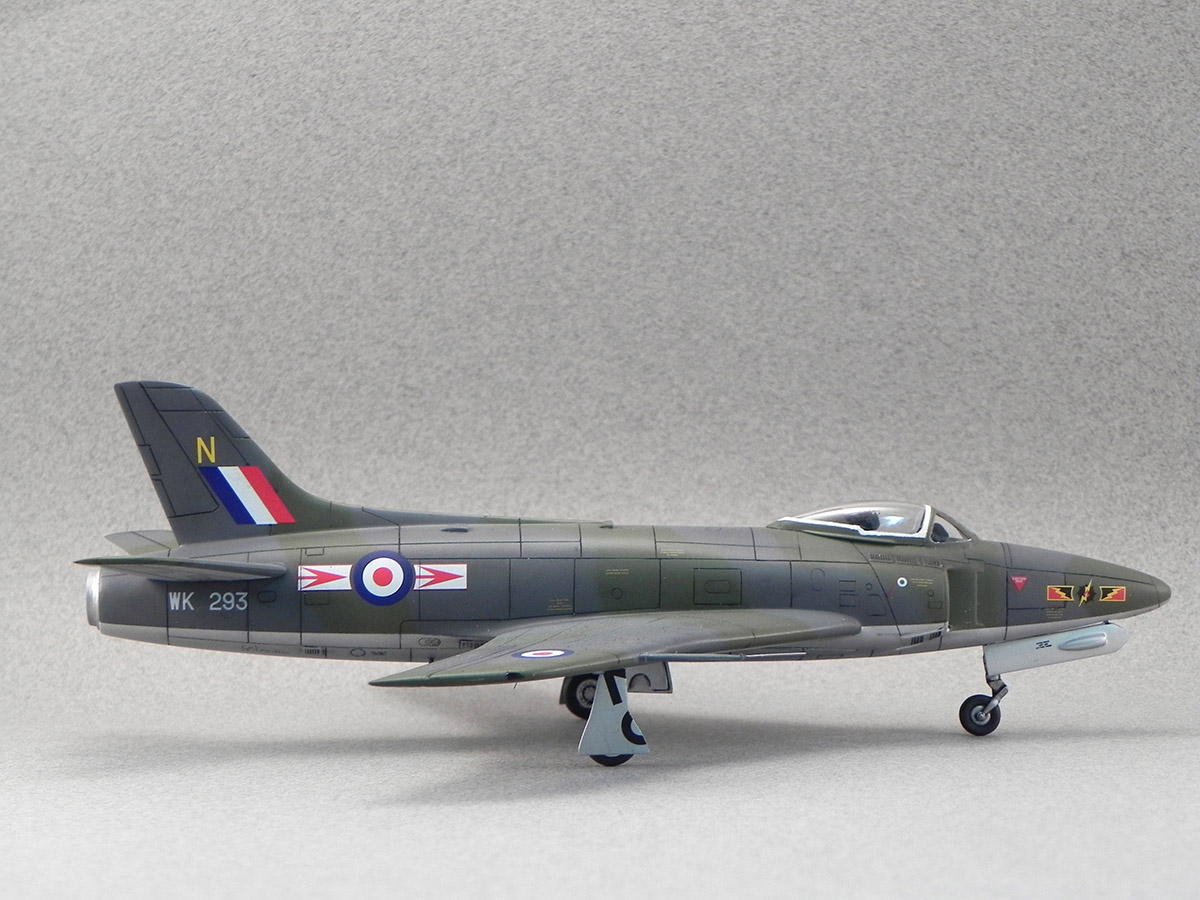
 The Supermarine Swift was a British single-seat jet fighter of the Royal Air Force (RAF) built by Supermarine during the 1950s. After a protracted development period, the Swift entered service as an interceptor, but, due to a spate of accidents, its service life was short. A photo-recon version, the FR.5, resolved some of the Swift's teething problems. The FR.5 was the last Swift variant to enter service with the RAF and was eventually replaced by the Hunter FR.10, leaving the RAF in 1961. The FR 5 was deemed to be suitable for its role and was based with RAF Germany during the Cold War.
While the Swift never saw combat action with the RAF, it did break a number of speed records in its time. In Libya, on 26 September 1953, an F.4 (WK198) piloted by Commander Mike Lithgow broke the world absolute speed record, reaching a speed of 737.7 mph (1,187 km/h), though it was broken in turn just eight days later by the Douglas Skyray, a United States Navy (USN) fighter. The Swift has the distinction of being the last British production aircraft to hold this record (the Fairey Delta 2 was experimental). Fewer than two hundred Swifts were built from an order of 497. A number of Swift airframes went to Australia for Operation Buffalo in 1956, being placed at various distances from a detonating atomic bomb. By its last variant, many of the problems that had plagued earlier Swifts were resolved but the program was not continued. The Hunter, performing satisfactorily in the same roles quickly replaced the Swift.
Overview
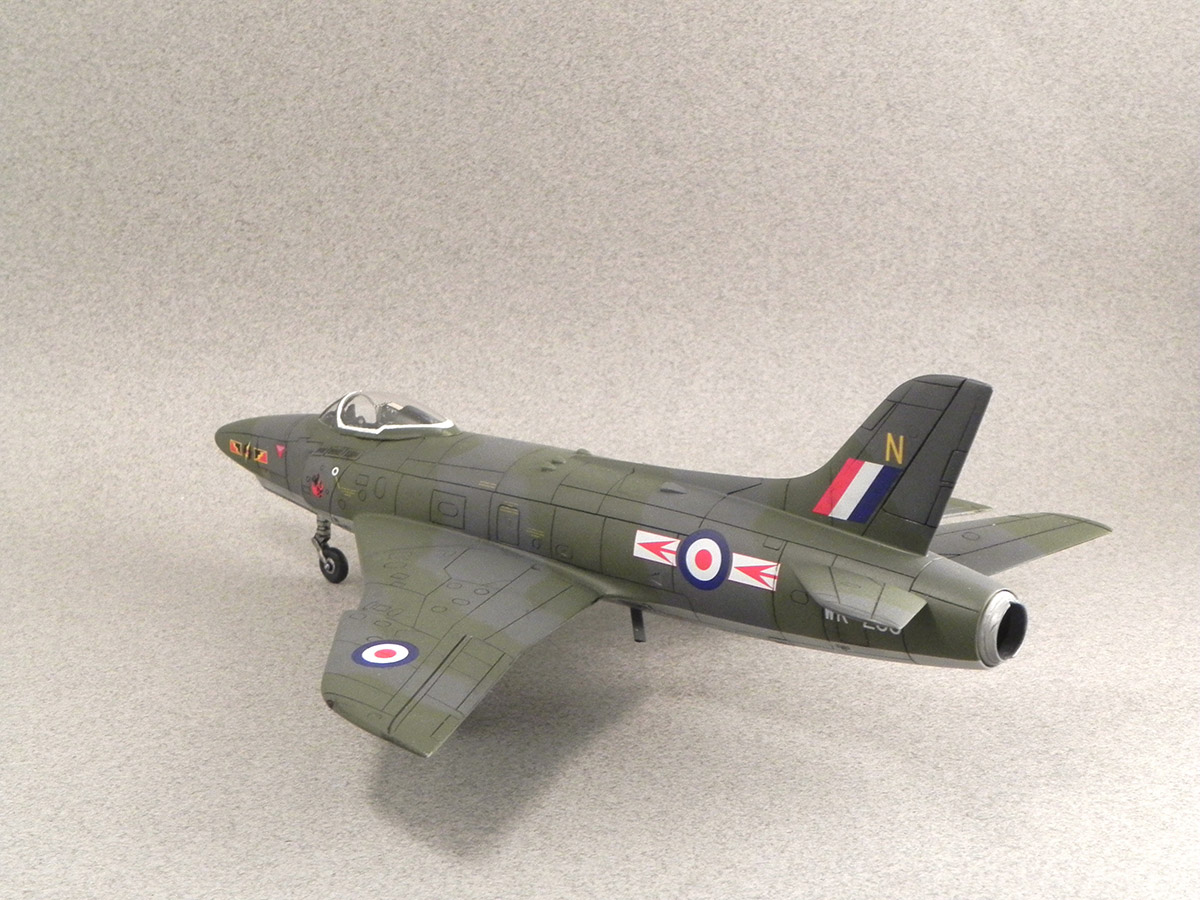
 Despite being a certified "wingnut" consumed with all things aviation, I knew little about the Swift prior to building this kit. That said I was quickly taken with the pleasing lines of the airplane. With its twin cheek intakes and raked wing leading edge the Swift appears to be the result of an amorous evening between a Hawker Hunter and a randy F-4 Phantom (any model but probably an E). The kit has its issues but with a little perseverance it builds into a nice representation that captures the smooth lines of this svelte post-WWII design from Supermarine.
The Kit
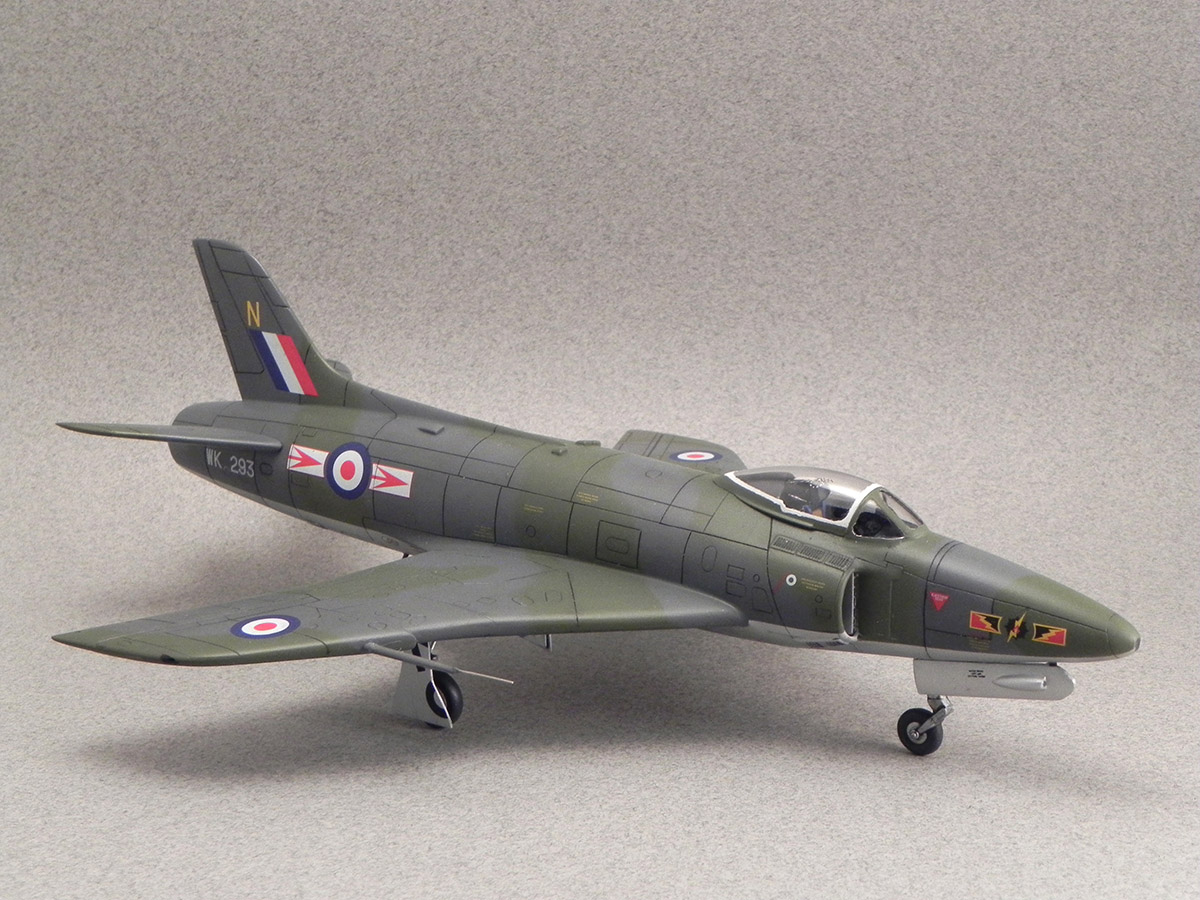
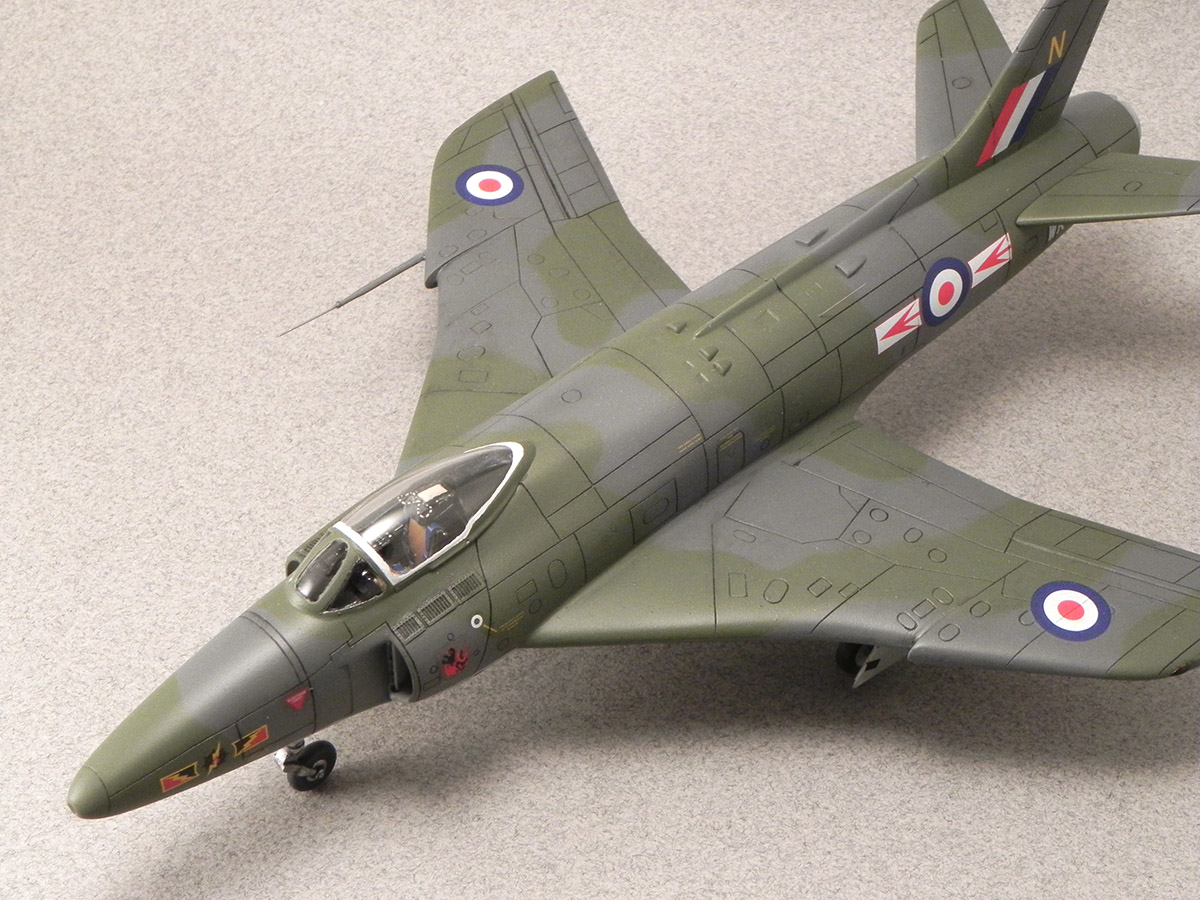
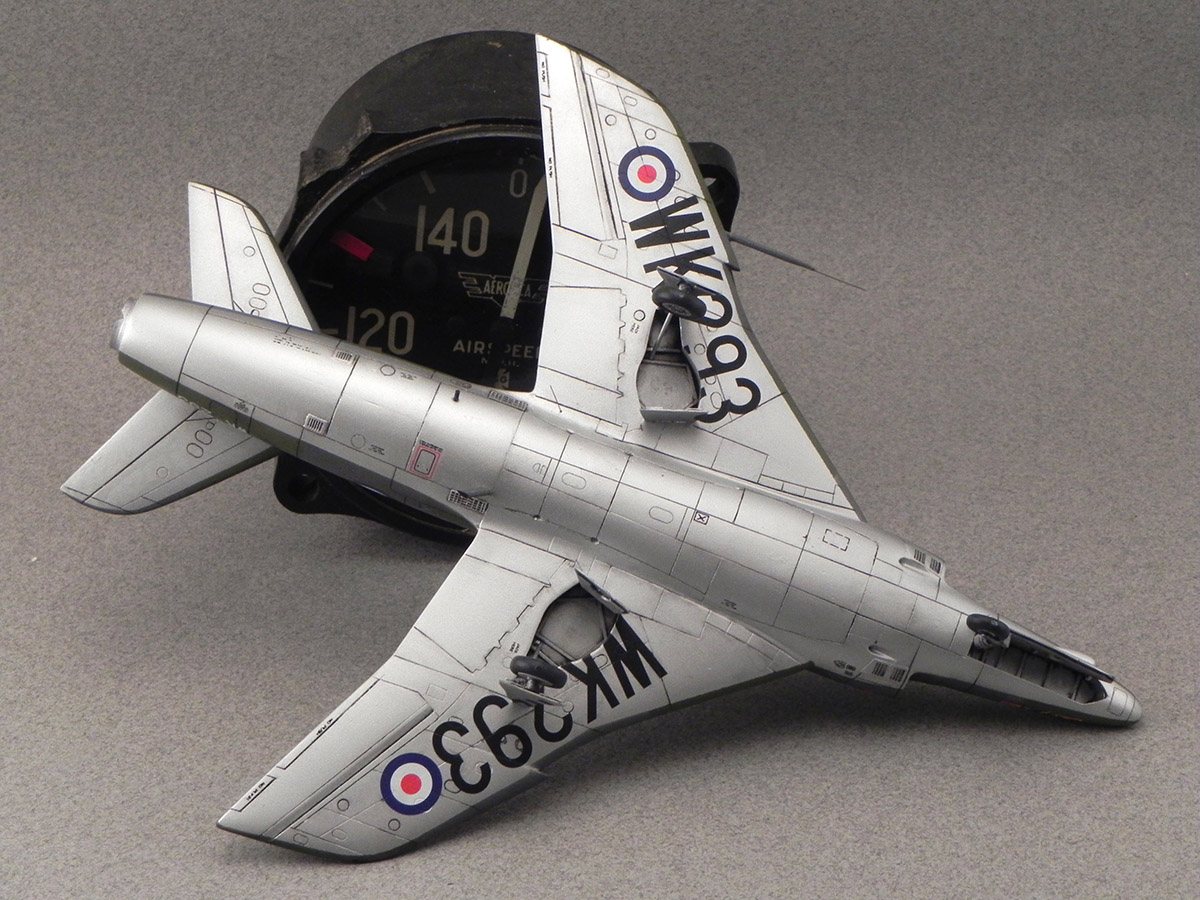
 The kit (Xtrakit, #XK72012) is molded in shiny gray styrene reminiscent of recent offerings from Sword. As with many limited-run kits the sprue attach points are thick and there is a fair amount of flash on many of the smaller parts rendering them useable only after a lot of cleanup. Inscribing is uneven and soft in some areas. The canopy is provided in two pieces permitting you to display it open. However, the canopy plastic is thick and the fit of the canopy parts to each other and to the airframe leaves much to be desired prompting me to display it closed. The cockpit is quite basic (panel, stick, and resin seat) and benefited greatly from some additions from the spares box. The decals (printed by Techmod) are in good register with colors that look appropriate. After reviewing the box contents, I became convinced that this would be a relaxing out-of-the-box build that would take just a few weekends to complete. Now I ask you, how many times have you begun a kit with the same expectation? How many times did those initial impressions prove wrong? Well, stay tuned.
Construction
 After cleaning all sprues by immersion in warm water with liquid dish washing detergent (to remove mold release compound), the major parts were cleaned up with sanding sticks, sand paper, files, and a new Xacto blade. The wing trailing edges were very thick requiring thinning to achieve a scaled appearance. I have found that the blade end of the UMM scriber is an ideal tool for this job. Once thinned, the upper and lower wing parts were joined with Tamiya liquid cement. There are no locating pins on the wing parts or any of the internal fuselage structures such as the cockpit, intake splitter plates, and nose wheel well. Careful fitting is required to avoid mistakes.
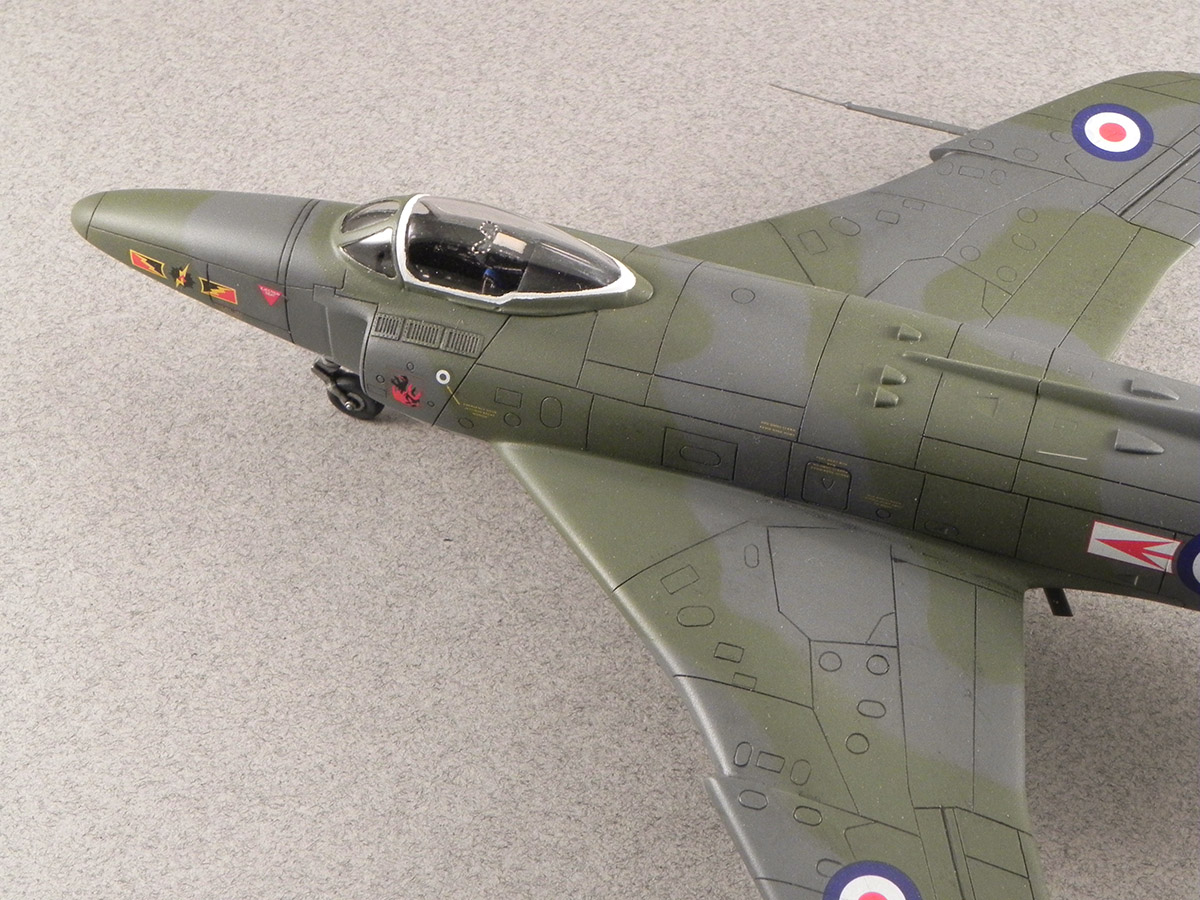 The basic cockpit was enhanced with an instrument panel, side consoles, and seat harness from the spares box. Since the kit depicts an FR.Mk.5 recon version, the instructions call for the installation of two badly molded camera windows on each side of the nose. That said, online pictures of Swift airframes show these covered, or closed? Moreover, the kit box art shows what appear to be covers over these windows. So, between the badly misshapen ill-fitting windows and a lack of photo documentation, I elected to fill each window area in with a block of resin (cut from an old resin pouring stub). This may be entirely incorrect and I apologize most unreservedly to any and all Swift aficionados reading this. After the resin plugs were blended in with sanding sticks, the fuselage halves were joined together with liquid cement. Any seems were filled with CA glue, smoothed over with sanding sticks and re-scribed to restore lost details.
The Wing to Fuselage Debacle
 Having cut my teeth on a steady diet of early MPM and Pavla kits, fit and scribing issues are things I have a little experience with. That said, the moment I test fitted the assembled wing to the fuselage, I knew that previous experience would come in handy. There was a pronounced ~1-2 mm step at both the front and back of the wing to fuselage join on the belly. In addition, there was a ~1 mm step where the upper wing surface adjoined the fuselage. So much for the quick OOB build eh? Since there are numerous panel lines in the belly area that would have to be restored, I opted to fill the gap with pieces of sheet styrene laminated to achieve the correct thickness.
Once glued in place with Tenax 7R, the added styrene was worked with sanding sticks until it blended with the contours of the fuselage. The addition of the styrene afforded me a putty-free area on which to scribe the now missing panel lines which I did using both the large and small UMM scribers and a sewing needle (photo). The ~1 mm step between top of the wings and the wing-fuselage fillet were filled in with small pieces of sheet styrene, glued in place with Tenax 7R thence blended with sanding sticks.
 The canopy pieces were polished out with Micro-Mesh and Novus Fine Scratch Remover #2 applied with a piece of microfiber guitar polishing cloth. After cleaning the canopy thoroughly in soapy water it was dipped in Future/Clear/Klear floor wax. While holding the edge of the canopy with a pair of fine tweezers Excess Future was wicked away by careful application of a lint-free tissue to the edges of the canopy. The wet canopy was then placed in a sealed container (to protect it from dust) and allowed to dry overnight.
Once dry, the canopy was attached with Super-Gold+ "odorless" CA glue (UMM-USA). This glue is ideal for clear parts, as it does not craze clear plastic, as many other CA glues will. The combination of a good coat of Future and Super Gold CA glue makes attaching clear parts almost foolproof.
 The remainder of the build was straightforward with the exception of the five small air intakes positioned on each side of the dorsal fuselage. These are provided as small misshapen, blobs of plastic that have to be re-shaped with files and sand paper to be made useable. Before gluing these on however, I polished the entire model with micro-mesh and took care of any scribing I missed earlier. I also left the horizontal stabilizer/elevator assemblies off to make painting easier.
Painting
 Once the canopy, air intakes, and burner can were masked off with Tamiya tape, the model was shot with Vallejo Surface Primer diluted ~30% with Vallejo thinner. I can't say enough good things about this primer. It shoots wonderfully, flows well and dries quickly. Most importantly, it sands very nicely. My thanks go out to the mean and evil owner of Skyway Hobbies in Seattle for "forcing" me to try it; now I'm hooked.
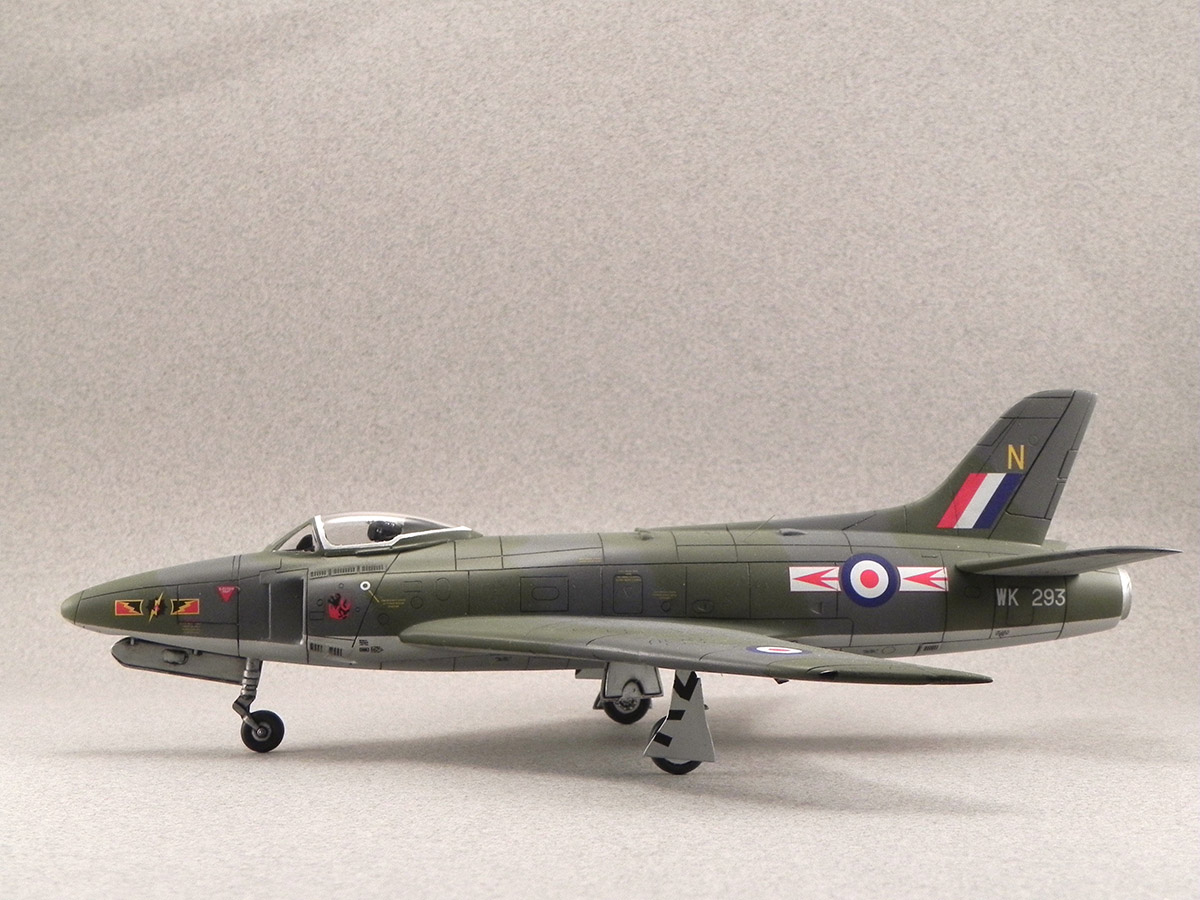
The model was painted with RAF Dark Green (Vallejo 71109), RAF Dark Sea Grey (Vallejo 71048) and Aluminum (Vallejo 71062) to which a few drops of dark grey paint was added to give it a silver dope appearance. The dark RAF green and grey were lightened by the addition of about 10% white paint by volume.
The belly of was shot first, then after 24 hours was masked with Tamiya paint and the upper colors were applied. The dark grey was shot first then, after drying, was masked off using Blue Tack. The dark green was then applied and the entire model was then given multiple coats of Future/Clear/Klear diluted 1:1 with Model Master Acrylic thinner. This was then set aside and allowed to dry for two days.
Finishing
 The decals were applied following the kit instructions and although well printed, the decals did not respond to either MicroSol or Solvaset and were only mildly reactive to MicroSet. After many hours of applying MicroSet the decals reluctantly adhered sufficiently to be passable. The entire model was given another coat of Future/Clear/Klear and allowed to dry overnight.
Panel lines were highlighted with artist oils (black and raw umber) mixed with distilled turpentine (Windsor & Newton) and applied with a fine trim brush. If carefully applied, the oil paint-turpentine mixture will wick along panel lines and require no clean up. That said if I allow the turpentine to dry overnight, the next day the oil paints rub right off the model leaving the paint in the inscribed areas but with no greasy residue to contend with.
The model was then sprayed with a light coat of Micro Satin. The rougher finish of the satin coat facilitates the use of pastel chalks used to dirty up a few areas on the airframe. After applying a final coat of Micro Satin, the masking tape was removed from the canopy and few details were touched up with a trim brush. With my "relaxing out-of-the-box build" completed, I headed down to the kitchen for a well-deserved adult beverage.
Conclusion
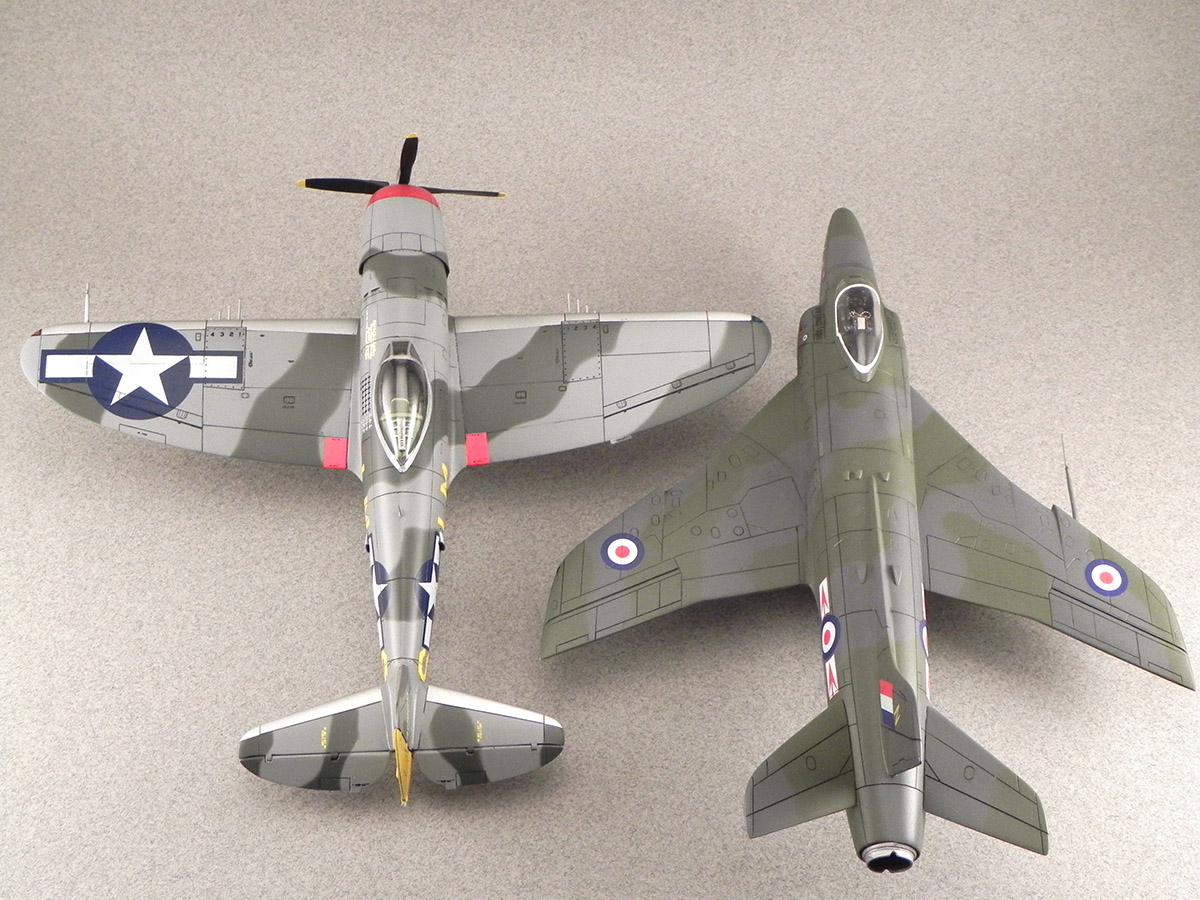
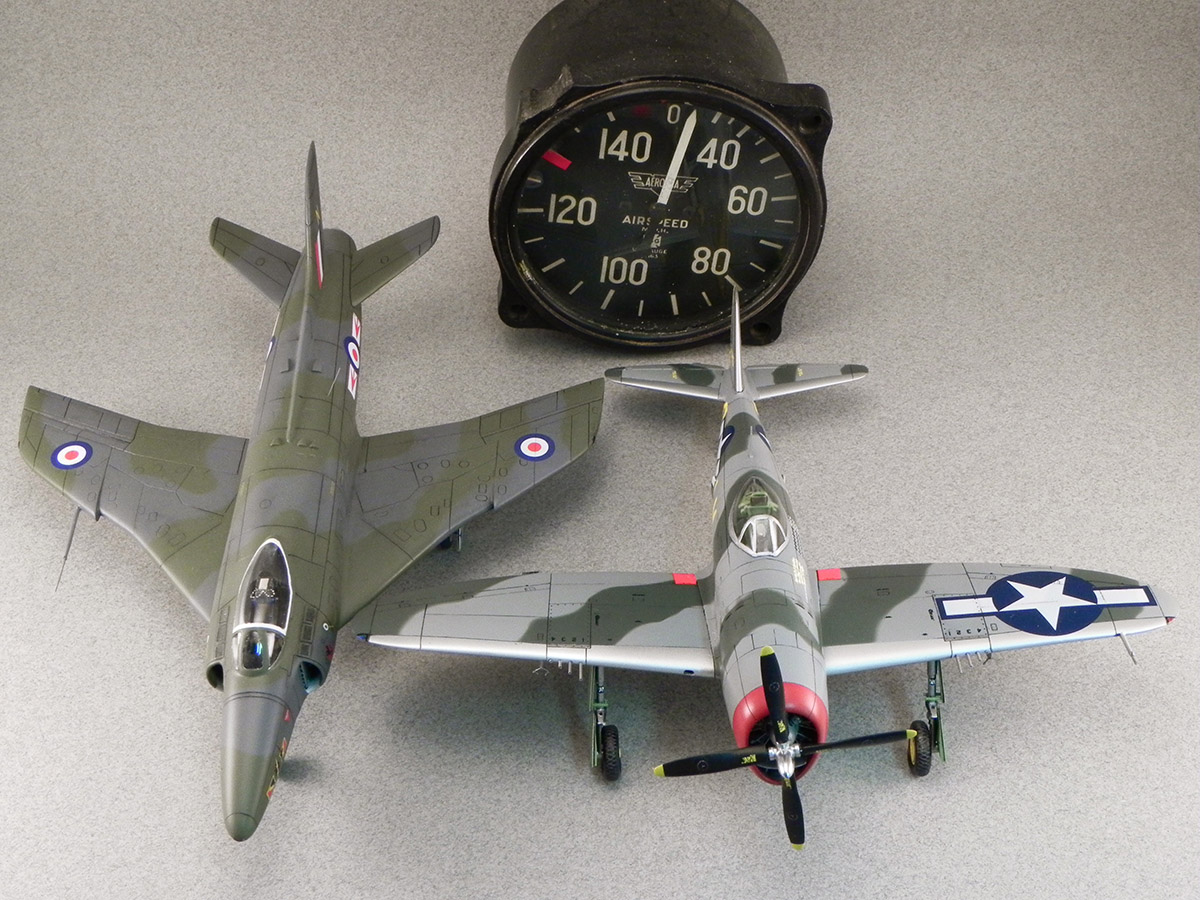
I liked this kit; hats off to Xtrakit for producing a model of such a little known aircraft. Perhaps the horrendous fit of the wing to the fuselage was a problem with the example I purchased and not a problem with the mold? Nonetheless, it builds into a nice representation of the Swift and looks great sitting next to a model of its great grandfather, the Spitfire Mk. I. Keep 'em coming Xtrakit!