

Arma Hobby 1/72 PZL P.7a 1939 Expert Set
By Matt Bittner
Introduction
From Wikipedia:
"The PZL P.7 was a Polish fighter aircraft designed in the early 1930s at the PZL factory in Warsaw. State-of-the-art construction, and one of the first all-metal monoplane fighters in the world between 1933 and 1935, it was the main fighter of the Polish Air Force. It was replaced in Polish service by its follow-up design, the PZL P.11c. More than 30 P.7 fighters remained in service during the Invasion of Poland, scoring several kills despite its obsolescence."
The Kit
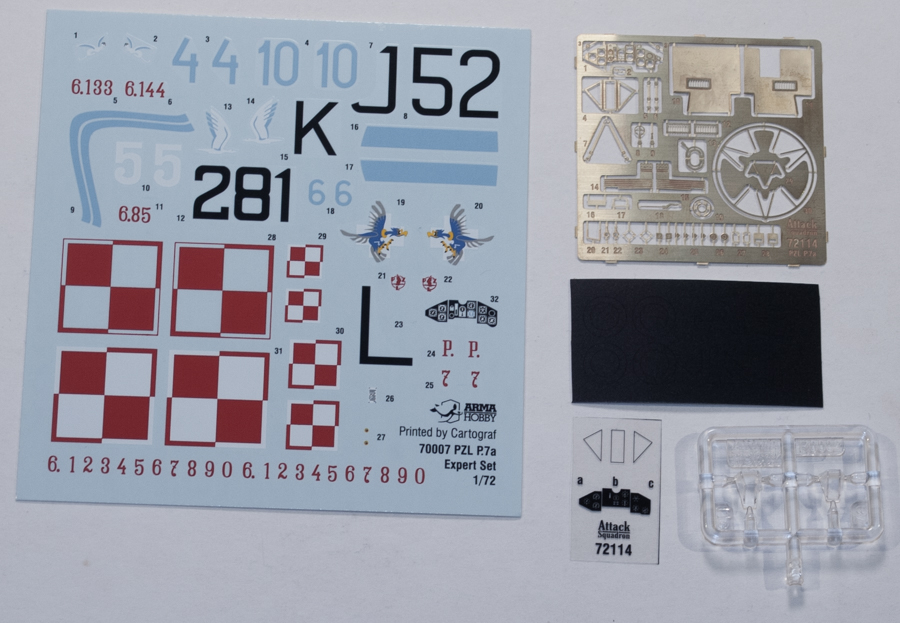
The Arma Hobby 1/72 PZL P.7a comes in multiple "boxings" which contains a lot or a little depending on your wants and experience level. Their "Expert Set" kits contain not only the injected plastic parts but also a set of masks, photoetch and clear film (for the instruments and windscreen). The 1939 Expert Set contains markings for aircraft that flew at the beginning of World War 2, when Germany invaded Poland:
- PZL P.7a, 123. Fighter Squadron from Cracow, in 1939 in Pursuit Brigade. Airplane of the 2nd Lieutenant Erwin Kawnik (1 shared victory in September 1939); Finished in Dark Polish Khaki on top and fuselage undersides, with Polish Light Blue-Grey flying-surface undersides
- PZL P.7a, 151. Fighter Squadron from Wilno, in 1939 in "Narew" Independent Operational Group. Airplane of the 2nd Lieutenant Zygmunt Kinel; Finished in Medium Polish Khaki on top and fuselage undersides, with Polish Light Blue-Grey flying-surface undersides
- PZL P.7a, 162. Fighter Squadron from Lwów, in 1939 in "Łódź" Army. Airplane of the 2nd Lieutenant Zdzislaw Zadrozinski (3 victories in September 1939); Finished in Light Polish Khaki on top and fuselage undersides, with Polish Light Blue-Grey flying-surface undersides
- PZL P.7a, 162. Fighter Squadron from Lwów, in 1939 in "Łódź" Army; finished overall in Light Polish Khaki on top and fuselage undersides with Polish Light Blue-Grey flying-surfaces undersides
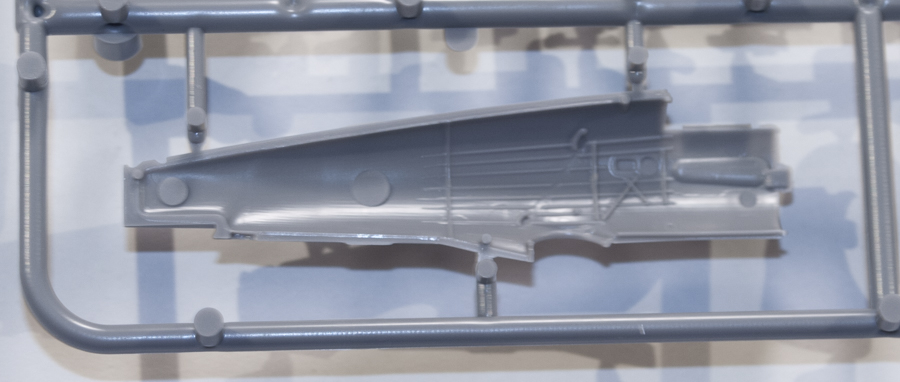
Decals looks really well done and in register. The main injected sprue consists of 40 pieces of plastic, the clear injected sprue contains two windscreens, but only one is used for the P.7a (the other for the upcoming P.11). Or, you can use the clear film windscreen instead of the injected plastic one for a thinner representation. The clear film also contains the back of the instrument panel which contains a representation of the instruments. The photoetch fret contains 36 pieces of etched brass.

|
Construction, as usual, starts with the cockpit. Pay close attention to the instructions as there are plenty of photoetch pieces to add to the plastic parts to make a pretty accurate cockpit. The instructions are a little unusual. Instead of the steps being in order on one page, the first steps are spread across two pages. In other words, be sure the instructions are spread open and each "page" isn't folded under the other. This may seem obvious to some, but when I started writing the review I was confused because that's how I had the instructions, looking at a single page instead of a two-page spread.
|
In fact, I understand exactly what Arma Hobby did. Instead of creating two different instruction sheets (I'm guessing) they created one with the photoetch instructions on the very first page instead of interspersed with the rest of the construction steps. That's why they show adding the gun sights to the wing after the model has been assembled, prior to the construction step of gluing the wing halves together and adding the wing to the glued-together fuselage halves. So go into construction knowing that, if you actually did pick up this "Expert Set" or one of the other releases with the photoetch fret.
|
Once all the pieces are added into the cockpit then the fuselage halves can be assembled and construction continues.
One of the instruction steps in the first two-page spread shows adding p/e pieces to both the fuselage halves and the wing. Whether you do that before you assemble the cockpit and fuselage halves is up to you, but I would think with the handling of the fuselage while putting them together could dislodge those photoetch pieces.
The next construction steps have you glue the piping to the engine and the tail pieces, landing gear legs and cowl to the fuselage, along with the engine and spinner. I would definitely leave the engine and spinner off until after painting.
The next step has you glue the wing halves together and cowl pieces together prior to adding them to the model. Again, since the engine hasn't been attached yet you will want to glue the cowl pieces together but leave those off until the end, after the engine has been glued into place. Also the wheels are attached at this point but again, probably best left off until the end.
The final construction step has you add the wing struts, separate prop blades, tail struts and landing gear rigging. Also note there are smaller instruction steps that show how to paint the prop blades and how to apply the masks that are supplied in this "Expert Set".
Conclusion
This looks to be an excellent kit and Arma Hobby has really created an excellent PZL P.7a kit. I've seen built-up examples on-line and it really is a stunning model. I'm definitely looking forward to their PZL P.11 series as well.
Huge thanks to Arma Hobby for supplying the review model.