
Brengun 1/144 Fokker E.II/E.III
By Matt Bittner
Introduction
The best known use of the Fokker Eindeckers was during what has become to be known as "The Fokker Scourge". During July through August in 1916 the Fokker Eindeckers were some of the first single-seat fighters to introduce mass-produced gun synchronization gear. This allowed a pilot to use his aircraft as the weapon and aim it as needed, instead of having a separate gun with another person using it to try and shoot down the enemy. Once the Allies caught up, with such aircraft as the Nieuport 11/16, the Fokker Eindeckers were quickly out-classed. But during that time, the Fokker and Pfalz E-Types were the aircraft to be reckoned with.
The Kit
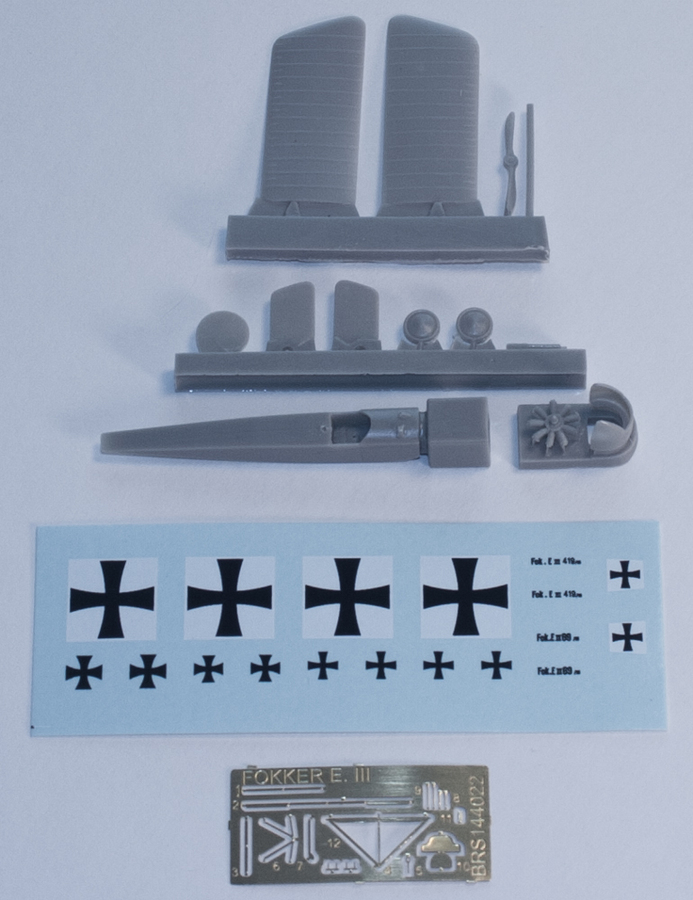
The Brengun 1/144 Fokker E.II/E.III consists of twelve pieces of gray resin and a photoetch fret with 15 pieces on it. Decals are for two Fokkers:
- Fokker E.II 89/16
- Fokker E.III 419/16
Decals appear to be in register, since they're just black and white and definitely nicely printed.
The first order of business with this kit is removing all the resin parts from their pour blocks and cleaning them up. Once that is accomplished construction can commence. Step one of the instructions has you build the seat. First fold the seat than add the photoetch seat belts. After that is finished you can put it and the photoetch control column into the cockpit. Note there is no other interior detail, but since the fuselage is one-piece resin, and is a small "hole", I don't think there's much you can do. You might be able to draw in detail but other than that it could be difficult to add items.
 Note that most of the structure to the Fokker is primarily photoetch. Photoetch provides the fold-up tail-skid, the fold-up main landing gear, and the bend to the main fuselage rigging strut. That leads to finishing the fuselage and then the airframe.
To finish the fuselage add the fold-up tail skid to the back of the model and the gun, photoetch step, engine and cowl to the front (although you'll want to leave the step off as the very last item to add – I would even wait until after rigging (if you decide to) is complete). Now you complete the airframe with adding the wings, stabs and rudder making it a complete model. Again this step has you add the landing gear but this is another area I would leave off until painting is finished.
Since the wings are butt-joined to the fuselage you might want to think about drilling holes all the way through the wings for the rigging, making the rigging truly functional. However, that is a lot of work so make your choice appropriately. If you decide to permanently mount the model to a base then it's probably not needed. But drilling through also ensures your rigging is in the correct place, top-to-bottom
Conclusion
This is an excellent 1/144 WW1 kit, because of the fact the resin pour has come out exceptionally thin. I would even go so far to say the wing trailing edges are too-scale which is an excellent piece of engineering. If you're looking for a 1/144 Fokker E.II/E.III you'll definitely want to pick up this kit.
Many thanks to Brengun for sending this to us for review.