
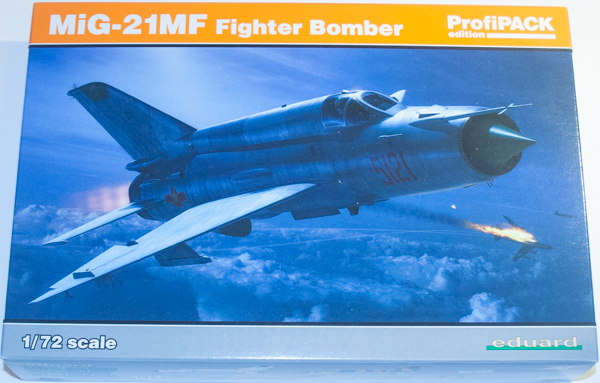
Eduard 1/72 MiG-21MF Fighter-Bomber
By Matt Bittner
Introduction
The Eduard 1/72 MiG-21s have been out for some time, now, and they are everything everyone is writing about. They are truly the "best in scale" and are to be seen to be believed. Because of being the best, there are a number of parts and a number of options for these kits, so definitely pay attention to the airframe you're building as there are plenty of options within the kits.
The Kit
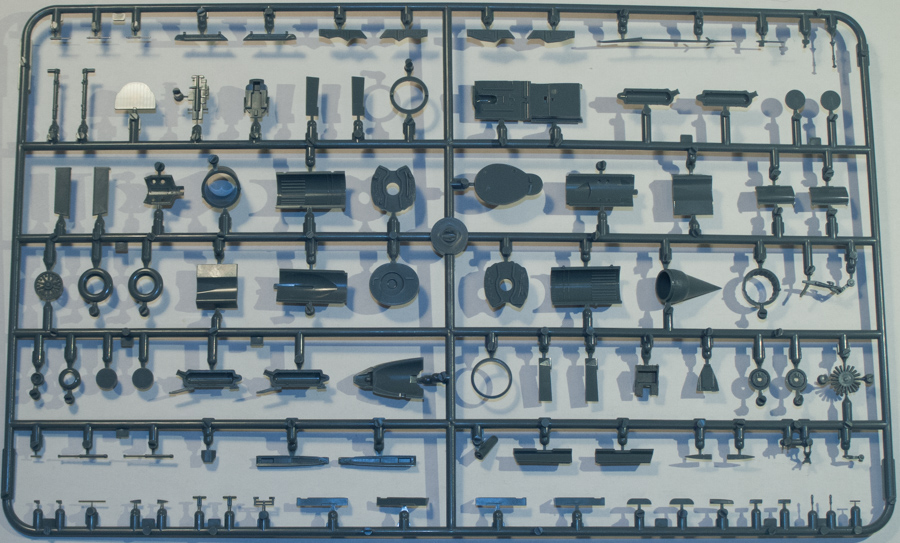
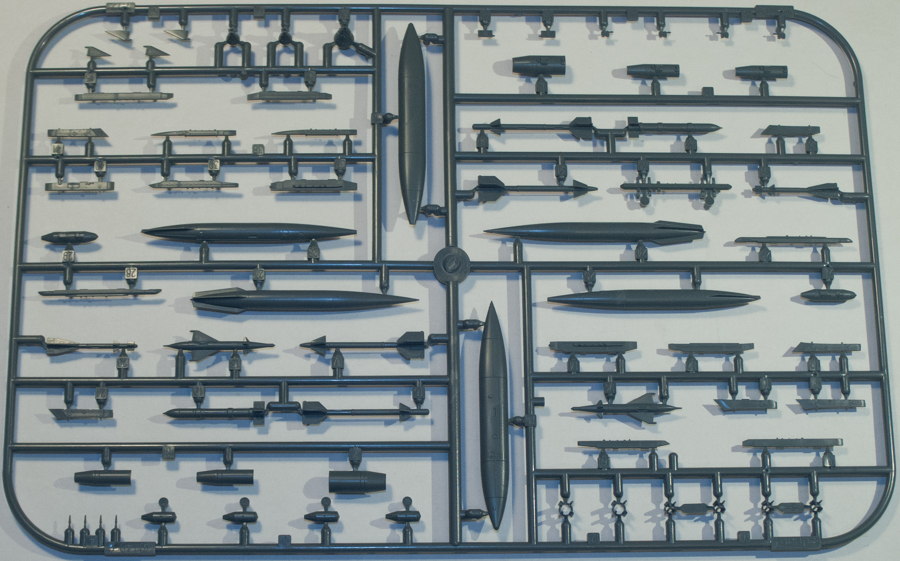
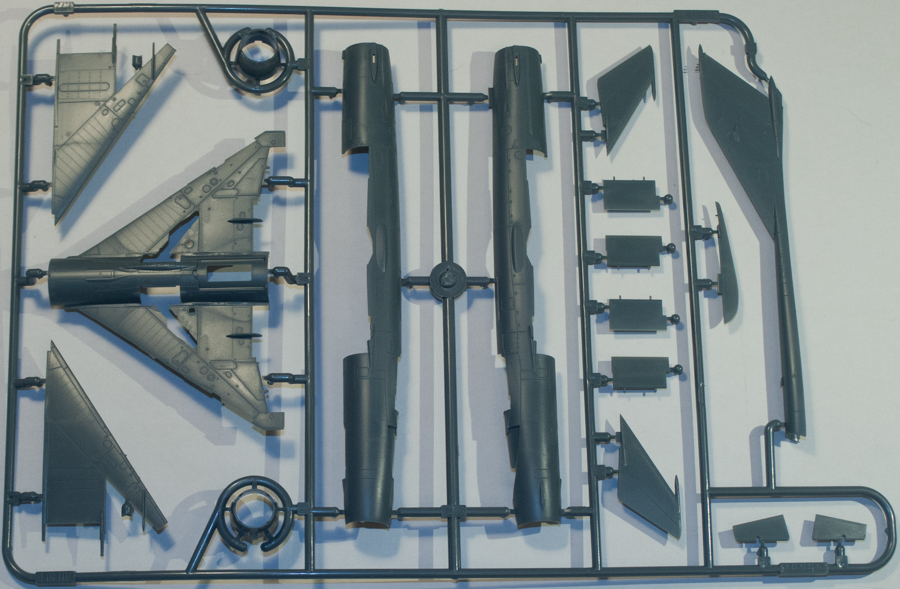
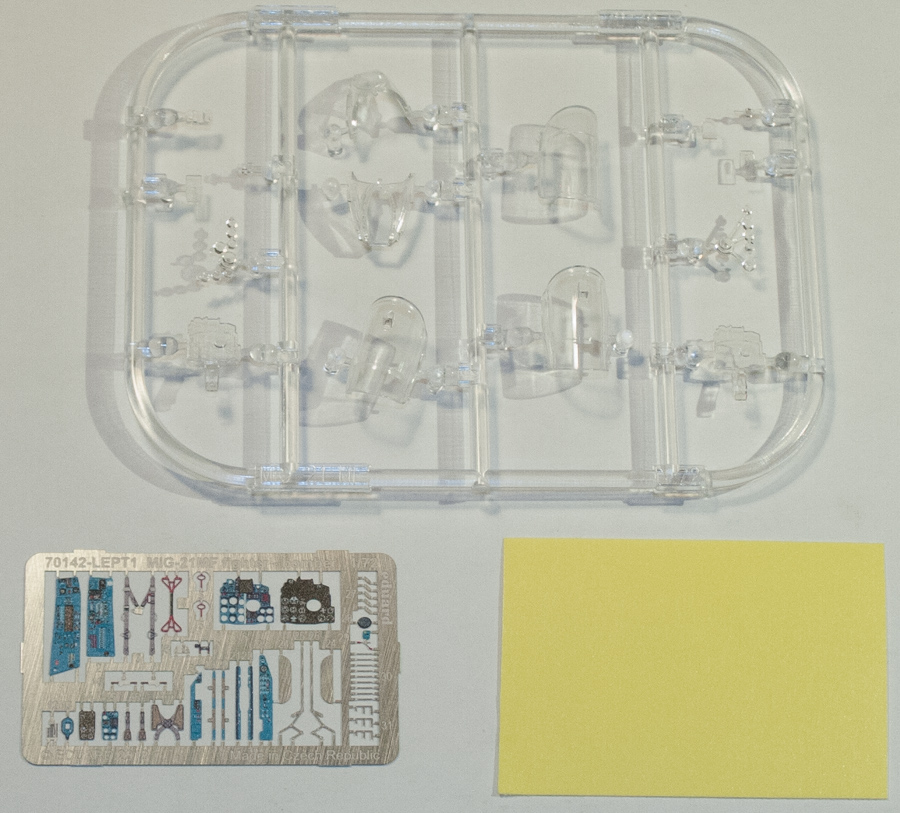
The Eduard 1/72 MiG-21MF Fighter-Bomber consists of, well, I'm going to type "a lot of parts". A lot. And not all are used for this boxing so you'll have plenty of parts to add to your spares box. Molding is top-notch and with minimal clean up you will be able to start building a 1/72 MiG-21 in no time. This release comes with the following marking options:
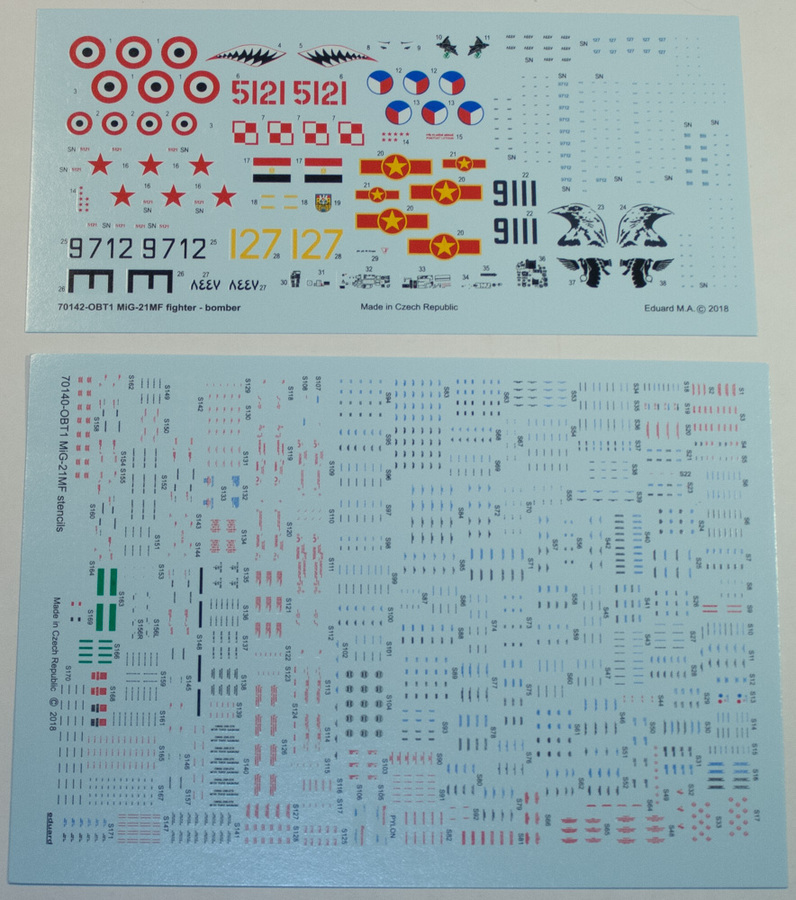
- MiG-21MF Fighter-Bomber 1/72 - No. 5121, flown by Pham Tuan, 921st Fighter Regiment, Noi Bai AB, Democratic Republic of Vietnam, December 1972
- MiG-21MF Fighter-Bomber 1/72 - No. 8447, No. 46 Squadron, Egypt, 1973
- MiG-21MF Fighter-Bomber 1/72 - No. 127, 812th Training Air Regiment, Kharkov Higher Military Aviation School of Pilots, Kupyansk Airfield, Soviet Union, August 1991
- MiG-21MF Fighter-Bomber 1/72 - No. 9111, 3. Eskadrą Lotnictwa Taktycznego, Poznań - Krzesiny, Poland, 2002
- MiG-21MF Fighter-Bomber 1/72 - No. 9712, 9th Fighter Regiment, Bechyně, Czechoslovakia, 1989 - 1993
Decals, as printed by Eduard, are top notch and appear to be in register. You receive not only decals for each airframe, but also full stencling for not only on the airframe but also the weapon pylons. Also included in the box is a photoetch fret and a set of masks.
|
I'm going to digress in this paragraph as Eduard's multiple releases have me thinking. Not sure how others structure their "parts bin" but in the past I used to just collect "all extra parts" and put them in one box, not caring what is in that box. When I was building Eduard's Avia B-534 III Serie kit - and working on a Series IV at the same time (which is still in progress) - I decided to keep all of the extra B-534 parts in B-534 boxes. Since I have the Big Ed collection for this kit, I decided to keep all extra smaller parts within that box. And, since I picked up a couple of the new-tool wing sets, I put them into the Royal Class B-534 box. I find this to be a little more logical than just storing all parts into one, eventually large box. Sure, once I build all the B-534s I have (if ever) then I need to rethink that, or just contain all parts in one B-534 box and label in it large letters "SPARE PARTS", but in the end I think it makes the most sense to include all extra B-534 parts into B-534 boxes. Maybe the same can be said for having multiple Eduard MiG-21 kits.
Okay, back to the MiG-21.
|
There are a lot of parts that make up the MiG-21 model's cockpit so it's best to study the instructions before committing to applying any glue. This release contains photoetch pieces for the cockpit, and some of those are prepainted, which means you'll need to find a paint suitable to match the Eduard phtoetch parts. Thankfully Eduard provides a formula to creat the correct shade of "MiG-21 interior green" using Gunze paints. Once the cockpit is built, construction continues with other interior pieces.
First to be built is the main gear well, consisting of four pieces. After that the "engine" is built, all best painted before parts are actually glued together. Then construction continues with the cockpit, by painting and adding other details (included photoetch) to the cockpit interior sides. Now that all the interior work is finished, one can actually start gluing main pieces together.
|
You'll need to add the cockpit, interior intake ring and "engine" to one fusleage side then glue the fuselage halves together. Then you add detail parts to the main gear wells in the lower wing piece, followed by gluing the upper wing parts to the lower wing. Once that is accomplished then you start building the entire airframe.
Glue the spine/fin/rudder one-piece part to the already glued-together fuselage, followed by the exhaust, followed by the nose ring. Add the HUD to the front of the cockpit. Finally add the main gear well previously assembled to the wing and add the wing to the fuselage. Voila! One MiG-21 airframe.
|
Other parts are added to the cockpit-are prior to adding the windscreen then you can add the horizontal tails/stabilizers and other "bumps" to the rear of the model, followed by the separate flaps and ailerons to the wing. While the next step has you add the nose gear, I would skip that step and save it until painting and decaling are finished. However, you can add the lower, rear fin and other parts to the underside prior to painting.
While I would leave the main landing gear and gear doors, along with any ordnance, off until the end, there are other pieces that should be added prior to paiting. In addition one of the final steps is building the ejection seat and adding it towards the end of construction.
|
Note that you can pose both the canopy and the speed brake in either the open or closed position. Also note this edition of the kit comes with photoetch pieces for the nose pitot vanes as well as static dischargers for the trailing edge tips of all flying surfaces. Also note this release comes with masks for not only the canopy, but also the dielectric panels on the tip of the upper and lower fins and other areas of the fuselage.
There are plenty of external ordnance decisions to make with this kit so study the airframe you want to build carefully, to ensure you have the right external stores in the correct locations.
Conclusion
The Eduard MiG-21 family is an excellent version of this fighter in 1/72 and is now considered to be the "kit of choice" for this aircraft. And rightly so, given the accuracy and amount of detail Eduard provides. It won't be a quick build, but it will look great on anyone's shelves once finished.
I definitely give plenty of thanks to Eduard for sending this to review.