Overview
The lack of advance warning in China led the Japanese to needing a fast, quick-climbing interceptor to challenge incoming bombers. While the Mitsubishi A6M took priority, the design team there eventually came up with that dedicated interceptor, the J2M. This plane, given the name Raiden (Thunderbolt), put its large 14-cylinder radial engine deep inside a tapered cowling, in an attempt to minimize drag. Initial problems with engine cooling and visibility resulted in an engine change that shortened the nose and improved cooling. After a bit of prototype work, the J2M2 entered service with the Japanese Navy.
The J2M3 was the first upgrade to the Raiden, and this variant saw the removal of the cowling machine guns and extra cannons added to the wings. This variant was the most produced variant, and while it was a popular aircraft for bomber interception, its technical problems and the advent of the superior N1K Shiden interceptor kept the Raiden's role in the Second World War to a minimum.
The Kit
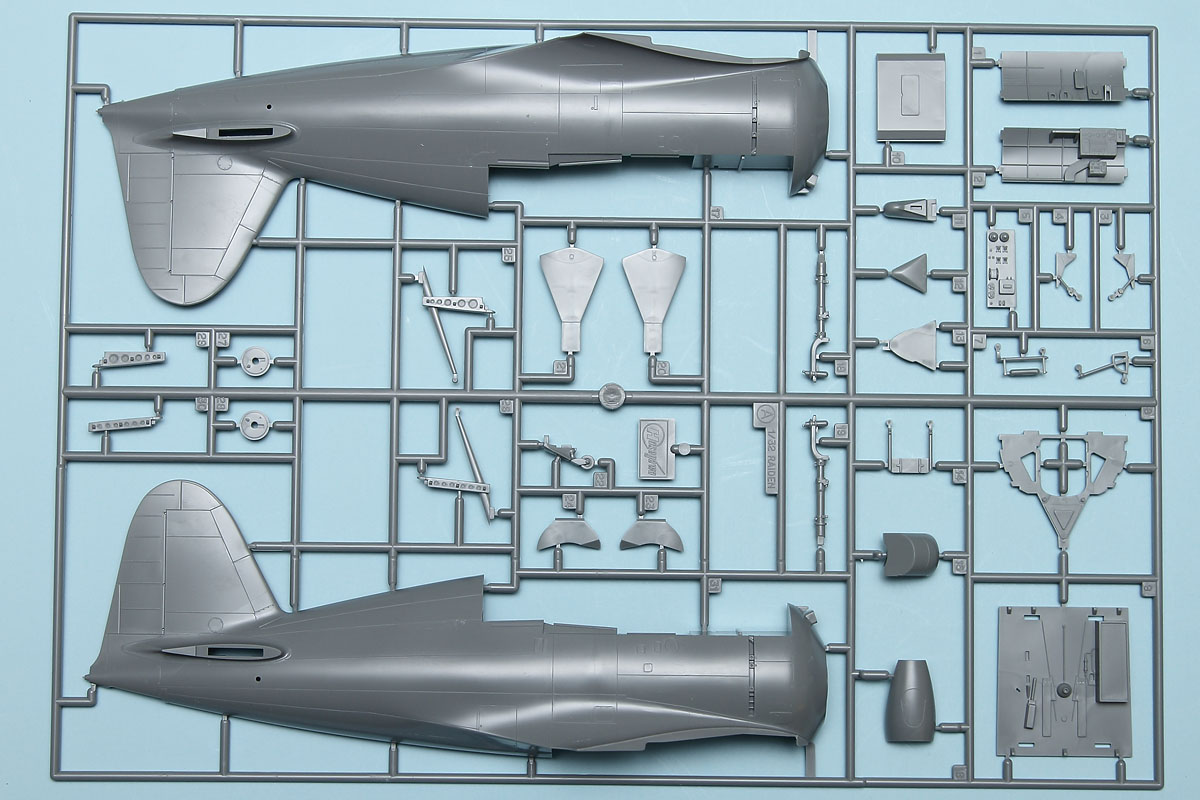
For those wanting a big-scale Raiden, the only game in town was the old Revell kit. While not a bad model, it dates back quite a few decades and can be difficult to find. Although I am not entirely sure, I believe that the Revell kit was released only once, back in 1971, and as such it commands very high prices in the used kit world. So this new release from Hasegawa is very welcome on many levels. First off, it's a new tool, so no worries about dealing with old plastic and excessive flash. Second, it's more accurate than the Revell kit, with better detail overall. Finally, the engineering suggests that we will see other variants in the future as well. The kit comes molded in Hasegawa's standard gray plastic, with petite recessed panel lines and some beautiful raised detailing in the cockpit and wheel wells. A complete engine, plus a pilot figure, round out the kit, while the decal sheet provides a pair of marking options.
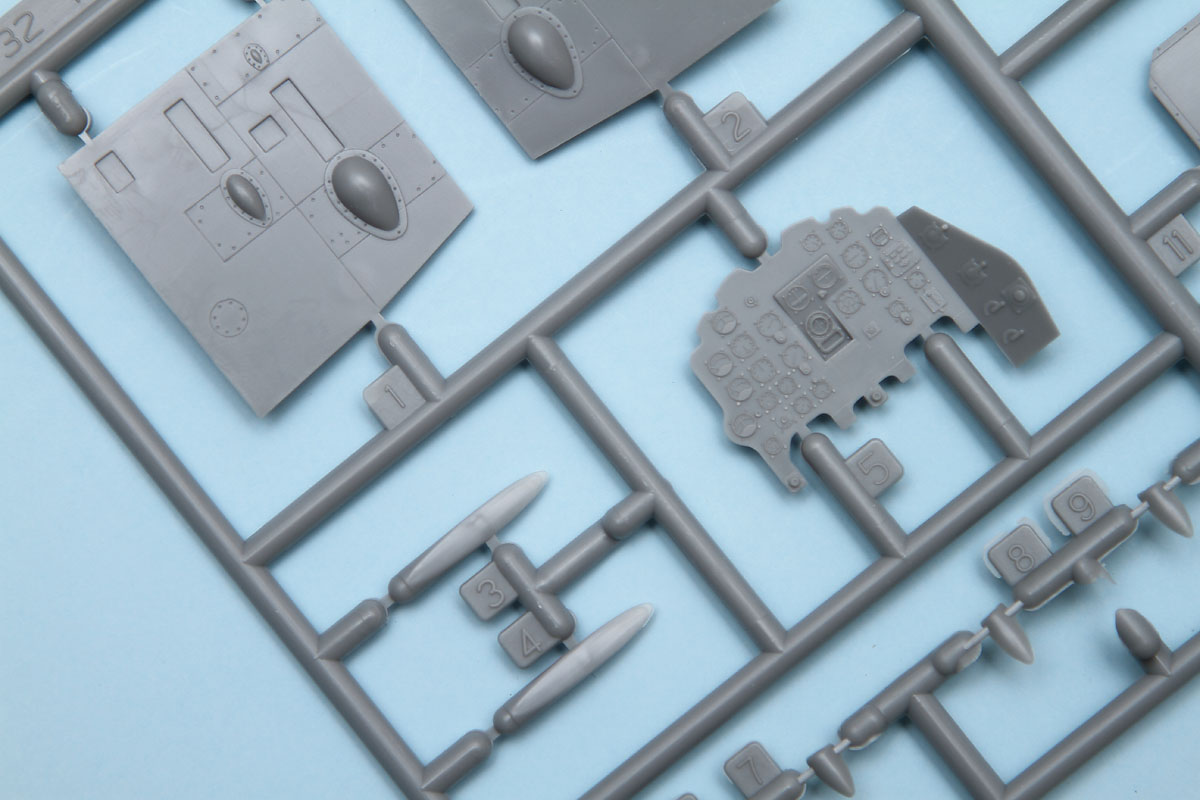
Starting with the interior, this is a fairly complex assembly. The reasoning for this is to ensure crisp detailing across all the parts, which Hasegawa has done quite well. The instrument panel has raised detailing, and decals are also provided for the instrument faces. I have found that painting the panel the base color and then applying these decals provides a great result, especially if you use a hair dryer on the decal after it is applied. Set on low, of course, the hair dryer warms the decal and allows it to really snuggle down into the raised detail. Done right, you will end up with an instrument panel that looks like the dials were painted on.
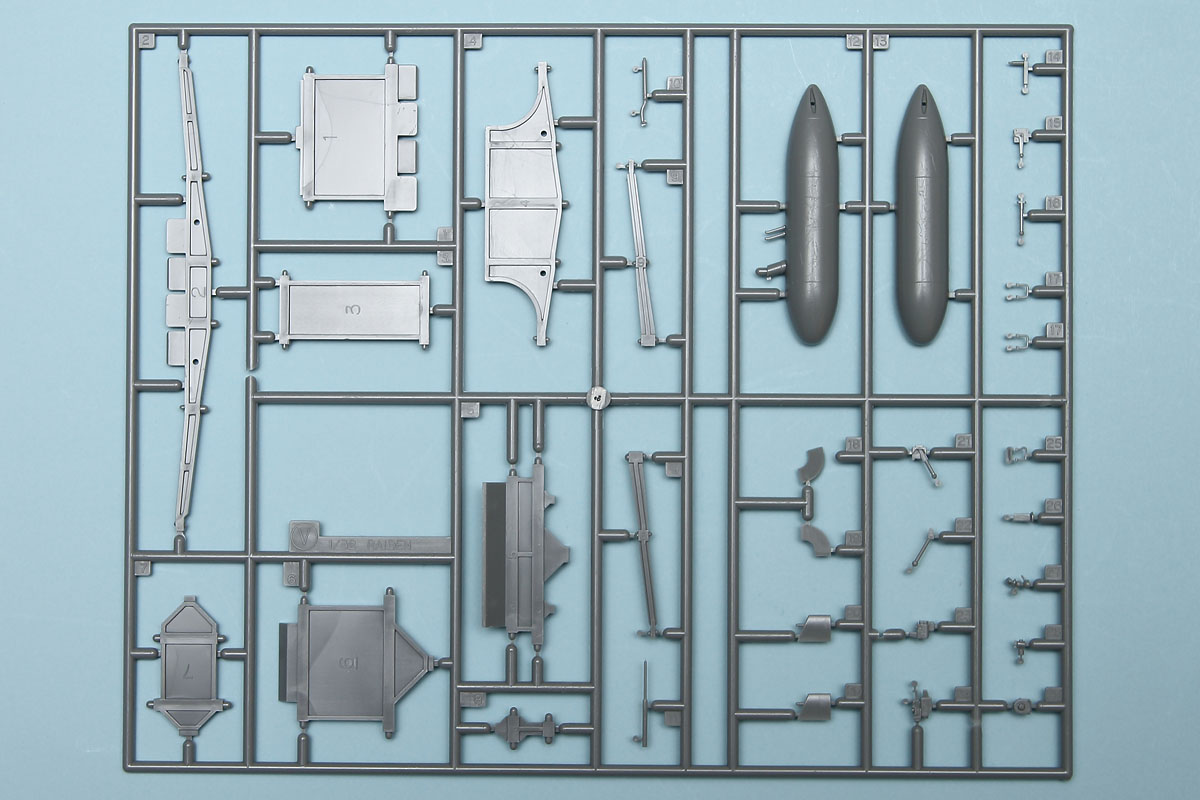
The seat and rear bulkhead assembly is nicely detailed as well, with the only thing lacking being seat belts. The headrest cushion is molded separately, which is a very nice feature as it allows you to paint and weather it separately from the metal structure. Since leather definitely has a different look than metal, this just further improves the realism of the finished cockpit. The radio box behind the seat is made up from four pieces, again to ensure sharp detail on all sides. The sidewalls are also separate, with the throttle quadrant being separate, as well as other control handles and levers. The cockpit floor gets all sorts of odds and ends, and the end result will be one of the nicest cockpits out there for straight out of the box.

The option of the pilot figure gives you the opportunity to hide much of this detail. The figure is really nicely detailed, and comes with three different heads and two different right arms. The different heads offer two styles of helmets and a third option with the pilot in full oxygen mask, complete with hose. The two arms allow for positioning the pilot to grip the stick or to be saluting. Finally, for those who do not want to have the figure in the cockpit, a separate seat cushion is provided. The instructions suggest that the figure could be fitted and removed as needed, but I wouldn't risk that as there is too much fine detail that could be broken with constant removal.
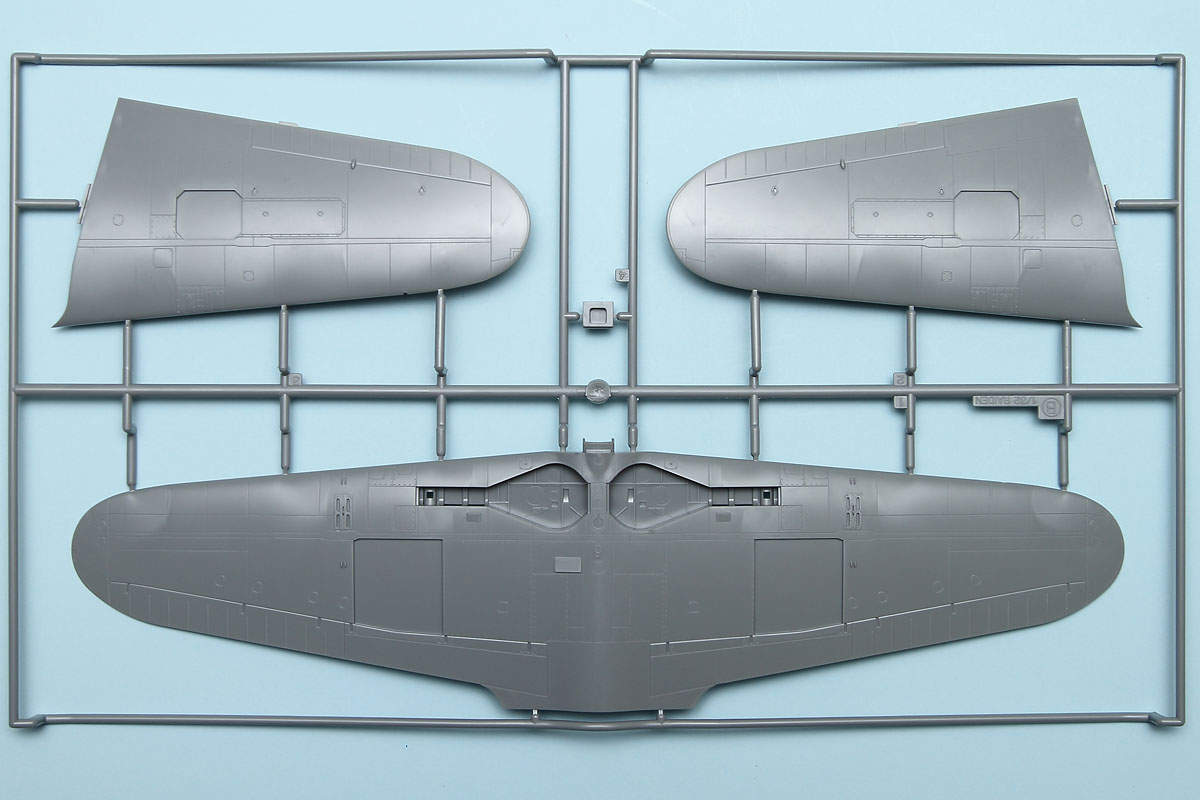
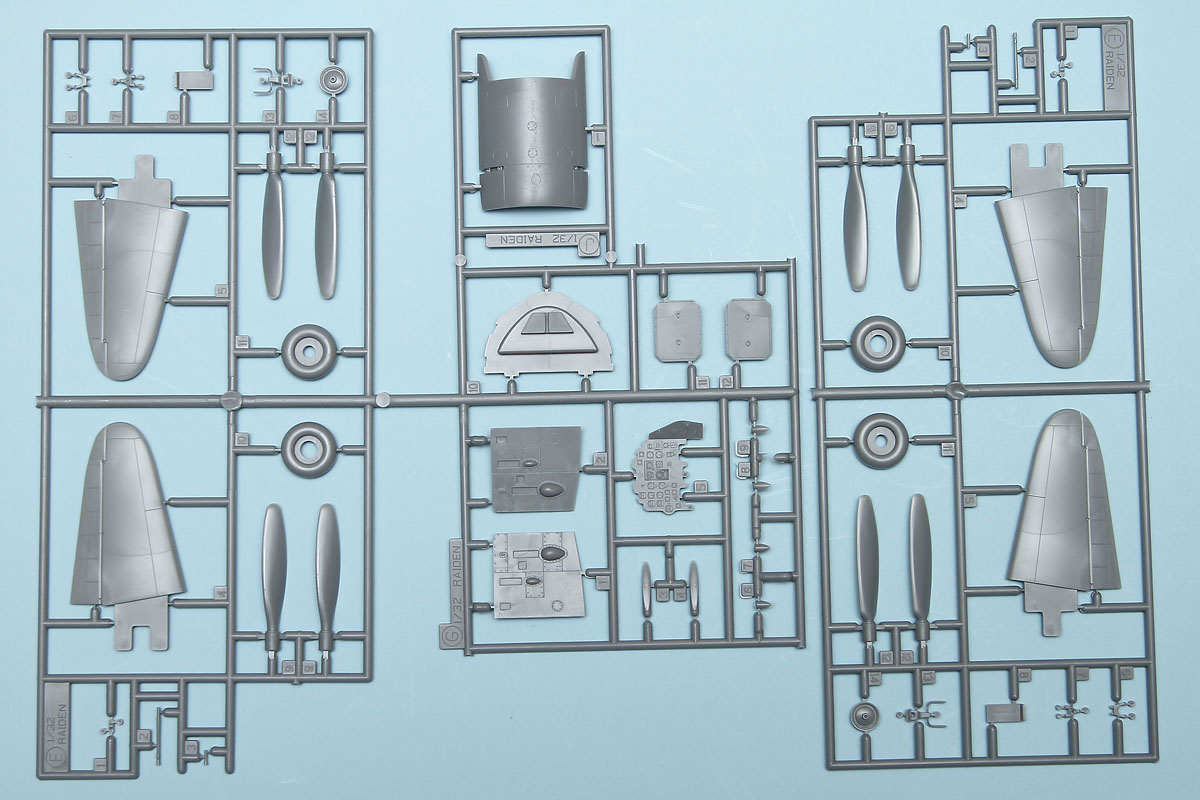
The fuselage assembly will strike some as a bit odd, as the kit comes with several bulkhead pieces. At first glance one might think this is overkill, but what this allows is for much more precise alignment of the parts and a better guarantee that the wing root fit will be excellent. It also allows for a very solid mounting point for the completed cockpit tub, while eliminating any risk of sink marks on the outside of the fuselage. A similar arrangement takes place with the wings, with those getting spar inserts to keep things nice and straight. Part of this assembly includes a piece that fits up into the fuselage along those large wing fillets, again improving strength at a point where potential seam work could take place.
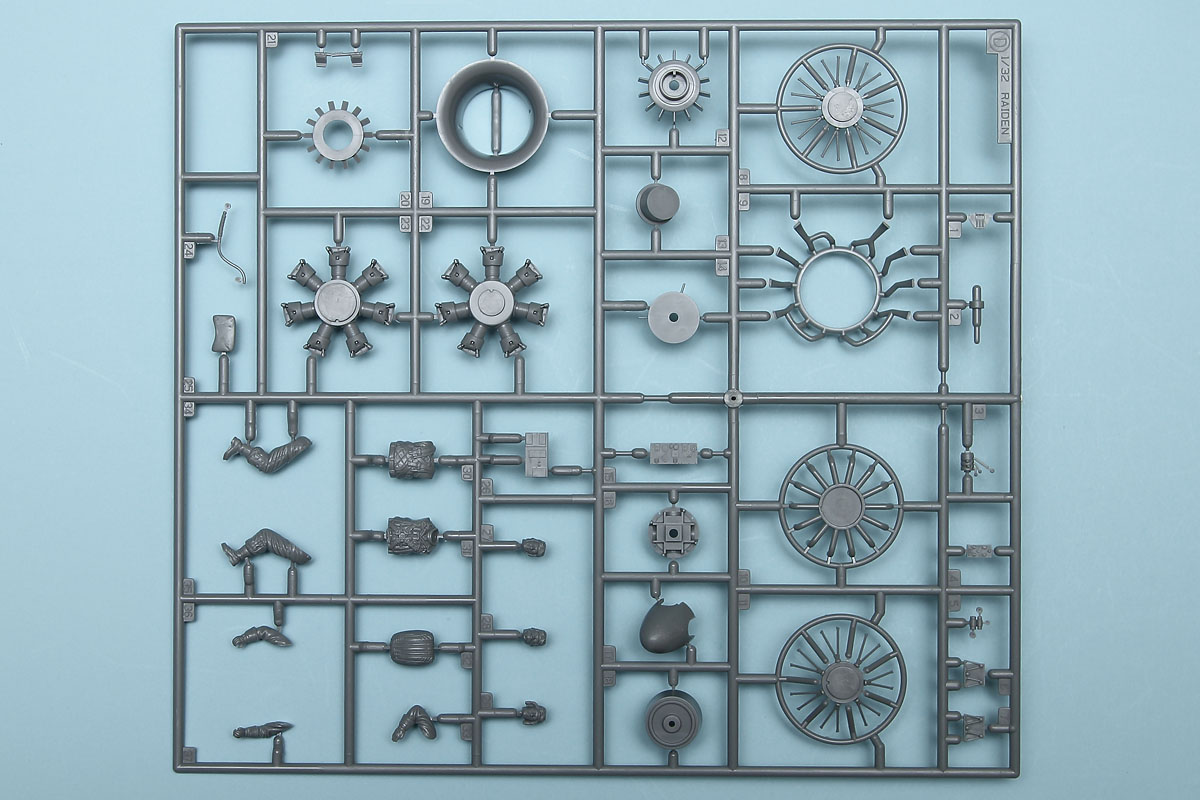
While on the subject of the wings, it is here that we see the first example of future variants. The modeler needs to open up the holes in the wing leading edge for the four cannon ports. Also separate are upper and lower wing panels, again aimed at the four-cannon armament of the J2M3. Undoubtedly we will see a future J2M2 release, which will have different panels in this area. One of the downsides to this method, though, is that the modeler will have to do some extra work to get those cannon barrels lined up correctly. These guns are inclined four degrees upwards, so you will have to break out your protractor and work up some kind of jig to secure these at the right angle. I would think that providing these as a cutout in the wing would have been a better route to go.

Flipping the model over, the landing gear is quite nice, with a two-piece tire receiving separate outer and inner hub pieces. The main gear strut is molded as one piece, with a two-piece separate oleo scissor assembly. The finished gear/wheel combination then meets up to the wheel door, which has both a solid attachment point for the strut as well as nice interior detailing. The tailwheel is molded as one piece, and fits into a wheelwell insert. One piece tailwheels can be a bit challenging to paint, but this one is large enough that it should not be too tough. While at the back of the plane, this kit comes with a separate clear piece for the tail light.
Switching ends, Hasegawa has provided the modeler with two types of propellers: a standard type and a high-performance type. Apparently these were interchangeable, so you can use whichever type of blade strikes your fancy. Either way, you get separate propeller blades that fit onto a rear hub piece, with a separate front hub. The propeller shaft is also a separate piece.

This leads us to the cowling and engine, and here we see another indicator as to a future J2M2 release. The one-piece cowling has the gun troughs molded in place, and since the J2M3 did not have fuselage guns, the kit comes with inserts that the modeler will put in the holes. The instructions then indicate where the modeler will need to scribe a new panel line, after smoothing out those inserts. This is excessively complex, and if those inserts do not fit absolutely perfectly, this area will be a chore to take care of. It would seem that just creating a separate tooling for the J2M3 cowling would have been a simple thing here, and would have made building the kit much easier.
On the positive side, though, the engine is very nice, with both rows of cylinders provided. Tehre are also two pieces for the rocker arms, and two pieces for the exhaust collector and stacks. Put all together and you have a beautiful looking engine that will be completely buried in the cowling, invisible from the front by the large impeller and ductwork, and invisible from the back by the tight-fitting cowl and exhaust stacks. Should the modeler want to show this engine off, though, it wouldn't be too hard to do, as a couple cuts of the cowling could open up the panels without much effort.
Moving on to the canopy, it is here that we see the final example of alternate variants. The kit comes with two windscreens, one for the J2M2 marked not for use, and the other for the J2M3. There are two sets of rear cockpit panels as well, depending on whether you will be modeling your aircraft with the canopy open or closed. There are two styles of antenna aerial mounts as well, denoting the different styles employed there.
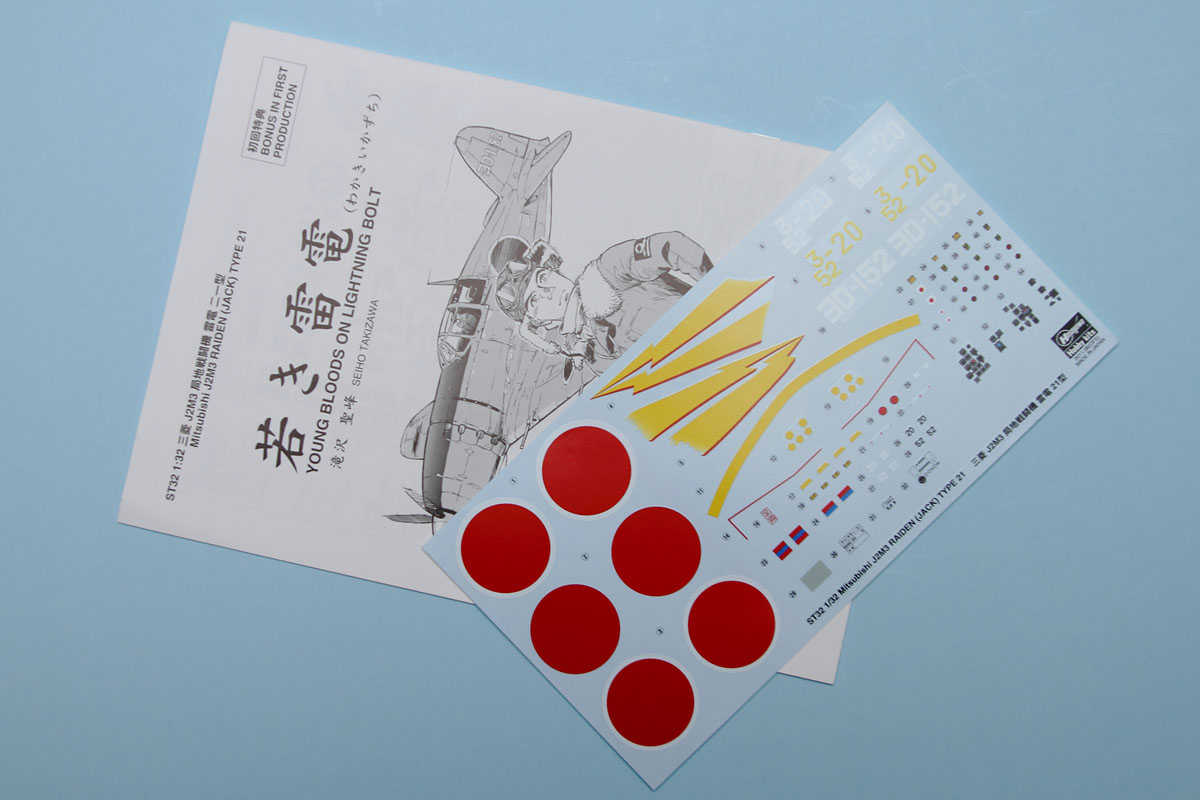
For the decal options, the first choice is the boxtop example, resplendent with the large yellow lightning bolts on the fuselage sides, from the 352nd Naval Flying Group. When one thinks of the Raiden, it is this scheme that immediately jumps to mind. The second option is from the 302nd Naval Flying Group, and it is a bit more sedate, featuring a thin yellow band around the rear fuselage and five flower markings on the fin tip. Both are finished in dark green over light gray green, with yellow wing leading edges. The decals are nicely printed, with bright colors and excellent registration. Finally, in this initial release, Hasegawa has included an interesting comic book about the Raiden and its pilots, written in both English and Japanese.
Conclusion
Despite the small issues with trying to get multiple versions out of a single mold, this is definitely the best choice for a 1/32 Raiden. Not only is it significantly cheaper than the old Revell kit, it is better detailed and easier to build. My thanks to Hasegawa USA for the review sample.