

Mark I 1/144 Curtiss P-36 Hawk USAAC
By Matt Bittner
Introduction
The Curtiss P-36 Hawk was the forerunner to the more successful P-40 Warhawk. Even so, the P-36 was definitely in a class by itself and was used in combat by the French during the Battle of France, amongst other nations including the Finns.
The Kit
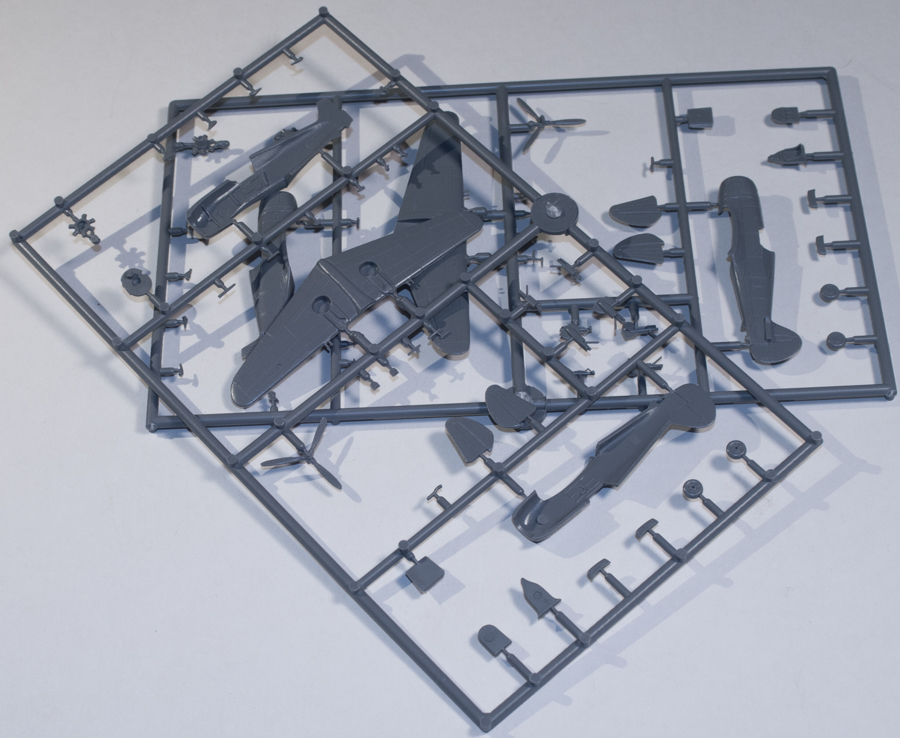
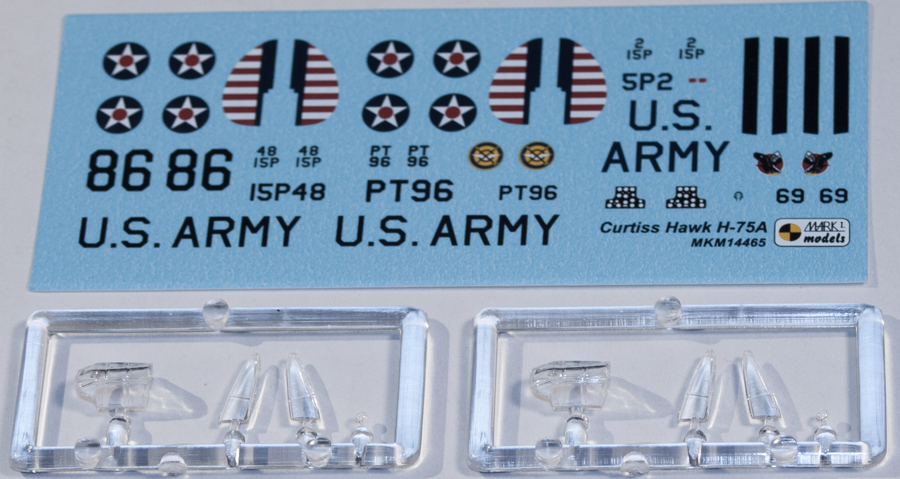
Each boxing of the Mark I 1/144 Curtiss P-36 contains two kits. Each kit consists of 35 pieces of injected, gray plastic (some parts used for different versions of the plane) and a clear sprue with four parts. Since this release is for the USAAC version of the P-36 decals are for four Army Air Corp aircraft:
- Curtiss P-36A, 48 15P, Black 86, 46th Pursuit Squadron, 15th Pursuit Group, Wheeler Field, Oahu, Hawaii, December 1941 (finished overall in a natural metal finish (NMF))
- Curtiss P-36A, PT 96, 55th Pursuit Squadron, 20th Pursuit Group, Barksdale Field, Louisiana, 1940 (finished overall in NMF)
- Curtiss P-36A, 2 15P, 47th Pursuit Squadron, 15th Pursuit Group, Haleiwa Fighter Strip, Oahu, Hawaii, December 1941 (finished in Olive Drab uppers and Neutral Gray undersides)
- Curtiss P-36C, Black 69 (Class II experimental camouflage scheme), 27th Pursuit Squadron, 1st Pursuit Group, Selfridge Field, Michigan during National Air Races, Cleveland Airport, Ohio (finished in olive drab, white, and sand)
Decals look good and appear to be in register. Before you continue with construction you'll want to decide which aircraft you're building because there are parts to add and/or parts to remove based on the above schemes you choose.
|
Construction starts with the cockpit and it consists of a floor, control column, seat and instrument panel with decals. This step also has you assemble the engine – after painting, of course – and it and the cockpit are inserted into one fuselage half before the fuselage halves are glued together.
The next step has you add the one-piece wing, the horizontal tail pieces and the top-cowl guns. This step also shows adding the prop but I would add that as a final step after painting. Also shown in this instruction step is which gun(s) to remove, based on your choice of aircraft (building the P-36A versus the P-36C).
|
In Step 3 again, there are parts to add if you're building the P-36C – which I would add now – as well as some of the other smaller parts and clear pieces, after masking, of course. However, I would leave the landing gear and gear doors off until after painting and decaling, just prior to adding the final overcoat.
Conclusion
Mark I has another hit on their hands with this release of 1/144 P-36s/Hawk 75s. This release is geared toward the USAAC use of the type while there are other boxing's for different types of Hawk 75s. With two kits in the box you have the option of actually choosing two of your favorites. A nice touch.
Huge thanks to Kits-Shop for sending the review kits.
|
|