
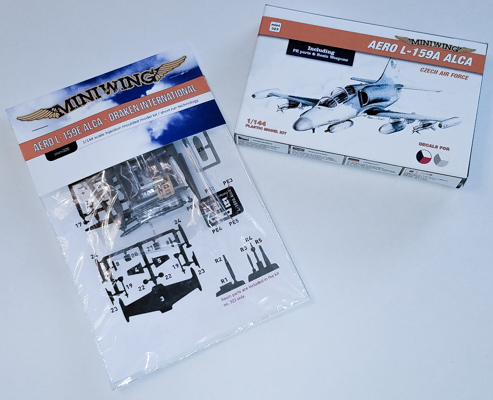
Miniwing 1/144 Aero L-159A/E Alca
By Matt Bittner
Introduction
Taken from Wikipedia:
"The Aero L-159 ALCA is a light subsonic attack jet and advanced trainer developed in the single-seat L-159A and two-seat L-159B versions respectively, produced in the Czech Republic by Aero Vodochody. In 2003, the Czech Air Force fleet of 72 L-159A aircraft was reduced to 24 due to budget constraints. After several years of storage, the government has re-sold most of the redundant aircraft to both military and civilian operators, namely the Iraqi Air Force and Draken International."
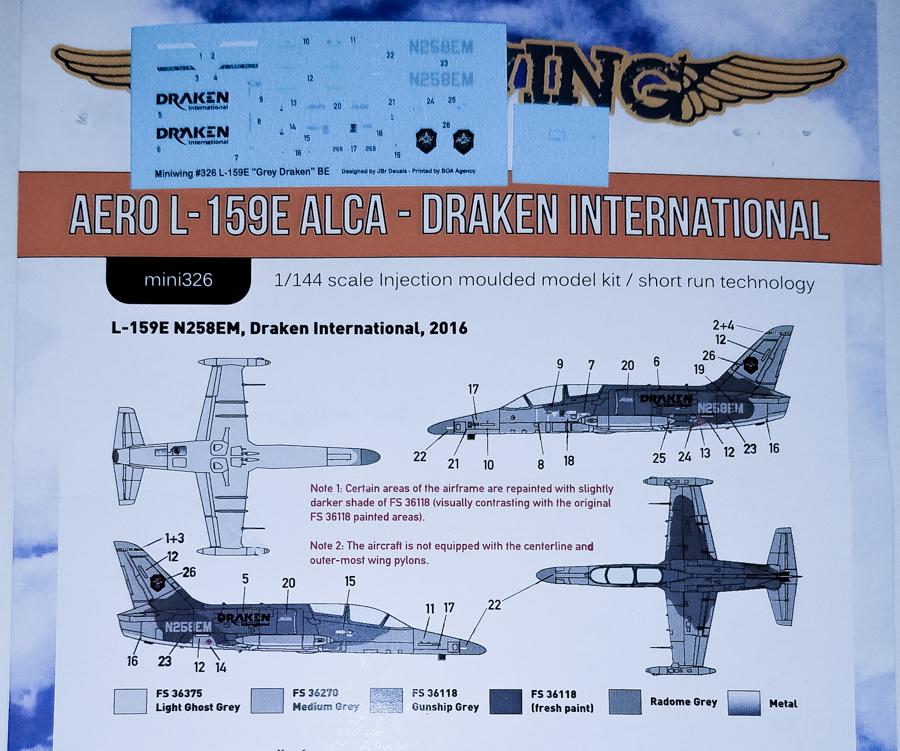
The L-159E designation was given to L-159As there were exported to Draken International.
The Kit
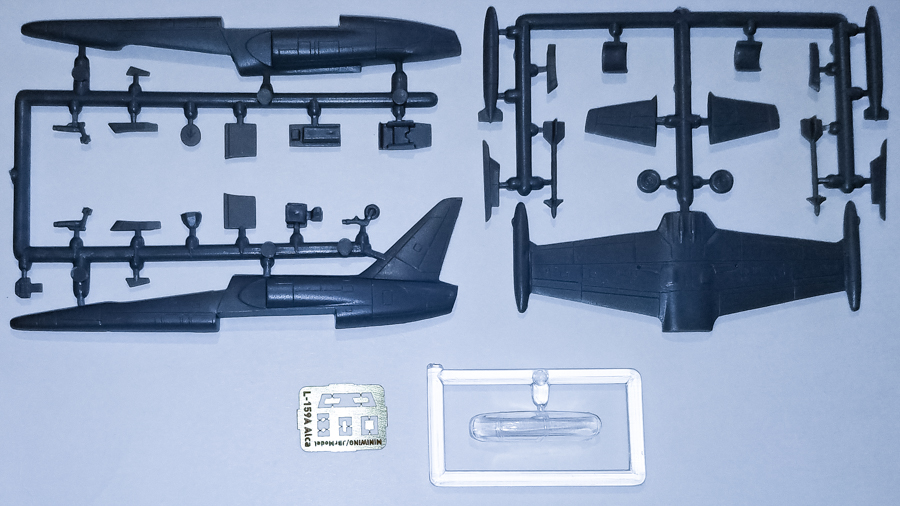
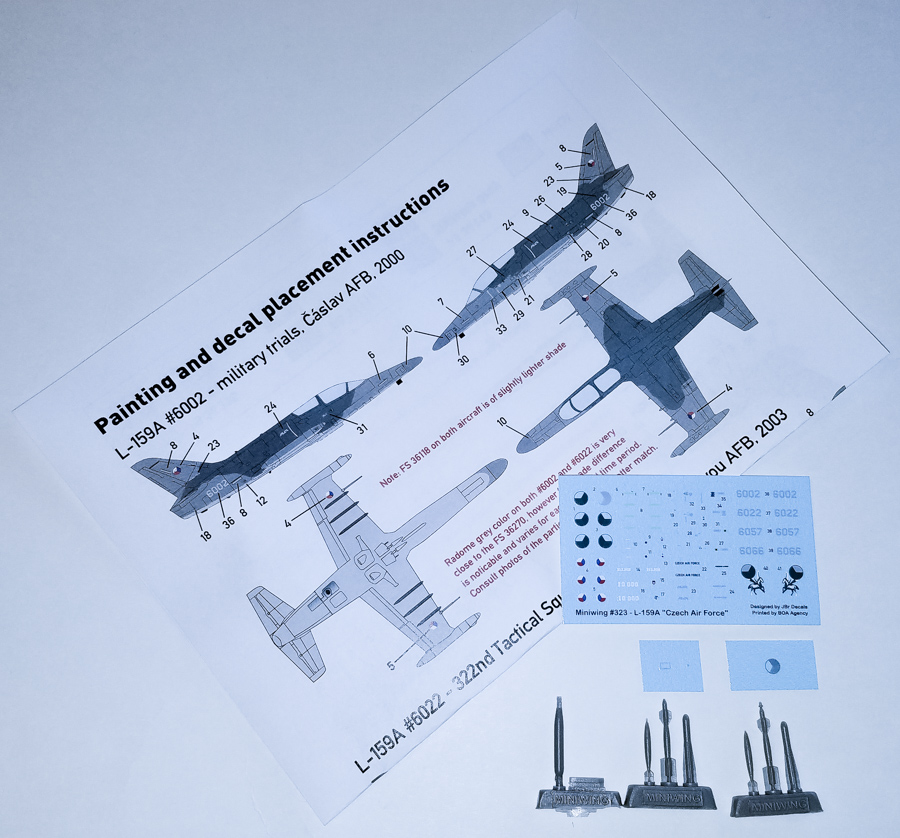
The basic Miniwing L-159 kit consists of 32 pieces of dark-gray plastic; one clear, injected plastic canopy; and a photoetch fret consisting of six pieces of brass, which are all antennas. Miniwing has released this kit in two main ways: as a boxed kit and as a bagged kit. The bagged kit contains just what I outlined above, and only includes decals for one aircraft (either Czech, Draken International or Iraqi). The boxed version includes not only what I mentioned above but also five pieces of resin: the center-section pylon; a PL-20 Plamen cannon pod that goes onto said pylon; a single Mk.82; a single GBU-12; and a single AGM-65. Those stores will go onto the underwing pylons but best to track down photos of an actual aircraft to see how they were placed. The markings for the boxed version of the kit are for four aircraft:
|
- L-159A #6002, Military Trials, Caslav AFB, 2000
- L-159A #6022, 322nd Tactical Squadron, Namest nad Oslavou AFB, 2003
- L-159A #6057, 212th Tactical Squadron, Caslav AFB, 2018
- L-159A #6066, 212th Tactical Squadron, Caslav AFB, 2007
All aircraft are finished in a three-tone gray scheme (uppers and lowers) and #6066 includes a black spine and rudder/fin. The decals are well done and in register as they're produced by JBr Decals so you can count on a top-notch product.
|
Some might consider this kit "chunky" and soft on detail. In addition, the sprue gates are quite thick which means it's best to use a razor saw to remove parts from the sprue. The "chunkiness" and softness is due to these molds actually being hand-made. While most molds now-a-days are usually 3D printed and/or milled, the fact these were hand-made results in molds not up to today's standards. These molds were initally created by Mark I, but because they thought they would be unable to recoup their investment the kit was never released. Miniwing decided to buy the molds due to national pride in the aircraft and released it realizing he would not recoup his investment. So take that into mind when you work on this model.
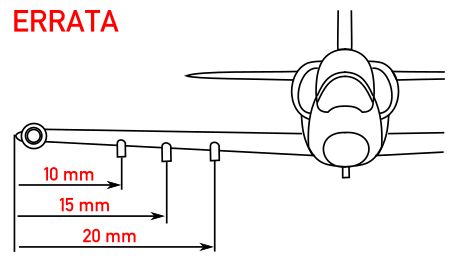
There is one other unfortunate aspect to this release. The first 100 or so kits came with instructions that gave the wrong measurements to add the pylons to the wings' underside. I have included the updated image within this review for those that have these first few releases.
|
On to the kit. Naturally construction starts with the cockpit and there isn't much too it. Unfortunately Miniwing/JBr Decals didn't include any seat belts nor instrument panel on the decal sheet which is something unusual. Once the cockpit pieces are added to one fuselage-half (and I've read where you definitely want to put part #13 in first which will guide where to fit the rest of the cockpit) the instructions have you add weight to the nose. I've also read this isn't necessary given the models long-nose and single-piece wing. But if you're unsure of that, add weight anyway as it should be just a few grams. Now you can assemble the fuselage halves, remembering to include the blanking plate into the tail.
|
Now the rest of the model can take shape. Add the wings, horizontal tail pieces, intakes with splitter plates and canopy (since it can't be opened unless you perform canopy surgery) and add the photoetch antennas, if so inclined. Turn the model over and add the weapon pylons (plus the resin center pylon, if using) along with the other photoetch antenna and you're ready for painting.
When painting and decaling are finished then you can add the landing gear, landing gear doors (which are a bit thick and best sanded down) and the weapons/external fuel tanks if using those. Now you have a finished Alca on your shelf.
Conclusion
While some might consider this a step-back for Miniwing, there is good reason for it. No one else was willing to release an L-159 in 1/144 so Miniwing took it upon themselves to do so. I'm hoping that someday, someone (Brengun?) will release not only a photoetch set for the model, but a replacement canopy as well. Peewit already has released canopy masks for the kit so that aspect is covered and a necessity, in my opinion. There's no doubt with a litte Tender Loving Care (TLC) you can create a splendid model using this kit.
I definitely thank Miniwing for sending the review kits.