
Miniwing 1/144 BAC Strikemaster
By Matt Bittner
Introduction
Taken from Wikipedia:
"The Strikemaster was capable of operating from rough air strips, with dual ejection seats suitable even for low-altitude escape, and it was therefore widely used by third-world nations. Operations by the type were restricted by most military users after the Royal New Zealand Air Force found fatigue cracking in the wings of its aircraft. Many aircraft retired by Botswana, New Zealand, Saudi Arabia and Singapore have found their way into museums and private collections.
"The Strikemaster was deployed by the Royal Air Force of Oman on several occasions during the Dhofar Rebellion, including a notable appearance providing Close Air Support during the Battle of Mirbat. Three Strikemasters were shot down over the course of the war, including one lost to an SA-7 missile.
"The Ecuadorian Air Force deployed the Strikemaster during the brief 1995 Cenepa War, flying ground sorties against Peruvian positions. An Ecuadorian Strikemaster crashed during a training mission in the Northern Border area, near Colombia, on 25 March 2009. Both pilots ejected; one later died of injuries received during the rescue attempt."
The Kit
|
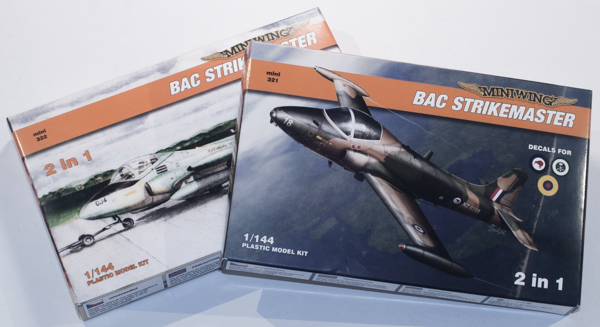
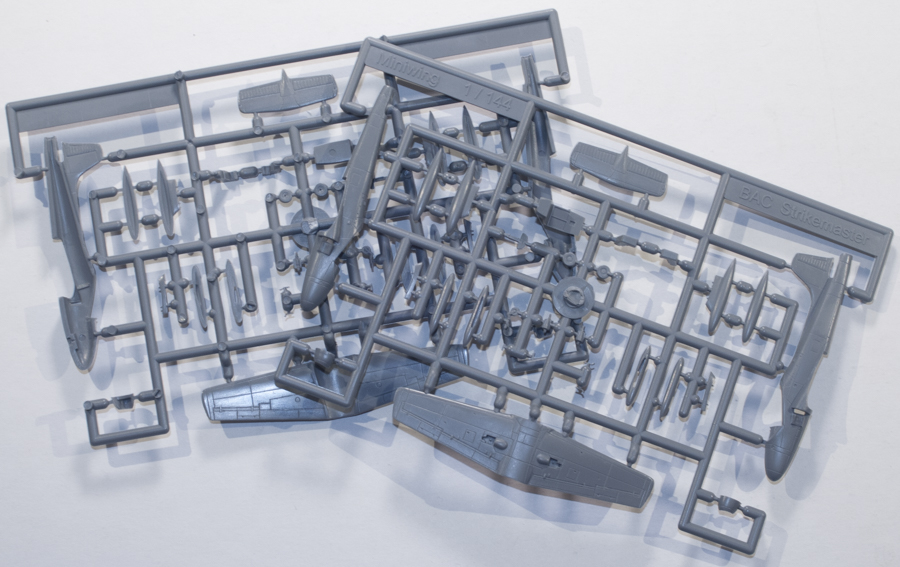
The Miniwing 1/144 BAC Strikemaster consists of 29 injected, gray parts and one clear, injected canopy. Miniwing has released two boxings so far, and have more planned. Each boxing contains two complete 1/144 BAC Strikemaster kits and each boxing comes with different decals. Kit #321 has decals for NS 63670 of the Royal New Zealand Air Force (finished with light grey undersides and tan, green and dark green on top); #1123 of the Royal Saudi Air force (light aircraft gray undersides, mid stone and dark earth on top, with day-glo orange wing tip tanks, fuselage stripe and uderside wing tips, nose and rear fuselage); and FAE262 of the Ecuadorain Air Force (dark green and dark sea grey on top with light aircraft grey undersides). Kit #322 contains decals for OJ4 of the Botswana Defence Force (tan and dark green wrap-around camouflage); #113 of the Kuwait Air Force (mid stone and dark green on top with light aircraft gray on the underside); and #167 of the Sudanese Air Force (mostly white with red accents). Decals are printed by JBr Decals and are top notch and will look great when added to the finished model. So your first decision is which marking you won't use since each boxing comes with three marking-sets but only has two kits per box.

Decals for kit 321
|
Construction shouldn't take long. After painting the cockpit and inside of the fuselage (unfortunately Miniwing provides no internal painting instructions), and applying the seat cushion/belt decals and assembling all parts of the cockpit, it can be inserted into one fuselage-half. After weight is added to the nose so it sits on its nose gear (Mininwing recommends at least 1 gram of weight) then the fuselage halves can be glued together and the intakes added to the completed fuselage. In addition, the canopy is added in this step as well but unfortunately there are no masks provided for masking it. Now the one-piece wing, one-piece horizontal tail and wing-tip tanks are added and it would be at this step I would paint the model. Once painting is finished then the underside pieces can be added (landing gear, gear doors and external stores) after applying all decals. Now you have a finished 1/144 Strikemaster on your shelf.
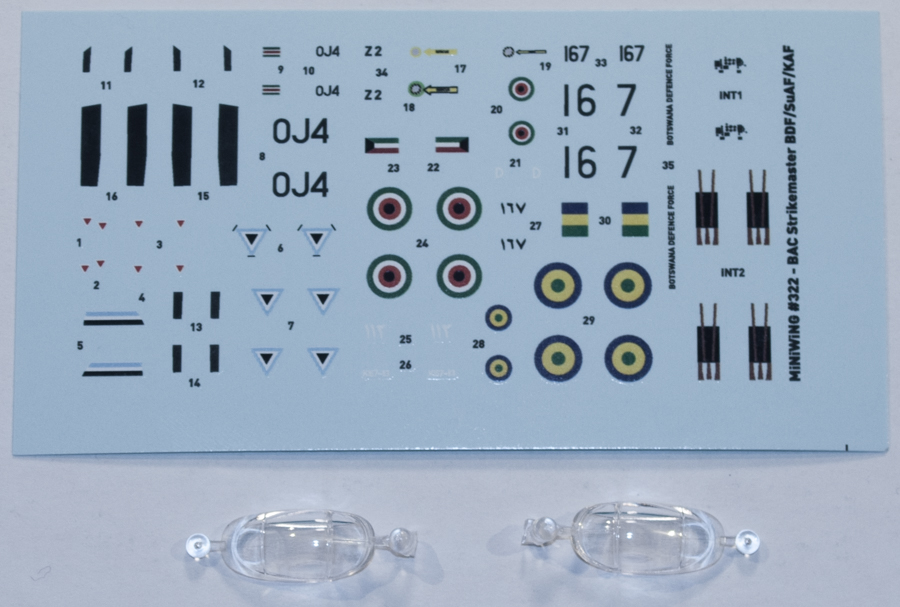
Decals for kit 322
|
Conclusion
Again, this kit shouldn't take long to finish and if you build both at the same time you'll have two 1/144 Strikemaster kits finished in no time. Remember that each Minwing boxing contains different markings so choose your kit based on that.
Plenty of thanks are given to Minwing for sending these kits to review. Now to build them!