
Miniwing 1/144 Cessna O-1/L-19 Bird Dog
By Matt Bittner
Introduction
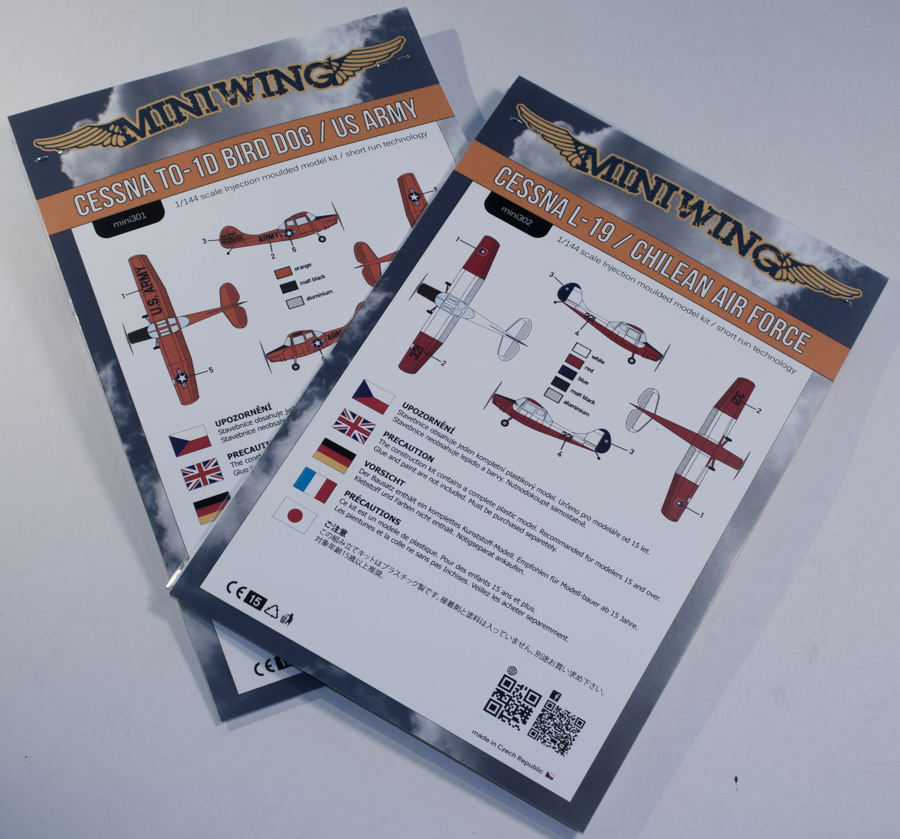
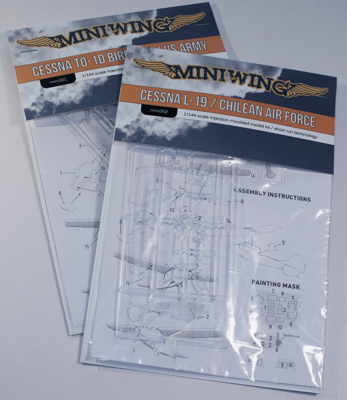
Miniwing is known for being one of the best 1/144 resin producers. Their kits are really top notch, look great and most build up relatively quickly. For their first foray into injected plastic they've decided to release a series of Cessna O-1/L-19 Bird Dogs. The first two released are a Chilean L-19 in red and white, and a U.S. Army TO-1D overall in orange. Recently Miniwing has announced four more releases: another U.S. Army version (this time overall in Olive Drab); an O-1A of the Royal Thai Air Force (light grey with day-glo orange wing stripes and horizontal tail surfaces); an L-19E of the Japan Ground Self-Defense Force (also in olive drab); an O-1E of the U.S.A.F. (finished in light grey); and an O-1A of the South Vietnam AF (finished overall in white).
The Kit
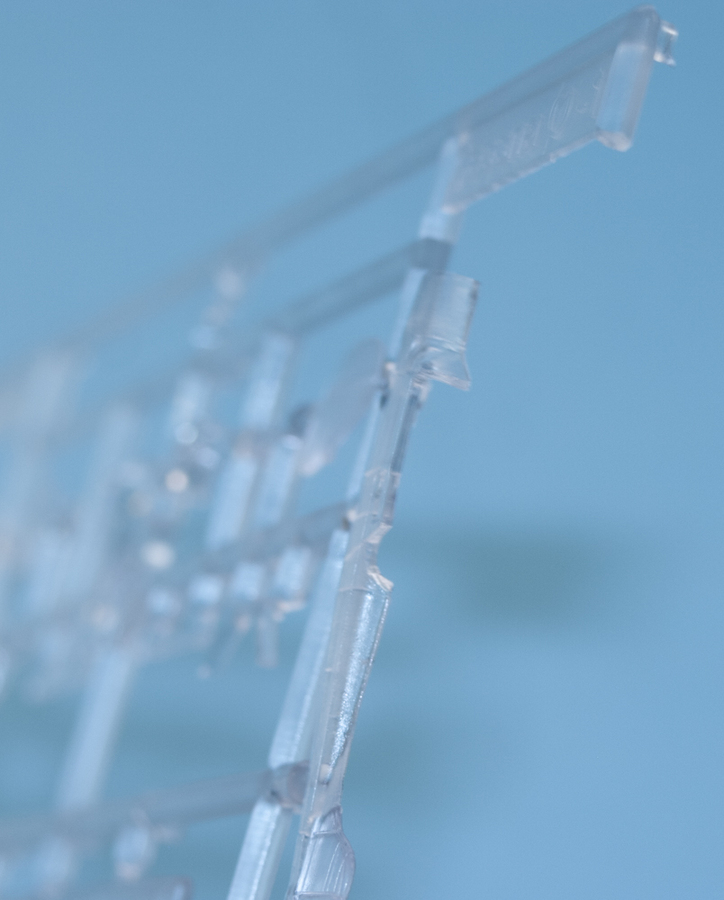
The Miniwing 1/144 Cessna Bird Dog is their first injected plastic kit, injected all in clear plastic. This is because of all the clear the Bird Dog had, not only the usual canopy and side windows but also windows in the wing above the cockpit. Supplying the kit in clear overall clear plastic helps with this aspect and now you don't have to worry about gluing any clear pieces. However, there is one small disadvantage to using clear plastic for this reason: the front windscreen now has a slight coke-bottle effect. But even so, I can't imagine how you could create a 1/144 model of a Bird Dog without doing it this way.
There are 13 pieces of plastic that builds up the model and since each Miniwing release only contains one marking option you'll need to decide up-front which scheme you want to finish your kit in and buy accordingly. The decals are wonderfully printed by JBr Decals and are in register and look great. Also supplied in the kit is a set of masks for the actual parts of the model that are to remain clear.

The interior is extremely simple as Miniwing only supplies a seat and nothing else. If you want to "busy up" the cockpit you're left to your own devices but if you don't open a door or "roll down" a side window, it will be difficult to see inside given it's such a small space. You will probably want to use the supplied masks for also painting the cockpit as you can apply them over the parts that are to remain clear on the inside of the model prior to painting.
Since all struts were molded in plastic – clear or not – they are probably too thick for the scale; however, this thickness helps to provide "robustness" in that you won't have to worry about bending or breaking them. Replacing them using some other material is entirely up to you but may look better.
Construction is simple. Add the seat into the cockpit and paint it (as mentioned, using the supplied masks), glue the fuselage halves together, glue the wing to the built-up fuselage, glue on the horizontal tail parts; add the nose and the rear cockpit window; and finally add the wing struts, landing gear struts, wheels and prop and you have a built 1/144 Bird Dog.
Conclusion
This is actually a very nice kit, even with the slight coke-bottle effect to the front windscreen. It will build up quickly and will look great however you decide to display it.
Many thanks to Miniwing for supplying the review models. These Bird Dog kits are available from Kits-Shop, post-free.
|
|