Introduction
Photo reconnaissance (PR) versions of the famous Spitfire actually started with the very first versions. There were two "straight" Mk.Ias converted into PR types by removing all guns and ammunition and putting cameras in the guns' place. As Supermarine kept modifying Spitfires into PR types the initial reaction was just to add letter caveats to the marks. Eventually, though, the British decided to re-number all the PR Spitfires into unique types. So, the fifth Mk.I version to be converted into a PR – the PR Mk.ID – was renamed the PR Mk.IV.
The Kit
The Czech Master Resin (CMR) kits are still considered the best 1/72 Spitfires in existence, regardless of material. However, they are resin and you will pay almost double what a Sword kit costs. You do receive a lot of options in a CMR kit but you have to be willing to work in resin and photoetch. Most modelers prefer injected plastic, so the Sword kit is the best in that regard.
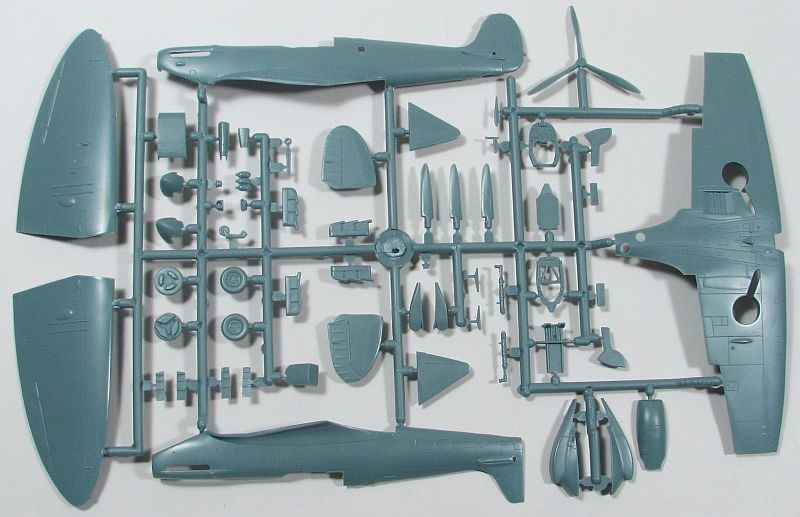
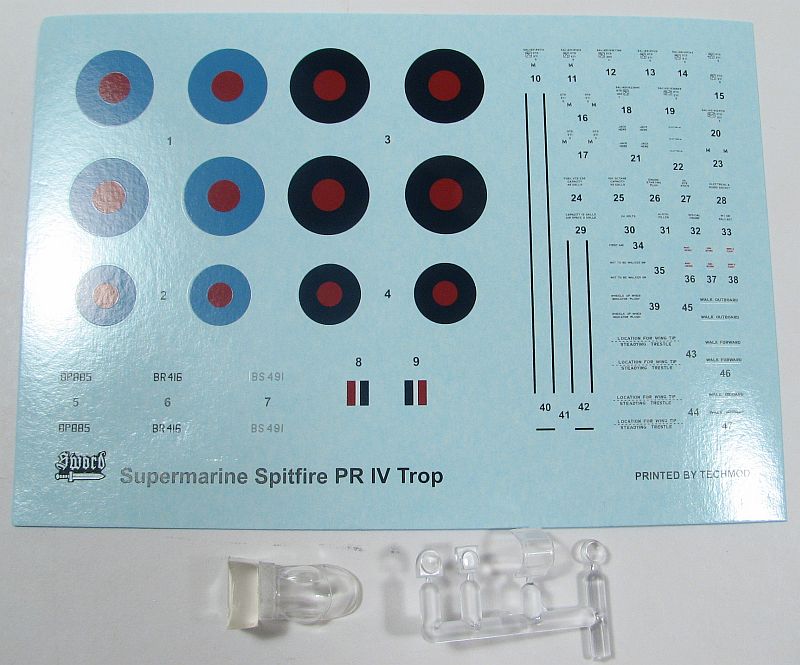
The Sword 1/72 Spitfire PR Mk.IV consists of 58 pieces of gray injected plastic and five pieces of clear injected plastic. In fact, a word on the clear pieces, especially the canopy. Sword has done an exceptional job molding the blisters on the side of the canopy. Very little to no distortion and the piece really looks great. Decals – nicely printed and in register – are for the following three Spitfires:
- PR Mk.IV Trop, BR416 of No.2 PRU, based at Marbel Arch, North Africa, 1942, finished mainly in white, with Royal Blue upper surfaces, meaning just the tops of the wings and horizontal tail pieces, along with just the top of the fuselage
- PR Mk.IV Trop, BP885, flown by Flt. Lt. Adrian Warburton of No.69 Squadron, based in Malta, 1942, finished overall in Royal Blue
- PR Mk.IV Trop, BS491, of 542 Squadron, RAF, Gibraltor, 1943, this one finished in overall PRU Blue
In addition to the decals for each specific aircraft, Sword also provides some decal stenciling. Excellent.
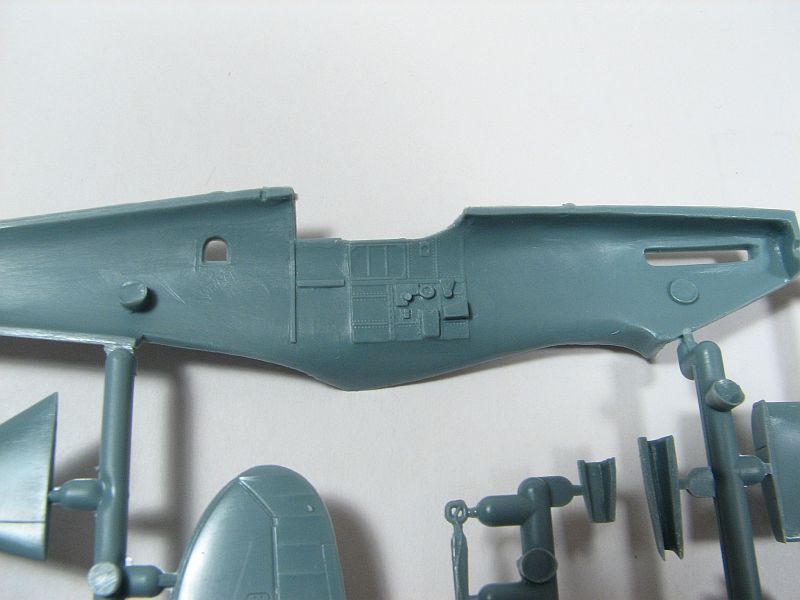
Construction naturally starts with the cockpit, and out-of-the-box it is a very nice one, the only thing missing are seat belts. Once the cockpit pieces are assembled then it, and a few more pieces, are glued into the fuselage halves, and the fuselage halves are assembled. (One thing I may figure out is how to make the exhausts fit into the model after painting – the instructions have you glue them in before the fuselage halves area assembled.)
Now that the fuselage is put together, attention is put onto the wings. There are landing gear sidewalls you need to glue in prior to doing anything else with the wings (although if you're building BR416 you'll want to perform the wing-tip surgery before even adding these sidewalls). Once that is finished then again, based on the aircraft, you'll need to sand off the strengthening strips on the top of the upper wing pieces. It is here also you'll add the clear pieces provided to represent the camera lens for the under-fuselage cameras. Now the instructions have you glue on the lower wing piece to the fuselage, and then add the upper wing pieces.
While the instructions now have you glue the landing gear pieces on, I would leave those off until the final steps, after painting and decaling. However, I would add the two under-wing intakes prior to painting. In addition you'll need to glue the horizontal tail pieces on and at least the rear clear piece. It is now that you can start painting and after that decaling.
Conclusion
This is an excellent kit and I can find no flaws with it at all. If you're looking for a PR Spitfire to build in 1/72 – and don't want to go the route of a conversion – then this is the kit you want. If you want to take the kit further than out-of-the-box, then you'll definitely want to pick up the Brengun photoetch set for it. That will take the model to a more detailed level. The Sword 1/72 Spitfire PR Mk.IV Trop will definitely look awesome when finished.