
Eduard 1/48 Brassin Bf109F Enhancement Sets
By Chris Cowx
First of all I would like to say I am starting to hate doing Eduard reviews. Endless strings of superlatives get irritating, but these things really are nice! The problems we have as modellers these days. Lord knows how we hold up!
Seriously, I will go into some individual detail for these four Brassin sets I am reviewing today, but I would like to begin with a few general notes. These sets are a testament to how improved resin casting is now, over what it was ten years ago, or even five years ago.
The details don't just stand proud of their surfaces, they are deeply undercut. The finesse is gorgeous, with things like perfect bolt heads and paper thin edges. The surface of the resin is smooth, like the injected molded plastic of a Tamiya kit. There are no bubbles, no pin holes-nothing. The resin parts are basically the same as their styrene counterparts, but with much finer details.
The photo etch is also of high quality. It bends well, has very fine detail and it is an excellent enhancement, as a general rule. Some of the photo etch of the 90's was not as good as the injection molded parts it was intended to replace.
In Eduard's current photo etch sets the parts chosen for reproduction in metal are much more sparing but the PE is very effective where it is used. The improvements in injection molding have closed the gap between plastic and photo etch, and this makes the overall detail better and easier to achieve.
Okay, onto the individual reviews.
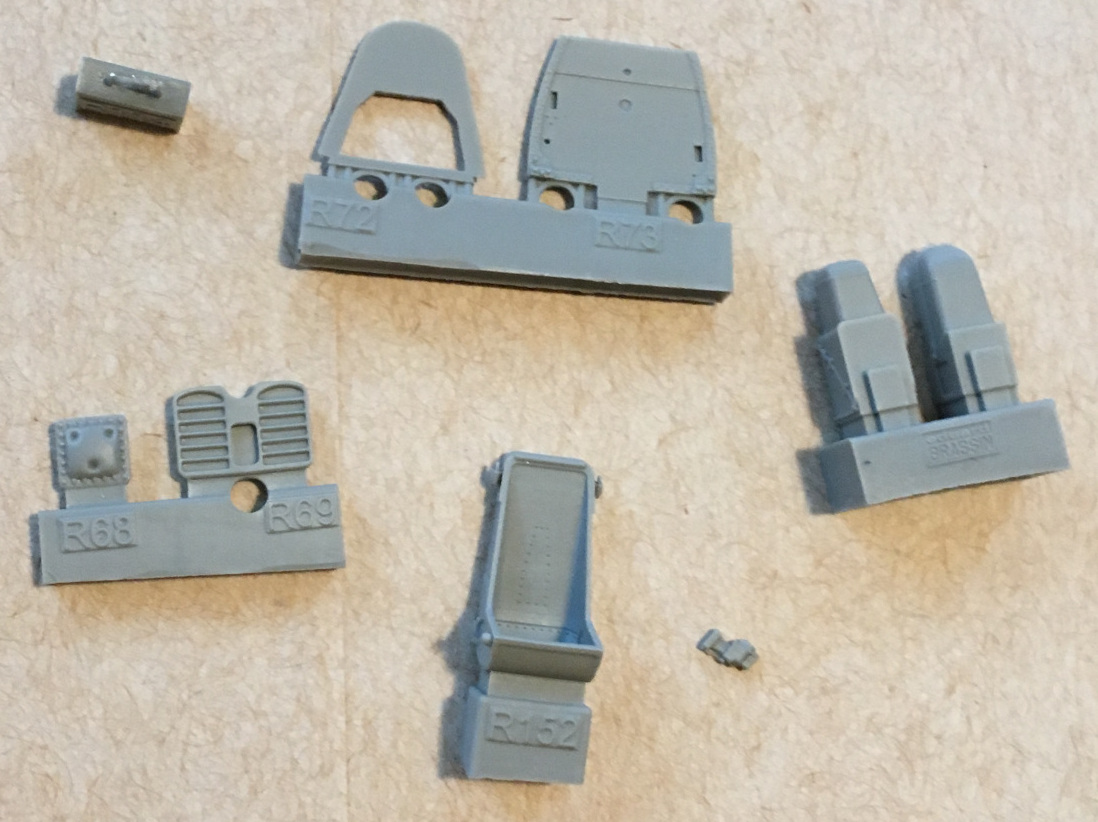
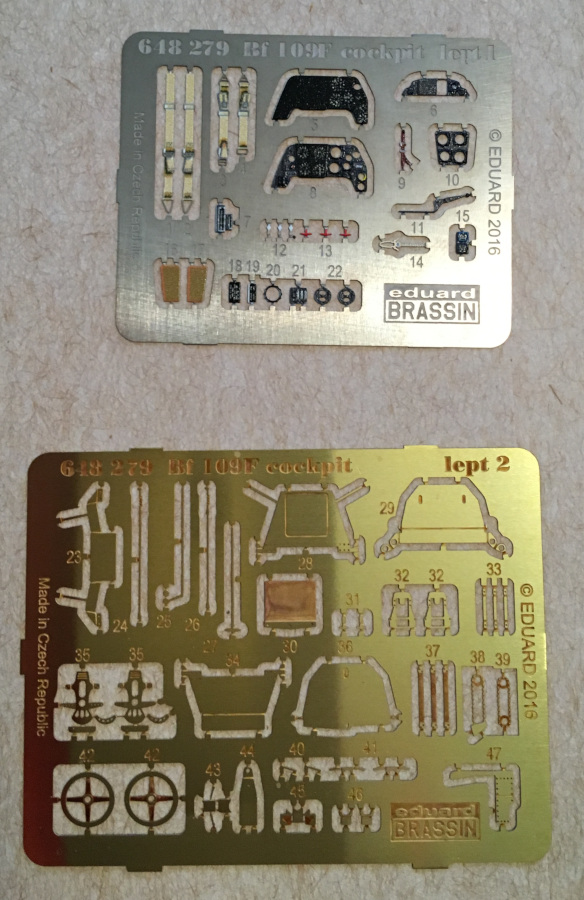
Cockpit #648279

|
I have used a lot of various resin and photo etched (PE) upgrades for cockpits over the last two decades or so and I feel this one is especially nice. I particularly appreciated that it gives you some choice. I am not personally a fan of coloured photo etch, for example. I like to paint my own instrument panels because I find that I can match the rest of the cockpit colour (s) better.
|
I also appreciate the three dimensional effect of an injection molded instrument panel over a flat coloured PE panel. I know, I am wrong and old fashioned, but there it is! But this Brassin set gives one the option of either a nicely molded resin panel with deep three dimensional detail, or a colour PE one. Something for everyone!
|
This is a set with little or no compromise on detail. Every rivet and bracket is done, and it replaces most of the injection molded cockpit parts. The gun sight alone is 5 pieces. A nice touch is the decals for the instrument panel for the dial faces. The instructions are excellent with accurate and detailed paint call outs, unlike many such sets that don't give any direction as for colour.
This Brassin set is a multi-media kit unto itself, and it has everything one could ever need to do an accurate cockpit, to virtually any level falling under the realm of sanity. You don't need anything, not even references! I'm a modeller with a lifelong pathological resistance to leaving well enough alone, so this is saying something.
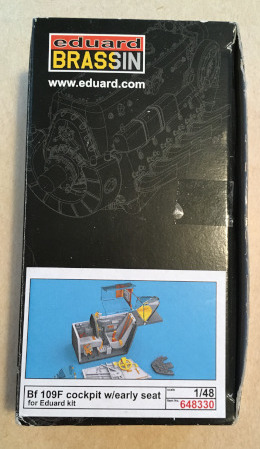
Eduard also released Brassin set #648330, as a compliment to the above cockpit set. This is basically the identical set except that it includes the earlier full bucket seat usually seen in the Bf109E, rather than the later seat pan. This should be a welcome sight for those that wish to be doing an early English Channel coast bird.
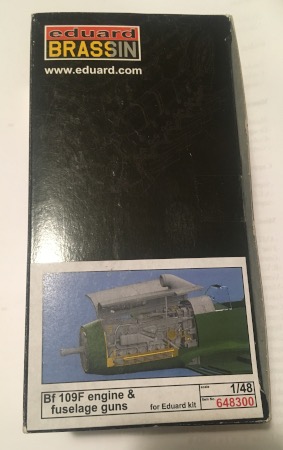
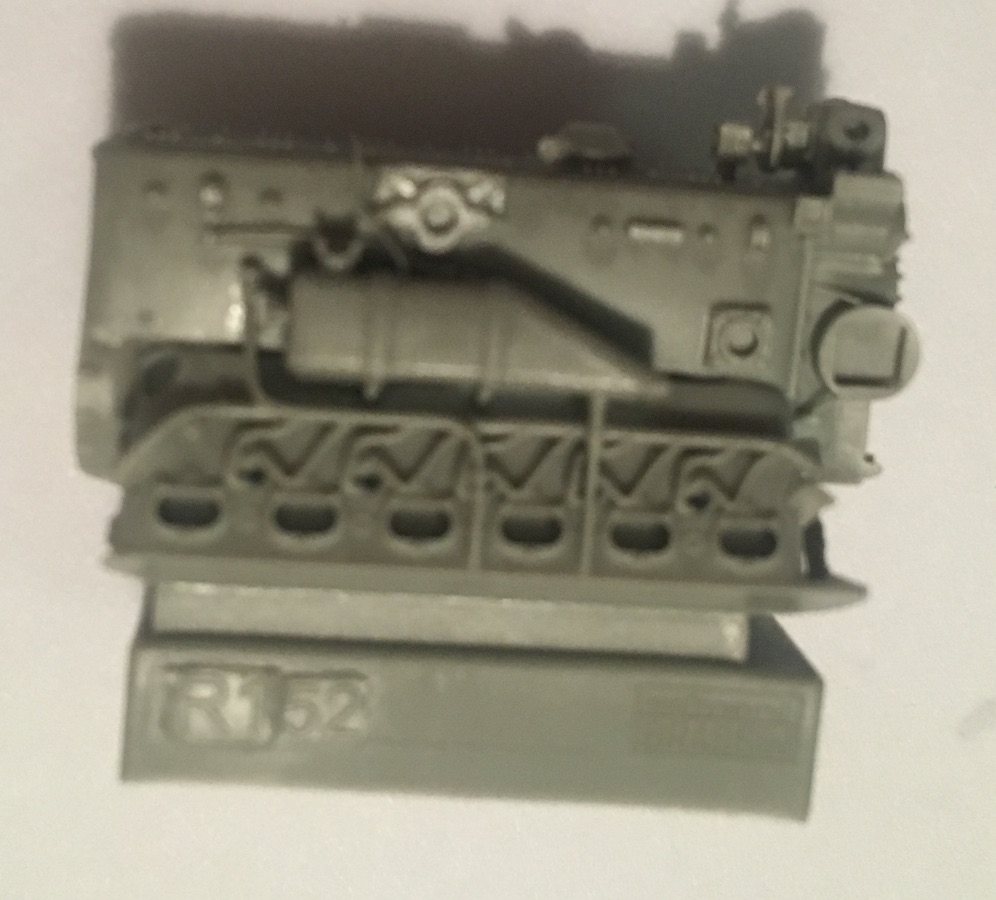
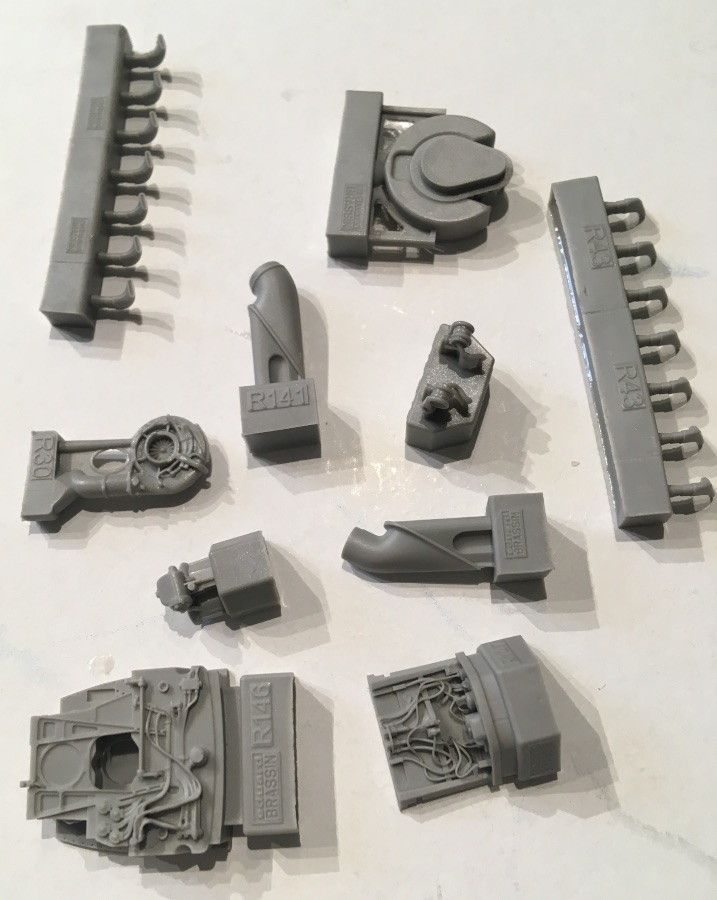
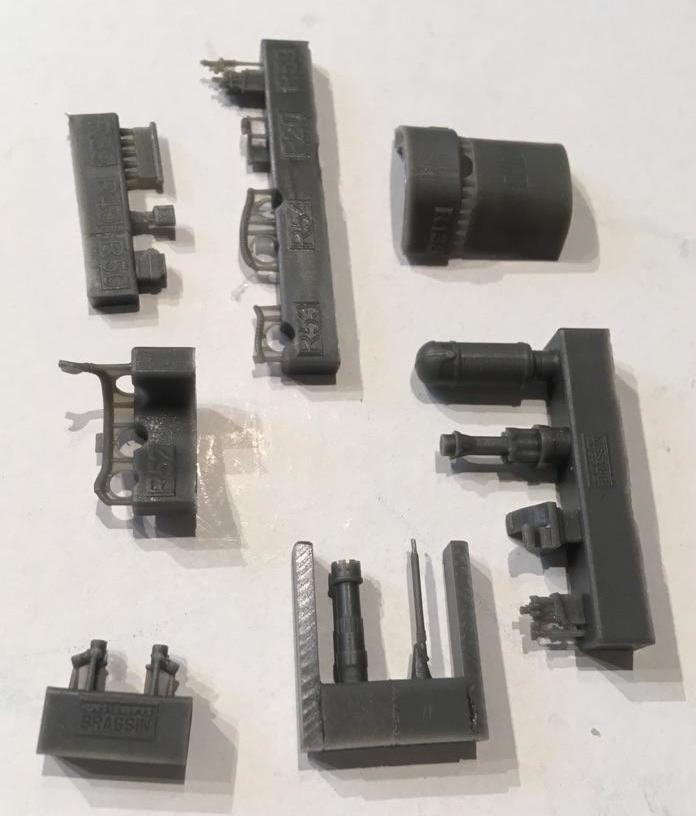
Engine #648300
|
This Brassin set includes a complete separate engine and full cowl gun details. This includes a separate block, new exhausts, oil cooler and guns with feed mechanisms. Regarding the level of detail, everything stated above applies here as well: fantastic resin with deeply undercut details, flawlessly smooth casting and no compromises on detail. I am surprised it does not come with tuning instructions!
|
Much of the wiring and tubing is molded in place. I prefer these items as separate parts but in this case the molding quality saves the day. Separate wiring and tubing is used in spots where molded-in detail does not work. Eduard has avoided the overuse of photo etched parts, which was virtually an epidemic in the dark old days of lesser resin casting. Here photo etch is used precisely where it does the most good, and otherwise the more 3 dimensional effects of the resin shine forth.
|
The instructions are excellent and the paint call outs are detailed and accurate. This is especially important with the engine, because while accurate info on the "man cave" (cockpit) is readily available, the Daimler-Benz DB 601 inverted V-12 is not so well covered.
|
A really nice final touch is a decal sheet for the engine serial number and data placards. This is the kind of detail that makes people stop for a second and even third time to look at your handiwork. Again, absolutely superb work on Eduard's part!
| ***image18** |
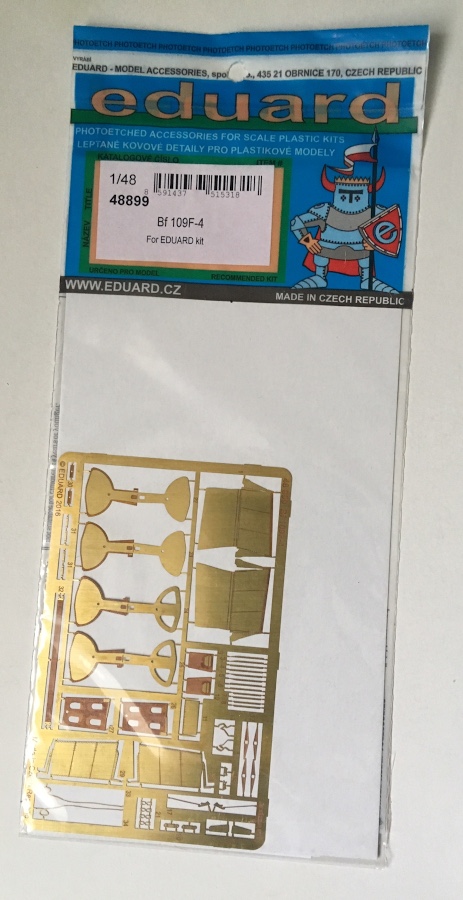
Photo etch #48-899
|
This is a very nice set, well designed to complement the kit. This PE set includes air frame detail, but virtually nothing for the cockpit. The Profipack kit already has extensive PE bits for the cockpit and it really doesn't need anything else. Anyone wanting to go further with the kit will likely want to use the cockpit set 648279/648330, reviewed above. What this set DOES have is a lovely collection of bits for the air frame! It has a beautiful set of landing gear doors, that will fold in half and give a very nice and accurate thin edge with the interior structure, and even the riveting is done right. It also has the wheel well channel around the legs, with the holes accurately done.
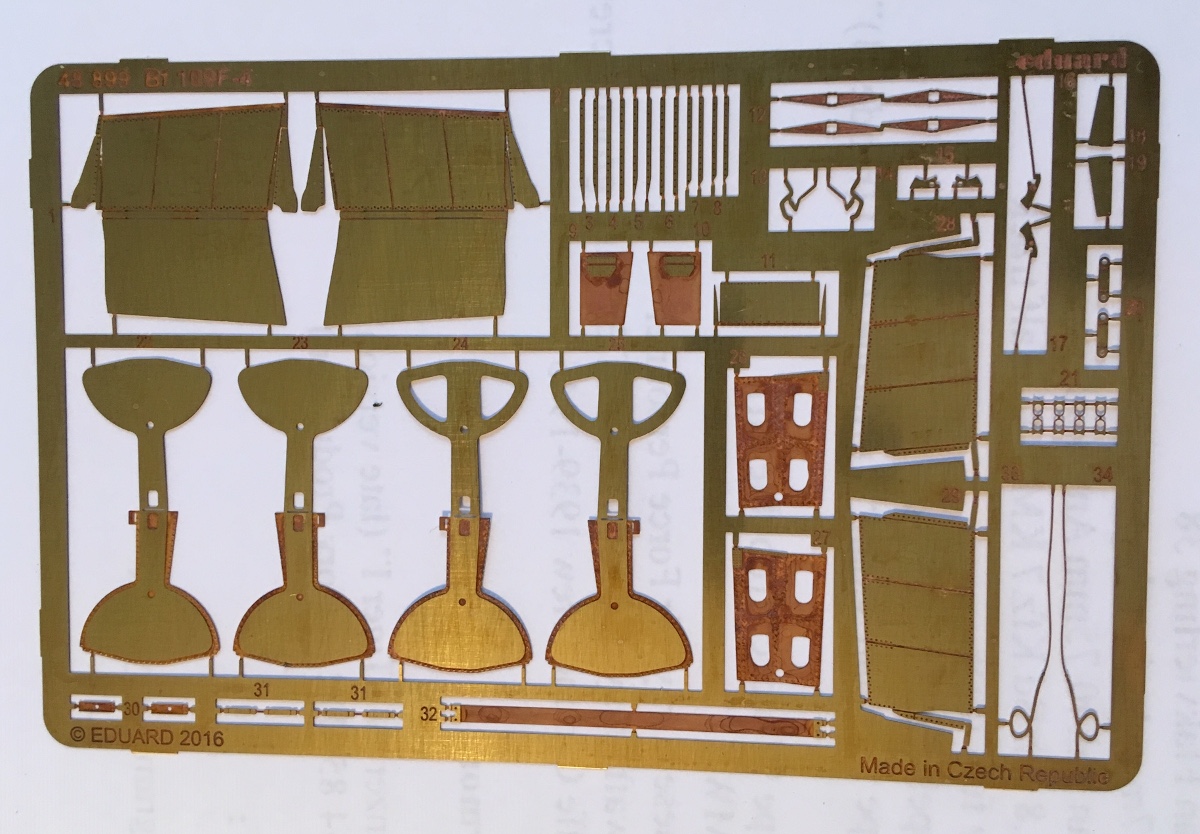
|
The other major area that is covered is the flaps. It has replacements for the flaps themselves along with various hinges, clevises, etc. I would want to make sure the flaps have a bit of a bend to them, thereby avoiding a flat "ironing board" look.
Overall an excellent set that gives you what you need without a lot of duplication. Well recommended to the guy that wants just a bit more for his Profipack kit!
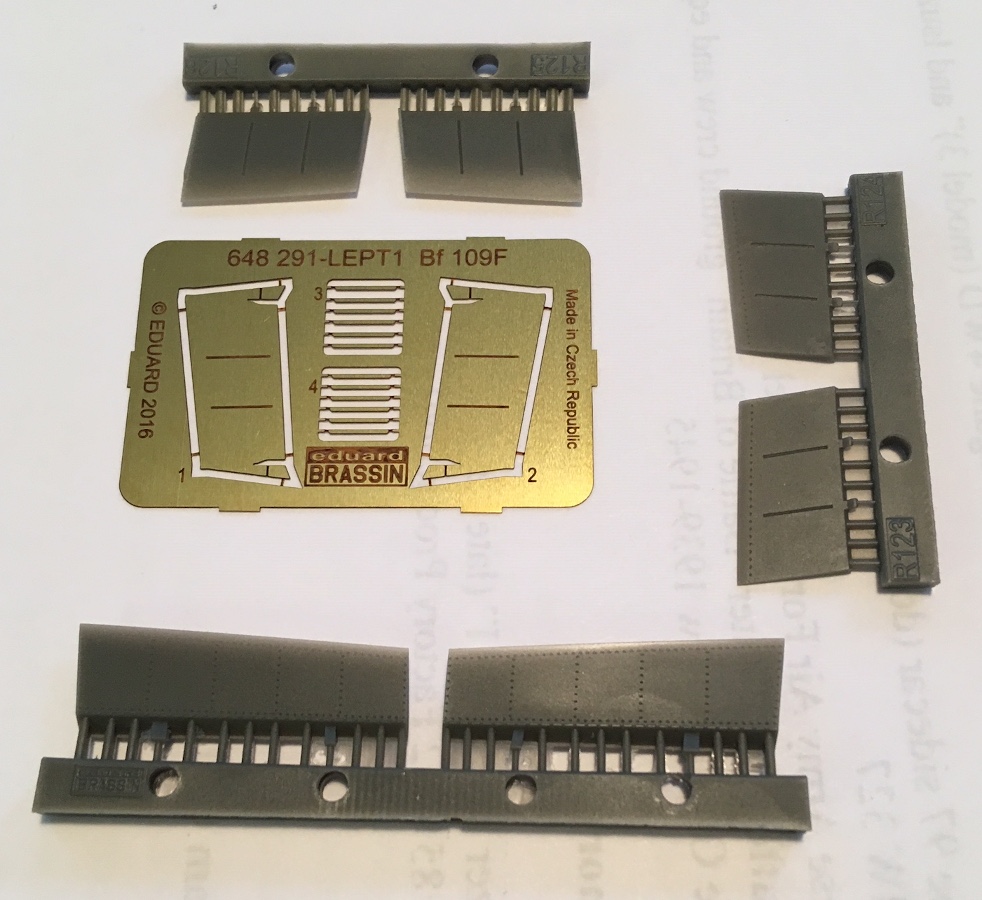
Landing Flaps #648291
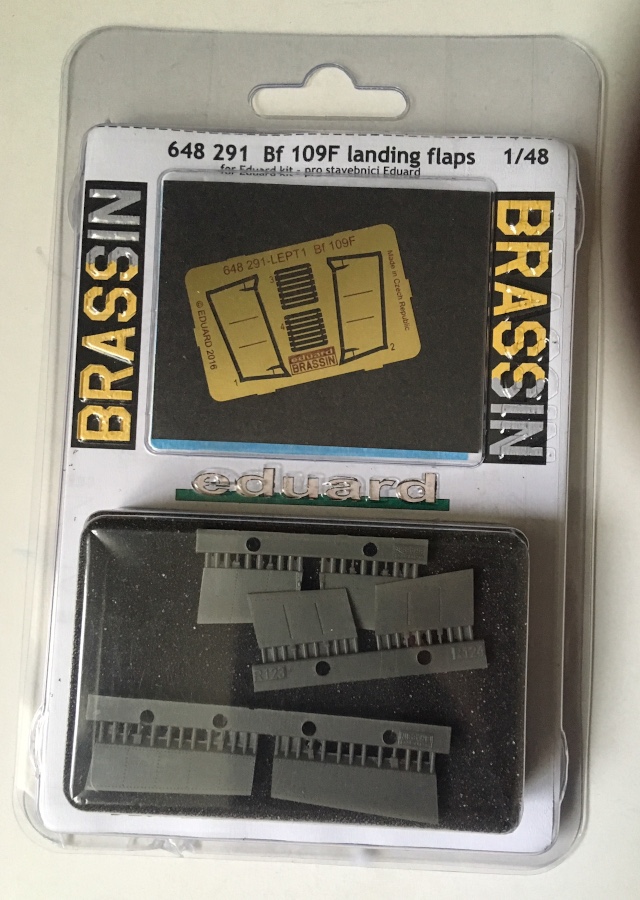
|
Well you learn something new every day! Like I just realized that the top radiator flap on a 109F is a double layered wind tunnel affair. I learned this because the Eduard set includes both the resin outer portion and a p/e inside set that gives the wind channel. Neat! Otherwise, it is a lovely set of resin flaps that have surface detail to match the kit, plus better detail in the interior areas.
|
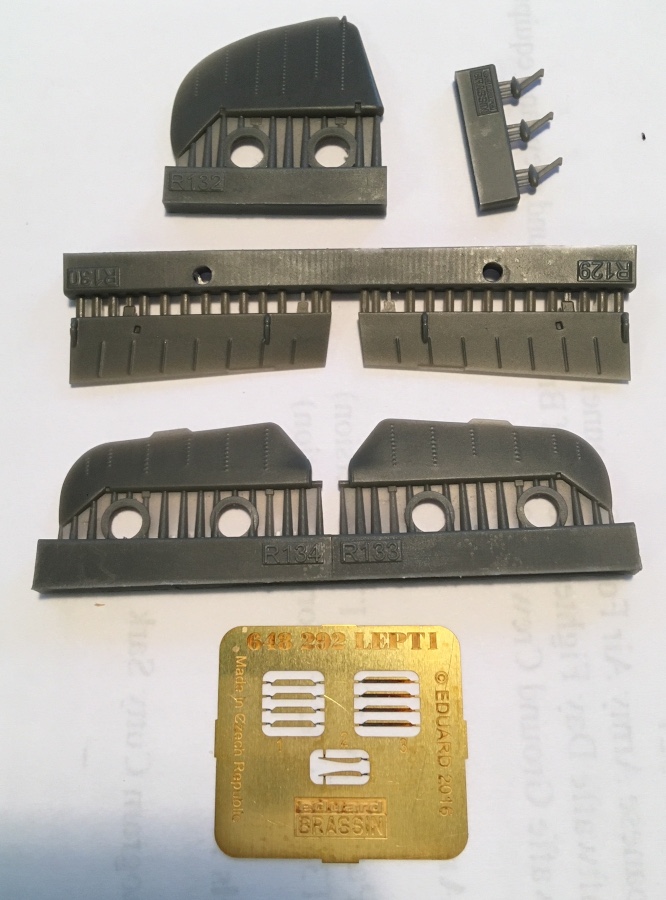
Control Surfaces #648292
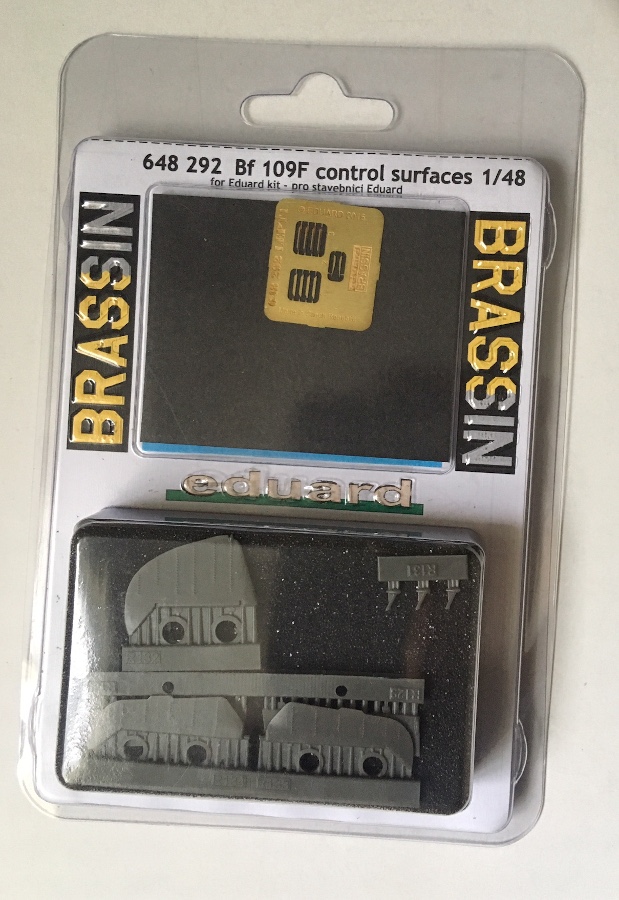
|
These seem to be designed primarily for a more subtle surface detail. Instead of the prominent tapes and stitching of the kit parts, you get a raised area for the tape and a line of dots to represent the stitching. I think that it will be more realistic, but of course tastes may vary!
|
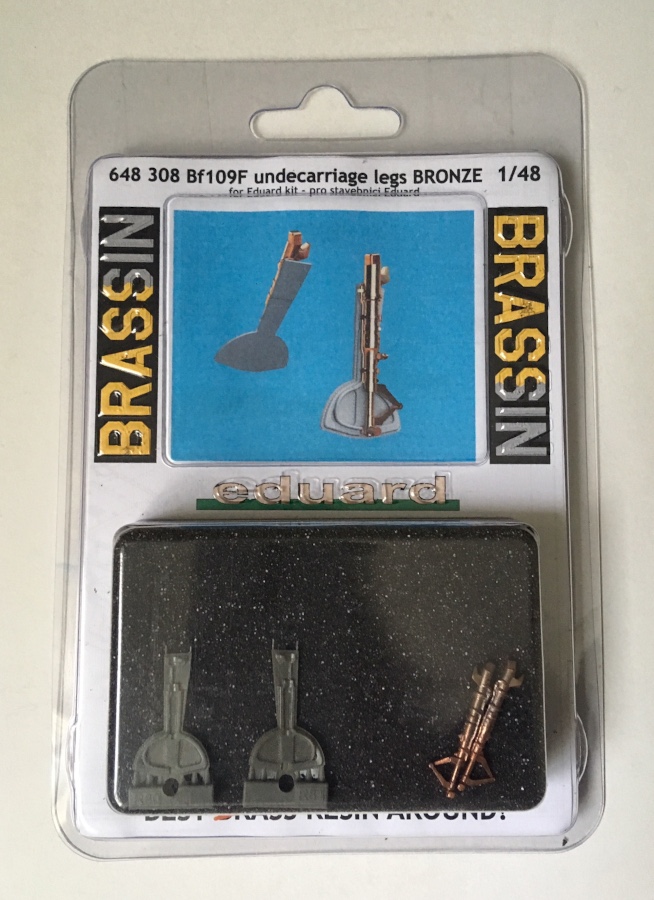
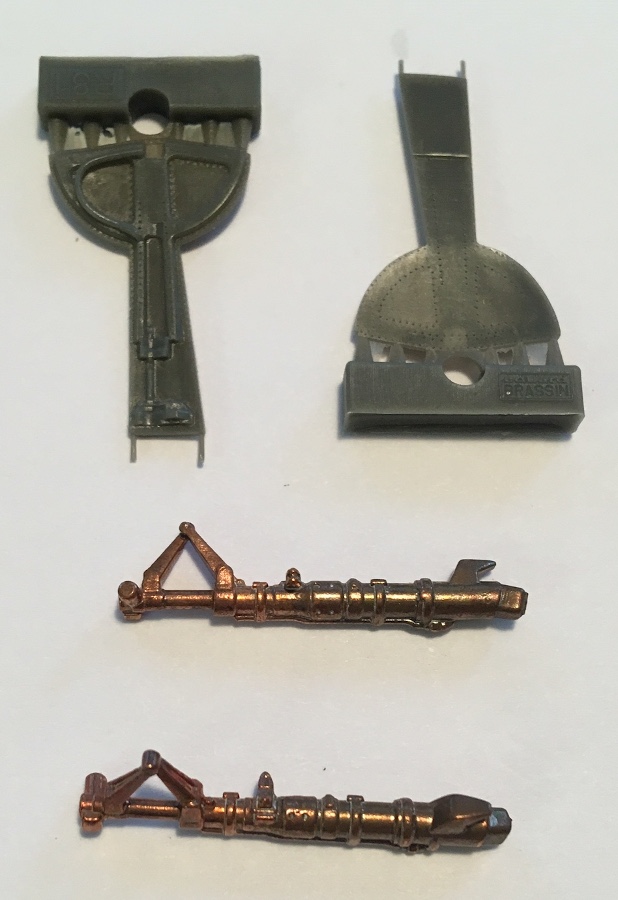
Bronze Undercarriage Legs #648308
|
The main difference between these parts and the kit parts is that they include the brake lines. They also have slightly better detail around the hinges on the oleo scissors. I was even more happy to see the resin gear doors, which have better detail than the kit parts, such as riveting and attachment points.
|
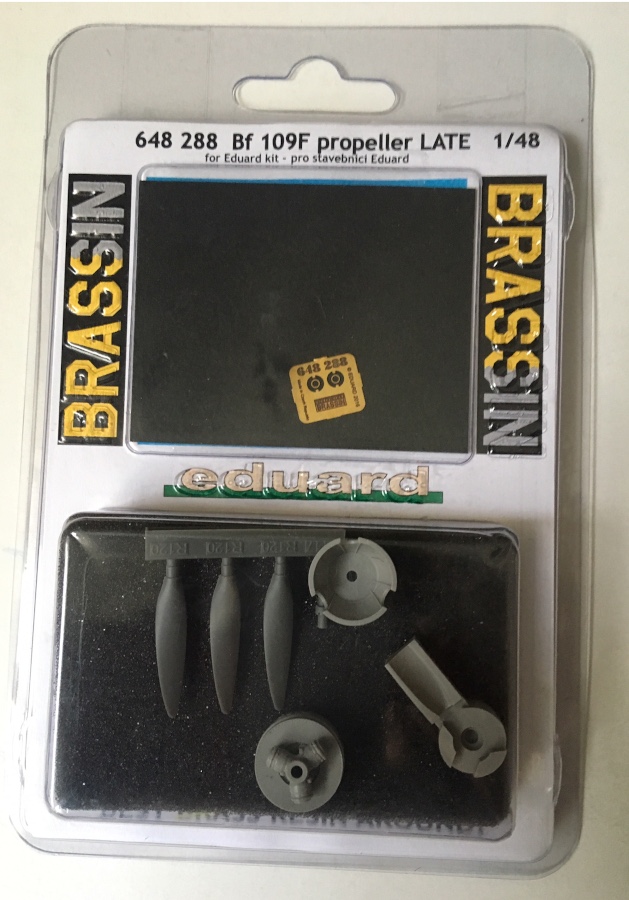
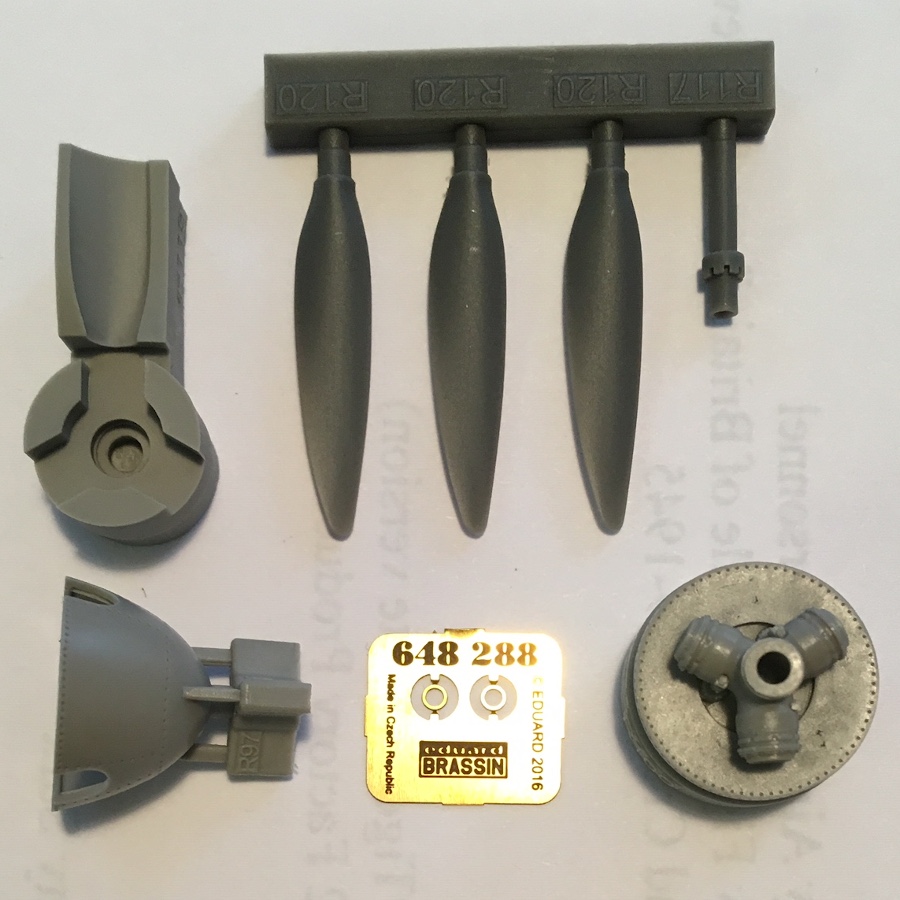
Late Propeller #648288
|
This set provides a hub/back plate plus four separate blades which makes assembly a bit more complex. There is a separate cannon blast tube, spinner plus an assembly jig for the blades. Finally, here is also a tiny p/e ring for the cannon muzzle. By using this set, you get finer detail on the hub, a fully riveted spinner, and generally more finesse by using this set. Subtle, but hey, you have come this far!
|
Conclusion
These sets are gorgeous. The casting quality is superb, the detail is deep and comprehensive, the photo etch is crisp. There is a well thought out approach taken to the multi-media nature of these sets, to bring out the best from each material.
These sets are for experienced modellers. They are complex yet relatively easy to use, but to get the best effect from them requires skill. That superb detail can be wiped out by a heavy coat of paint. Heavy handed weathering may eliminate any benefits of the exquisite surface detail. Most of these sets are not worth doing piecemeal: you need to go all the way. These do not correct some major flaw, simply because the kit does not really have any.
Now that I have scared you off, here is the good news. The cumulative effect these sets, used well, will raise the model to the next level. Additional rivets, thinner edges, tiny details that require a longer look, etc will set your model apart. Using the full suite of these sets is where 1st Place or Best of Show models come from. With a little help from you, of course!
Highly recommended. I would like to thank Eduard for the review samples.