


 Classic
Airframes 1/48 A5M4-K Claude Trainer
Classic
Airframes 1/48 A5M4-K Claude Trainer
By John C. Valo
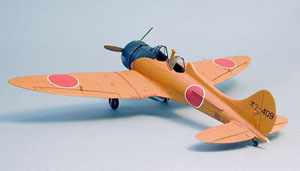
Having worked with Classic Airframes on various projects, and having built a few of their kits, I was delighted to have been asked to build up an example of the new A5M4-K Claude trainer to provide a review article. CA rather specializes in less than run-of-the-mill subjects, but this one is way out there! I can't say I have an overabundance of reference material on this particular airplane, so I won't even try to comment on the history here. Suffice it to say that for cramming two cockpits into a small single-seat design, the result isn't as inelegant as it probably could have been, and the CA kit captures the lines and 'sit' of the airplane quite well.
 To
keep things fresh, I like to start with different assemblies for each
new project. I admit to having always started on the cockpits whenever
I built a model, but the only result was a workbench scattered with really
nice cockpits when my enthusiasm for a given model waned. For the Claude,
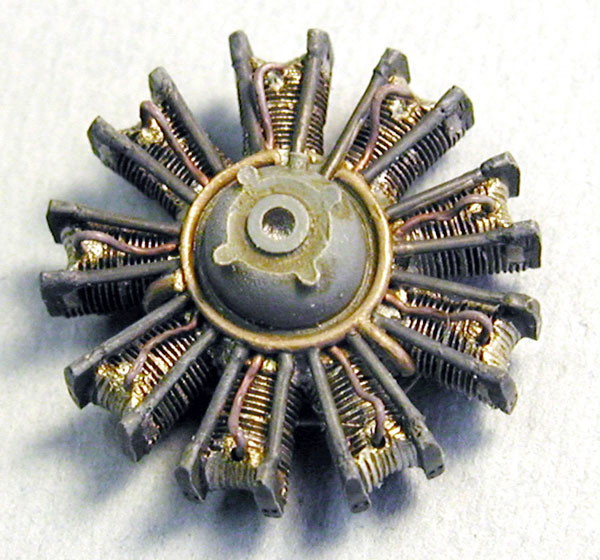
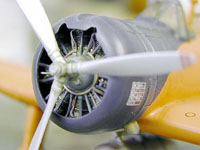
I decided to start with the engine, which is a beautifully molded multi-piece
resin affair. The instructions provide a suggestion for adding pushrods
from styrene rod or wire, and as it was being assembled, I could not help
but to embellish with a simple ignition harness. A little wash, a little
dry-brushing, et voila!
To
keep things fresh, I like to start with different assemblies for each
new project. I admit to having always started on the cockpits whenever
I built a model, but the only result was a workbench scattered with really
nice cockpits when my enthusiasm for a given model waned. For the Claude,
I decided to start with the engine, which is a beautifully molded multi-piece
resin affair. The instructions provide a suggestion for adding pushrods
from styrene rod or wire, and as it was being assembled, I could not help
but to embellish with a simple ignition harness. A little wash, a little
dry-brushing, et voila!
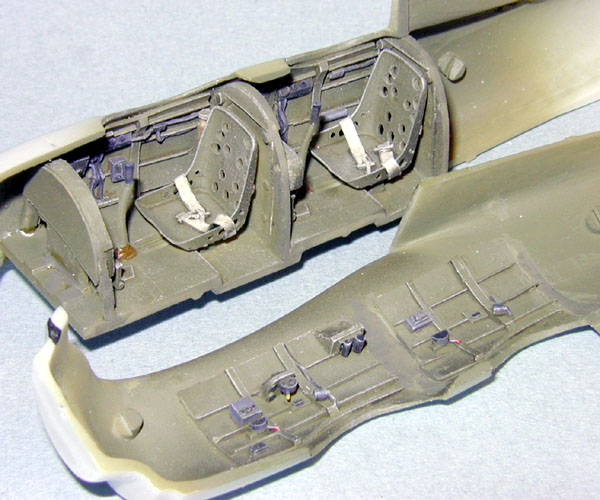
Once satisfied with the engine, I moved on to the cockpit. The resin
cockpit is quite nice, although I did heed the advice provided in Step
1 of the instructions and shaved the rear instrument panel from part R9,
gluing it to the back of part R7. Although the instructions show the cockpit
parts being assembled as a tub, I elected to build up the floor and bulkheads
first, fitting and adjusting these to match the cockpit openings. I then
glued one set of the resin cockpit sides to the fuselage halves, then
dry-fit and assembled the remaining cockpit parts as I went. A word of
advice - dry fit all the 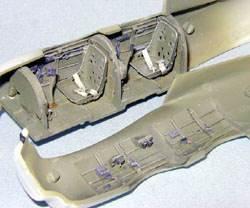 parts
before painting and detailing, as there will be some trimming involved!
I narrowed the cockpit floor so it would fit farther forward in the fuselage,
which helped align the instrument panel bulkheads and seats with the cockpit
openings. Depending on how you approach the assembly, fitting and a bit
of sanding will be necessary to make sure all those parts fit into the
proper place. After all, just like the real thing, this is a two-place
cockpit going into a one-place airframe that wasn't horribly spacious
to begin with! Note that immediately following that inserting the fuselage
underside spacer eases the fit of the cockpit parts mentioned below. I
painted the cockpit parts with a generic khaki-grey, and picked out the
details in various colors. The only addition to the kit parts were seatbelts
made from electrical tape. With all parts in place, the fuselage halves
were joined together. Again, the instructions suggest sanding the mating
edges of the rear fuselage upper parts, as the fin/rudder (part A7) is
slightly narrower than the fuselage at its seam. Not much thinning has
to be done, but be sure to test fit the fin/rudder as you go so you don't
remove too much. I added a small clear lamp to the end of the fuselage
made from a piece of clear sprue. Per the instructions, the unnecessary
tailhook fairing was sanded off.
parts
before painting and detailing, as there will be some trimming involved!
I narrowed the cockpit floor so it would fit farther forward in the fuselage,
which helped align the instrument panel bulkheads and seats with the cockpit
openings. Depending on how you approach the assembly, fitting and a bit
of sanding will be necessary to make sure all those parts fit into the
proper place. After all, just like the real thing, this is a two-place
cockpit going into a one-place airframe that wasn't horribly spacious
to begin with! Note that immediately following that inserting the fuselage
underside spacer eases the fit of the cockpit parts mentioned below. I
painted the cockpit parts with a generic khaki-grey, and picked out the
details in various colors. The only addition to the kit parts were seatbelts
made from electrical tape. With all parts in place, the fuselage halves
were joined together. Again, the instructions suggest sanding the mating
edges of the rear fuselage upper parts, as the fin/rudder (part A7) is
slightly narrower than the fuselage at its seam. Not much thinning has
to be done, but be sure to test fit the fin/rudder as you go so you don't
remove too much. I added a small clear lamp to the end of the fuselage
made from a piece of clear sprue. Per the instructions, the unnecessary
tailhook fairing was sanded off.
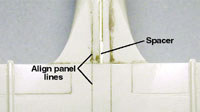 Moving
on to the main structural assembly, about the only real fit problem that
I encountered was when dry-fitting the lower wing to the fuselage halves.
Gaps at the wing roots obliged me to insert a small (1 mm / .030") spacer
between the fuselage halves at the lower seam, immediately behind the
wing/fuselage joint. There are two panel lines that run lengthwise on
the underside of the fuselage halves that will match up to their counterparts
on the lower wing when the spacer is inserted. After doing this, the wing
roots only needed a touch of the sanding stick for a good fit. I filled
the resulting gap between the fuselage halves with putty, and all was
well. This also dramatically assisted the fit of the cockpit parts. This
particular point has been reflected in the instructions also. Having not
yet built the single-seat Claude, I have no idea if the same situation
exists, but it certainly is an easy fix, and would be worth checking into
if building the single-seater. Once the wings were in place, I cut away
the navigation lights and replaced these with new ones carved from colored
toothbrush handles. Optional resin aileron actuators are
Moving
on to the main structural assembly, about the only real fit problem that
I encountered was when dry-fitting the lower wing to the fuselage halves.
Gaps at the wing roots obliged me to insert a small (1 mm / .030") spacer
between the fuselage halves at the lower seam, immediately behind the
wing/fuselage joint. There are two panel lines that run lengthwise on
the underside of the fuselage halves that will match up to their counterparts
on the lower wing when the spacer is inserted. After doing this, the wing
roots only needed a touch of the sanding stick for a good fit. I filled
the resulting gap between the fuselage halves with putty, and all was
well. This also dramatically assisted the fit of the cockpit parts. This
particular point has been reflected in the instructions also. Having not
yet built the single-seat Claude, I have no idea if the same situation
exists, but it certainly is an easy fix, and would be worth checking into
if building the single-seater. Once the wings were in place, I cut away
the navigation lights and replaced these with new ones carved from colored
toothbrush handles. Optional resin aileron actuators are 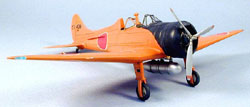 provided
if you choose to carve off the ones molded onto the wings. I elected to
do so, and I think the result is well worth the minimal effort involved.
The stabilizers, engine and cowl were affixed in place, then it was into
the home stretch.
provided
if you choose to carve off the ones molded onto the wings. I elected to
do so, and I think the result is well worth the minimal effort involved.
The stabilizers, engine and cowl were affixed in place, then it was into
the home stretch.
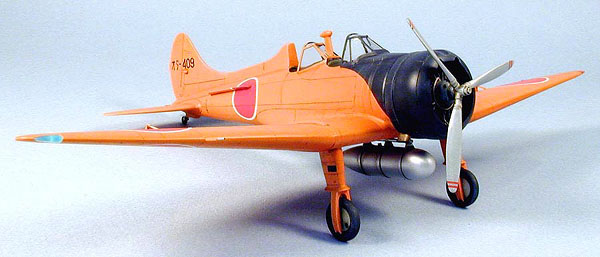
For the fixed landing gear, CA provides two styles of wheel spats, a
full spat (as on the fighter version) and a cut-back variation. I have
not seen photos of the particular arrangement that CA has provided for
the cut-back version, but it certainly is conceivable that this arrangement
was used. From a 'model' standpoint, this is a whole lot easier to build
(and I'm quite sure, manufacture) than the most commonly photographed
'bare strut with a couple of pieces of tin attached' variant. As I wanted
to build this kit essentially as it came in the box, I used the parts
provided. I would advise sanding the mating edges of the constituent parts
of the spats on a flat piece of 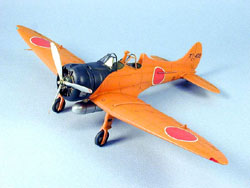 sandpaper,
occasionally checking the fit of the wheel between the spat halves. I
only recommend this because I didn't, and wound up with a slight, almost
unnoticable, mismatch between the port and starboard spats. Live and learn!
sandpaper,
occasionally checking the fit of the wheel between the spat halves. I
only recommend this because I didn't, and wound up with a slight, almost
unnoticable, mismatch between the port and starboard spats. Live and learn!
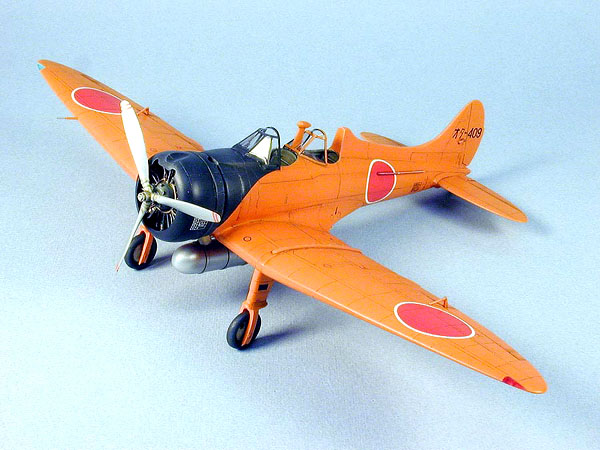
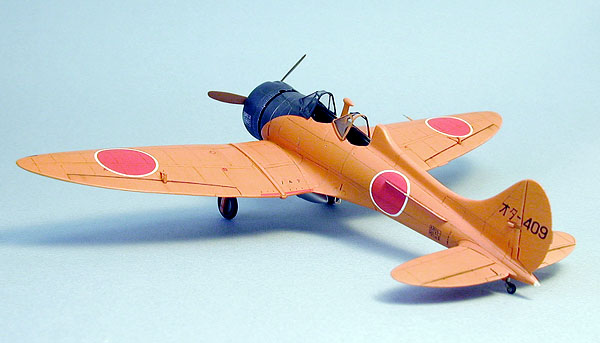
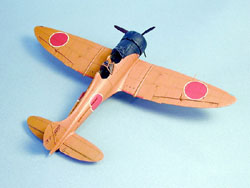
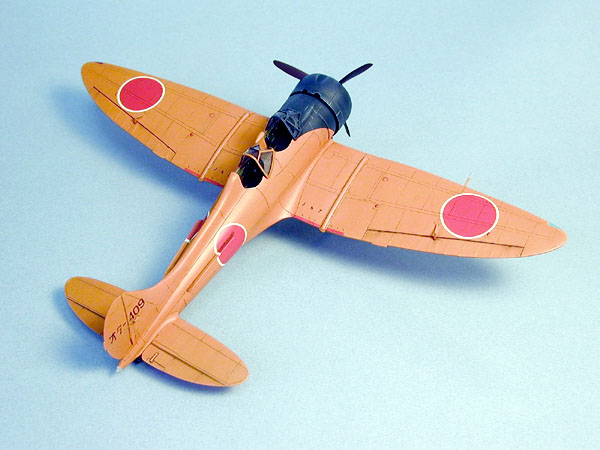
The kit provides markings for two aircraft, one in overall yellow-orange, and one in dark green over yellow-orange. I elected to do the former, to add a splash of color to my collection. I gave the model a final once-over with fine sandpaper, primed, and painted it overall with Polly-Scale paints mixed to the appropriate yellow-orange. The sweeping anti-glare panel was masked and painted in a blue-black mix. Future was used as a pre-decal clear coat, and the Microscale decals went on without a problem, snuggling into the panel lines beautifully after the application of some Micro-Sol. I attached the styrene-sheet airflow fences after applying the decals, then matched the touch-up paint to the decal colors. All panels lines were given an oil wash, then the model was given a final Polly-S satin clear coat.
 Two
sets of windscreens are provided (one spare of each), and these were attached
using white glue and framed with strips of pre-painted electrical tape.
The forward windscreen fit fine into the molded areas on the fuselage;
the rear windscreen needs some trimming and test fitting, so take your
time. A hole has to be made in the forward panel of the rear windscreen
to allow the rollover fairing to protrude through, which I added after
the windscreens were in place. The propeller consists of resin hub and
plastic blades that benefit from some thinning at the tips. Although the
instructions suggest drilling the hub out to attach the blades, I simply
glued the blades on as a butt joint. Adding the pitot tube, tailwheel
and drop tank finished the job.
Two
sets of windscreens are provided (one spare of each), and these were attached
using white glue and framed with strips of pre-painted electrical tape.
The forward windscreen fit fine into the molded areas on the fuselage;
the rear windscreen needs some trimming and test fitting, so take your
time. A hole has to be made in the forward panel of the rear windscreen
to allow the rollover fairing to protrude through, which I added after
the windscreens were in place. The propeller consists of resin hub and
plastic blades that benefit from some thinning at the tips. Although the
instructions suggest drilling the hub out to attach the blades, I simply
glued the blades on as a butt joint. Adding the pitot tube, tailwheel
and drop tank finished the job.

 Overall,
I was very pleased with this kit, and anyone who is familiar with building
limited-run kits of this nature shouldn't have any problems correcting
the minor fit problems. Being an aficionado of the weird and wonderful,
I am generally happy to trade a few minutes of my time for the opportunity
to add such a bizarre contraption to my collection. I found that this
model has certainly whet my appetite for the single-seat version of the
Claude that CA released earlier - I'll have to work that into the schedule
somehow! Recommended to the experienced limited-run builder.
Overall,
I was very pleased with this kit, and anyone who is familiar with building
limited-run kits of this nature shouldn't have any problems correcting
the minor fit problems. Being an aficionado of the weird and wonderful,
I am generally happy to trade a few minutes of my time for the opportunity
to add such a bizarre contraption to my collection. I found that this
model has certainly whet my appetite for the single-seat version of the
Claude that CA released earlier - I'll have to work that into the schedule
somehow! Recommended to the experienced limited-run builder.


Previous: Contents

