Minicraft 1/144 737-300 'British Airways'By Michael Benolkin | 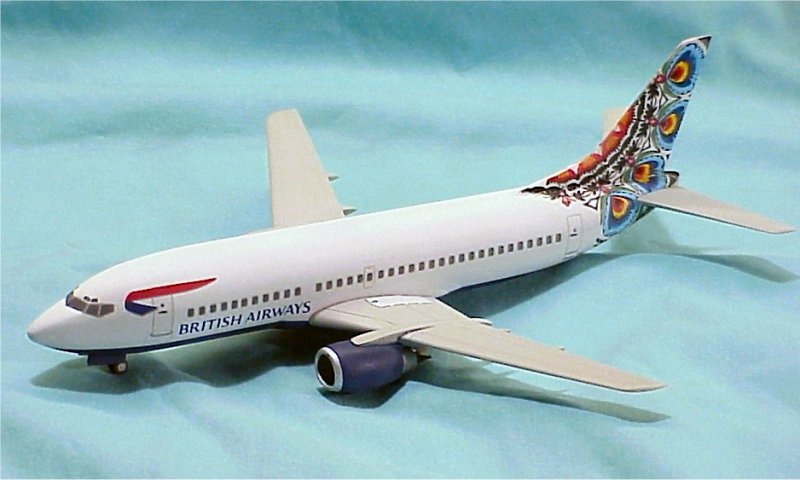 |
Background
The 737 was first 'regional jet' of the jet age. As the 707 (and DC-8) series became more common on the rosters of the major airlines, the focus was shifting toward an aircraft that was more economical on the less-traveled routes and the tri-engined 727 was born. Even then, the need for an aircraft that could operate out of smaller airports with a minimum of support, as well as operate on the shorter hops was envisioned. Boeing developed the 737 to answer these needs.
Designed to reuse as much of the engineering from the 707 and 727 programs, the 737 is a twin-engined aircraft that initially came in two configurations - the 737-100 and the stretched 737-200. The 737-100 would carry 85 passengers in a mixed-class configuration, while the 737-200 would accommodate an additional 10 passengers in the same configuration.
The next-generation 737 replaced the 15,500 lb thrust JT8D engines of the -100/-200 with 22,000 lb thrust CFM-56 engines. The 737-300 can accommodate 126 passengers in a mixed class configuration, the 737-400 can carry 147 passengers in the same configuration, while the 737-500 steps back into a 110 passenger capacity in the mixed class configuration.
The latest generation 737s that are still in production today employ the latest technologies learned from the 757 and 767 programs and successfully fills the short and mid-range requirements previously filled by both the 727 and 737.
The Kit
 Minicraft's 737-300 kit is the first and only 737-300 offered in injection molded plastic in 1/144 scale. The kit is molded in light gray plastic and features finely scribed details.

Construction of the basic kit is very straightforward. I started with the fuselage, using Testors liquid cement to assemble the two halves. When the glue had dried, I used my multi-grit sanding sticks and Flex-I-Files to remove any evidence of a seam. In only a few spots did I need to use gap-filling cyano. The cockpit 'cap' is a clear part that has the windscreen and a good portion of the surrounding fuselage as one part, enabling you to install, sand and blend the part into the fuselage assembly without having to sand over the windscreen itself.
 Next came the wings, which were also assembled with Testors Liquid Cement. Once the wings had dried, I removed any hint of seams with the sanding sticks and Flexi-I-Files. This is the only area in the kit where I could find a problem. When installing the flap guides to the underside of the wings, the instructions had two of the parts on one wing backwards. I confess that I didn't remember to note which parts, but you'll see that the you'll be asked to install the larger flap guide on the inboard side of one wing and the outboard side of the other. Simply install the larger flap guide on the inboard side of each wing.

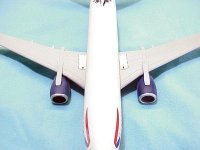
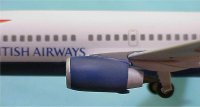
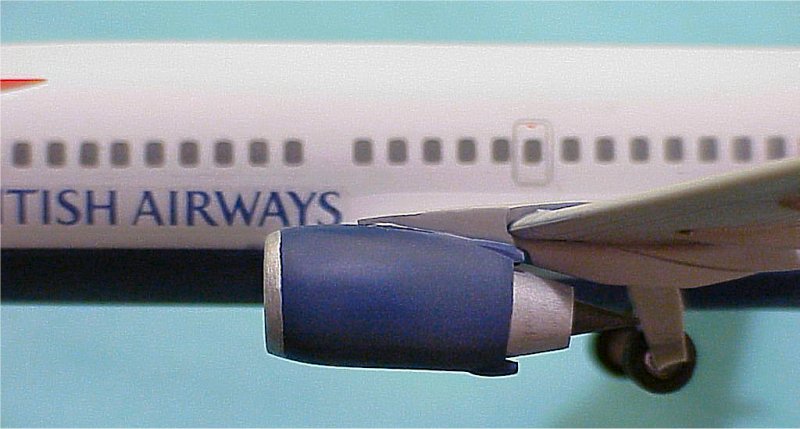
The engine pods took a little more effort, as the compressor face parts required some dry-fitting and filing in order for the engine pod halves to fit together snugly. Once I achieved a good fit, I assembled both engine pods and set them aside to dry. When the pods had dried, I used the same techniques to remove the seams.
Painting
 Once the major assemblies were ready, it was time to paint. I started by painting the fuselage a British Airways White, which is white with what appears to be a brownish-gray hue. The fuselage was masked and a dark blue was applied to the fuselage underside and to the engine pods.

While the fuselage and engines were drying, I shot the wings and horizontal stabs with a neutral gray.
The engine pods were then masked and different sections were painted with shades of Alclad II metalizer.
Final Assembly
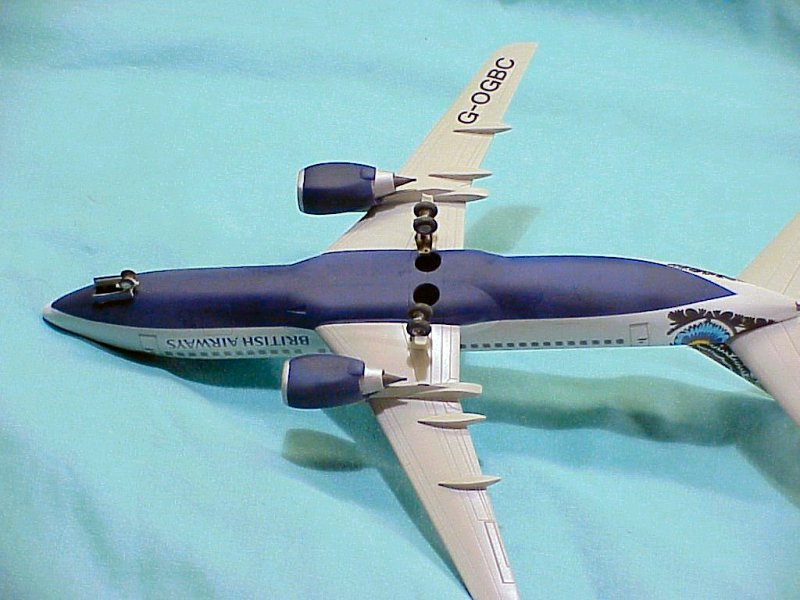
 The engines mount onto the undersides of the wings with no problems, but the upper fairing of the engine mount does not quite fit right. If you rely on the locating hole on the part, there is a gap left between the upper fairing and the rest of the engine mount. I removed the locating pin from both upper wing fairing parts and was able to get a good fit.
Installation of the wings and horizontal stabs is very straightforward. The wings use an interlocking scheme to assure the correct dihedral and is basically fool-proof. I waited to install the horizontal stabs until after the decals were completed, as you'll see why in the photos.
Once the major assemblies are in place, all that remains is to install the landing gear.
One thing you might notice during these final assembly stages is that the CFM-56 engines appear to be cocked up at an odd angle in relation to the fuselage. Don't worry about it. Once you set the aircraft on its landing gear, you'll see that everything is fine.
Decals
 The main purpose of this project was to build the British Airways aircraft that was represented in the FCM decal release that we reviewed several months ago. This aircraft is quite colorful and I thought would be a great test of FCM's decal line.
The first step was to apply a coat of Future to get a good surface to apply the decals. Once dry, I started with the windscreen and cabin windows. I carefully maneuvered the decals in place. FCM's decals do tend to adhere to wherever you place them, but they can be carefully coaxed into position by brushing on water and 'floating' them.
With the decals in place, I carefully dabbed the water away with a paper towel and applied a coat of Solvaset. I was surprised to see these decals not react to Solvaset, though after several applications, the decals conformed nicely to the fuselage details.
I repeated this process with each of the other markings, taking care not to do too much in any step. I did save the best for last - those huge tail markings.
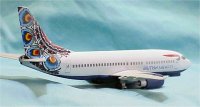
That fascinating scheme on the tail is one flat decal. While a flat decal will conform just fine to the vertical stab, getting it to conform around the compound shape of the read fuselage AND the vertical stab was another matter. I considered cutting the decal into sections, but opted instead to apply the decal as once piece. It did set well on the vertical stab and even made the 90 degree corner onto the upper fuselage. This is where I though the challenge would began, but I found that by cutting slits into the clear areas of the decal, the decal was able to settle over itself as it conformed over the fuselage.
Once the rear area decals had dried and settled into place, I trimmed open the slots for the horizontal stabs. The horizontal stabs will need to be propped up to the correct angle while the glue is drying.
I gave the aircraft one additional coat of future to seal the decals into place, followed by a dullcoat to represent an aircraft that has seen a few miles.
Conclusions
 The Minicraft 737-300 is an easy build. If you do find the engines angled up too much, you can use the upper engine fairings to push the engine angle back into place. The assembly was very straightforward, aside from that small error in the instructions. I can easily recommend this kit to builders of all skill levels.

The FCM decals have a different personality to them than other decal products I've used in the past. Nevertheless, you'll achieve some great results with a little patience as you get to know them. You'll also find a nice array of kit subjects from FCM that are not offered anywhere else.
My sincere thanks to Minicraft and FCM for these samples.


