Champlin Project: | 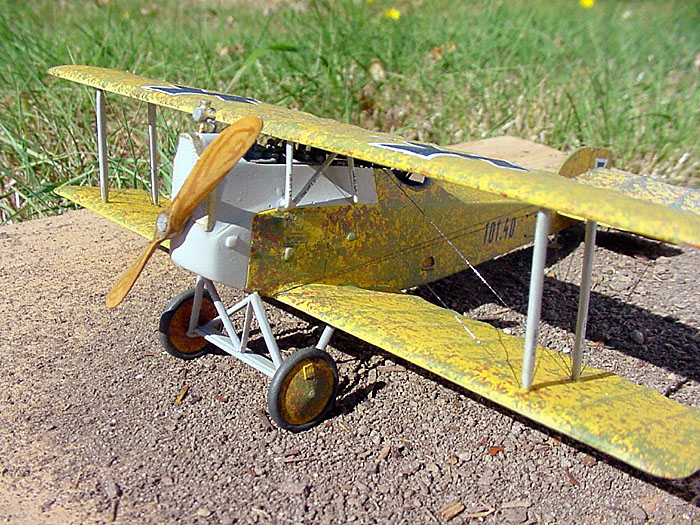 |
Overview
The Museum of Flight in Seattle has recently purchased the Champlin Fighter Collection, currently housed in Arizona. The collection is comprised of 25 fighter aircraft, most of of which are from the WWI era. Of those WWI aircraft, there are several flying replicas as well as real prototypes.
In order to generate enthusiasm for the acquisition and to set up a preview of coming attractions, the Museum approached Will Perry of the NorthWest Scale Modellers to commission them to build models of each aircraft in the Champlin collection. The NorthWest Scale Modellers were very interested in taking on the project. When the idea was also floated to IPMS Seattle (Seattle chapter of International Plastic Modellers Society) there were more volunteers to build models than there were prototypes to go around.
 .....
.....
Representatives from the Museum of Flight met with representatives from NorthWest Scale Modellers (and by proxy, IPMS Seattle) in order to hammer out time lines and consideration for doing the project. NorthWest Scale Modellers agreed to build models of each type in 1/48th scale using injection molded kits currently available, using markings of the prototypes in the collection, and finishing the project by March 2002. The completed collection will be rolled out at the annual NWSM Model Display at the Museum of Flight in February 2002 and will be presented to the museum some time in March 2002.
 ..
..
The use of the models by the museum would be two part. One would be to have the models set up as part of a 'coming attractions' display before the real aircraft arrive. The other use would come after the Champlin collection arrived in Seattle; the models would either reside next to the prototypes, or across the street from the new building to inform the public of what is offered there.
Building the Kit
There is no need for me in this article to review the Aviatik Berg D.1 kit from Flashback or dwell on the history of the Berg in Austro-Hungarian service since this was covered quite thoroughly in the September issue of Internet Modeler. I will instead focus on the building of the kit and the modifications necessary to convert to the prototype Berg from the Champlin collection.
 ..
.. ..
..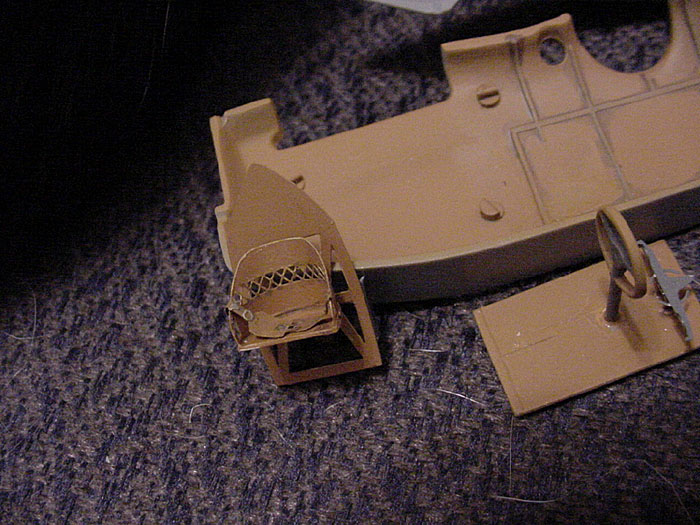
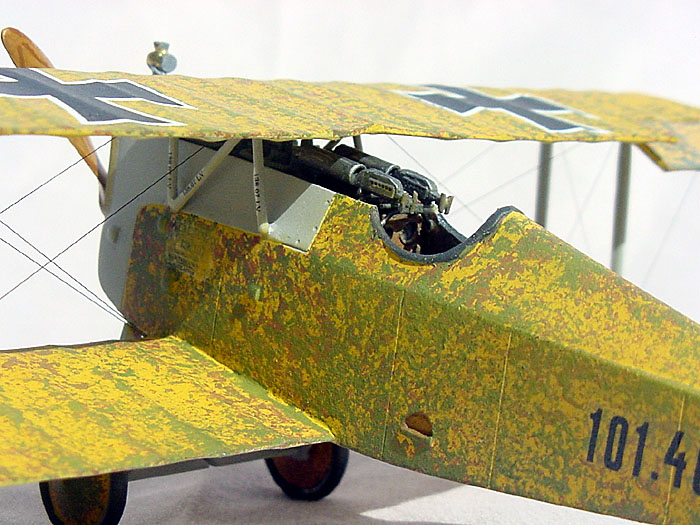
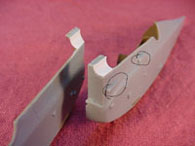
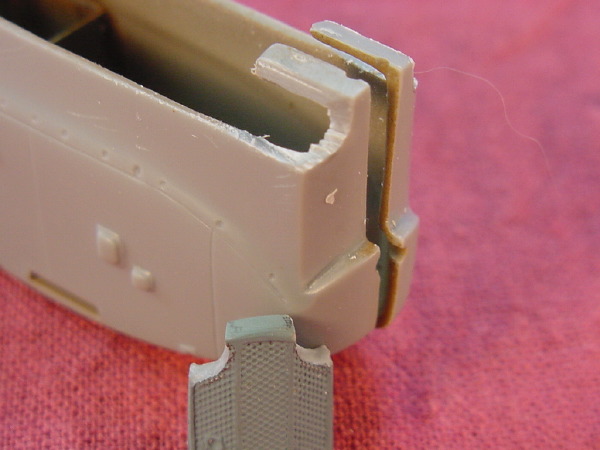
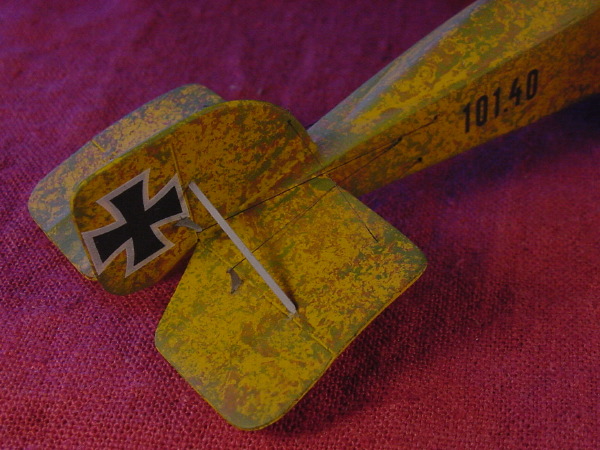
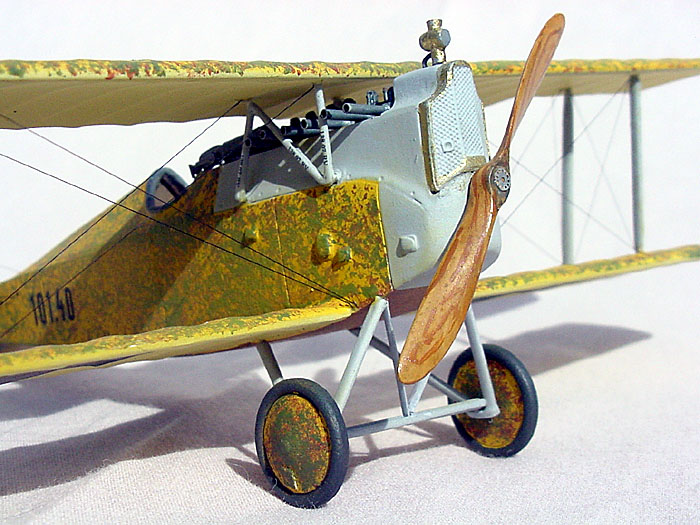
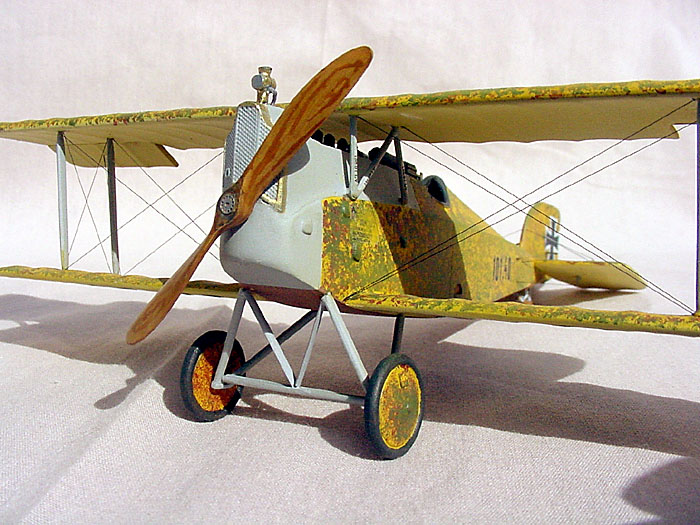
The interior and the fuselage needed to have extensive modifications done to them. The Schwarzlose machine guns that would have been embedded in the nose of the Flashback kit needed to be exposed above the engine in the Champlin type. In order to do that, scallops needed to be carved out of the nose and radiator on the kit. I covered over those scallops on the fuselage using sheet styrene is shown in the picture. I also removed two bulges on the port side of the fuselage, cut open the area in front of the cockpit, and filled the holes where side windows were placed on the kit. These are circled in the picture showing the nose modifications.
 ..
.. ..
..
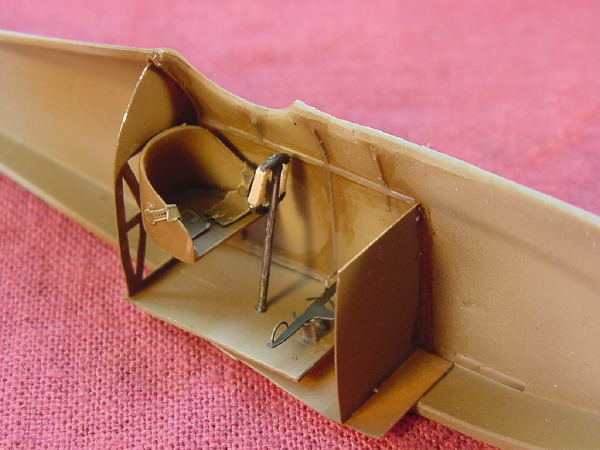
At first, I forgot to remove the fuselage bump that the tailskid is attached to. In fact, I was in the process of decalling when I looked at a picture from Champlin and it suddenly dawned on me that the Champlin subject doesn't have that bump. I shaved it off with a brand new scalpel blade and applied a thin sheet styrene patch. This leaves a very minor shelf, but I'm not terribly concerned about it. I scratchbuilt the mounting for the tailskid out of brass wire and fishing line. The landing gear required an additional V strut to the fuselage. I quickly cut two pieces of Strutz material to length and bevelled the ends so that they could fit tightly together and fastened them with CA glue.
 ..
.. ..
..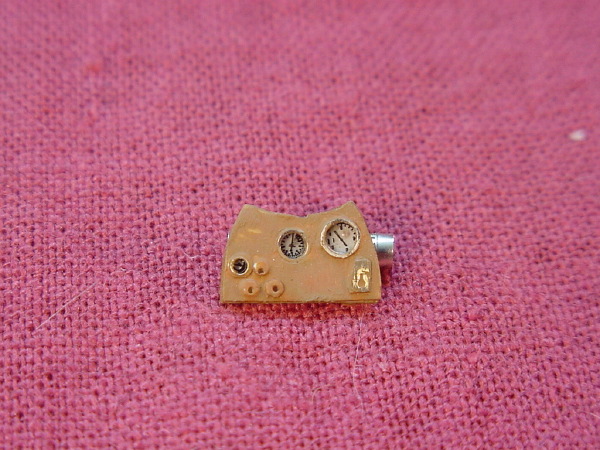
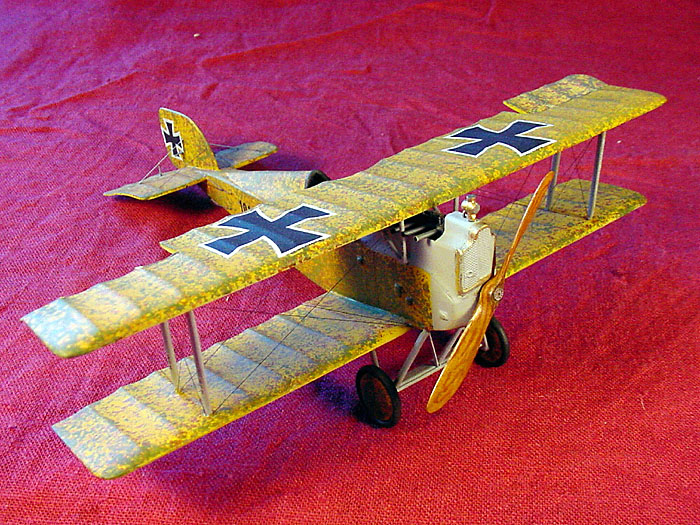
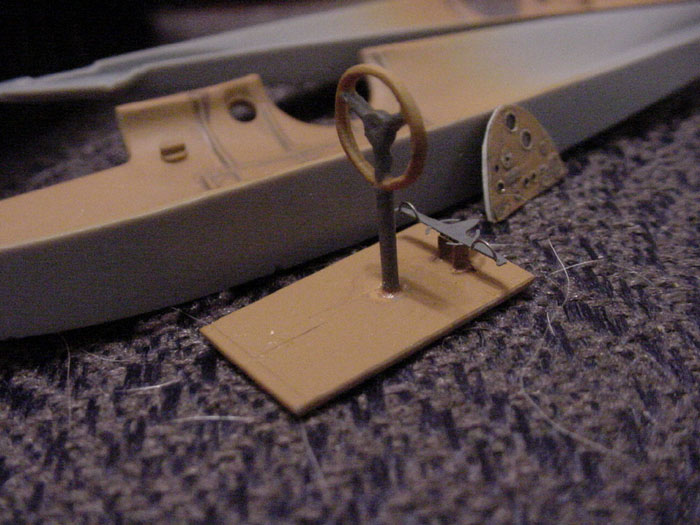
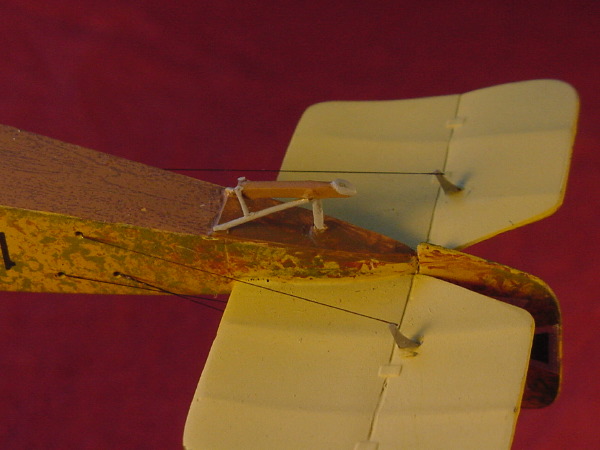
The instrument panel needed to be rebuilt to show the modified shape and configuration of instruments on the prototype. I built the instrument panel using a sandwich technique; I cut the two shapes of the instrument panel from sheet styrene, then punched appropriately sized holes using my punch set from Reheat. I embedded photoetch bezels (Copper State Models) in those holes. Acetate dials that come with that set fit in behind the photoetch German bezels. Before I played with those, however, I sprayed the panel a wood color and washed it to give it some added depth. In order to make the bezels stand out, I just scraped them to reveal the nickel PE underneath. I attached the dials one by one to the back of the bezels, then attached the second piece of sheet styrene to the first. The end result is quite believable and it's not really that much work.
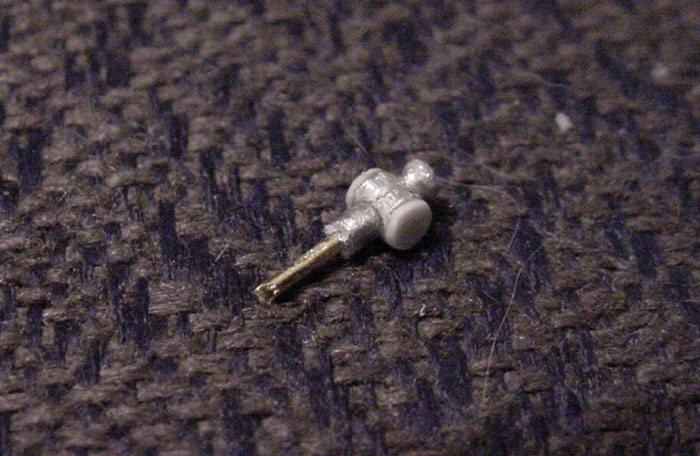
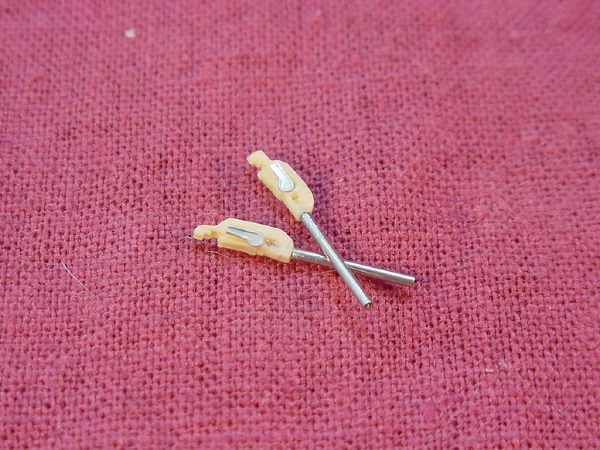
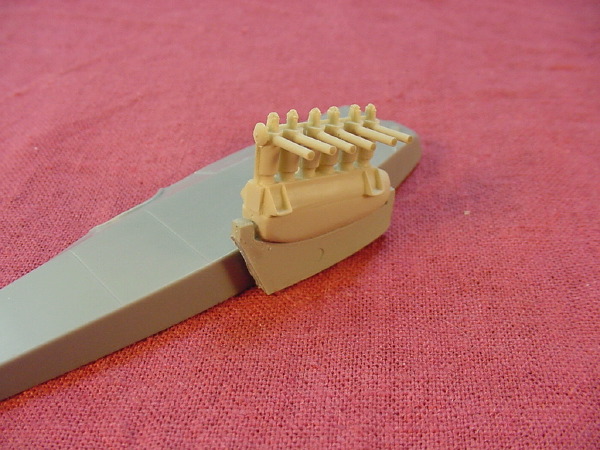
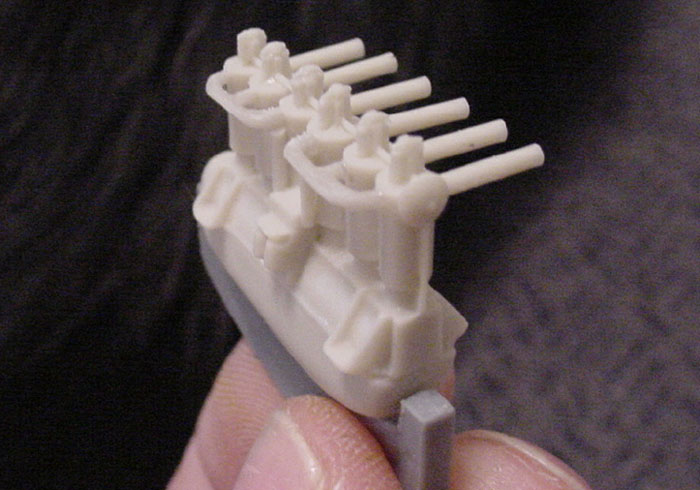
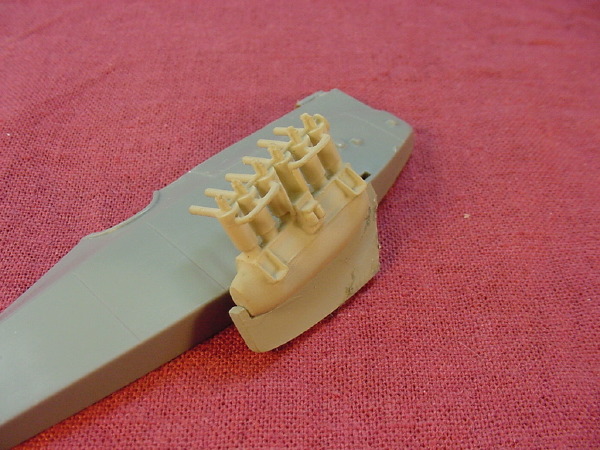
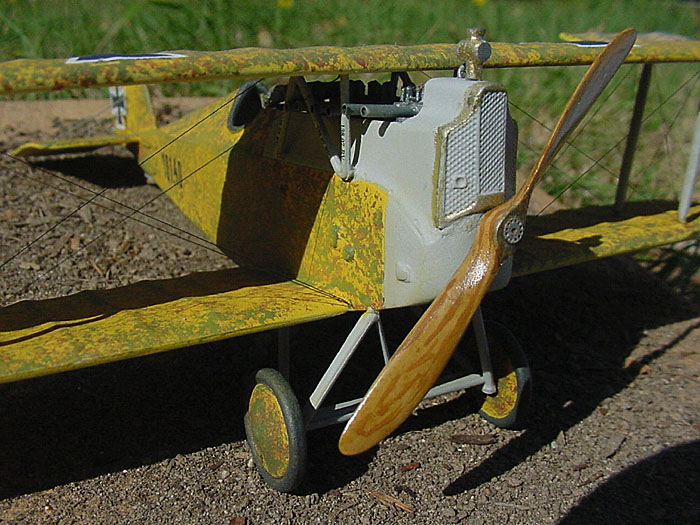
Schwarzlose machine guns: I don't believe these are available after market any where. I took the breeches of some Copper State Models resin Vickers guns and carved here and there to modify the shapes and so forth. (Really, that was a waste of some fine resin; the two guns don't resemble eachother enough to make a modification after all.) I then attached some photoetch detail to resemble the configuration of the Schwarzlose. I used hypodermic tubing for the barrels; in order to attach them more positively, I drilled holes in the gun breeches and glued in wire that would slide into the tubing. I then used aluminum tubing to make the cooling jackets; I believe that the Champlin type does not have holes in the cooling jackets, so that was easy! I slid the aluminum tubing over the barrels and attached them with CA glue. I also filled the fronts of the cooling jackets, but they are barely visible once the upper wing is on. As a final touch, I attached bits of brass to the breech end that would represent handles that were on the Champlin guns. I painted each gun dark silver (titanium, one of the Model Master 'metal' colors) and picked out the highlights either with silver quilting pencil or by a bit of scraping with a scalpel to reveal the aluminum or nickel underneath. I painted the gun handles dark brown to represent wood. I forgot to take pictures of the completed guns before attaching them to their brace on the fuselage! It's a shame since a lot of work went into each gun. I fashioned the brace for the machine guns out of brass wire and attached it to the fuselage sides prior to mounting the upper wing.
 ..
.. ..
..
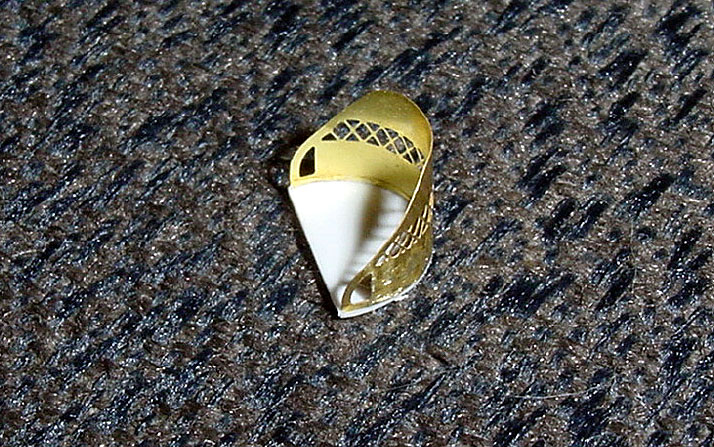
The radiator cap is very prominent on the nose of the Berg; in the Flashback kit, the cap is not well molded and has an impressive sink mark in it. I decided to scratchbuild one rather than try to save the kit part. I cut two lengths of aluminum tubing (different diameters) and drilled a hole through one of them. Then I threaded the other bit of tubing through the first and glued it in place. I then cut the tubing to length, dressed and flared the ends, and capped them with sheet styrene. I inserted a bit of brass rod into the bottom of the assembly to add some surface for gluing and drilled a similar sized hole in the fuselage to take that rod. I also drilled a smaller hole in the cap and in the fuselage to take a piece of 'hose'. To simulate the hose, I used lead wire and simply CA glued it in place.
Painting/Decoration
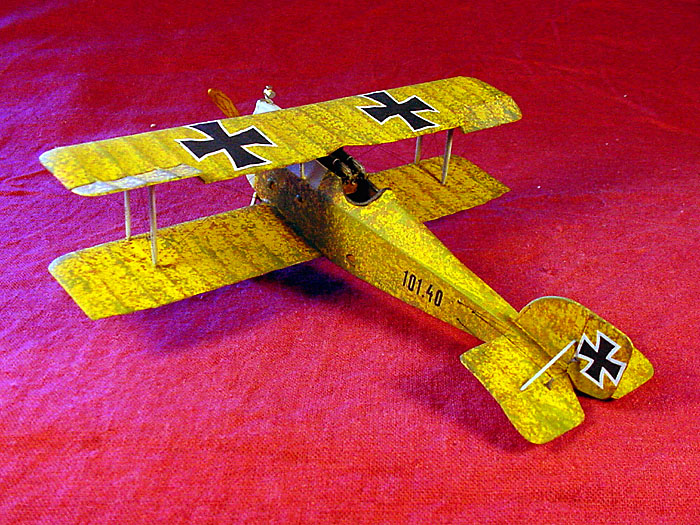
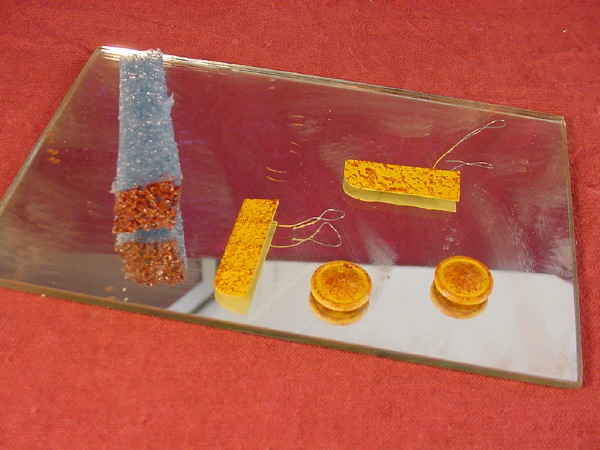
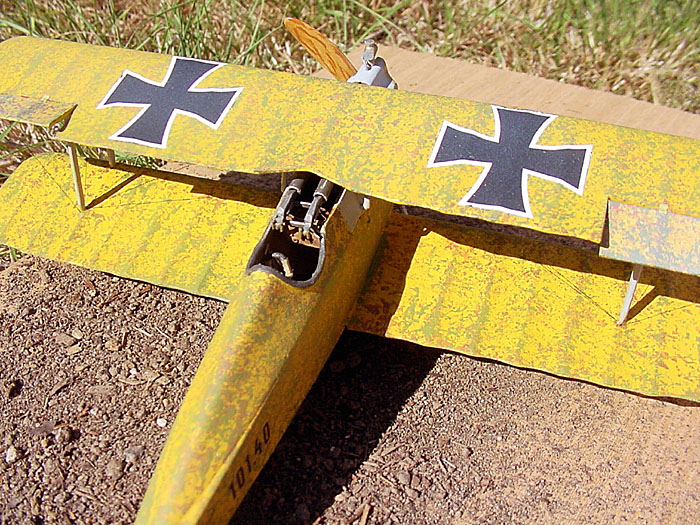
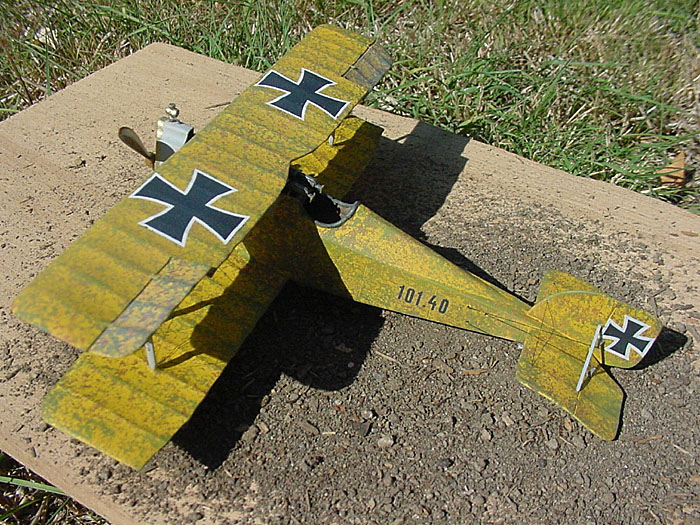
I first shot the whole thing primer gray using Floquil enamels. I then sought out a proper base for the scumble camouflage. My first choice was too dark; I tried using a Panzer dark yellow and decided it wasn't appropriate. After some more thought, I ended up spraying the Berg with Union Pacific Armour Yellow. Over that, I used soft styrofoam to dapple on Boxcar Red (brown) and then Italian Olive Green. The contrast between the yellow and the other too colors was too striking, so I lightly dusted over that with Armour Yellow. After decalling, I oversprayed everything with the tiniest bit of diluted gray/thinner to mute the contrast between the black crosses and the camouflage. There are several pictures here of the progressive layers of camouflage as well as the styrofoam smudging tool that I used. The end result isn't totally to scale, but feels right; this is art, isn't it?
 ..
.. ..
..
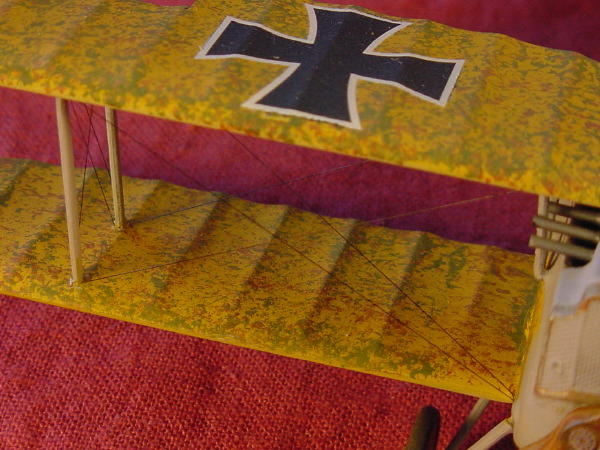
I planned on using kit decals throughout, then noticed that the Champlin subject has white outlines on the Maltese crosses on the rudder. I cannibalized that type from an Eduard Albatross Dv kit. For the upper wings, I still don't know if the Champlin subject has white outlines or not; I decided that since the rudder does, the upper wing crosses probably also have white outlines as well. I am a bit of a gambler. I found some appropriately sized crosses in the Eduard Pfalz DIII kit. As for the undersurfaces of the wings, I simply used the kit decals without white outlines. For the serial numbers on the sides of the aircraft, I cobbled them together from numbers on the Flashback decal sheet. As for the stencils on the struts, I simply used the kit decals, which has a different serial number. If you study them with a magnifier, you may notice the discrepancy but for the most part, the overall effect is good. They will more than suit the purpose at the Museum of Flight where the model will sit in a display case.
 ..
.. ..
..
In order to simulate a wood grain finish for the underside of the fuselage, I tried painting the grain and was disappointed with the results. I opted to use a SuperScale decal sheet of wood grain that I've had kicking around for years. After having attached the landing gear and tail skid, the best way to apply a decal for the wood grain was to do it in strips. The end result would have been better and easier had I planned ahead to use a SuperScale decal for the wood finish, and cut it to shape early on. The end result doing things backwards as I did was acceptable but I'd have done it differently had I planned ahead. Regarding the quality of the decal, I was pleased with the way these decals responded to solvent. Except for my lack of planning, the decals went down easily and smoothly.
 ..
..
The rigging on this aircraft was fairly straight-forward. Prior to assembly, I drilled most of the pilot holes for rigging. In several cases, I neglected to drill the necessary holes. It is generally a good idea when rigging a WWI aircraft to actually draw the rigging diagram yourself so that you understand clearly what needs to be done. Had I done that, I doubt I'd have forgotten any pilot holes. I call these pilot holes because they will accept the rigging line and allow a bit of fudge factor in the length of line. For line, I used 1lb test Tippet line. This is a fishing line that is readily available at fly fishing stores. I darkened the line using a permanent felt tip marker; this darkens without adding significantly to the diameter of the line. .94lb test is even finer; I think it would be more suitable to 1/72nd aircraft. I attached the rigging using CA glue and accelerator; my technique is:
 ..
..
-
put the model in a Panavise so that it's quite secure
-
dip a toothpick in accelerator and hold it in my teeth (dry side in; you don't want to taste accelerator!)
-
slide the Tippet line into the hole
-
apply CA glue there with a bit of wire with my other hand
-
deliberately put down the wire
-
lightly touch the toothpick to the joint.
Using this technique, you actually cut the line a little bit short and stretch it to the contact point. Doing that, there is no need to apply any heat at all. I prefer the lines to be taut enough to hold them straight but not too taut that the glue joints need to be very strong. With practice, you can get very good at using Tippet line for your rigging needs.
 ..
..
Conclusion
All in all, I've really enjoyed building this kit. It reminded me that scratchbuilding is a necessary aspect of modelling in spite of the plethora of aftermarket doodads and so forth. In building this model, I frequently became caught up in the building of it and would neglect looking at photos of the prototype from Champlin. Because of this, the process was sometimes two steps forward, then one back. I think that I am a better modeller having worked out all the problems, the modifications, the scratchbuilding, and the tons of compromises. The end result is nowhere near perfect, but does capture the essence of the real aircraft that will be coming to Seattle.


![]()


