Revell 1/24 Warren Johnson's Pontiac Firebird Supermanby Kelly Jamison | 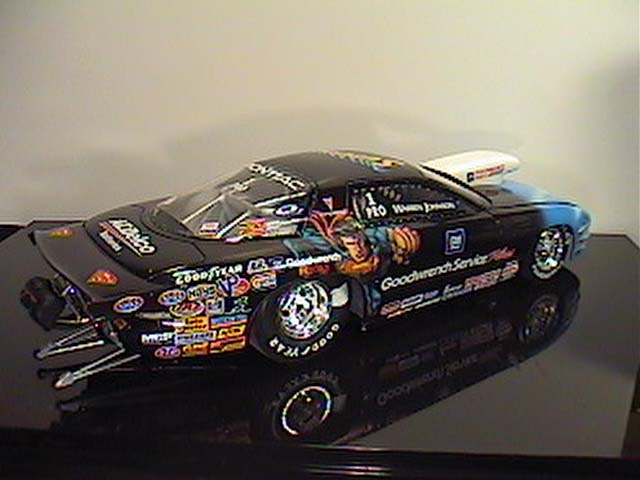 |
Introduction
Warren Johnson better known as the ³Professor² is one of the most successful Pro Stock Drag racers ever. He has won five NHRA Pro Stock Championships. He is the second most winning driver in the history of NHRA only behind the legendary Bob Glitton. To his credit, Warren Johnson was the first to exceed 200 miles per hour in the quarter mile in ProStock Racing. His GM Goodwrench Service Plus Pontiac Firebird is a very formidable opponent on today¹s circuit. It is loaded with a 500 CID 1300 horsepower powerplant that can propel the Superman Firebird to an outstanding 6.84 second quarter mile with an incredible 202.24 mile per hour top speed. Warren is at the top of his game and will be a tough competitor for years to come.
I am not a car builder but lately I have come to the conclusion that you develop better skills and learn more about the art of modelbuilding by trying your hand at something totally out of your genre. I decided to pick the most polar opposite subject that I could have thought of. My usual building is late war Luftwaffe so I thought the Superman ProStock race car would be a good subject to do. Research wasn¹t too bad on this subject. There are many websites that have great reference material right at your fingertips. The best source of info for me was the March 2000 Scale Auto Enthusiast and the NHRA website. Scale Auto Enthusiast had a six page photo spread with all kind of angle and detail shots of the engine, interior and paint job. If you have the ability to get this issue I recommend it highly. This also had a double edge to it. It shows a lot of shortcomings of the kit and inaccuracies in the moldings. I will address each of these when we get to them during the construction.
The Kit
|
|


I decided to treat the build as a small series of models that would be assembled later. The first of the little models would be the engine. It is a straightforward build and the fit is good. The intake manifold was this big slab of plastic that didn¹t really resemble what the real thing looked like. The instructions call for fanbelts and a fan to be put on the front of the engine. Reference and knowledge of this car tells me to throw away that little cooling fan. It doesn¹t belong there at all.
I used a little filler here and there to fill in some seams and painted the block S-N-J silver. I stripped off the chrome plating on the valve covers. The photos show these as brushed aluminum. Each part of the engine got a coat of the S-N-J silver then were buffed to a different shine to show the different components. This helps out the monotone colors used namely Silver. It also gave the engine a more solid and natural metal look.
The cool can attached to the front of the engine mount looks nothing like the real thing. Do your best in this area.
In order to give the engine a bit more flash I painted the oil filter a ³FRAM² orange and the starter a satin black with a silver band around the center. The carburetors got a coat of silver then a thin coat of gold to give it that alloy look. Then a light wash of black made the details stand out a little better.
There are many wires, boxes, and pieces parts that go into the engine area that did not come with the kit. Since the project was going to be ³Out Of Box² I did not add anything that didn¹t come with the kit. So there is lots of room for improvement. A scratchbuilder would have a field day in the large engine bay.
At the transmission there is a chrome piece which I have no idea what it is. It doesn¹t look like anything on a race car. I used it anyway but it is just plain wrong for this car. The reference pictures show the complicated set of pushrods and gear shift levers which do not come with the kit. Too bad. It gives the interior that busy office feel that it should have.
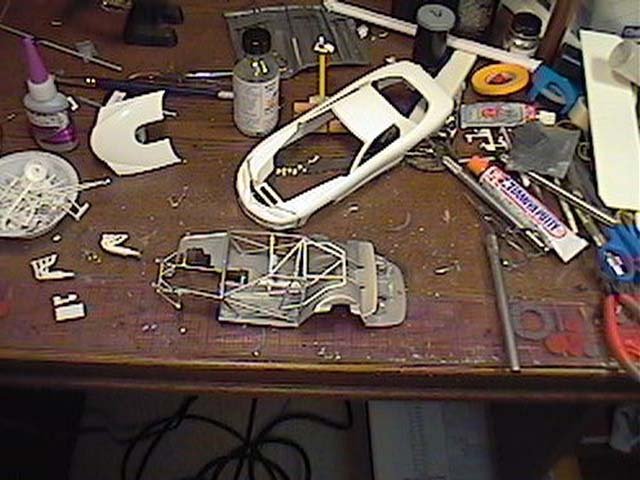
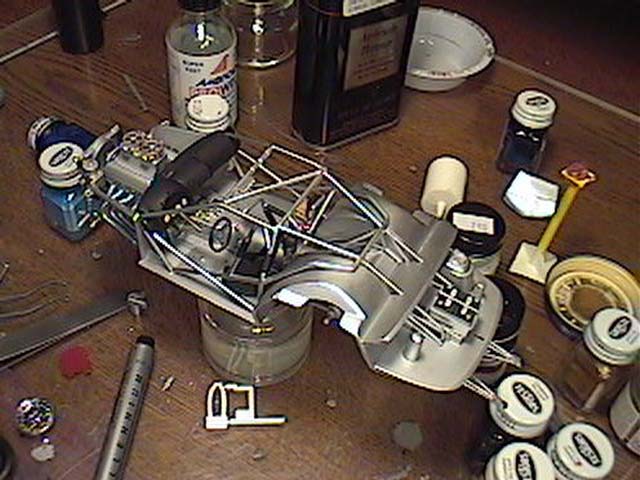
Once I finished off the engine I put it off to the side and started the next phase of the build. The Chassis!
Each part got cleaned up and ready for painting. There were sink holes in the main chassis that needed filling. Most of these you cannot see once the car is assembled, but the ones on the bottom are very obvious and need to be filled and sanded. Everything got a coat of S-N-J silver first.
After assembly I went back and repainted the areas that got cleaned up or sanded down. I used Ambroid ProWeld to glue the fire wall to the chassis floor. I allowed it to soften the plastic a bit then pressed it hard to the floorboard. It gave a welded look to the firewall mating surface. Then I glued the fender well pieces onto the forward part of the chassis. I bypassed putting the small firewall tank, steering shaft and steering arms into place at this time. I also put the shocks off to the side until later. I was waiting to have the wheels finished so I could make sure the wheels are straight and plum with the rest of the car.
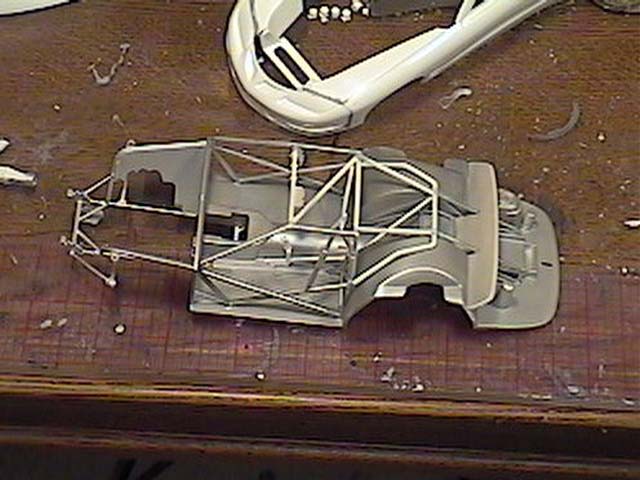
There are lots of roll cage, body stiffener, fire wall, and mounting point parts. Each one was buffed to a different shine to make them stand out a bit better. I assembled the roll cage without the seat leaving out the steering column, fire extinguisher and electronics box.
Next thing to be assembled was the roll cage braces chassis pan extension, kickerbar, rollcage support and rear fire wall. Then I superglued in the brake-gas-clutch petals and built up the rollcage. It tool a lot of work cleaning up these parts then trial fitting them. The headrest bar didn¹t seem to fit at all.
Now everything got another coat of silver. I painted the rollcage padding flat black and finished out the battery box. Which you can leave out. It is hidden in the trunk anyway and can not be seen. While that was drying I painted the steering column and steering wheel, shocks and electronics rack.
The shocks took a lot to clean up. The molds seemed to be shifted over real bad and a better part of a day with a file was needed to give the shocks their spiral spring look. (If I wasn¹t doing an ³Out Of Box² kit I would have sanded these smooth and wrapped wire around the shock strut for a much better looking coil spring.) These got painted black with a light blue coil as per reference photos. It helps add a splash of color to the all silver paint.
I moved on to the headers which clean up real nice. I gave them a coat of silver, then a thinned out blue wash around the mating surface and down tubes coming out of the engine head to give the headers that heated metal look. This adds color to the silver on silver engine area. The headers fitted well through the side walls, but there is not a positive feel where they should be glued to the engine block. I ended breaking the headers off many times during final assembly if you don¹t have wheels on the chassis yet the whole thing will rest on the headers. You might think of putting them on as one of the last things you do. You will see what I am talking about during assembly.
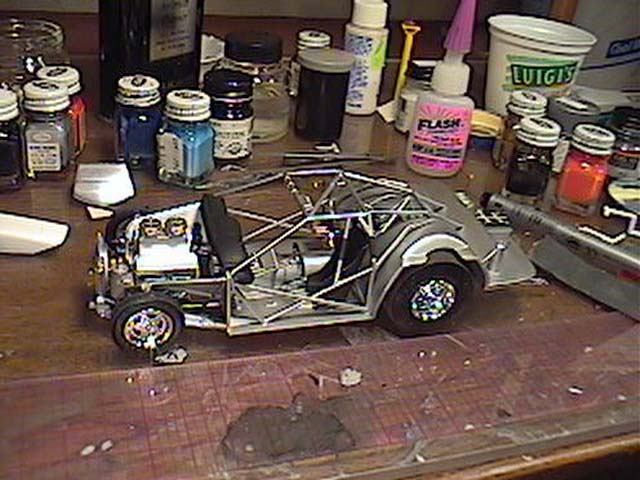
I finished out the front of the chassis by installing the engine at this time. I took my time with the hoses, belts and radiator. I painted the hoses flat black and used a metallic blue around where the clamps would be. They were a bit of a pain but went on and looked great with just a bit of adjustment.
I striped off all the chrome from the rear wheelie bars. The real thing is not chrome and the parts were not molded very well. It took a lot of cleaning up to get these parts to look right. I took extra pains to make sure that these components were squared up and straight. Everything got a coat of silver. I used different shades of aluminum paint to pick out bolts, nuts and plates. It really helps in the long run. It got glued to the bottom of the chassis.
Next came the rear shocks which got the same treatment as the front shocks. The drive shaft and chassis brace were next. I got the drive shaft cleaned up. It suffers the same mold shift that most of the other components do. It got sanded smooth and I polished it up pick out the u-joints and couplings with chrome silver paint. The fan shroud got a coat of silver and was polished out to give it a good shine.
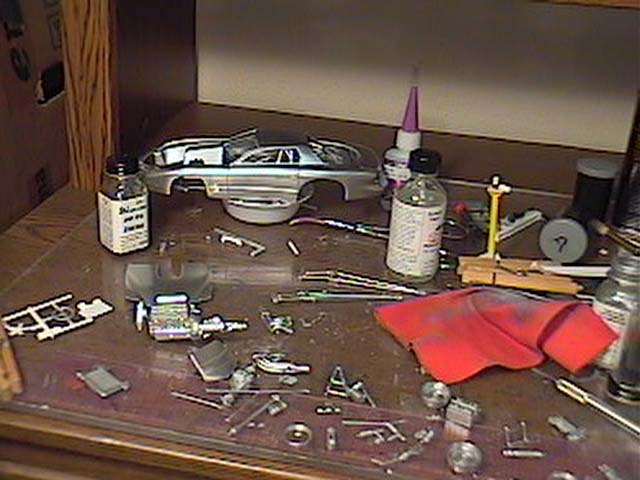
I spent a lot of time on the tires and wheels. Be very careful in clipping off the wheels from the chrome tree. I took a bit of chrome paint to hide the sprue attachment point. You have to use superglue when working with gluing plastic to the tires. I sanded the treads down and scuffed the rubber on the back tires which really help the look of the wheels. The big slicks on the back are two pieces that need to be superglued together. The inner and outer wheel glued together with no problems. You might need to strip off some of the chrome so that the superglue has something to stick to. I used a white gel pen to paint the Goodyear Eagle raised letters. Don¹t even bother with the decals. They are too thick and do not stick to the rubber tires anyway. I also used a fine point black pen to put small dots representing the screws that keep the wheels from spinning off the tires. With the whels attached, the car was sitting on its own weight and starting to look more like a race car than a junk yard!
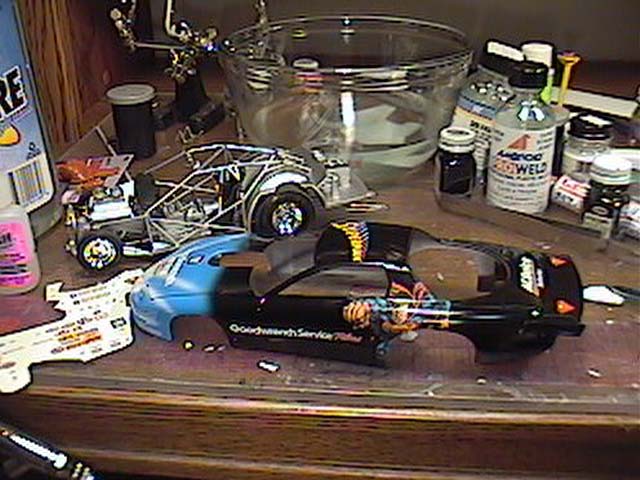
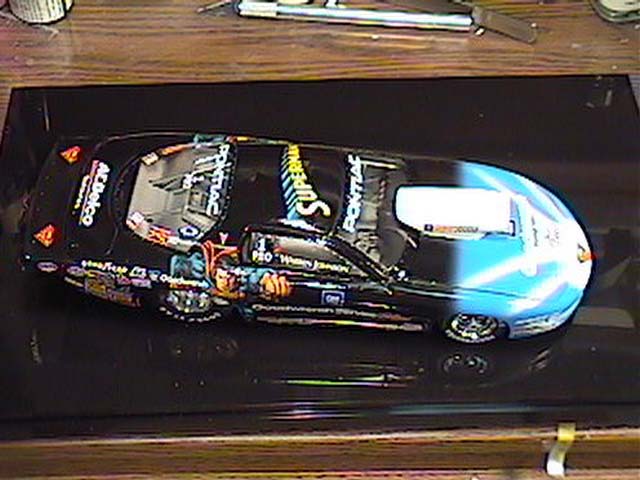
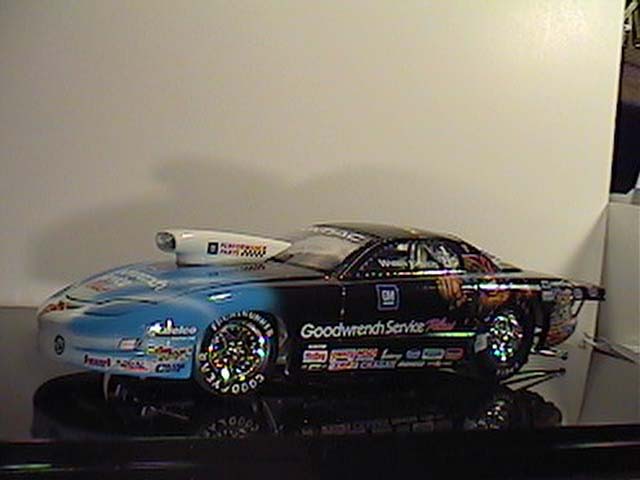
I then turned my attention to the body. The basic shape of the car is good. It needed cleaning up around the roof where it meets the trunk and the nose and tail needed some fitting and sanding. The interior and exterior got a coat of aluminum and the wheel well area got a coat also. I held off putting the parachute support and parachute packs on. Once I polished the body smooth it got five coats of Testors Gloss black, I left it to dry for about three days. Make sure to paint the hood and rear spoiler or you will be pulling out the airbrush over and over. (trust me on this one) I put the car body in a loose fitting Rubbermaid container and just forgot about it for about a week. That made sure that it was completely dry otherwise you could leave fingerprints all over the finish ruining weeks of work. I then glued the red clear plastic taillight in then the rear spoiler got tacked on.
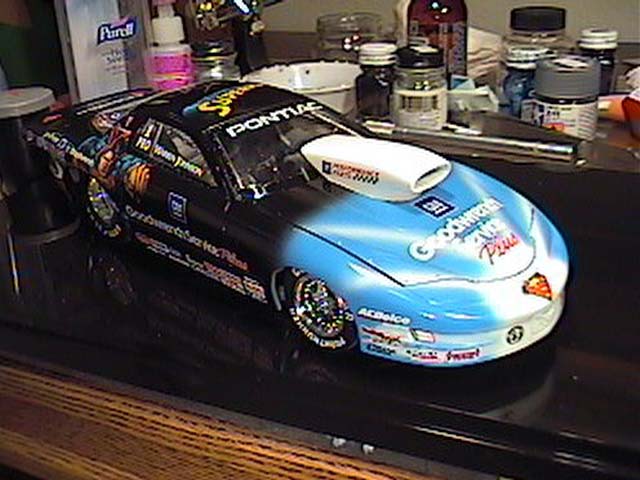
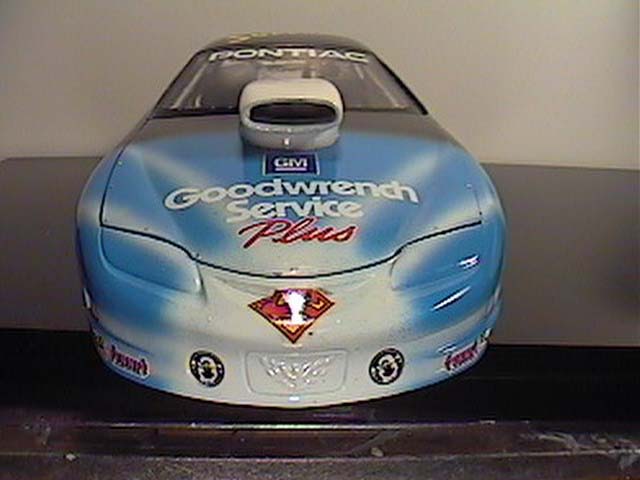
Once everything was very dry I gave it all a coat of future floor polish and started on the decals. The front decals that give the paint job the distinctive light blue with white streaks is so thick that it is unusable. SolvaSet couldn¹t even help them. Throw them away and break out the airbrush again. I painted the area white then went back over it with light blue. Then again with the white painting the streaks that fade back. It gives the blue a stronger color if the base coat is white and not black.
The stickers that are on the sides of the car are not exactly like the pictures of the real car but that is OK because they change depending on sponsorship and repainting the car. They are thick and Solva-set does not work on them. They fit well and look great once on and dried.
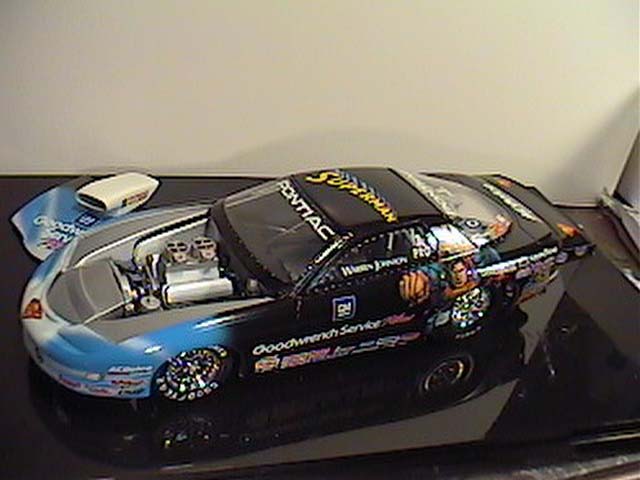
The last major thing to do on the body is the scoop. It is of the wrong shape and should go on the carbs and not on the hood according to my reference. The seam that runs inside the scoop is difficult to clean up. I wish the kit would have come with an intake cover of some type. You can¹t see anything down it anyway.
I painted the inside of the glass frame and highlighted the small screw heads with silver gel pen. Then glued all of the glass in. It fit very well to my surprise! The whole thing got a coat of Future again and the window decals were put on. Once that dried the whole thing got polished with a soft cloth and another coat of future was put on. Be very careful not to put it on too thick and put the car back into a container after each clear coat to keep dust from settling on the wet paint. You must make sure the body is completely dry before handling.
The last thing I did was the parachute packs. My reference says to paint the cables that hold the packs together a bright red with silver hardware. I also put the rear spoiler stabilizer bars on painting them chrome silver.
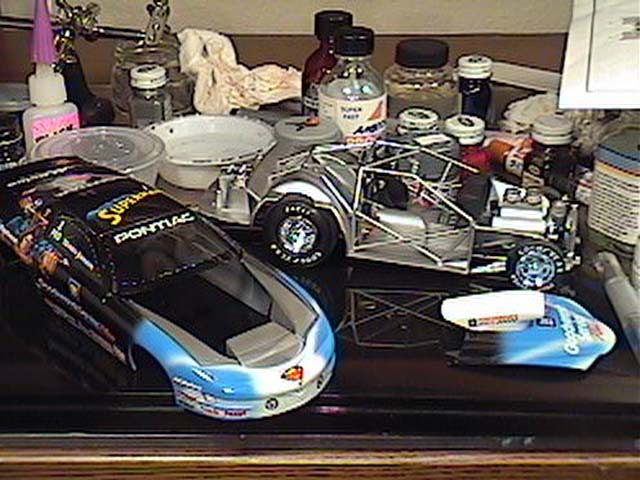
Conclusion
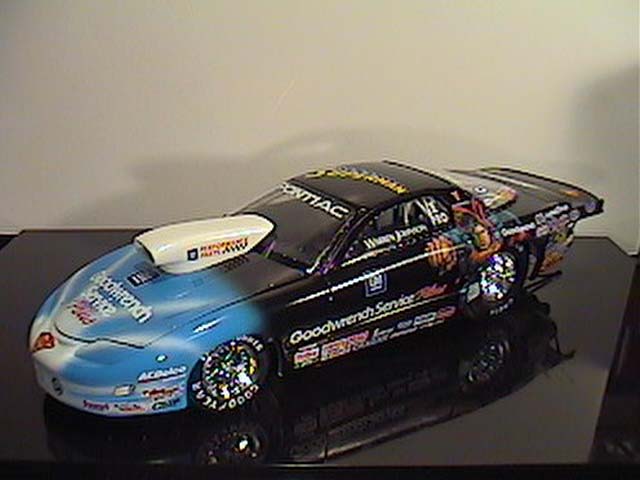
Every part on this kit needed some kind of attention. The molds didn¹t align up very well on some key parts. The shocks and the drive shaft were the worse. I was always going back to clean something up or repaint something or sand something. I wanted to build this using ³Out Of Box² IPMS rules so that kept me from making some changes I would have liked to. I would have liked to added some photo-etched accessories and spark plug wires, put the scoop on the carbs and not on the hood, added the missing shifter linkage and all the little bits and pieces to the engine area. I did add some tape seat belts painted black with silver buckles. I think there is lots of room for improvement that could really benefit this kit. It is a challenge to build and not very accurate compared to pictures of the real car. BUT! Boy it does look so good sitting on the shelf.


![]()


