Building the Verlinden 1/35 Seehund German WWII Submarineby Richard Eaton | 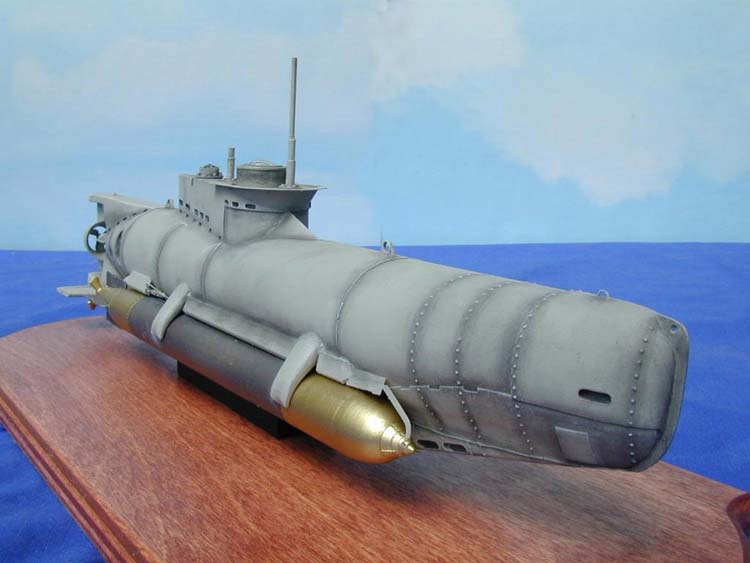 |
Introduction
I have always wanted to try one of Verlinen's interesting line of 1/35 German Pocket submarines. I did an in-box review of the Seehund in the September 2001 issue of Internet Modeler. This kit was burning a hole in my bench so I dove right in. If you are into mini submarines of WWII, read on.
Preparation
|
|
I went through the parts and found that nothing was missing. The directions help identify all parts very well. All resin parts have pour plugs or stems. These all need to be removed and cleaned up. I used a #11 point on most small parts and cleaned them up with a sanding stick. Note that resin dust is not particularly harmful but some folks have allergic reactions. Use a dust mask. A razor saw made quick work of the torpedo pour plugs. The pour tab on the single piece hull is another matter. This huge plug runs the length of the hull and is several mms thick. This called for more drastic action. After losing the feeling in both hands trying to use a razor saw, I wound up clamping the hull and pulling out the trusty hack saw. I taped the hull to prevent damage but managed to nick the hull bottom in several places. This was easily repaired with filler. Whew....
Construction
Torpedoes
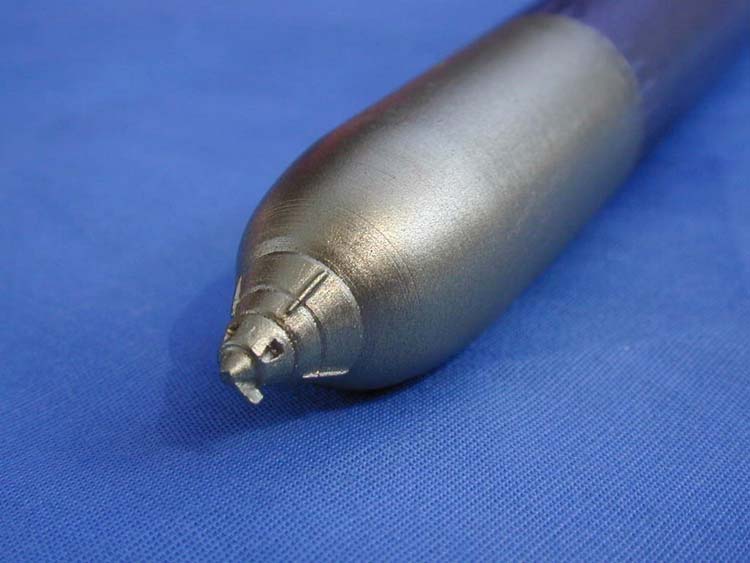
The torpedoes look so damned cool on the box photo I had to start with them. They are comprised of the main body/warhead, a separate tail section, detonator, fins, and prop blades. I tried to sand the joint between the body and the tail section to form a perfect mate. Even using a glass plate I could not sand the two round surfaces to a perfect match. Anyone know a trick to this? I wound up using filler.
I then added the detonator, which fit perfectly. The fins were a tad tricky to position as there are no indicators on the tail cone to show where they should go. I wound up eyeballing them into place using what surface detail there was. This would prove to be a constant theme during construction. I did a lot of eyeballing on this one. I then added the prop blades and I had a pair of wicked looking torpedoes on my hands.
I then proceeded to paint the torpedoes to match the box art. I wanted a metal look to them so I first airbrushed the bodies with Testors burnt iron Metalizer. I then masked (again eyeballing) and applied Testors Non-buffing Metalizer Brass. This gave me a beautiful finish on the warhead and after ends of the fish.
Though I masked around the main cylinders, I didn't bother masking the fins. It is a simple matter to touch them up with a brush after spraying the brass color. I used scale black and then dry brushed with steel. I was pleased with the results. So much so I showed them to my wife. She said, "Oh, those look expensive!" I have no idea what she meant by that but took it as a good thing.
The Hull
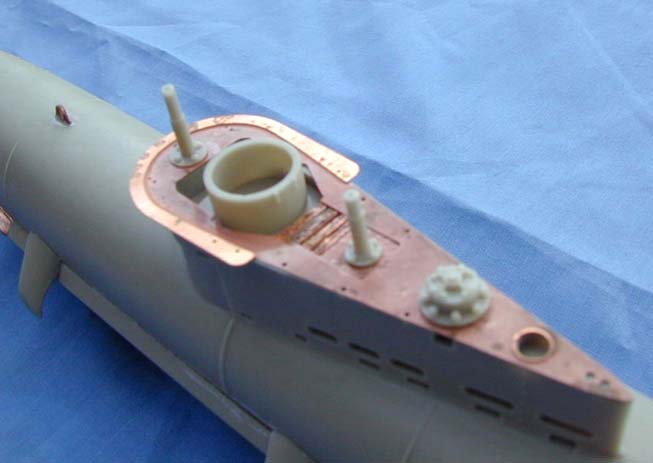
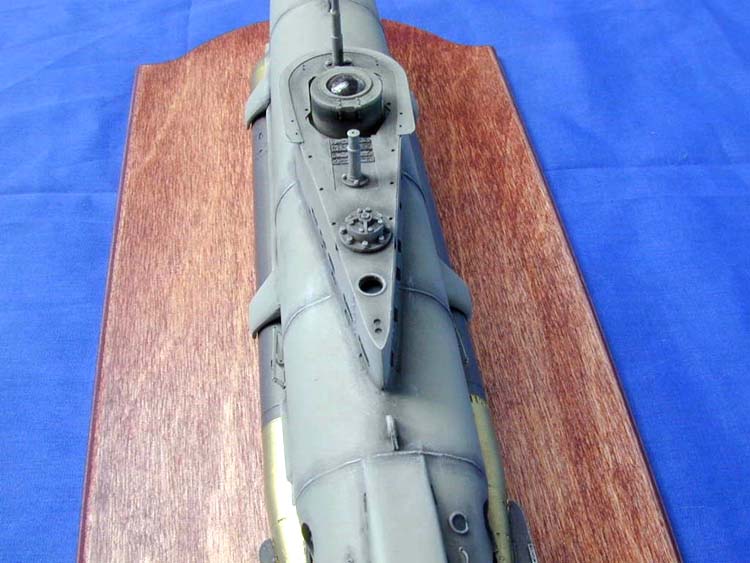
The combination of the clear exploded drawing that is the instructions and the photograph on the box makes assembly pretty straightforward. The only problem is that there are no indications on the model where to position parts. I decided to build from the top down starting with the conning tower. I cut out the two PE parts that form the top deck of the con and CAed them in place. I then added all the resin detailed parts to the con except for the hatch. This included the periscope, which I would recommend leaving off as I snapped it off several times in subsequent assembly. The hatch has a large hole that when cleaned up accepts the vacform clear vision dome part. The hole is a tad small so I sanded it out to allow more of the dome to protrude. Once I was happy with the dry fit I painted the hatch and then attached the dome with Kristal Klear. I set it aside for now.
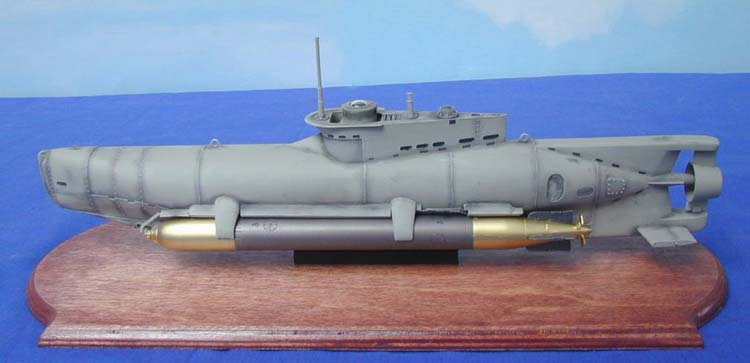
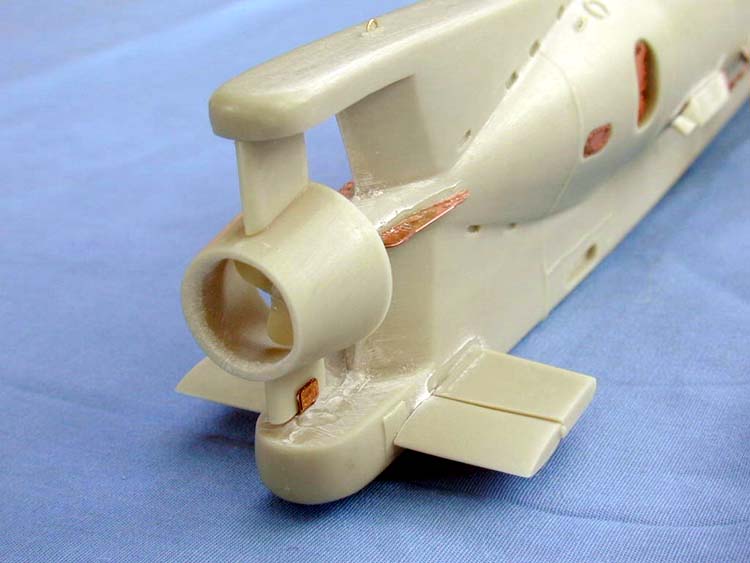
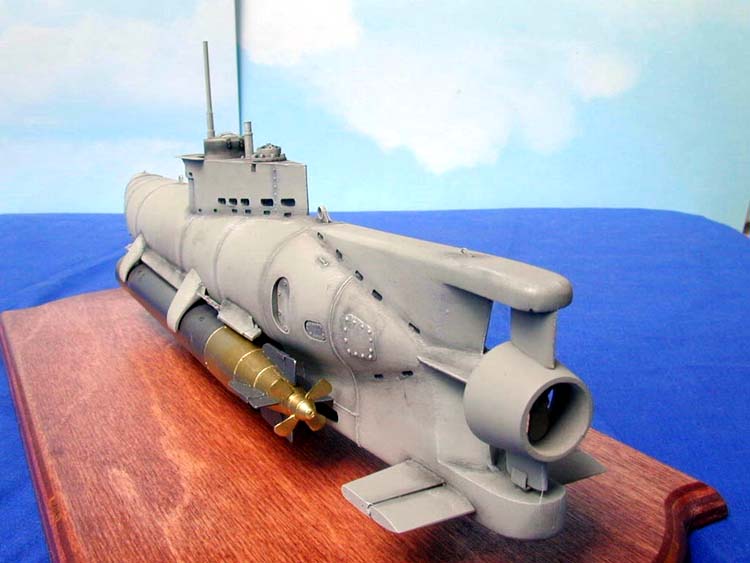
I then assembled the propeller and rudder structure. The rudder is divided in the middle with a cone that surrounds the propeller. I suppose this provided wake suppression. I glued the prop on the hull and then dry fit the rudder assembly. The prop is too big to fit in the cone. I decided to trim down the prop to fit. I then added the PE rudder mount and glued it in place. I finished up the control surface by adding the rear diving planes (again eyeballing.)
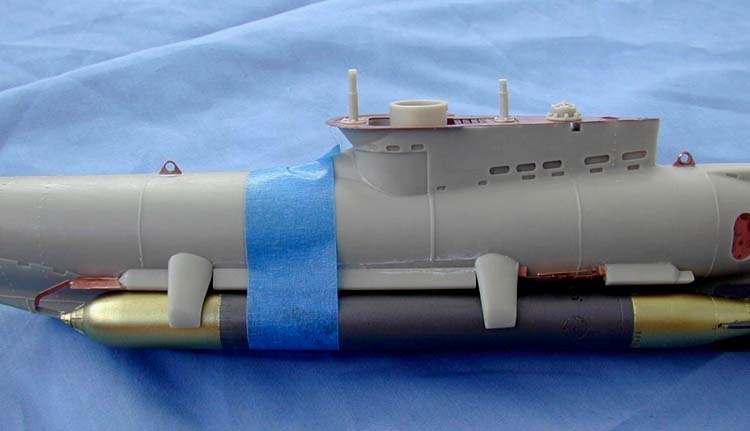
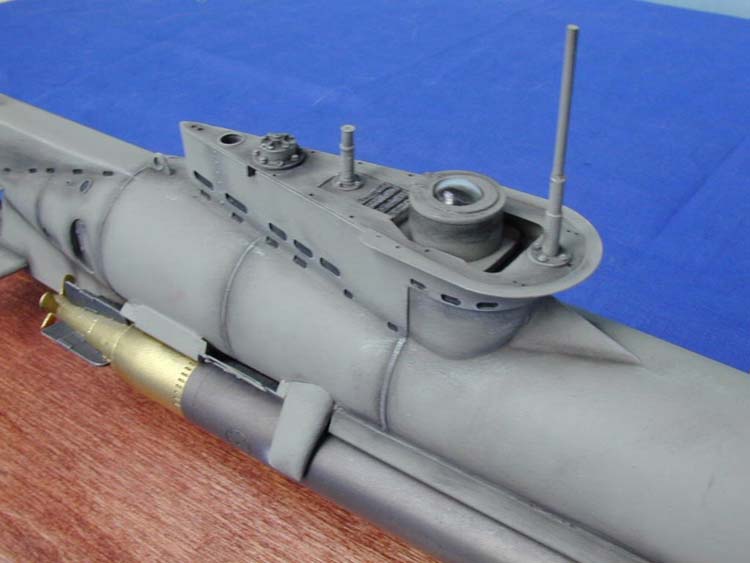
I then worked up the parts that make up the torpedo mounts. These consisted of two resin support arms, three rail-like pieces and a PE ejection mechanism. As there is no indication exactly where the parts should mount to the hull I wound up taping the torpedoes in place to use as a guide for the mount assemblies. Once things looked right I glued the mounts in place and added the front PE guide mounts in place. These have thin arms that you bend until they make contact with the warhead. The torpedo mounts were problematic so take care here. Once happy, I removed the torpedoes. I then filled and sanded the gaps between the mount parts and the hull.
I then applied the various, plates, davits, and tie downs to the rest of the hull to finish assembly. The thin wire included for tie downs was too flimsy so I replaced it with brass wire. Assembly was then (almost) complete.
Painting and Weathering
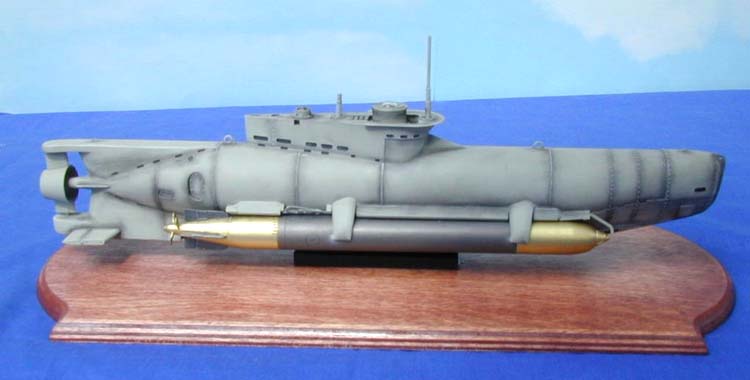
Instructions say paint the whole model dark sea gray. I wanted to control the various shades of weathering so I went with light sea gray. Once everything was dry I added the hatch/dome assembly. I did the "future" trick with the doom to bring out the sparkle. I wanted to show a lot of tonal variations with weathering and bring out the excellent hull details. I darkened all hull flooding ports with scale black. I then used black pastel dust to darken around all the hull plate seams. I then sealed the weathering with a coat of dullcote. Mask that dome! I then went over the whole model dry brushing with light gray to make all those rivets and other details pop out.
I decided to go very easy on the rust at the end because, let's face it, these vessels did not last that long in action. I wrapped up the build by gluing those two beautiful torpedoes in place using the box photo as a reference. I then replaced the periscope that finally managed to leave this dimension after it broke off for the third time with painted brass rod. I mounted the model on wood for photographs and to take down to the local IPMS show.
Conclusion
I am quite pleased with the results of this build. I would certainly recommend that you have a few resin kits under your belt before trying this kit. It is a tad pricey, so you might want some resin experience before purchasing one. The sparse instructions lend the kit to more advanced modelers but the old trusty eyeball pulled me through. That said, I definitely recommend this kit to the submarine enthusiast.
NOTE: Richard's Seehund took first place at the local IPMS show held in Austin, Texas in late August 2001.


![]()


