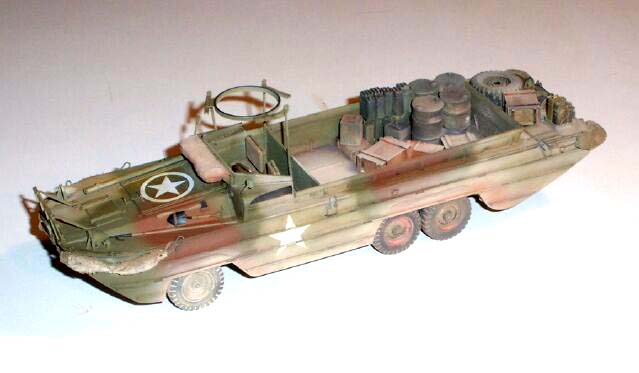
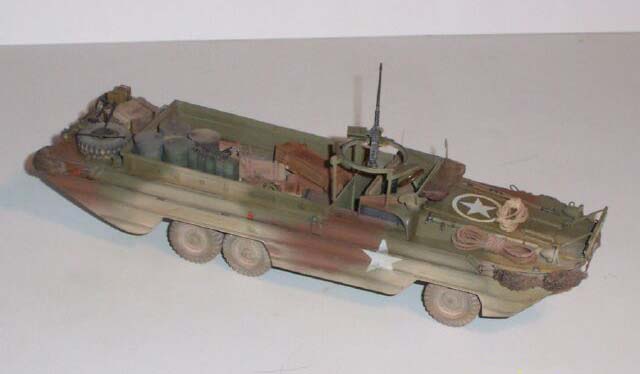
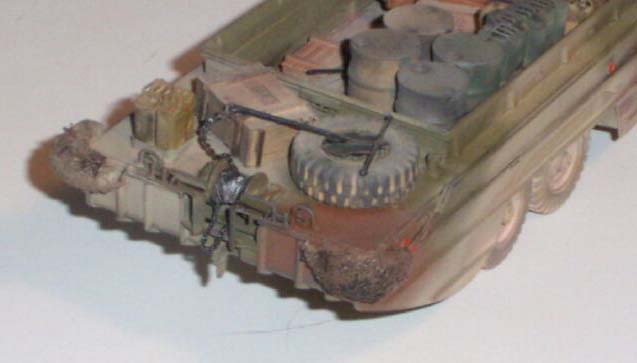
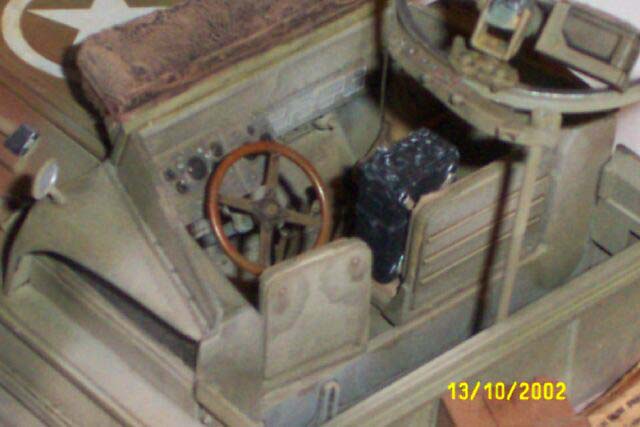
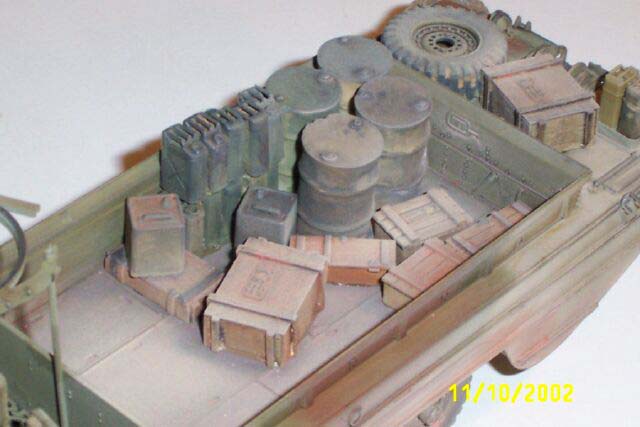
Italeri 1/35 GMC DUKW 353 |  | Introduction 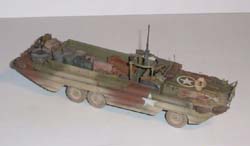 The GMC DUKW-353 was an amphibious six-wheel drive truck with a boat-type hull built on a modified GMC chanel-style frame and power train. In addition to being amphibious, it was very roadworthy, and it had inflation controls in the cab to allow the driver to adjust tire pressure to match road conditions. The ³Duck,² as it was nicknamed, could carry 25 troops or two and a half tons of equipment. The Duck was a crucial tool in supporting allied land forces as they forded rivers across Europe during the advance on Germany. The GMC DUKW-353 was an amphibious six-wheel drive truck with a boat-type hull built on a modified GMC chanel-style frame and power train. In addition to being amphibious, it was very roadworthy, and it had inflation controls in the cab to allow the driver to adjust tire pressure to match road conditions. The ³Duck,² as it was nicknamed, could carry 25 troops or two and a half tons of equipment. The Duck was a crucial tool in supporting allied land forces as they forded rivers across Europe during the advance on Germany. This model has been a long time coming, but finally it's here, and was it worth the wait, I think so. On first opening the box, you think, WOW, what a size, and believe me, it's not small. There are a few sink marks about, but as construction proceeds, they are hardly seen, and those that are seen, are easily dealt with. Construction 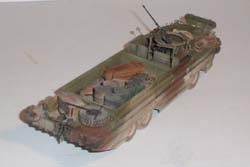 I am not going to give you a blow by blow account of how I made this model, but just highlight a few points to note, as far as the model goes, it went together fine, no problems at all. I am not going to give you a blow by blow account of how I made this model, but just highlight a few points to note, as far as the model goes, it went together fine, no problems at all. I started off at section 7, almost making the model in reverse, but not forgeting to fit part 2A first, be careful here,as you need about four pairs of hands to glue all the bits - and hold them together as they dry. I also fitted the top deck part 1B, the fit is good . I then moved on to the axles and wheels. Again no problems here. You will have to rub down the wheels so as to not show the joint line. Allow time for the axles to dry before fitting the wheels, as any little pressure will put the suspension arms out of alignment. 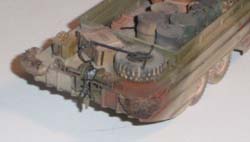 Next came the fitting of the rotor and rudder. Again straightforward. I then went back to the begining of the plans. Next came the fitting of the rotor and rudder. Again straightforward. I then went back to the begining of the plans. In section 3, it's best to fit the windscreen assembly first, as it fouls the bonnet if you don't. At this stage, I cut the windscreen off to have it down, and I made a cover for it out of mulliput. I left out the light perspexes for now, until after painting. 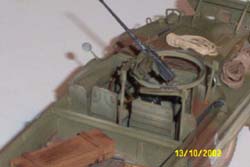 At this stage I raided the spares box for a machine gun mount, the exellent Tamiya Allied accessory set was used. The two wings on part no.36A need to be bent slightly backwards to act like an anchor. Also, it doesn't have to go where the plans say it does. Some references show these stowed on the side, front, back - anywhere it can hang on to basically. At this stage I raided the spares box for a machine gun mount, the exellent Tamiya Allied accessory set was used. The two wings on part no.36A need to be bent slightly backwards to act like an anchor. Also, it doesn't have to go where the plans say it does. Some references show these stowed on the side, front, back - anywhere it can hang on to basically. Next I fitted parts 50C. Be careful not to knock them off as they are very small, you don't want to feed the carpet monster - I did!! I replaced the jerry cans, with Verlinden items, as they are quite prominant where they are. I also made a mounting frame for them out of brass strip, with a strap out of masking tape. The fitting of the winch in section 6 is a bit funny, so be careful. I replaced the moulded on cord with nylon rope from the local model railway shop. I remade the bumper bags - parts 102C,103C,105C,107C - out of mulliput smoothed to shape. These were wrapped in a bit of wet bandage, soaked in pva glue. This way they will sit on the corners properly. But I`m sure a rope expert will go mad over my `GRANNY` knots made out of nylon rope . That's about it for the construction, until after painting anyway!! Painting and Weathering 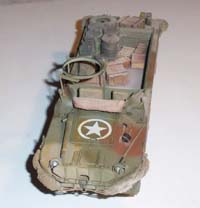 The whole model was first sprayed in light grey primer, and left to dry for at least 24 hours. Next everything was sprayed black as a base for the pre- shading. Then came olive drab lightly sprayed over the black, leaving some of the black undercoat showing in some areas. this was followed by red, sprayed in random wavy bands across the model, and finally tan, painted in the same way. Once this was dry, I added a little white to the base colours, and sprayed inside the respective colour bands just to give the colours a bit of depth. The whole model was first sprayed in light grey primer, and left to dry for at least 24 hours. Next everything was sprayed black as a base for the pre- shading. Then came olive drab lightly sprayed over the black, leaving some of the black undercoat showing in some areas. this was followed by red, sprayed in random wavy bands across the model, and finally tan, painted in the same way. Once this was dry, I added a little white to the base colours, and sprayed inside the respective colour bands just to give the colours a bit of depth. After everything has dried, a coat of gloss varnish (yes, gloss) was sprayed over the entire model in preperation for the decals. These were apllied using the micro sol/set solutions. After a couple coats of this, the stars settled down perfectly, this was then left to dry. So I now have a big gloss boat on my desk!!! - but not for long. The entire model was sprayed with matt varnish. This is for two reasons: one to turn the high gloss finish to a dull armoured matt (when was the last time you saw a gloss tank??) and the second one is to lock in the paint finish, and the decals, ready for the weathering process.  First I gave the whole model a wash of burnt umber oil paint, and allowed 24 hours to dry. I then made up a mix of Humbrol olive drab, lightened with yellow ocher oil paint, and dry-brushed the whole model. This takes some time, and be careful not to knock off any detail like the mirrors. This was then left for about 4-5 hours. I then drybrushed the whole model again, but using humbrol gun metal. This was then allowed to dry for 24 hours. After this was dry, I mixed up a mixture of Tamiya chrome silver marker, and raw sienna oil paint. I used this to lightly drybrush all the hooks, eyes, and the very edge on the model. This must be left to dry for at least 48 hours. First I gave the whole model a wash of burnt umber oil paint, and allowed 24 hours to dry. I then made up a mix of Humbrol olive drab, lightened with yellow ocher oil paint, and dry-brushed the whole model. This takes some time, and be careful not to knock off any detail like the mirrors. This was then left for about 4-5 hours. I then drybrushed the whole model again, but using humbrol gun metal. This was then allowed to dry for 24 hours. After this was dry, I mixed up a mixture of Tamiya chrome silver marker, and raw sienna oil paint. I used this to lightly drybrush all the hooks, eyes, and the very edge on the model. This must be left to dry for at least 48 hours. 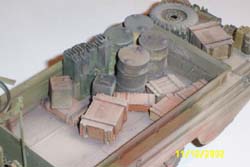 While this is drying, you can choose a load for the back of your DUKW (if anyone has a 105mm howitzer for sale please give me a shout) For now I will leave the back empty. While this is drying, you can choose a load for the back of your DUKW (if anyone has a 105mm howitzer for sale please give me a shout) For now I will leave the back empty. Back to the weathering. I next ground down some light brown pastel chalks, and mixed this with white spirit to make a runny paste. This was then painted on the lower hull , when it has dried it looks like thick dust. You may have to try various colours to find the right colour for the dust/mud you want. Then a light overspray of Tamiya acrylic buff, mixed with flesh, was sprayed all over the model to give it that worn look. The details were now painted - the lights, mirrors - all using Humbrol colours. Once dry, another coat of matt varnish was given over the entire model. Conclusion Well what can I say about this new model, it was a joy to build, no major, or even minor problems, detail is good, decals are good, and the price is even better, around £15 in the U.K. Apart from the lack of a crew and an engine – which I'm sure Mr.Verlinden will sort out PLEASE, PLEASE, PLEASE - this model comes highly recommended. | 


|