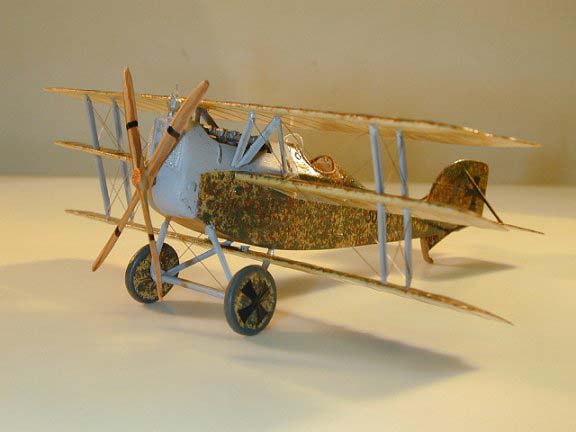
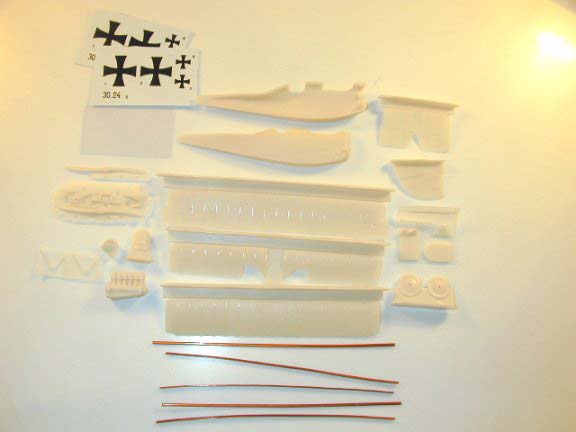
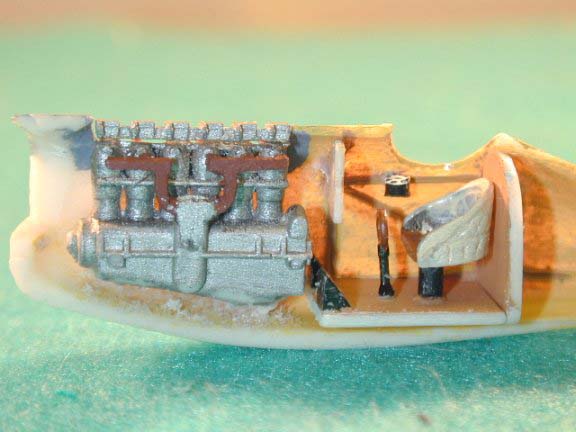
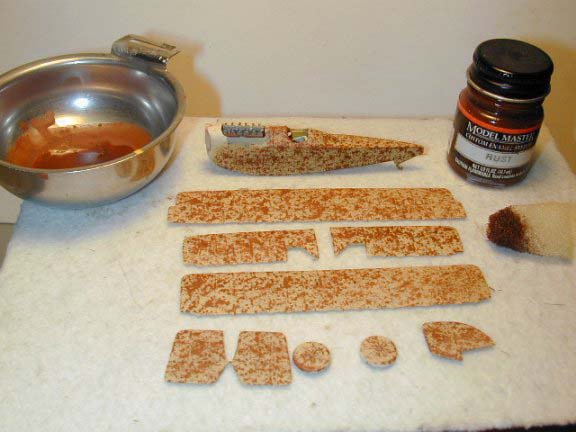
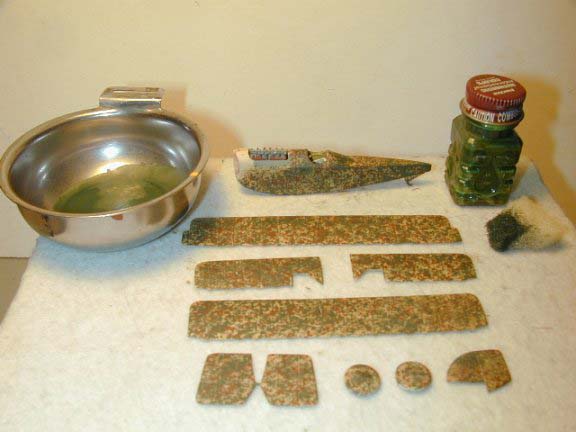
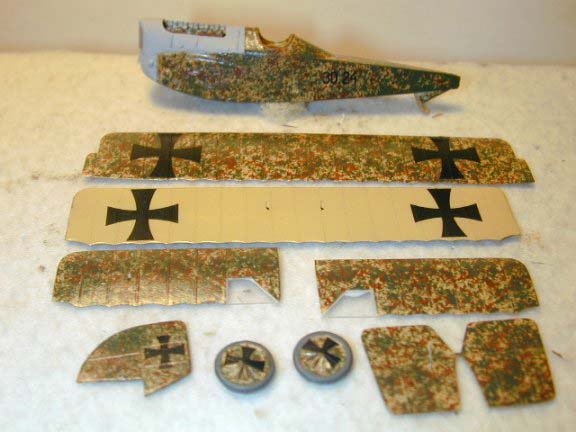
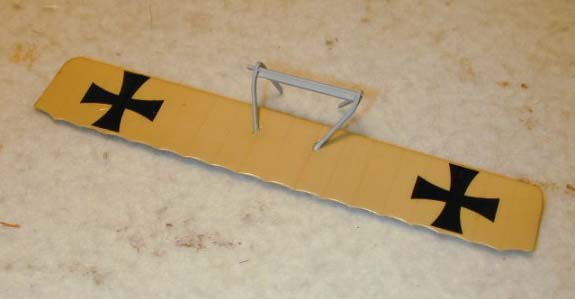
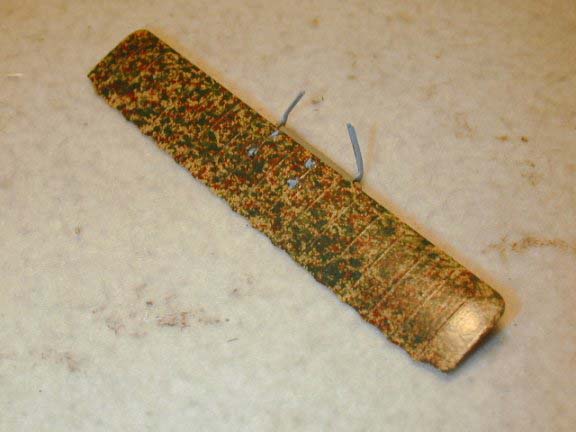
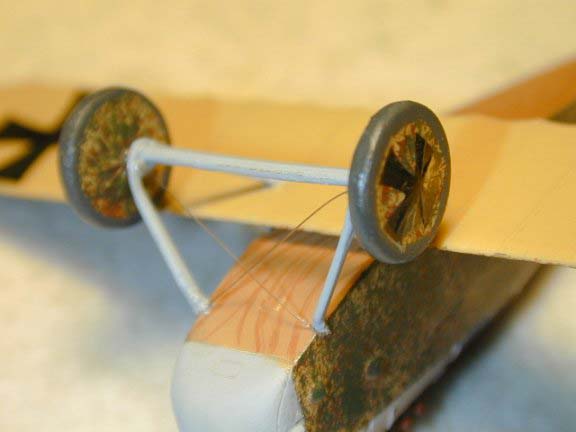
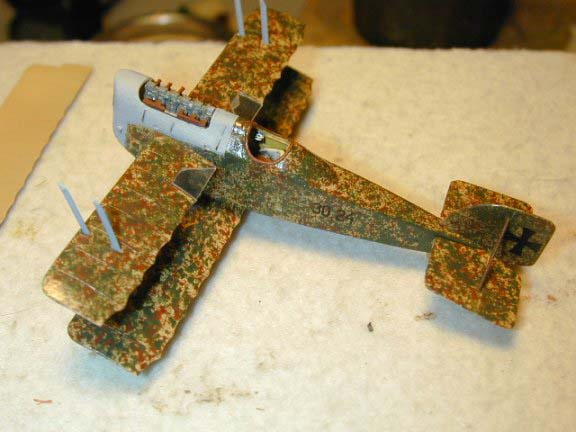
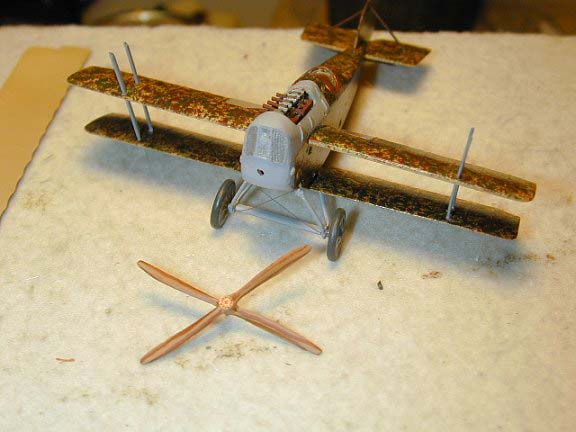
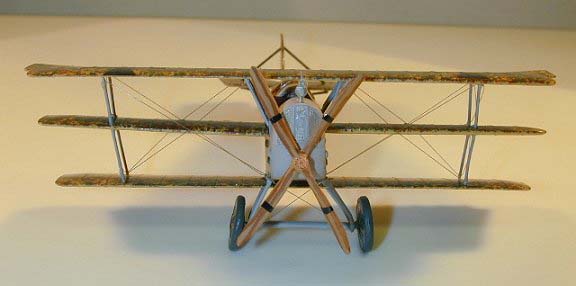
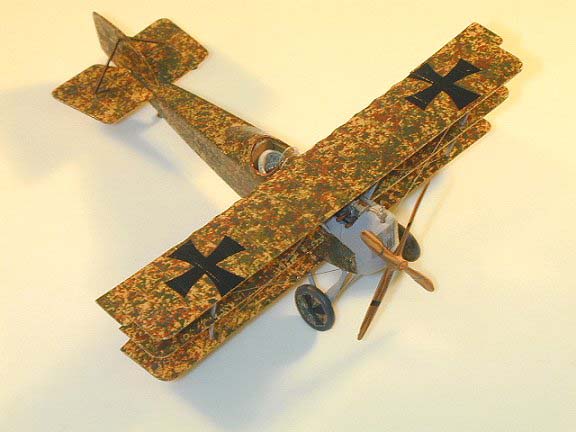
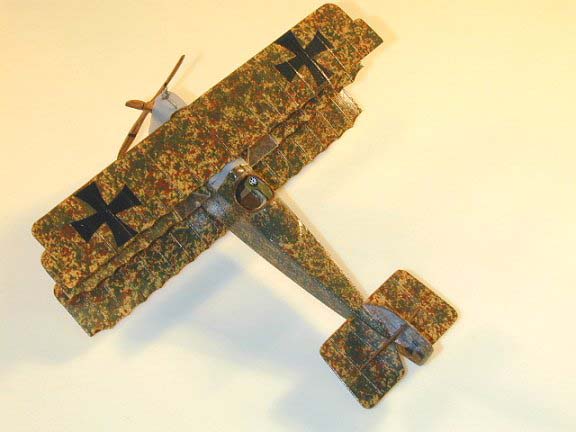
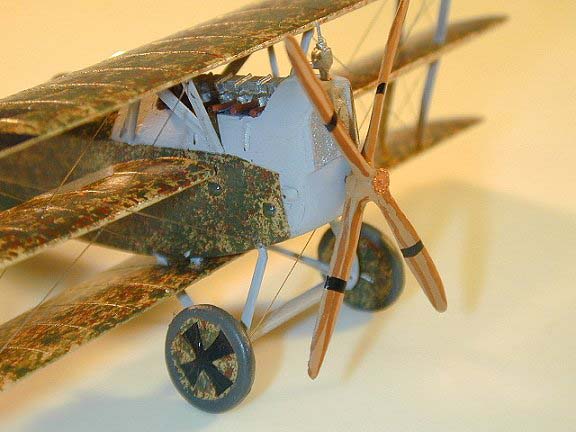
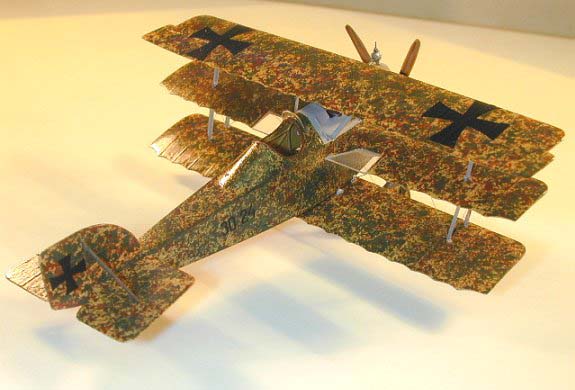
RVHP Resin 1/72 Aviatik 30.24 Triplane | 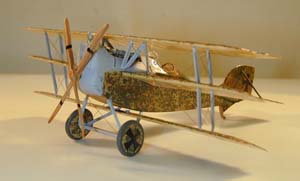 | A BRIEF HISTORY The Aviatik proposal for a two-seat triplane was rejected by Flars in July 1917 but the development of a single-seat version continued. The drawings submitted on 17 September 1917 showed a triplane cellule fitted to a standard Aviatik D.1 fuselage and tailplane. In September 1917, Aviatik received a contract to build four experimental triplane fighters to be powered by a 185/200 hp Daimler engine. The first triplane fighter, designated 30.24, began flight testing in October 1917. Powered by a 185 hp Daimler engine, the Aviatik 30.24 had inferior performance compared with the similarly engined Aviatik D.1. The 30.24 was returned to the factory for installation of a 200 hp Daimler engine and twin machine guns. It reappeared at Aspern on 26 February 1918 for further tests that showed little improvement. The triplane was transferred to Flek 8 then to Flek 6 in Wiener-Neustadt, where a variety of experimental radiators were installed as part of the program to improve forward view of the Aviatik fighters. 30.24 was accepted in Sept 1918. The remaining prototypes (designation unknown), completed but disassembled, were accepted at the end of Oct 1918. The 30.24 was offered for sale to the Czechoslovakian government in April 1920. This brief history is taken from the instruction sheet of the kit and is my entire source of information and knowledge of this plane. There are no references listed and my sincere thanks goes out to Steven Perry and Grezegorz Mazurowski for scans of photos so I would have some clue how to build this kit. With this information, let's go into the kit and the build. THE KIT 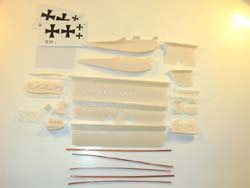 With the exception of metal strut material, the kit is 100% polyurethane resin. The wings are very delicate with the slightest hint of ribs, top and bottom. Holding the parts up to a light, almost no voids were found and the ones I did find were so small that I ignored them. The details are crisp and not overdone. A clear plastic sheet is included for the wing cut outs and windscreen. The locating holes for the struts are clearly defined. There's not much else to say about the kit. Since I have no reference material on the 30.24, I cannot say if the dimensions are accurate. The fuselage did match some D.1 plans I do have. This is a small, obscure plane and will make a nice addition to my collection and triplane segment of the collection. With the exception of metal strut material, the kit is 100% polyurethane resin. The wings are very delicate with the slightest hint of ribs, top and bottom. Holding the parts up to a light, almost no voids were found and the ones I did find were so small that I ignored them. The details are crisp and not overdone. A clear plastic sheet is included for the wing cut outs and windscreen. The locating holes for the struts are clearly defined. There's not much else to say about the kit. Since I have no reference material on the 30.24, I cannot say if the dimensions are accurate. The fuselage did match some D.1 plans I do have. This is a small, obscure plane and will make a nice addition to my collection and triplane segment of the collection. Some of the parts are attached to a piece of tape and almost spelled the kiss of death for these parts trying to remove them. Resin is very weak and cleaning the parts will present a challenge. I broke several parts that had to be replace trying to remove them from their resin moldings. THE BUILD The fuselage A very light sanding of the fuselage halves is all that is needed to get a nice tight fit of the two halves. The sides are thin enough that no thinning was necessary when installing the engine and cockpit parts. The cockpit consists of three parts, there is a solid fuselage oval and an instrument panel with some instruments imprinted on it. This section went in without any problems. A problem arose with the engine. The intake manifold broke in several places and was too thick. I think this is the nature of resin and small parts. A very easy solution is to take the engine from a RODEN kit and move on. But I wanted to keep the model as it comes out of the box so I carved and shaped and coaxed the parts together. Some trimming is required in the opening for the engine so all of the exhaust pipes will fit. Then the sides were thinned as much as possible and the manifold was sanded so I could close the fuselage halves. The photograph of the completed engine is prior to sanding. There are no locating pins or ledges for the engine and it must be held in place while closing the fuselage. I tore my house apart looking for some modelling clay and came up empty handed. But, wait, is that biscuit mix on the shelf? It is. Some biscuit mix, some water, a little kneading, five minutes in the oven...... OK, so I didn't put it in the oven. However, in the absence of clay, I have a substance that I can embed the engine into and then glue it when I have the engine positioned where I want it. After glueing the engine, the fuselage halves are glued together with super glue. The radiator and tail skid are added and the unit is puttied and sanded. Tail Surfaces This is a very straightforward section. The vertical stablizer is sanded slightly and is ready. The hortizonal stablizer is molded in one piece with the most delicate connection in the world. I was able to maintain this connection until final assembly when it became necessary to cut the connection as it is too wide for the fuselage. These two pieces will be attached after painting. Wings Again, very minor sanding is required for the wings. Make sure the middle wing is sanded straight at the end so it will mate with the fuselage square. Do not sand off too much or it will affect wing alignment later. Here is where I departed from the kit instructions. Instead of cutting the struts, I slotted the middle wing to accept a strut running through it. My hope was to have fewer alignment problems down the road. Painting At this point of construction I am ready to paint and apply decals. The entire model is painted in unbleached linen (CDL). I had nothing but dread about trying to apply "Autumn Leaf" to the surfaces. Reading Dr. Martin O'Connor book "Air Aces of the Austro-Hungarian Empier 1914-1918" on page 234, gave me my direction. According to Dr. O'Connor, the paint was applied with saturated sponges directly over the linen and wood. However, the mottling of any one color was never allowed to become so dominant that it overwhelmed the others. So, I cut packing foam about one inch long and about the diameter of my little finger. In a metal cup I mixed and thinned my paint to be fairly thin. I dabbed the foam into the paint, blotted it on a napkin, and lightly touched the surface of the model. The foam left about a half dozen dabs of paint. When the dabs no longer showed up, back to the paint cup. One important thing. Do not put pressure on the foam as you are painting. By doing so, you will blot a large section of paint and lose the effect you are trying to achieve. This was repeated with the second color and all painting was complete. The total time of painting is less than 10 minutes. I am very pleased with the results. All surfaces are gloss coated and the decals are applied and another coat of gloss is added. With the exception of the metal parts of the plane and the struts, the painting is complete. After painting, I added the plastic inserts in the middle wing with white glue. Wings and landing gear construction The landing gear is the most difficult part of the model because of little to no reference material. Again, I sloted the lower wing to run the strut through it. An old Revell DH2 sacrificed its landing gear for this kit and with some modifications, worked well. The hardest part is the front support between the fuselage and wing. I just had to guess as to where it was located and its size. I made sure the wing was in its proper flight position and glued it in place. After that, the next two wing were pretty easy. I slid the struts through the middle wing, got the proper angle and attached the middle wing. With the lower two wings attached, I got the correct angle for the rigging that goes through the middle wing and drilled the holes to the rigging will go straight through the wing. With this done, the top wing is attached. I again have departed from the kit. My rigging method does not lend itself to metal struts so I replaced the kit metal struts with Contrail plastic stock. The cabanes did not fit so I made new ones. They were so fragile in the first place I was surprised they survived the sanding. Final bits and pieces After drilling all of my rigging holes, the top wing is attached along with the wheels and tail surfaces. The propeller was difficult in that a lot of sanding was required to get to what amounted to two propellers bolted together and look right. The configuration is correct but only adds to the odd nature of this model. The rigging is completed and the wind screen is added and the model is complete. Conclusion 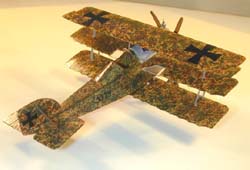 The total building time is about 15 hours. The most difficult part of the model is the flying blind during construction. Again, no reference materials are listed and no true length drawing are given for struts. If I have any criticism about the Czech kits it's the fact that they do not list any reference materials. This kit is an excellent offering of a plane that no one has offered in the past and I would be shocked if anyone offers it in the future. But for that reason, I feel it's imperative on the manufacturers of these obscure planes to provide as much reference material as is available. Not so much for the advanced builder with access to help such as was in my case, but to the average builder who may want to try and build an unusual kit. I think they may become discouraged and not try another one in the future. The total building time is about 15 hours. The most difficult part of the model is the flying blind during construction. Again, no reference materials are listed and no true length drawing are given for struts. If I have any criticism about the Czech kits it's the fact that they do not list any reference materials. This kit is an excellent offering of a plane that no one has offered in the past and I would be shocked if anyone offers it in the future. But for that reason, I feel it's imperative on the manufacturers of these obscure planes to provide as much reference material as is available. Not so much for the advanced builder with access to help such as was in my case, but to the average builder who may want to try and build an unusual kit. I think they may become discouraged and not try another one in the future. But all things considered, this is an interesting addition to any collection, especially someone like myself who thrives on the unusual planes of WW1. This is my ninth triplane to be added to a growing segment of my collection. | 


|