Emhar 1/72 A7V “Sturmpanzer” German World War 1 TankBy Dave Manter |
 |
History
 In
November 1916 the German War Ministry authorized the development of the
A7V, which finally rolled out of the factory in January 1918. The first
combat that the new tank saw was in March 1918 at St. Quentin.
In
November 1916 the German War Ministry authorized the development of the
A7V, which finally rolled out of the factory in January 1918. The first
combat that the new tank saw was in March 1918 at St. Quentin.
The first 5 tanks were armed with a 5.7cm Maxim-Nordenfeldt cannon, which
had been produced several years earlier in Britain! 6 German MG 08 pattern
heavy machine guns were also carried. The tank was powered by 2 Daimler
165-204 type 75 Kw petrol engines and had a top speed of 6 ½ mph
with a range of 50 miles. The crew was 18 men but as many as 26 could
be carried. There were 20 A7Vs produced.
Construction
 The
kit consists of 30 parts molded in a dark gray plastic. Detail is very
nice with little, if any, flash. The instructions divide the vehicle into
9 easy to follow steps. Construction begins with the installation of the
main cannon. The assembly of the 6 machine guns follows this. The next
step is to install the one-piece running gear to the lower hull. The detail
on the running gear is great and can be enhanced by careful painting.
Step 6 is the most critical as it the main hull. Careful test fitting
will make final assembly easier. My sample fit very nicely. Step 7 is
the installation of the 6 machine guns and these can be snapped into place
so that they can be moved. Step 8 is the installation of the top deck
and commander's observation deck. The last step is to attach the exhaust
pipes. I assembled this kit in just 1 very relaxing evening.
The
kit consists of 30 parts molded in a dark gray plastic. Detail is very
nice with little, if any, flash. The instructions divide the vehicle into
9 easy to follow steps. Construction begins with the installation of the
main cannon. The assembly of the 6 machine guns follows this. The next
step is to install the one-piece running gear to the lower hull. The detail
on the running gear is great and can be enhanced by careful painting.
Step 6 is the most critical as it the main hull. Careful test fitting
will make final assembly easier. My sample fit very nicely. Step 7 is
the installation of the 6 machine guns and these can be snapped into place
so that they can be moved. Step 8 is the installation of the top deck
and commander's observation deck. The last step is to attach the exhaust
pipes. I assembled this kit in just 1 very relaxing evening.
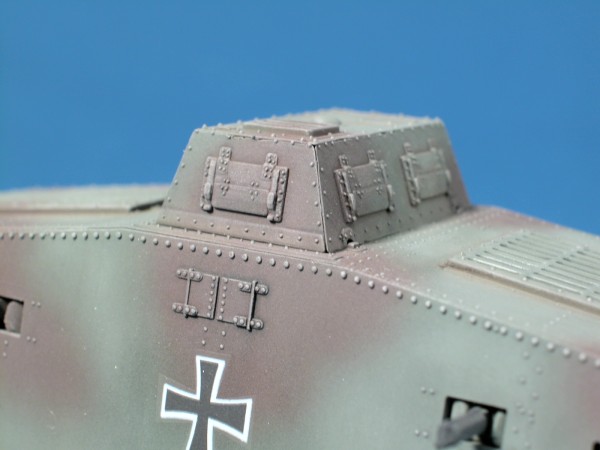
Painting
 The
kit comes with decals for 5 different tanks in 2 different color combinations.
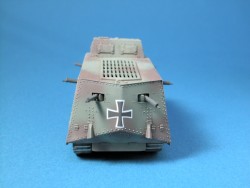
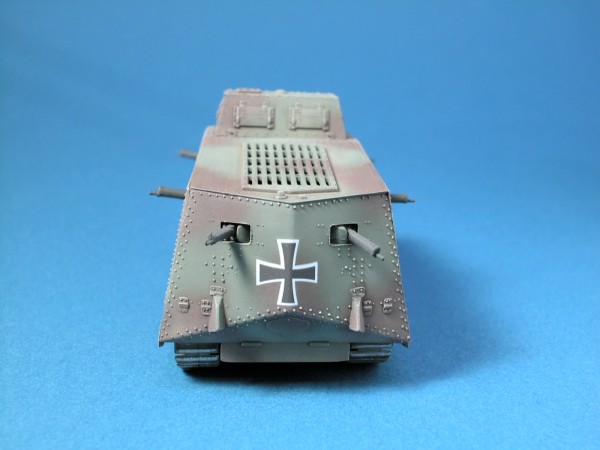
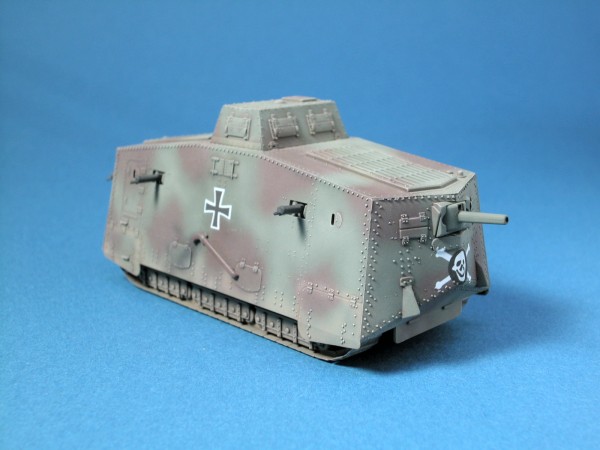
I choose tank # 506 as this had the smiling skull on the front. I base
painted the entire tank with Tamiya Field Gray. I then added the camouflage
pattern with Tamiya Red Brown. I then mixed a nice “dirt”
color from Tamiya Flat Earth and Tamiya Desert Yellow in a 50/50 mix.
This was applied to the running gear and lower hull. I also sprayed this
lightly up the sides as well. After this had dried I applied a very thin
wash of black over the entire tank. The next step was to apply a “pin
wash” to all of the recessed and raised details.
The
kit comes with decals for 5 different tanks in 2 different color combinations.
I choose tank # 506 as this had the smiling skull on the front. I base
painted the entire tank with Tamiya Field Gray. I then added the camouflage
pattern with Tamiya Red Brown. I then mixed a nice “dirt”
color from Tamiya Flat Earth and Tamiya Desert Yellow in a 50/50 mix.
This was applied to the running gear and lower hull. I also sprayed this
lightly up the sides as well. After this had dried I applied a very thin
wash of black over the entire tank. The next step was to apply a “pin
wash” to all of the recessed and raised details.

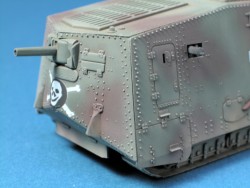
 The
last step in the weathering process was a light dry brushing to accent
all of the wonderful raised rivet details. I painted the machine guns
black. I then sprayed several coats of Future in the areas where the decals
would be applied. After drying over night, I applied the decals and found
them to be thin and easy to use. A little Micro Set was used and after
drying an over spray of Gunze Clear Flat was used to seal them in and
to kill the gloss from the Future. The last step was to dry brush a metallic
gray color on the tracks.
The
last step in the weathering process was a light dry brushing to accent
all of the wonderful raised rivet details. I painted the machine guns
black. I then sprayed several coats of Future in the areas where the decals
would be applied. After drying over night, I applied the decals and found
them to be thin and easy to use. A little Micro Set was used and after
drying an over spray of Gunze Clear Flat was used to seal them in and
to kill the gloss from the Future. The last step was to dry brush a metallic
gray color on the tracks.
Conclusion
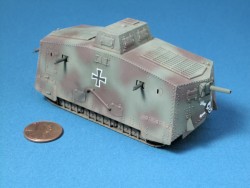 All
in all this was a very enjoyable project. The kit fit well and the detail
is superb. The decals allow you to do several different tanks with a couple
of interesting paint schemes. I spent 3 evenings (about 6 hours, mainly
on painting) on this tank and found it to be a nice change of pace, as
I don’t normally work in 1/72nd scale. My thanks to Squadron
Mail Order for the review sample.
All
in all this was a very enjoyable project. The kit fit well and the detail
is superb. The decals allow you to do several different tanks with a couple
of interesting paint schemes. I spent 3 evenings (about 6 hours, mainly
on painting) on this tank and found it to be a nice change of pace, as
I don’t normally work in 1/72nd scale. My thanks to Squadron
Mail Order for the review sample.


![]()


