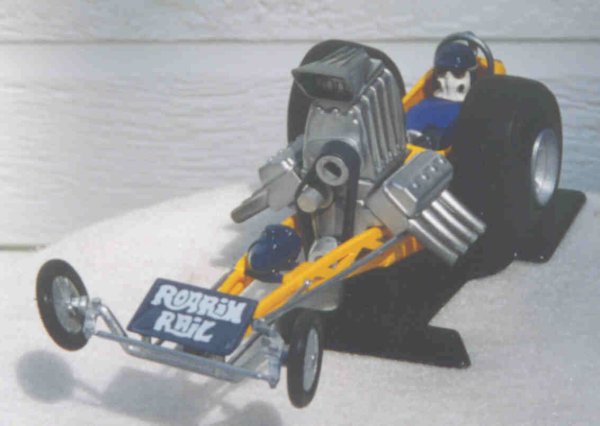
Revell Tom Daniel's “Roarin' Rail”Greg Barling |
 |
GENERAL
This caricature kit is aimed at the younger/newer modeler. The instructions indicate a 2001 release date, but information molded on the underside of the base (part 15) states a copyright date of 1970. Even so, the kit has stood up well (if it does, in fact, date back that far), with minimal flash and sink mark problems.
Revell also includes good guidance for new builders on their instruction sheet. They provide a hotline number for questions and comments, plus their website and mailing addresses, and a text box of basic instructions for the young modeler to read before he/she begins work
INSTRUCTIONS
There are fifteen illustrated steps, well laid-out and easy to follow. Youngsters should have no problem at all following them. The only minor nitpick is the drawing showing the placement of four small “rosette” stickers: guidance arrows point to the driver, a tire and the engine, with only one aimed at the car body.
CONSTRUCTION
 I
put myself in the place of a youngster (not difficult, as those who know
me will testify!) and built the kit OOB. The only “improvements”
made were a bit of seam filling on the engine, body and tires and drilling
out the exhaust pipes. The plastic is of standard hardness, so I experienced
no surprises.
I
put myself in the place of a youngster (not difficult, as those who know
me will testify!) and built the kit OOB. The only “improvements”
made were a bit of seam filling on the engine, body and tires and drilling
out the exhaust pipes. The plastic is of standard hardness, so I experienced
no surprises.
The little flash found is easily removed with a sanding stick or craft knife. The spoiler (part 13) had the most of any part, but again this was easily removed. Otherwise, what little flash there is does not hamper construction: a youngster probably would not even notice it (apart from the noted spoiler).
Each body half shows a small sink mark on the side where a round joining bar is molded into the inside of each part. There are smaller sink marks on the forward body frame. All of these are easily filled and sanded. Again, if left alone, they do not adversely affect construction.
A few parts provided slight problems. Some were difficult to “snap” together (body halves and the pulley-to-engine connection), while others fitted loosely and benefited from a touch of glue (one each of the large and smaller wheels). Otherwise, I experienced no major assembly problems.
ADDED DETAILS
 Although
I earlier stated that I built this model OOB, I did add four small improvements:
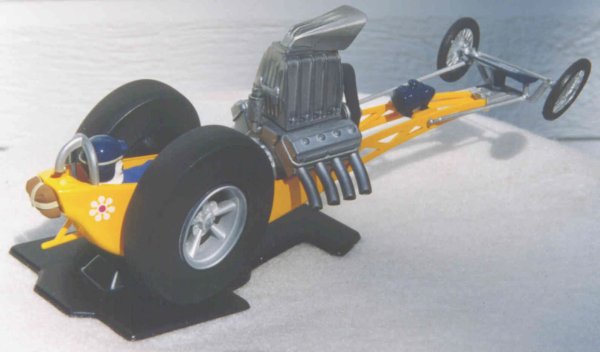
I placed three thin strips of masking tape on the model, two to represent
the parachute pack strapping, and the third around the driver's helmet
to represent the goggle strap. Also, the construction of the engine scoop
(parts 11 and 12) leave a gap in the interior of the scoop that is difficult
to fill. I simply added a few lengths of microstrip to cover the gap,
and then painted it into the scoop assembly.
Although
I earlier stated that I built this model OOB, I did add four small improvements:
I placed three thin strips of masking tape on the model, two to represent
the parachute pack strapping, and the third around the driver's helmet
to represent the goggle strap. Also, the construction of the engine scoop
(parts 11 and 12) leave a gap in the interior of the scoop that is difficult
to fill. I simply added a few lengths of microstrip to cover the gap,
and then painted it into the scoop assembly.
PAINTING AND FINISHING
 The
box art shows a drawing of the model resplendent in an electric-blue finish,
but the kit body is molded in yellow. I stuck with the yellow, airbrushing
on a few coats of Modelmaster Chrome Yellow. This went on well, so additional
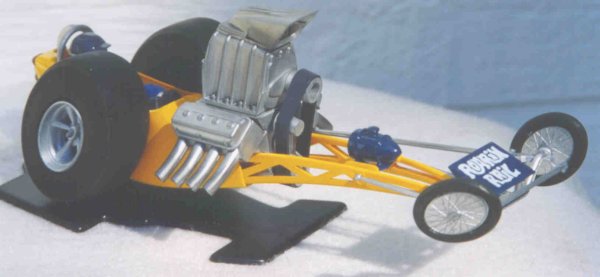
polishing with Micromesh or other polishing media was not required. I airbrushed
the tires with Xtracolor Tire Black, while the wheels, engine and various
rods got a variety of Modelmaster metalizers. A wash of thin oil paints
and turpenoid brought out a little of the engine and block detail. The driver
got a blue driving suit and helmet, a white facemask, and black gloves.
The
box art shows a drawing of the model resplendent in an electric-blue finish,
but the kit body is molded in yellow. I stuck with the yellow, airbrushing
on a few coats of Modelmaster Chrome Yellow. This went on well, so additional
polishing with Micromesh or other polishing media was not required. I airbrushed
the tires with Xtracolor Tire Black, while the wheels, engine and various
rods got a variety of Modelmaster metalizers. A wash of thin oil paints
and turpenoid brought out a little of the engine and block detail. The driver
got a blue driving suit and helmet, a white facemask, and black gloves.
EXPERT OPINION
There is an old saying: “When in doubt, go to the experts.” So I did. Dylan and Spencer are two young brothers who live next door. I took the opportunity to visit with them, to show them the model and to ask their opinion. I was lucky in that when I visited their friend Ian was with them. The three boys examined the model carefully from all angles, asked very good questions, and came to the opinion that they liked the model quite a bit. All three thought that they would like to build one. One dissenting opinion was that I should have painted the body bright red: then it would have been “really cool!” All in all, my expert panel gave the model a passing grade (and these guys were tough judges!).
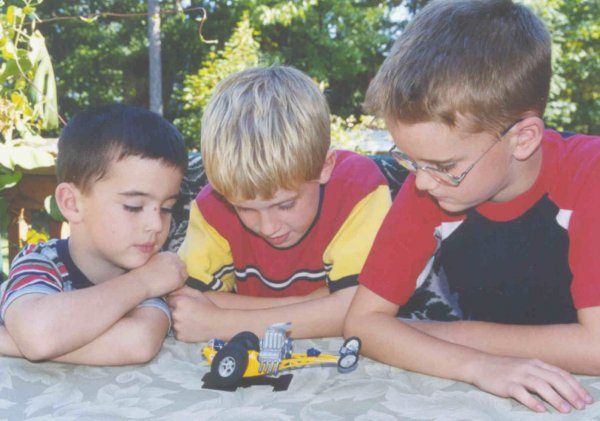 Left
to right: Spencer, Ian and Dylan give the 'Roarin' Rail' a close-up examination.
My panel of experts liked the model, giving it their nod of approval and
three thumbs-up!”
Left
to right: Spencer, Ian and Dylan give the 'Roarin' Rail' a close-up examination.
My panel of experts liked the model, giving it their nod of approval and
three thumbs-up!”
CONCLUSION
This was a fun build. I spent about four hours on the project (exclusive of paint drying time), but I expect that a youngster, keen to get it built and not fussed by various construction techniques, can snap it together and place the sticker-type decals within the hour. Recommended as a starter kit for the neophyte modeler.

![]()


