Eastern Express 1/72nd T-34/76 Model 1942
By James D. Gray
|
 |
Construction
 Soviet
armor in the Great Patriotic War seems quite standardized when you first
start to learn about it, but as you immerse yourself in the details
more and more variability appears. The T-34's produced in 1943, for
example, had four different types of turret, functionally identical
but visually distinct. It's these sorts of details that can help you
to make your model different from what comes out of the box. Soviet
armor in the Great Patriotic War seems quite standardized when you first
start to learn about it, but as you immerse yourself in the details
more and more variability appears. The T-34's produced in 1943, for
example, had four different types of turret, functionally identical
but visually distinct. It's these sorts of details that can help you
to make your model different from what comes out of the box.
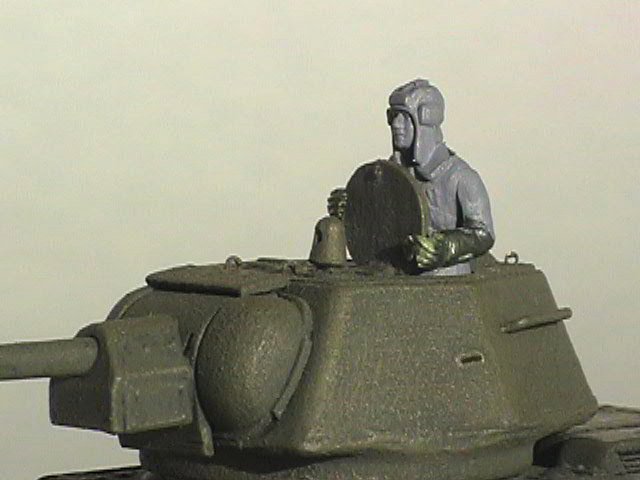
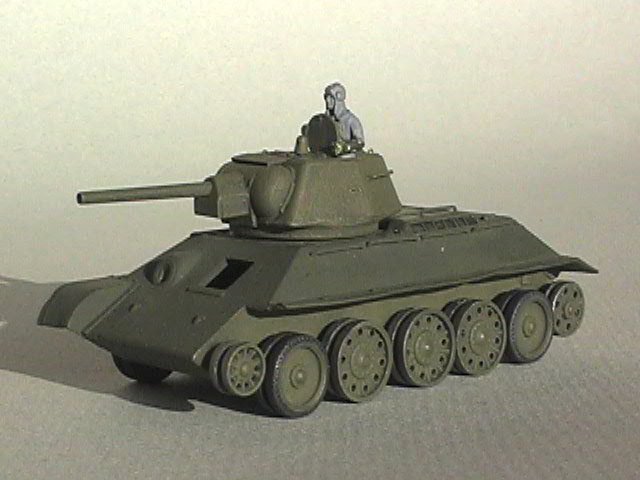
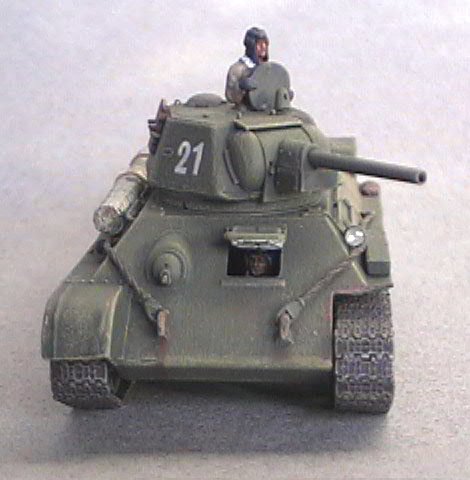
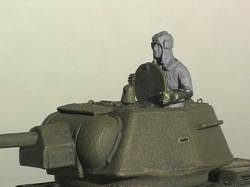
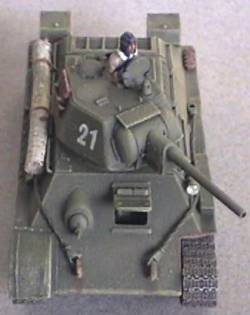
Construction began with the turret, which goes together very well.
The turret hatches are unfortunately molded shut, so I cut out the commander's
hatch and made a new hatch cover from sheet plastic. I wanted to pose
a figure there. I also drilled out the 76mm gun and the machine gun
barrels. There is a vision slit on each side of the model turret, but
the real ones seem to have a raised lip around them which the kit did
not include. I built up this lip with  several
coats of thick paint. I carefully cleaned up the glue line where the
upper and lower halves of the turret join. This proved to be a mistake.
There is a prominent mold parting line here in the real thing, which
the Soviets didn't waste time cleaning up very well. I had to put this
back on with stretched sprue which I then filed when dry to make a rough
line. The most delicate detail on the turret, the lifting rings, were
produced from fine wire and glued into holes drilled in the turret roof. several
coats of thick paint. I carefully cleaned up the glue line where the
upper and lower halves of the turret join. This proved to be a mistake.
There is a prominent mold parting line here in the real thing, which
the Soviets didn't waste time cleaning up very well. I had to put this
back on with stretched sprue which I then filed when dry to make a rough
line. The most delicate detail on the turret, the lifting rings, were
produced from fine wire and glued into holes drilled in the turret roof.
The new Eastern Express T-34 comes with what Steven Zaloga calls the
"softedge turret". Looking at every T-34 photograph I could
find seems to suggest that this was the least common style of turret,
which will put a crimp in the markings you can choose from.
 The
hull and its various features took up a lot more time. Basic construction
was pretty straightforward; typical of Eastern European kits, it is
built up of flat plates. Just be sure everything is nice and square
and there will be few problems. A good modeller will fill the gaps under
the fenders with sheet plastic but since I was doing this kit instead,
I squirted in a lot of Green Stuff and sanded it down afterwards. It
does not have to be a very neat job since this area is difficult to
see after the tracks are installed. The join where the glacis plate
meets the lower hull is sharp, but this is only correct for the later
T-34-85; it should be rounded. This is easy enough to fix with a file
and sandpaper. The hull side plates will need some shims or filler to
match up with the upper hull plate. The two final transmission covers
at the hull rear don't fit very well at all and need some cunning use
of filler. I used multiple applications of paint, which is easier to
control but takes infinite patience. I made a mistake and matched these The
hull and its various features took up a lot more time. Basic construction
was pretty straightforward; typical of Eastern European kits, it is
built up of flat plates. Just be sure everything is nice and square
and there will be few problems. A good modeller will fill the gaps under
the fenders with sheet plastic but since I was doing this kit instead,
I squirted in a lot of Green Stuff and sanded it down afterwards. It
does not have to be a very neat job since this area is difficult to
see after the tracks are installed. The join where the glacis plate
meets the lower hull is sharp, but this is only correct for the later
T-34-85; it should be rounded. This is easy enough to fix with a file
and sandpaper. The hull side plates will need some shims or filler to
match up with the upper hull plate. The two final transmission covers
at the hull rear don't fit very well at all and need some cunning use
of filler. I used multiple applications of paint, which is easier to
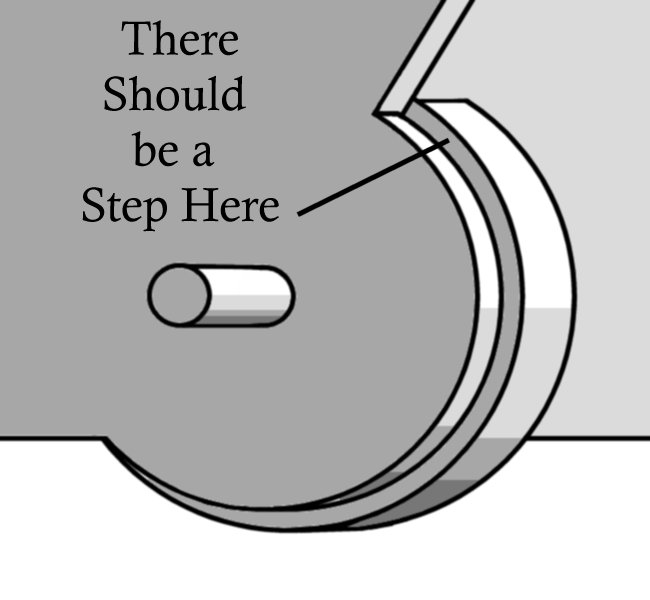
control but takes infinite patience. I made a mistake and matched these
 housings
up with the hull-side pieces too well; there's supposed to be a step
there, but I sanded it flush. The fenders are rather thin but still
not scale thickness, so I scraped and sanded them down, and then carefully
bent them up by heating them with a candle and applying some needle-nose
pliers. It's easy to do but easy to mess up as well. Too much heat and
they melt, and the pliers sometimes leave marks that have to be filled.
This method tends to round the corners on the fenders a bit, but if
you are careful it's nothing a few swipes with the edge of a hobby knife
won't fix. Also I cut off one of the front fenders. Soviet tanks hardly
seem to get out of the factory without bending or tearing off the sheet
metal! housings
up with the hull-side pieces too well; there's supposed to be a step
there, but I sanded it flush. The fenders are rather thin but still
not scale thickness, so I scraped and sanded them down, and then carefully
bent them up by heating them with a candle and applying some needle-nose
pliers. It's easy to do but easy to mess up as well. Too much heat and
they melt, and the pliers sometimes leave marks that have to be filled.
This method tends to round the corners on the fenders a bit, but if
you are careful it's nothing a few swipes with the edge of a hobby knife
won't fix. Also I cut off one of the front fenders. Soviet tanks hardly
seem to get out of the factory without bending or tearing off the sheet
metal!
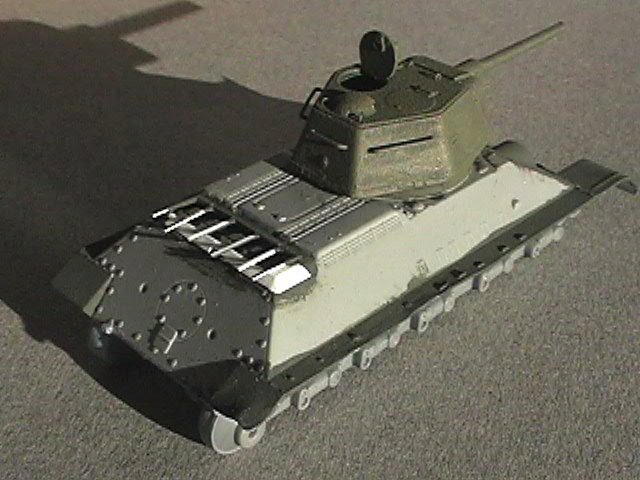
 Now,
on to the screen and cover at the back of the engine deck. This is where
air which has been sucked through the engine's radiators is ejected
by a big centrifugal fan. In the few photos which show this screen clearly,
it's obviously a rather light mesh and quite transparent. The molded
screen isn't bad, but it isn't transparent either, so I decided I'd
like to replace the screen with a real screen. It would have been better
had I decided this before assembling the hull, of course, but oh well!
That's what you get if you don't plan things out thoroughly in advance.
I cut the cover containing the screen off with a razor saw and filled
the resulting ugly hole with Green Stuff. I produced some rather simplistic
dampers; nothing sophisticated is required, since you won't be able
to see them very well under the mesh. I thought I could use the appropriate
part off the Esci kit, but of course it was a different size and shape
and no use at all, so I scratched a replacement, twice as a matter of
fact since the first one was no good. In the end the outside part was
carved from plastic sheet and the individual mullions were made from Now,
on to the screen and cover at the back of the engine deck. This is where
air which has been sucked through the engine's radiators is ejected
by a big centrifugal fan. In the few photos which show this screen clearly,
it's obviously a rather light mesh and quite transparent. The molded
screen isn't bad, but it isn't transparent either, so I decided I'd
like to replace the screen with a real screen. It would have been better
had I decided this before assembling the hull, of course, but oh well!
That's what you get if you don't plan things out thoroughly in advance.
I cut the cover containing the screen off with a razor saw and filled
the resulting ugly hole with Green Stuff. I produced some rather simplistic
dampers; nothing sophisticated is required, since you won't be able
to see them very well under the mesh. I thought I could use the appropriate
part off the Esci kit, but of course it was a different size and shape
and no use at all, so I scratched a replacement, twice as a matter of
fact since the first one was no good. In the end the outside part was
carved from plastic sheet and the individual mullions were made from
 very
thin sheet aluminum. The generous Mr. Bill Glinski gave me some screen
for it. It's not easy to cut, as the grain of the screen is on a diagonal
with the rest of the cover. Then came the hardest part; after finally
assembling a good looking cover and screen, I gently crushed it with
my fingers. It was a shame, but the real things almost always look like
they've been trampled by heavy-footed Soviet desantniki (armored infantry). very
thin sheet aluminum. The generous Mr. Bill Glinski gave me some screen
for it. It's not easy to cut, as the grain of the screen is on a diagonal
with the rest of the cover. Then came the hardest part; after finally
assembling a good looking cover and screen, I gently crushed it with
my fingers. It was a shame, but the real things almost always look like
they've been trampled by heavy-footed Soviet desantniki (armored infantry).
On mid-production T-34's like this one, with hexagonal turrets, there
are two different kinds of grab handles. There are straight tubes held
on with sheet metal brackets, and tubes bent so the ends could be welded
directly to the hull. Of course, the first is much more difficult to
model, and of course it is much more common on the real T-34's. I went
for the easy solution, and installed the bent tubes out of brass wire.
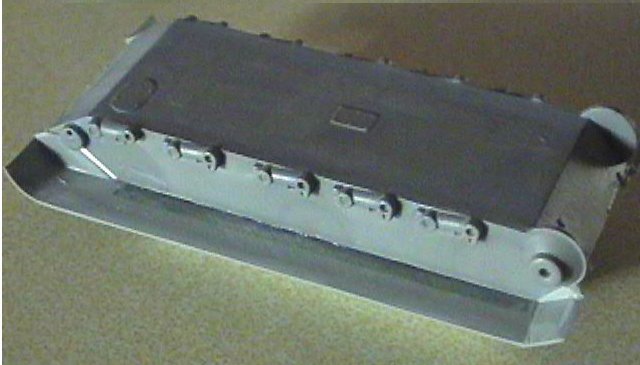
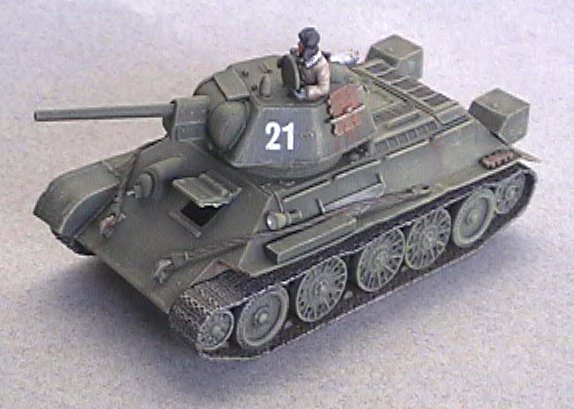
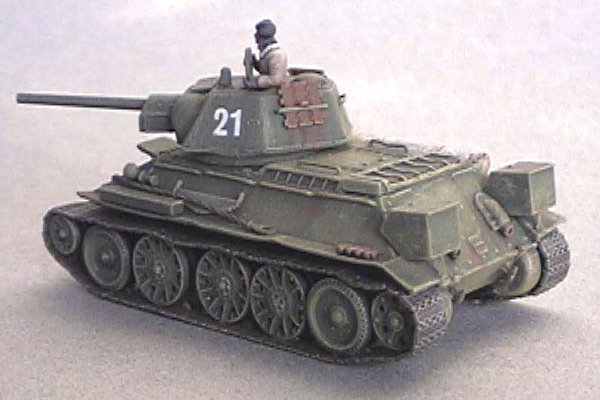
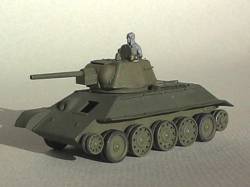
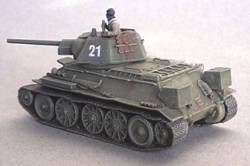
 The
wheels were a major project all by themselves. Just to be different,
I wanted one of the 1942-43 tanks with a mixed arrangement of wheels
with and without tires. (This is the result of rubber shortages; at
the beginning of the war, T-34's have all rubber-tired wheels, but when
the rubber started to run out, they devised an all-steel wheel. Unfortunately,
this caused so much vibration at speed that parts would get shaken off
the tank, so a compromise arrangement was made, with rubber tires at
bow and stern and all-steel wheels in the middle. This is what I wanted
to duplicate.) The Esci kit had all-steel wheels and fortunately these
are exactly the same diameter as the Eastern Express's wheels. I had
to drill the back of the Esci wheels and install stub axles to match
the Eastern Express hull. This was a fragile connection, but nothing
better presented itself. The Esci wheels were OK…but after I looked
at them a while they became less and less OK. They were just too crude
a representation, and finally I could not stand it any more. I ripped
them off and started over. I thinned down the rims first, with a new
Exacto blade and a roll of sandpaper, and I cut the axle dome out of
the center. I drilled out the lightening holes to a proper diameter.
Then I replaced the center dome with a plastic disk punched out with
a set of The
wheels were a major project all by themselves. Just to be different,
I wanted one of the 1942-43 tanks with a mixed arrangement of wheels
with and without tires. (This is the result of rubber shortages; at
the beginning of the war, T-34's have all rubber-tired wheels, but when
the rubber started to run out, they devised an all-steel wheel. Unfortunately,
this caused so much vibration at speed that parts would get shaken off
the tank, so a compromise arrangement was made, with rubber tires at
bow and stern and all-steel wheels in the middle. This is what I wanted
to duplicate.) The Esci kit had all-steel wheels and fortunately these
are exactly the same diameter as the Eastern Express's wheels. I had
to drill the back of the Esci wheels and install stub axles to match
the Eastern Express hull. This was a fragile connection, but nothing
better presented itself. The Esci wheels were OK…but after I looked
at them a while they became less and less OK. They were just too crude
a representation, and finally I could not stand it any more. I ripped
them off and started over. I thinned down the rims first, with a new
Exacto blade and a roll of sandpaper, and I cut the axle dome out of
the center. I drilled out the lightening holes to a proper diameter.
Then I replaced the center dome with a plastic disk punched out with
a set of  Waldron
punches (happily one punch exactly matched the required diameter) and
started installing the radial gussets. I couldn't cut and install these
tiny bits in the proper size so what I did was cut them oversize, glue
them in place, and after the glue was dry I cut them down with a new
Exacto blade. The dome over the bearing, and the nuts, I built up with
layers of white glue. I've got to find a better technique; this one
is OK but in the end I just can't seem to get things as even and uniform
as I'd like. Waldron
punches (happily one punch exactly matched the required diameter) and
started installing the radial gussets. I couldn't cut and install these
tiny bits in the proper size so what I did was cut them oversize, glue
them in place, and after the glue was dry I cut them down with a new
Exacto blade. The dome over the bearing, and the nuts, I built up with
layers of white glue. I've got to find a better technique; this one
is OK but in the end I just can't seem to get things as even and uniform
as I'd like.
If I ever need all-steel wheels again, I'll either buy them from Al-By
or make one really good one and get it cast. This was just too tedious
to do again. Also, the all-steel wheels make one of the kit's flaws
easier to see; the rear three wheels are a bit too close together. Fixing
that would very difficult, so I let it ride.
 People
naturally associate the T-34 with those cylindrical fuel tanks on the
sides of the rear hull, but these types of fuel tanks were rather later
in the war. To be a little different, I wanted the square-ish sheet
metal tanks over the rear fenders, as represented on the Esci kit. I
used the Esci parts, but I had to modify their shape somewhat, since
the Esci kit's rear hull is at a different angle than that on the Esci
kit. I glued on a wedge of plastic to make up the difference. People
naturally associate the T-34 with those cylindrical fuel tanks on the
sides of the rear hull, but these types of fuel tanks were rather later
in the war. To be a little different, I wanted the square-ish sheet
metal tanks over the rear fenders, as represented on the Esci kit. I
used the Esci parts, but I had to modify their shape somewhat, since
the Esci kit's rear hull is at a different angle than that on the Esci
kit. I glued on a wedge of plastic to make up the difference.
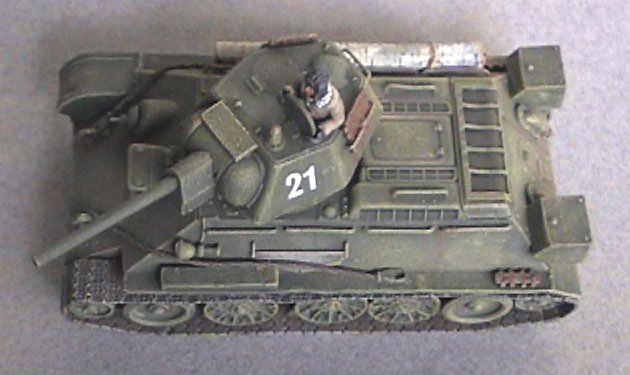
The unditching log is a twig. When I first tried this out on my model,
it was too realistic, which is to say it looked like a twig. I tried
repainting it, a blotchy white-to-pale-gray coat with a random pattern
of circumferential dark gray stripes reproduced a birch log very well,
and I was most pleased with the effect.
 The
Eastern Express kits comes with four ends for the tow cables. You have
to supply the cables for yourself. I was going to use a thread, stiffened
with white glue, but I had no thread of the right thickness. Then I
had a brainstorm and took three threads and twisted them together, clamped
on each end to hold them in place. I soaked in some diluted Elmer's
glue and after that dried I painted over the outside with a dark reddish-brown
paint. Together, these stiffened the cable to the point where it remained
twisted after the ends were unclamped. Actually, this was better than
simple thread; the three-strand arrangement is more visible and it looks
very much like real steel cable. The
Eastern Express kits comes with four ends for the tow cables. You have
to supply the cables for yourself. I was going to use a thread, stiffened
with white glue, but I had no thread of the right thickness. Then I
had a brainstorm and took three threads and twisted them together, clamped
on each end to hold them in place. I soaked in some diluted Elmer's
glue and after that dried I painted over the outside with a dark reddish-brown
paint. Together, these stiffened the cable to the point where it remained
twisted after the ends were unclamped. Actually, this was better than
simple thread; the three-strand arrangement is more visible and it looks
very much like real steel cable.
This was my first experience with link-and-length tracks. While the
results look good (especially on a T-34, rubber-band tracks never cut
it) they were a lot of effort. The plastic is very brittle and it is
difficult to work the lengths into a curve, to duplicate the slight
sag between each wheel. I tried heating the tracks in hot water but
this had little effect. Eventually I managed to get the lengths to curve
without breaking by heating them over a light bulb, though even then
it took several applications to get any reasonable curve. I'd really
rather have 100% individual links than the lengths. Also, of course
the number of links didn't come out even. I managed to work in a partial
link on the top run on top of a wheel, where there is so little room
below the fenders it can't be seen. Next time I hope for a better and
easier effect, but even with all the problems the appearance is better
than rubber-band tracks.
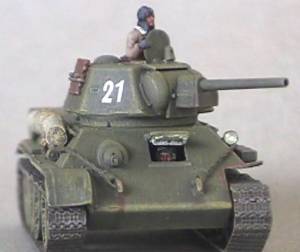
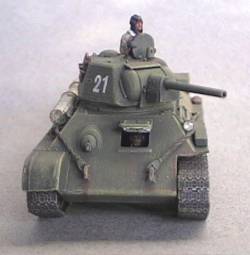
 The
single headlight is drilled out and a disk of aluminum foil is glued
inside; then a drop of epoxy glue makes the glass. The
single headlight is drilled out and a disk of aluminum foil is glued
inside; then a drop of epoxy glue makes the glass.
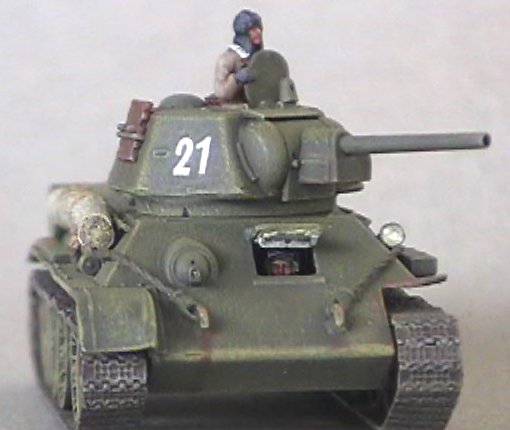
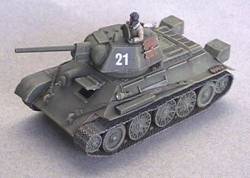
The vehicle is painted in Humbrol's Deep Bronze Green very heavily
drybrushed with Pactra Light Olive Drab. The whole vehicle is drybrushed
with Humbrol Panzer Yellow, for dirt and highlighting, then lightly
drybrushed again with more Light Olive Drab to tone down the overemphasized
corners. I painted the tracks while still on the sprue, and then retouched
them after installation; dark reddish brown with a drybrushing of a
lighter, more red brown. I used a silver colored pencil to highlight
the raised details on the tracks, and that looked very good. The spare
tracks are painted much more rusty, since they don't have the rust rubbed
off through use.
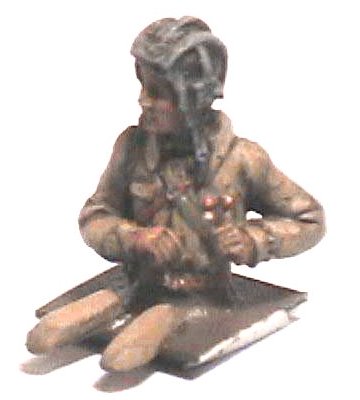
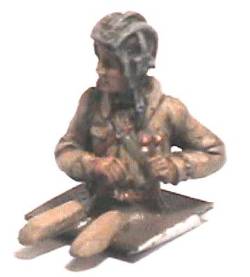 I
am becoming more and more inclined to think that good figures are necessary
to set off a good model. The commander is an Esci figure with some Preiser
luftwaffe legs. He looked pretty good. I bent his hands to grip the
hatch cover. The driver is a magnificent AB figure, but fortunately
it's difficult to see him. Fortunately, because he'd make the commander
figure look bad if you could compare them. I
am becoming more and more inclined to think that good figures are necessary
to set off a good model. The commander is an Esci figure with some Preiser
luftwaffe legs. He looked pretty good. I bent his hands to grip the
hatch cover. The driver is a magnificent AB figure, but fortunately
it's difficult to see him. Fortunately, because he'd make the commander
figure look bad if you could compare them.
Conclusion
So there you are! I'm quite pleased with the final results, though I
could have got there by an easier route. I might not build 35,000 like
the Soviet government, but I'll build a few I'm sure.
|


|