Finishing and Weathering the 21st Century Toy's 1/18
Scale P-47D Thunderbolt
|
 |
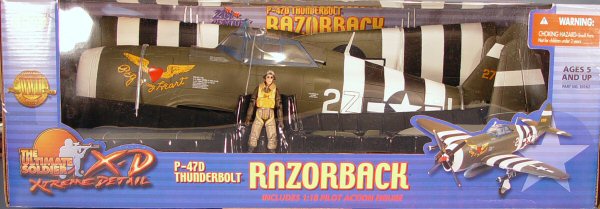
We had the opportunity to see the 21st Century Toys’ 1/18 scale
Extreme Detail series P-47D Razorback Thunderbolts in a nice preview at
the Hobby Visions show in Las Vegas. Since that time, 21st Century Toys
was kind enough to send us a review sample, partly out of curiosity to
see what would happen if someone were to refinish the model in an article.
 The
Thunderbolt comes in the usual well-packaged (and large) box that protects
the detailed subject very well in transit. Unlike their previous releases
in this series, the Thunderbolt’s box is glued shut, so you’ll
immediately know if anyone has been inside the box before you. My example
had a minor glitch that must have happened during packaging, but this
turned out easy to correct – more on this later. The
Thunderbolt comes in the usual well-packaged (and large) box that protects
the detailed subject very well in transit. Unlike their previous releases
in this series, the Thunderbolt’s box is glued shut, so you’ll
immediately know if anyone has been inside the box before you. My example
had a minor glitch that must have happened during packaging, but this
turned out easy to correct – more on this later.
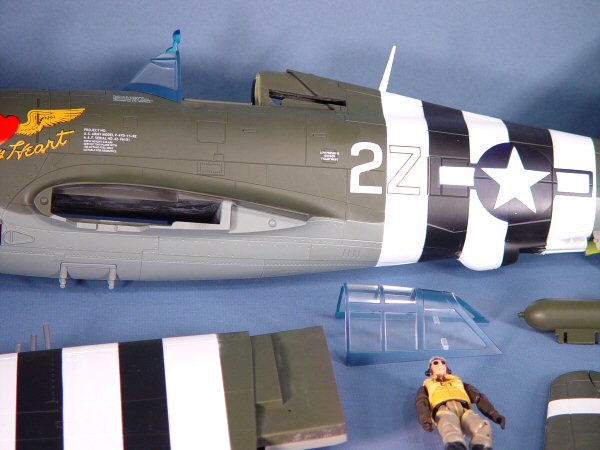
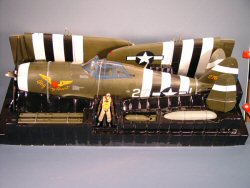 Straight
out of the box, this P-47D ‘Peg O’ My Heart’ (2Z-L)
was assigned to 510 Fighter Sqn/405 Fighter Group/9 AF. One of the unique
signatures of this fighter group was to paint the squadron’s colors
on the canopy frame: red for the 509th, blue for the 510th and yellow
for the 511th. This aircraft still sports its D-Day invasion markings
top and bottom, so the time period is still within a few days of the invasion.
Using those facts, it is safe to say that the only fresh paint on the
aircraft is in the form of those invasion stripes. Many aircraft received
some fresh paint as the upper invasion stripes were covered over after
the invasion was well underway, but that detail isn’t depicted here.
Therefore the actual aircraft probably didn’t look as clean and
fresh as this bird does out of the box. The job is defined – weather
the Thunderbolt! Straight
out of the box, this P-47D ‘Peg O’ My Heart’ (2Z-L)
was assigned to 510 Fighter Sqn/405 Fighter Group/9 AF. One of the unique
signatures of this fighter group was to paint the squadron’s colors
on the canopy frame: red for the 509th, blue for the 510th and yellow
for the 511th. This aircraft still sports its D-Day invasion markings
top and bottom, so the time period is still within a few days of the invasion.
Using those facts, it is safe to say that the only fresh paint on the
aircraft is in the form of those invasion stripes. Many aircraft received
some fresh paint as the upper invasion stripes were covered over after
the invasion was well underway, but that detail isn’t depicted here.
Therefore the actual aircraft probably didn’t look as clean and
fresh as this bird does out of the box. The job is defined – weather
the Thunderbolt!
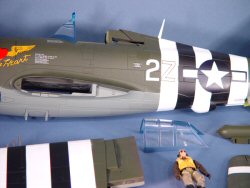 The
first step was to repaint the canopy frames as the paint was transparent
in places and detracted from the ‘model.’ I masked the canopy
transparencies with Tamiya tape and sprayed the frames with Tamiya acrylic
Blue. Next I touched up some of the painted-on details in the cockpit
as some of the painting looked a little rushed. The coaming over the instrument
panel was painted Tamiya Flat Black and the one missing detail here is
the lack of a gunsight. If I miss that detail enough, I might get around
to scratch-building one. The
first step was to repaint the canopy frames as the paint was transparent
in places and detracted from the ‘model.’ I masked the canopy
transparencies with Tamiya tape and sprayed the frames with Tamiya acrylic
Blue. Next I touched up some of the painted-on details in the cockpit
as some of the painting looked a little rushed. The coaming over the instrument
panel was painted Tamiya Flat Black and the one missing detail here is
the lack of a gunsight. If I miss that detail enough, I might get around
to scratch-building one.
 With
the cockpit completed, I turned my attention to that immaculate olive
drab paint. As many of you know, OD Green weathers rather quickly and
depending on the paint manufacturer, will fade into some interesting shades.
I decided to stay conservative here and took Tamiya’s Olive Drab
straight from the bottle and started painting inside of the panel lines.
I added a touch of Tamiya Flat White to the color and repeated the step,
painting more toward the center of each panel. Once again I added a little
more white and repeated the process. The result was a ghastly patchwork
of blended colors, but we’re not finished yet. I took an old t-shirt
and buffed the paint smooth, this resulted in a nice subtle bit of wear
and fading in the Olive Drab. With
the cockpit completed, I turned my attention to that immaculate olive
drab paint. As many of you know, OD Green weathers rather quickly and
depending on the paint manufacturer, will fade into some interesting shades.
I decided to stay conservative here and took Tamiya’s Olive Drab
straight from the bottle and started painting inside of the panel lines.
I added a touch of Tamiya Flat White to the color and repeated the step,
painting more toward the center of each panel. Once again I added a little
more white and repeated the process. The result was a ghastly patchwork
of blended colors, but we’re not finished yet. I took an old t-shirt
and buffed the paint smooth, this resulted in a nice subtle bit of wear
and fading in the Olive Drab.
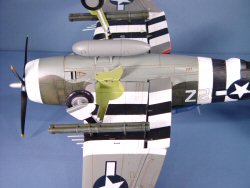
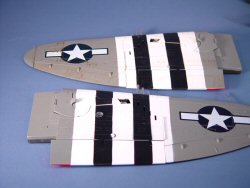 The
next step was to mix up some Van Dyke Brown oil paint into a diluted solution
with Odorless Mineral Spirits and brush the mixture into the scribed detailing.
Don’t worry about spots and marks in the wrong places or putting
too much weathering on any given spot. Just paint a surface at a time,
like all of the upper surfaces on the wings, horizontal stabs and fuselage,
and then set them aside for an hour or so. All you have to do is buff
the excess off the surfaces with that same t-shirt. You can see in the
photo to the left that the upper wing has received the wash while the
lower wing is still 'clean'. If there are any stubborn spots, a bit of
mineral spirits on the t-shirt or a Q-Tip will solve the problem. Whatever
paint that 21st Century Toys is using with these aircraft, it doesn’t
react to mineral spirits nor ammonia (Windex – for cleaning up any
leftovers from the Tamiya acrylics). The
next step was to mix up some Van Dyke Brown oil paint into a diluted solution
with Odorless Mineral Spirits and brush the mixture into the scribed detailing.
Don’t worry about spots and marks in the wrong places or putting
too much weathering on any given spot. Just paint a surface at a time,
like all of the upper surfaces on the wings, horizontal stabs and fuselage,
and then set them aside for an hour or so. All you have to do is buff
the excess off the surfaces with that same t-shirt. You can see in the
photo to the left that the upper wing has received the wash while the
lower wing is still 'clean'. If there are any stubborn spots, a bit of
mineral spirits on the t-shirt or a Q-Tip will solve the problem. Whatever
paint that 21st Century Toys is using with these aircraft, it doesn’t
react to mineral spirits nor ammonia (Windex – for cleaning up any
leftovers from the Tamiya acrylics).
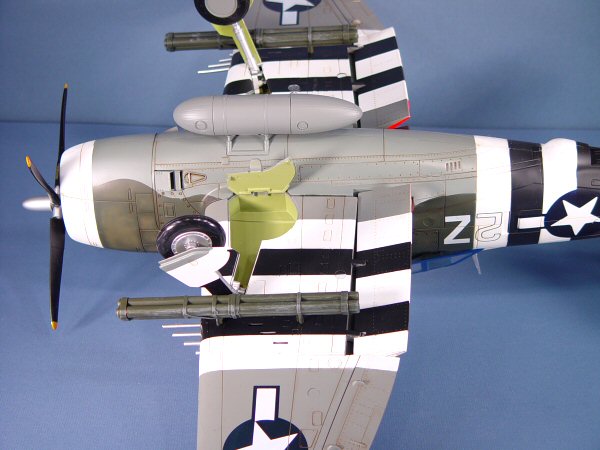
 Once
all of the parts are weathered, dry and cleaned up, it is time to assemble
the Thunderbolt. Yes, assembly time was all of two minutes, though it
almost took longer to figure out that the smaller main gear doors have
to be firmly (but carefully) pried open to get the main gear down. Once
all of the parts are weathered, dry and cleaned up, it is time to assemble
the Thunderbolt. Yes, assembly time was all of two minutes, though it
almost took longer to figure out that the smaller main gear doors have
to be firmly (but carefully) pried open to get the main gear down.
Among the features of this release, the canopy opens and closes (though
you’ll be amazed at the engineering behind this little feature),
the main gear and tail wheel are positionable, as are the flaps and flight
control surfaces. Once I get my aircraft posed, I usually don’t
‘play’ with them as they look too nice on the shelf or hanging
in my workshop.
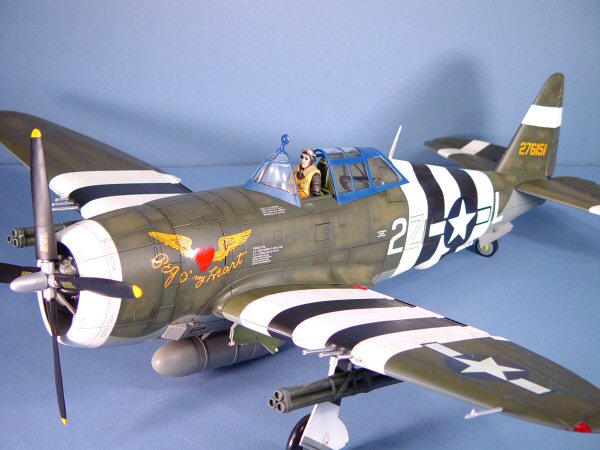
 You
can see that the combination of paint fading and weathering has added
a little age to the aircraft while not significantly altering its overall
appearance. If you want to be more creative, a silver pencil to show scratched
and scuffed paint, another oil mixture to represent the oil that flows
through (and out of) this engine, etc. You can have fun and add some personality
to your flightline. You
can see that the combination of paint fading and weathering has added
a little age to the aircraft while not significantly altering its overall
appearance. If you want to be more creative, a silver pencil to show scratched
and scuffed paint, another oil mixture to represent the oil that flows
through (and out of) this engine, etc. You can have fun and add some personality
to your flightline.
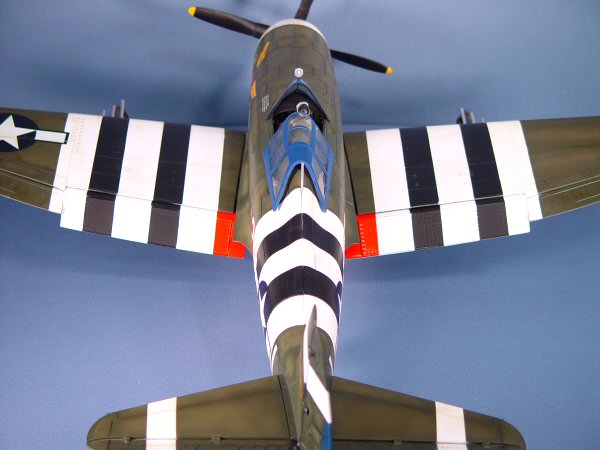
You might have noticed the bent gun barrel in some of the early photos.
This defied any attemt at bending back into shape. I decided to heat the
barrel with a hair drier, and it had no sooner warmed up when it straightened
itself! Cool! Another finishing touch was to paint the right navigation
light with Tamiya Transparent Green. For some reason, the left wing nav
light was already 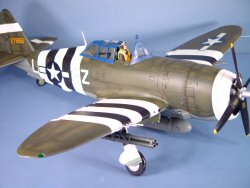 red,
but the right nav light was clear. I added a dab of silver on the rear
view mirror atop the windscreen. Aside from dry-brushing some gray onto
the bazooka rocket launchers to bring out some of that detail, the job
is finished! red,
but the right nav light was clear. I added a dab of silver on the rear
view mirror atop the windscreen. Aside from dry-brushing some gray onto
the bazooka rocket launchers to bring out some of that detail, the job
is finished!
The next time you’re in a model building slump or you just want
something fun and different to do, grab one of these great collectible
toys and have some fun.
My sincere thanks to 21st Century Toys for this project sample!
|
|