PST's KV-2 "Dreadnought" Heavy Tank in 1/72nd Scale
|
 |
Background
Never having built a PST kit, I have been fascinated by their subjects
and therefore I have several of them in the closet. I decided I had to
build one of their kits. My choice was straightforward: how could one
resist building a model of this magnificent looking behemoth? If you read
Scheilbert, he claims the KV-2 was successful in the Finnish winter war
in 1940: crushing bunkers and flattening things like people and motorcycles.
However, using its sizable armament was a more difficult 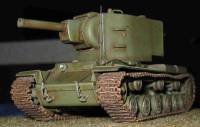 proposition
because its turret could only be rotated on completely flat ground. Presumably,
this made it almost ideal for fighting on a paved interstate highway but
less so on the undulating steppe of the U.S.S.R. That is but one view
- others differ. According to the "Russian Battlefield" website,
the KV-2, armed with a 152.4 mm M-10 howitzer, and machine guns at the
rear and bow, presented a difficult proposition for the invading German
army. Its crew comprised six members: namely, tank commander, gun commander,
second gun commander (loader), gunner, driver, and radio operator. Apparently,
its mere appearance was sufficient to strike fear into the hearts of the
opposition, not to mention the fact that only the 88 mm AA-Gun, could
knock it out. However, knock it out it did, and this in combination with
mechanical problems lead meant that production ceased in October 1941
with 334 total built. proposition
because its turret could only be rotated on completely flat ground. Presumably,
this made it almost ideal for fighting on a paved interstate highway but
less so on the undulating steppe of the U.S.S.R. That is but one view
- others differ. According to the "Russian Battlefield" website,
the KV-2, armed with a 152.4 mm M-10 howitzer, and machine guns at the
rear and bow, presented a difficult proposition for the invading German
army. Its crew comprised six members: namely, tank commander, gun commander,
second gun commander (loader), gunner, driver, and radio operator. Apparently,
its mere appearance was sufficient to strike fear into the hearts of the
opposition, not to mention the fact that only the 88 mm AA-Gun, could
knock it out. However, knock it out it did, and this in combination with
mechanical problems lead meant that production ceased in October 1941
with 334 total built.
In the Box
Manufactured in Belarus, PST's product is contained in their usual sturdy,
top-opening box with the excellent box art presented as a large postage
stamp. Inside the box are five grey-coloured sprues 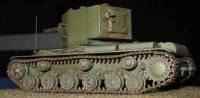 of
well-molded parts. There is little flash and the only real clean up needed
is to remove the molding seams, which can be especially tricky on some
of the small pieces. One of the sprues contains all the pieces for the
link-and-length tracks, which are very nicely done. The box art shows
towropes and radio antenna though neither is included in the kit. Also
contained is a small decal sheet containing one option for a KV-2 and
two options for a KV-1B. The instruction sheet is clear enough and it
purports to show how a KV-1 can be made from this kit: surely they mean
a KV-2B but even then, one would have to make many more changes than shown
in the kit's instructions to make that. of
well-molded parts. There is little flash and the only real clean up needed
is to remove the molding seams, which can be especially tricky on some
of the small pieces. One of the sprues contains all the pieces for the
link-and-length tracks, which are very nicely done. The box art shows
towropes and radio antenna though neither is included in the kit. Also
contained is a small decal sheet containing one option for a KV-2 and
two options for a KV-1B. The instruction sheet is clear enough and it
purports to show how a KV-1 can be made from this kit: surely they mean
a KV-2B but even then, one would have to make many more changes than shown
in the kit's instructions to make that.
Construction
 Being
somewhat new to tank construction, I have not really worked out at which
stage to paint and glue on the tracks. I made enquiries of more experienced
modelers and I was comforted by the response that this was not a problem
unique to myself. I decided to assemble the underside and sides of the
chassis first and then add the tracks before gluing the mantle on top.
This worked fairly well. I glued the sides and underside together and
left that to dry. Being
somewhat new to tank construction, I have not really worked out at which
stage to paint and glue on the tracks. I made enquiries of more experienced
modelers and I was comforted by the response that this was not a problem
unique to myself. I decided to assemble the underside and sides of the
chassis first and then add the tracks before gluing the mantle on top.
This worked fairly well. I glued the sides and underside together and
left that to dry.
Next was the turret assembly. This has a large number of small pieces
that require careful clean up, primarily to remove the molding seams.
However, the fit is excellent and the sub-assembly went together well
with only a modicum of sanding and 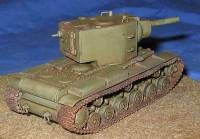 a
tiny bit of filler required. I opened up the end of the gun barrel: rather
than using various sized drill bits, I followed the advice in Sheperd
Paine's book, and used the point of a sharp number 11 blade in my X-ACTO
knife, carefully twisting it until the top of the gun barrel was hollowed
out. This method gives one more control than trying to find the correct
sized bit and using a pin vice drill. One has the option to leave the
turret hatch open but because there is no interior, I preferred to glue
it closed. a
tiny bit of filler required. I opened up the end of the gun barrel: rather
than using various sized drill bits, I followed the advice in Sheperd
Paine's book, and used the point of a sharp number 11 blade in my X-ACTO
knife, carefully twisting it until the top of the gun barrel was hollowed
out. This method gives one more control than trying to find the correct
sized bit and using a pin vice drill. One has the option to leave the
turret hatch open but because there is no interior, I preferred to glue
it closed.
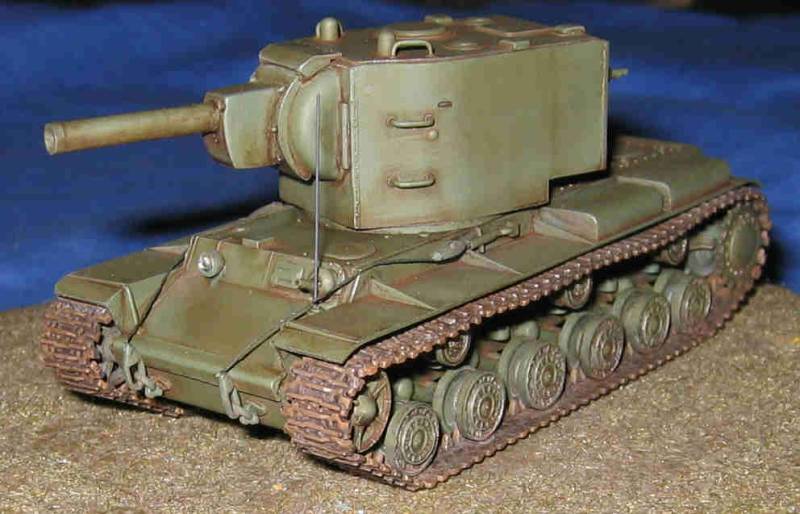
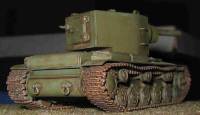
I then began assembling the mantle. Actually, there is no significant
assembly involved, just gluing on the various boxes and other accouterments
on top of the chassis. I followed the instructions and added the forward
gun, drilling out the gun barrel. Note that those triangular shaped support
pieces on the sides of the mantle are actually meant to be struts. I noticed
this later and to make these parts, I recommend slicing these things off
and replacing them with plastic strips.
 Once
this was all dry, it was time to paint. I used Model Master's acrylic
"Russian Armor Green" lightened with a fair amount of light
grey and white: I had used it straight out of the bottle on a previous
build and it was too dark once I started to add an oil wash. I sprayed
the chassis, mantle, turret and the wheel parts (which I had left on the
sprue). At this point, I also sprayed the track parts, also on the sprue,
with Polyscale "Rust". Once
this was all dry, it was time to paint. I used Model Master's acrylic
"Russian Armor Green" lightened with a fair amount of light
grey and white: I had used it straight out of the bottle on a previous
build and it was too dark once I started to add an oil wash. I sprayed
the chassis, mantle, turret and the wheel parts (which I had left on the
sprue). At this point, I also sprayed the track parts, also on the sprue,
with Polyscale "Rust".
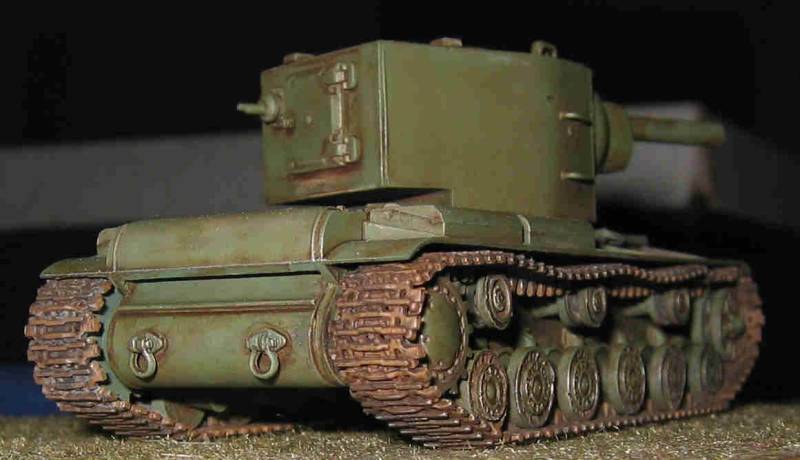
Once this had dried, I added the wheels: there was a fair amount of
seams to remove and slight flash on the face of the wheels but they went
together easily enough. Track assembly came next. While the link-and-length
tracks are time consuming to assemble, they look more realistic than the
alternative "Rubber band" type. I took care to ensure each section
was lined up and used a Touch 'n' Flow to apply Ambroid's Proweld. I was
able to create a slight sagging effect on each track and even so there
were plenty of spare track pieces left after I had finished. When the
track pieces were  glued
on, I realized I should have weathered the track more on the sprue: it
would have been easier to apply the oil wash and soft-lead pencil. Also,
I should have given the lower hull its oil wash prior to gluing the tracks
onto it. glued
on, I realized I should have weathered the track more on the sprue: it
would have been easier to apply the oil wash and soft-lead pencil. Also,
I should have given the lower hull its oil wash prior to gluing the tracks
onto it.
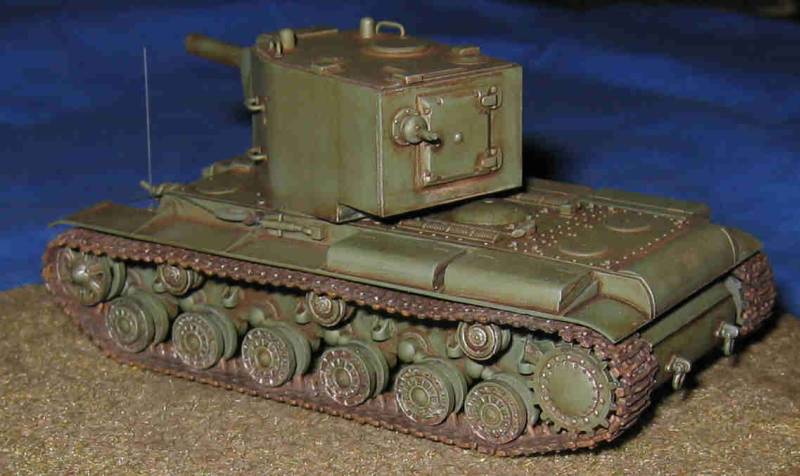
Once the tracks and lower hull sub-assembly had been given its oil wash,
I glued the turret onto the mantle and glued that onto the lower hull
to complete the chassis. At this point, I glued part B1 onto the front
of the chassis: the whole thing fitted really nicely. Next was the oil
wash and weathering. I used a burnt umber oil wash and a silver Prismacolor
pencil to highlight the bolts, edges and the prominent track parts. I
drilled out the headlamp and inserted an MV lens - it looks better than
simply painting the lamp silver. Finally, I added a little more weathering
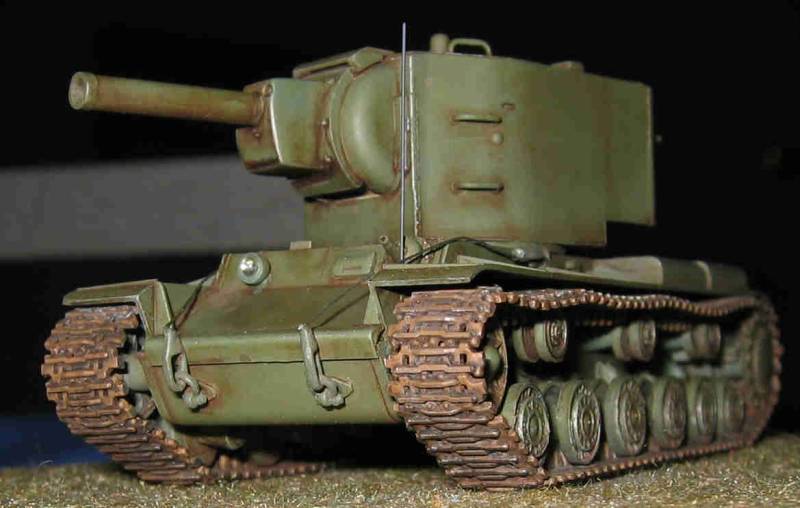
effect using pastel chalks.
Once the kit's contents had been glued together, I used some thick thread
painted dark green - I put some paint between my thumb and forefinger
then pulled the thread through - and glued it using Elmer's white glue.
Finally, I added a radio antenna using 28 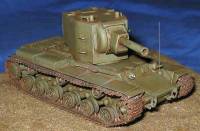 gauge
copper wire rolled straight with a steel ruler and painted dark grey.
Apparently, radio communications were not used early in war, so it may
be inaccurate to include this latter enhancement. I omitted the decals:
I am not claiming they are inaccurate but I saw many pictures of KV-2's
without any markings. gauge
copper wire rolled straight with a steel ruler and painted dark grey.
Apparently, radio communications were not used early in war, so it may
be inaccurate to include this latter enhancement. I omitted the decals:
I am not claiming they are inaccurate but I saw many pictures of KV-2's
without any markings.
In conclusion, I was surprised at the good quality of this kit, and
how easily and quickly it went together: all completed in about eight
days. Highly recommended.
References
Horst Scheibert. "Stalin's Giants: KV-1 & KV-II." Schiffer
Military History, West Chester, Pennsylvania.1992.
Sheperd Paine. "Modeling Tanks and Military Vehicles." Kalmbach
Publishing Co., Waukesha, Wisconsin.1982.
Acknowledgements
Thanks to Matt Bittner for helpful tips.
|
|