
Building the ICM T-35
By Brent Theobald
 |
Historical Data
| Technical and Tactical Specifications of the T-35 heavy tank | |
| Combat weight, tons: | 50 |
| Crew: | 11 |
| Dimensions (meters): | |
| Length: | 9.720 |
| Width: | 3.200 |
| Height: | 3.430 |
| Ground Clearance (mm): | 530 |
| Armor (mm): | |
| Hull Front: | 20-50 |
| Hull Side: | 30 |
| Hull Bottom: | 10-20 |
| Hull Rear & Turret Sides: | 20 |
| Speed (km/h): | 28.9 road, 14 terrain |
| Range (km): | 100 road, 80 terrain |
| Engine: | 4 stroke, V-12 cylinder, water-cooled, petrol aircraft engine M-17L, developing 500 h.p. |
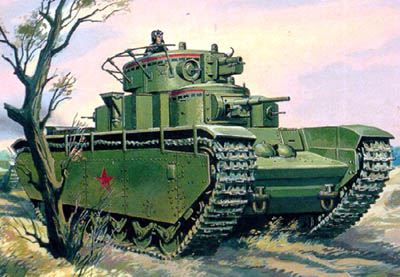
| Armament: | 1 x KT–28 gun (76.2 mm) with 96 rounds; 2 x 20K anti-tank guns (45 mm) with 226 rounds; 5-7 machine guns DT (7.62mm) with 10,080 cartridges. |
 belonging to the Kiev Separate Military Region. All were lost during the first weeks of battle in the L’vov region of Western Ukraine. Almost all loses were due to mechanical failure rather than enemy action. Only seven tanks were actually lost in combat. Two T-35s saw action during the Battle of Moscow. Two more spent four years in the Kazan tank school.
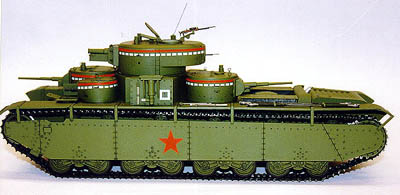 The hull is comprised of three long pieces. Mine were warped, but little care and quick drying super glue solved this. I followed up by making fillets with some thick super glue, this lends more strength to the joints. Mark the little rectangles cast into the inside rear of the hull. This is where the engine will mount. Pop the driver's compartment in the hull along with the drive train assembly. You also install a bulkhead at this point, which acted as a spreader on my model.
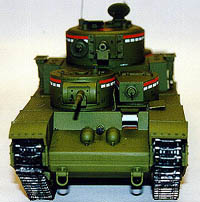 Next comes the bogey assembly. This is where things became tricky. The housing halves were warped and didn't want to clip around the road wheels. A medium sized binder clamp is perfect for squashing the housing halves together around the road wheels while the glue dries. Time to dry fit the bogey assemblies to the hull. On my kit every pin was oversized, or every hole was undersized. Enlarging these holes was no big deal. When this is finished, the kit really starts looking impressive. Be sure to scrape paint off parts G10 and E6 because the skirts mount to them later on. It is easier to scrape the paint now than later. Give it all a nice dark wash, do a little drybrushing, then set it aside.
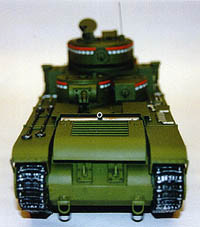 was used mostly for parades and kept in good repair. When you wrap the tracks around the wheels, do your best to make them sag over the top. ICM gives you plenty of links - I had a whole fret left over when I was done.
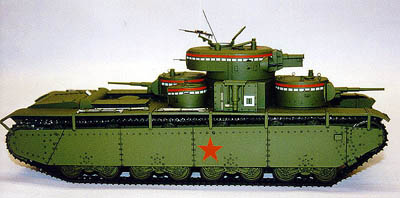 Now for the coup de grace - the final large turret. Once again it had annoying warpage, which was easy to correct. I was concerned with the top of the turret fitting on the clamshell halves. Luckily it went together nicely. Pay close attention when building the main gun, because it is easy to do it incorrectly. (I tried very hard to build it upside down.) The fit of the remaining parts was very good.
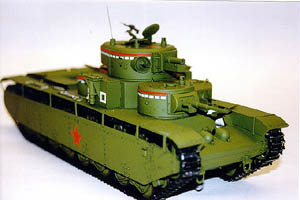
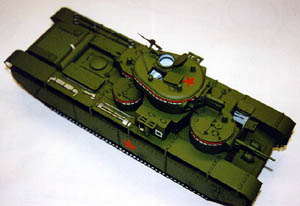 Some of the schemes for the T-35 were very simple and bland to me. I picked the parade decorations from 1936. They look nice, but were going to require more work to get the decals to settle down around all the rivets etc. Unfortunately my test decals "shattered" when I tried to apply them to my test model. I used Microscale decal film solution to save them. There was also a red star on the top of the large turret according to one reference I found, which was not included in the kit's decals. I added this from another set. I had to use a lot of setting solution on the turret stripes, but it was worth it.After shooting Testors clear matte finish, I installed the machine guns. I did a final dark wash on everything and called it complete. One remark on the warpage issue: I have spoken with other modelers who have built this kit and did not have any of the warpage problems I did. Hopefully your T-35 will be like theirs.