Summary
Dragon has released the first of their Black Label line of models. It is the M103A1 Main Battle Tank (Heavy), the first-ever styrene rendition in 1/35th scale. The kit is a mixture of state-of-the-art slide molding and cast hull texture reminiscent of Dragon's top of the line Smart kits, and the ease-of-building and lower part counts of their Cyber Hobby line. DS tracks and separate tires and wheels help with painting, and the significant number of unused parts points to alternate versions to come.
Background
The M103 series of tanks started with the T-43 prototype. It was developed in the early 1950's to combat the JS-3 and other Soviet heavy tanks. The tank carried a rifled 120mm M58 cannon for long-distance engagements. The cannon fired separate-loading rounds, which required two loaders, thus giving it a five-man crew. The first M103s reached service in 1956, after several modifications were made to the base T-43. The US Army fielded a single heavy tank battalion in Germany, while the USMC assigned the M103s to a heavy tank company in each of their three tank battalions. The M103 suffered from a weak drive train (shared with the M48-M48A1), high fuel consumption and a suspect fire control system.
The US Army withdrew the M103 in 1963 with favor of the M60 Main Battle Tank. The M103 saw several more improvements during its career, which resulted in the M103A1 (1959) with an improved fire control system and later, the M103A2 (1964). The A2 replaced the gasoline engine with the M60 tank's diesel engine and transmission and it included the distinctive humped engine deck. The M103A2 continued to serve with the Marines until 1974, when they were replaced with M60A1s.
Opening the Box
The M103A1 comes shipped in a large, sturdy box whose cover depicts a very nice painting of the tank on a winter road, probably somewhere in Germany. Unfortunately, some of the details in the artwork are not included in the kit. This includes the canvas gun mantle cover and the distinctive slanted angles of the upper main track and running gear, fore and aft. However, the coolness of this big American tank with its huge gun and giant white stars is enough to get you past that and excited about the build to come.
The contents of this box include:
1) 10 sprues in soft, light grey plastic, packaged separately.
2) Two runs of yellow/tan DS track.
3) 1 small photo-etch sheet, including machine gun parts and tool storage box sides.
4) 1 small length of twisted steel wire for use as a tow cable (120mm)
5) 1x8-page blue and white instruction sheet with 17 steps, plus a single addendum sheet replacing portions of Steps 1, 8 and 17.
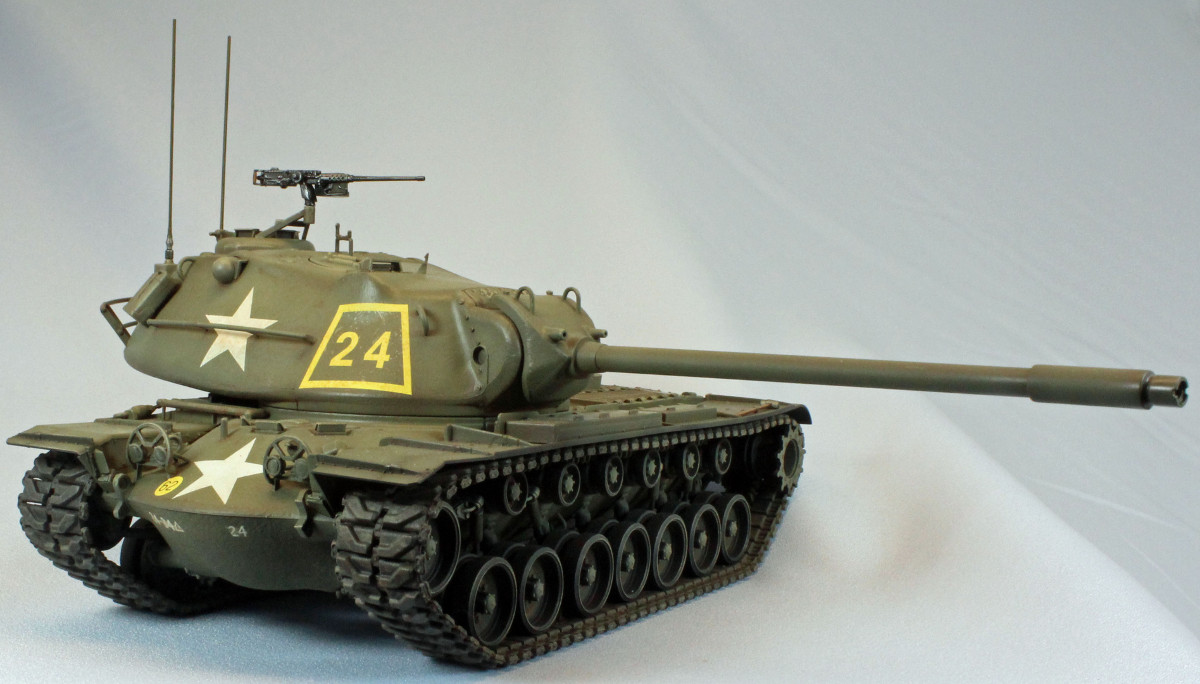
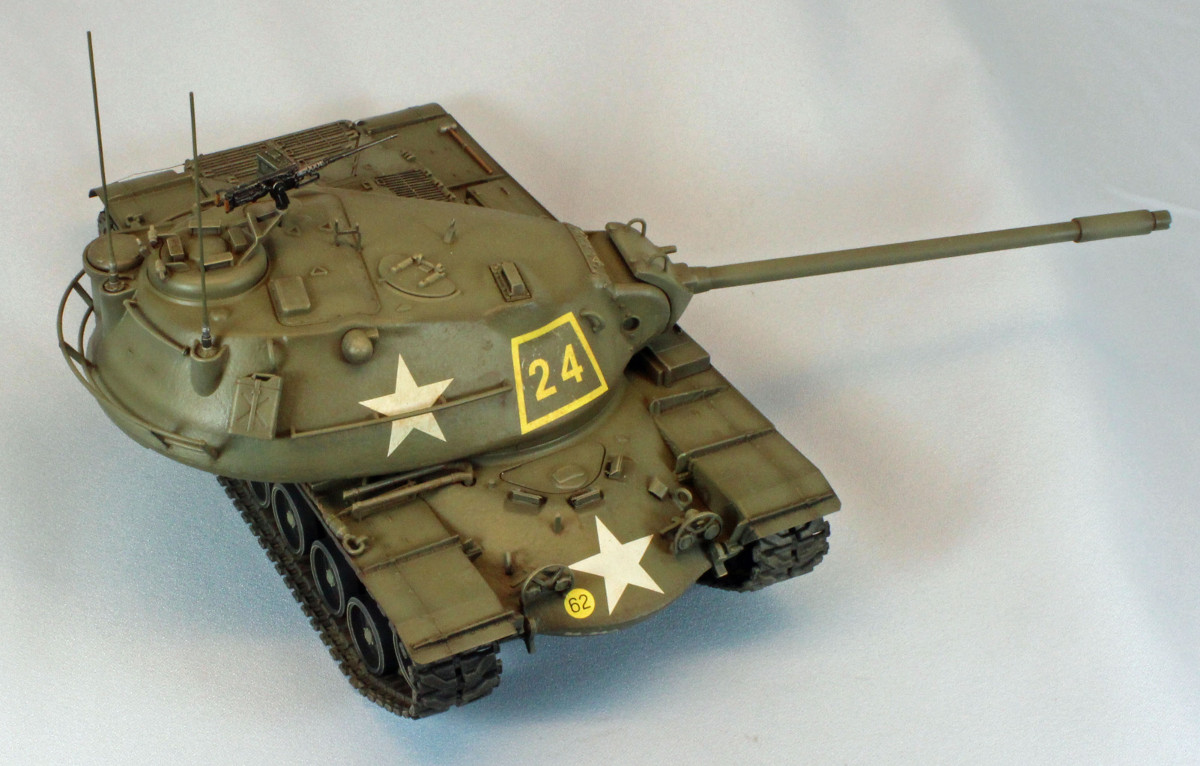
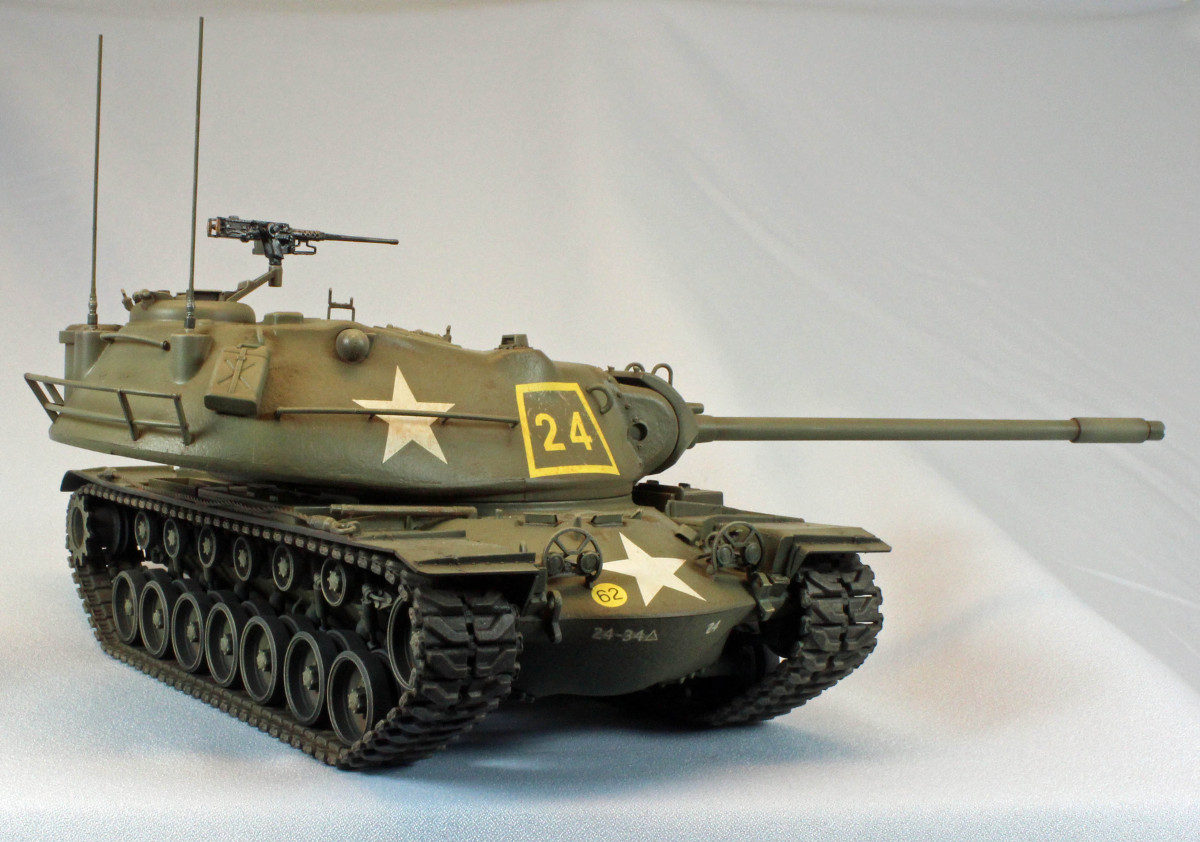
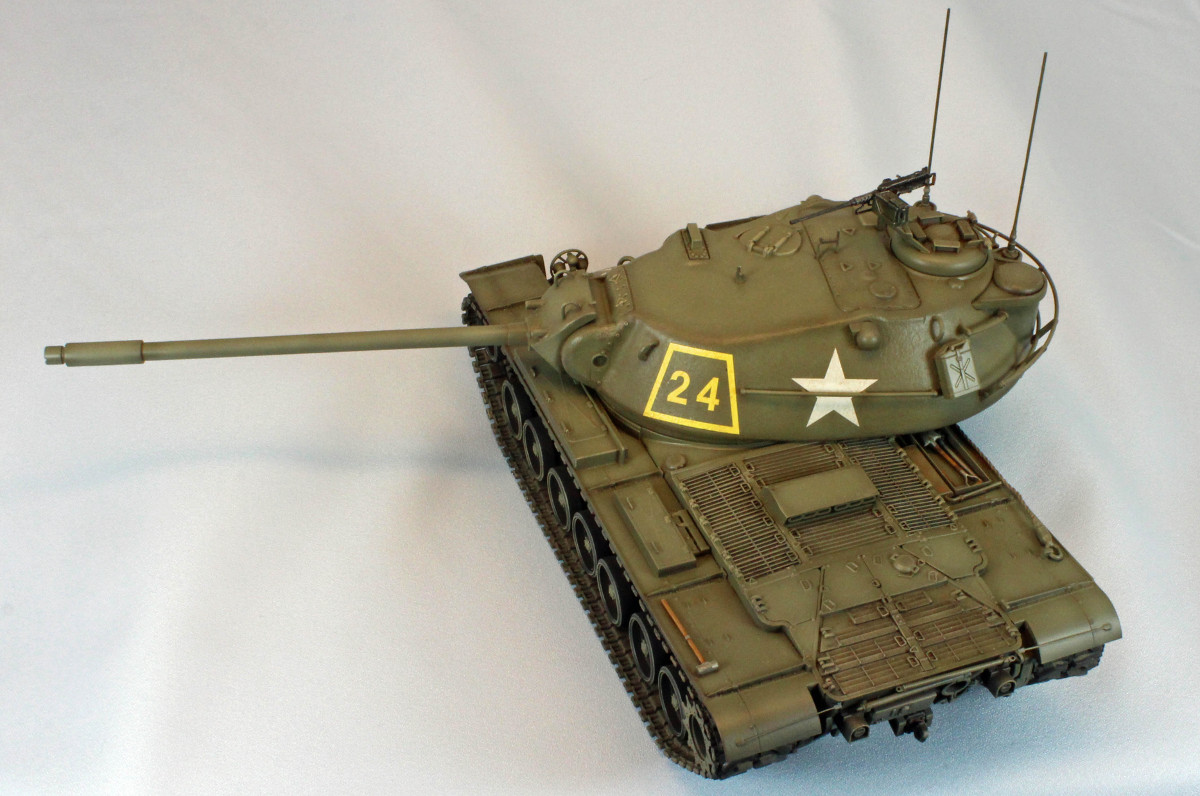
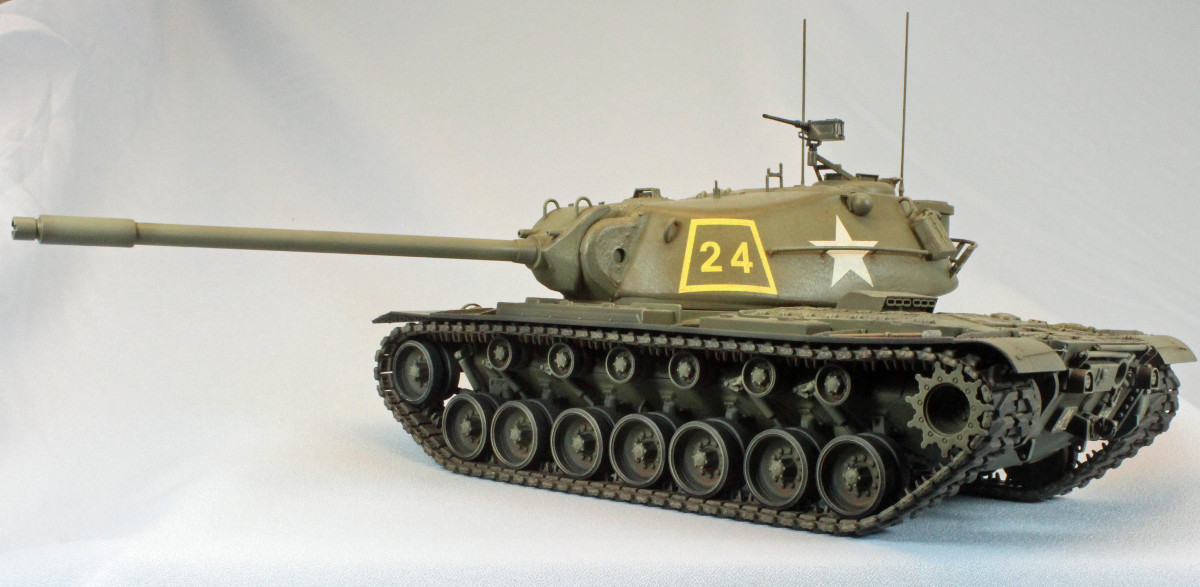
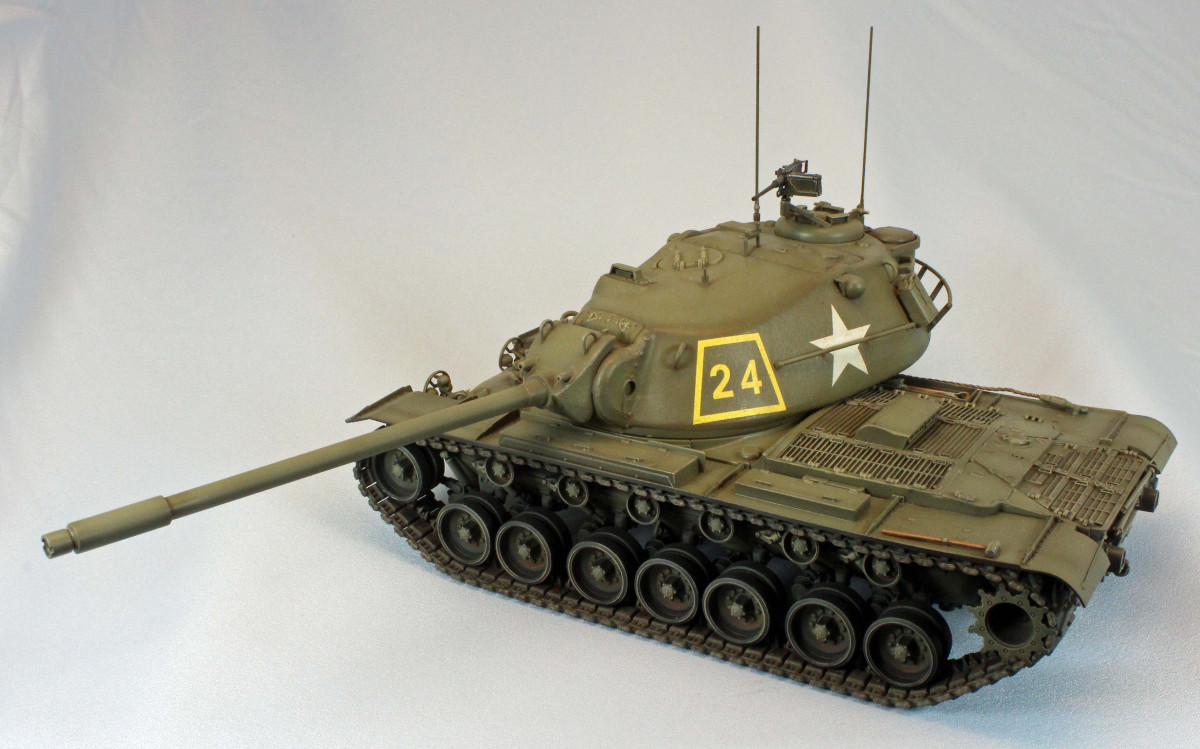
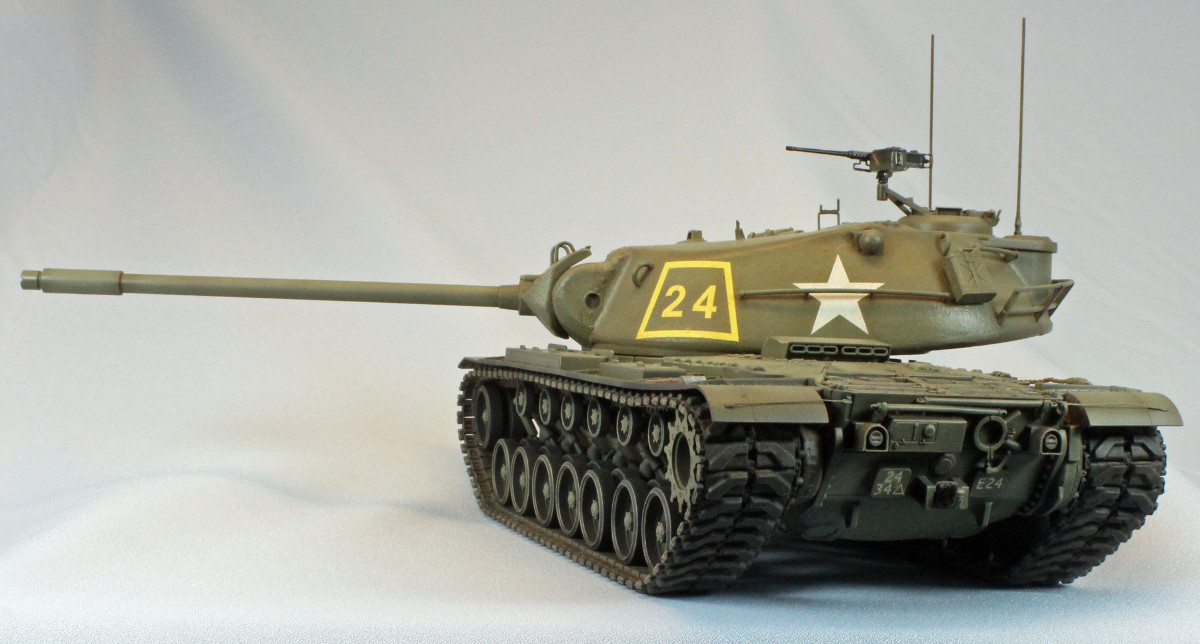
The instructions come with three finishing schemes, all in US Army Olive Drab, represented with Dragon's ubiquitous blue-and-white three-view drawings, and a small, but perfectly registered, decal sheet from Cartograph of Italy. These include:
E Company, 34th Armor, 24th Infantry Division, Germany 1959
(2) Unidentified Units, Germany 1959
The Instructions
All hopes for a fresh new direction with Dragon instructions with this new line of kits can be dashed, unfortunately. Several parts are mis-labeled, some 'unused' parts are actually used (and visa-versa), and there are still some confusing 'put it here' arrows. But the instructions are no worse than what we've seen before, so if you go slowly and test-fit the parts, things will go pretty well. The assembly sequence varies by modeler but the general flow of things goes pretty much as Dragon intended. The exceptions I made are identified in the text below.
Up-Front Decisions
There are a lot of round pieces on this kit: wheels, tires, return rollers, a total of 80. One reason for this is that Dragon has molded the rubber tire portions of the wheels separately to help with painting. The wheel wells are so deep, however, that the demarcation between wheel and tire is all but hidden in shadow. If you want to show a clean demarcation between tire and wheel after painting, you will need to adjust your assembly sequence accordingly so that you can slip the tires over the wheels after painting.
There is also a seam line that you can remove from the outer surface of each tire (I didn't), but be forewarned: you will have to do it 56 times....
The Build
Lower Hull and Chassis
Construction starts with the lower hull and chassis. There are seven double-wheels on each side of the M103, along with six double-return rollers. They all have to line up true when they are installed on the tank. I found that I could line up the return rollers better if I attached Parts C4 to the hull first, and then attached the rollers to those parts. The wheels don't get attached until Step 8, but the same build sequence obtains here for proper alignment. Attach the hardware first, and then attach the wheels to the hardware. The two drive sprockets are six-part affairs that didn't seem to fit real well. No matter how I worked the outer four parts, the assemblies still seemed wobbly and not symmetrical. I lined things up as best I could and set them aside to dry before attaching them to the hull. Note that you need to use the (instructions) addendum insert for these sprockets, but the fit wasn't good either way.
For some reason Dragon has chosen to delay attaching the wheels until Step 8, but if you put them on now it works just as well, and doesn't interfere with subsequent steps. The wheels have a little play so I used a steel ruler to line up everything correctly. On the port side, third station in, the wheel is obstructed by one of the axles (Part D49). I had to cut off a piece of the axle for the wheel to seat correctly. I checked everything twice to make sure that I hadn't messed up somewhere. Strange.
Upper Deck and Rear Hull
Step 3 begins with the upper hull. The driver's hatch can be posed open or closed, but I closed it due to a lack of interior detail. There is also no interior detail on the commander's turret hatch. The third hatch, also on the turret, is molded shut.
The upper deck and rear hull contain a lot of molded-on detail that in other Dragon kits would have consisted of dozens of parts or more. The molding is relatively detailed so, for many modelers, this might be seen as an improvement.
In Step 7, you attach the main barrel lock to the rear of the tank. You can assemble it stowed or deployed for shipping. Dragon includes an extra diagram showing the location of the various parts for the stowed configuration, but even with that you will need to do a little additional research to figure out the correct installation. It looks like an extra part or two is included, hidden in the diagram they provide.
Dragon thoughtfully provides a nice set of bolts on the sprue to dress up areas around the vehicle, including the front fenders in Step 8. These prevent you from having to "roll your own". I didn't use them but they are nice to have in your spare parts box.
In Step 10, you will need to assemble a photo-etch tool enclosure as there is no plastic alternative provided in the kit. It isn't difficult to do, and it looks nice when completed, but I found it odd that Dragon chose to render this and several other details in PE while molding so much other detail directly into the plastic. The twisted steel cable fit nicely into the two cable-ends after they were opened up a bit with a drill. Dragon's 113mm length requirement in the instructions is accurate; the cable drapes just off the vehicle side, around the tool box and other details.
Turret Detail and Fit
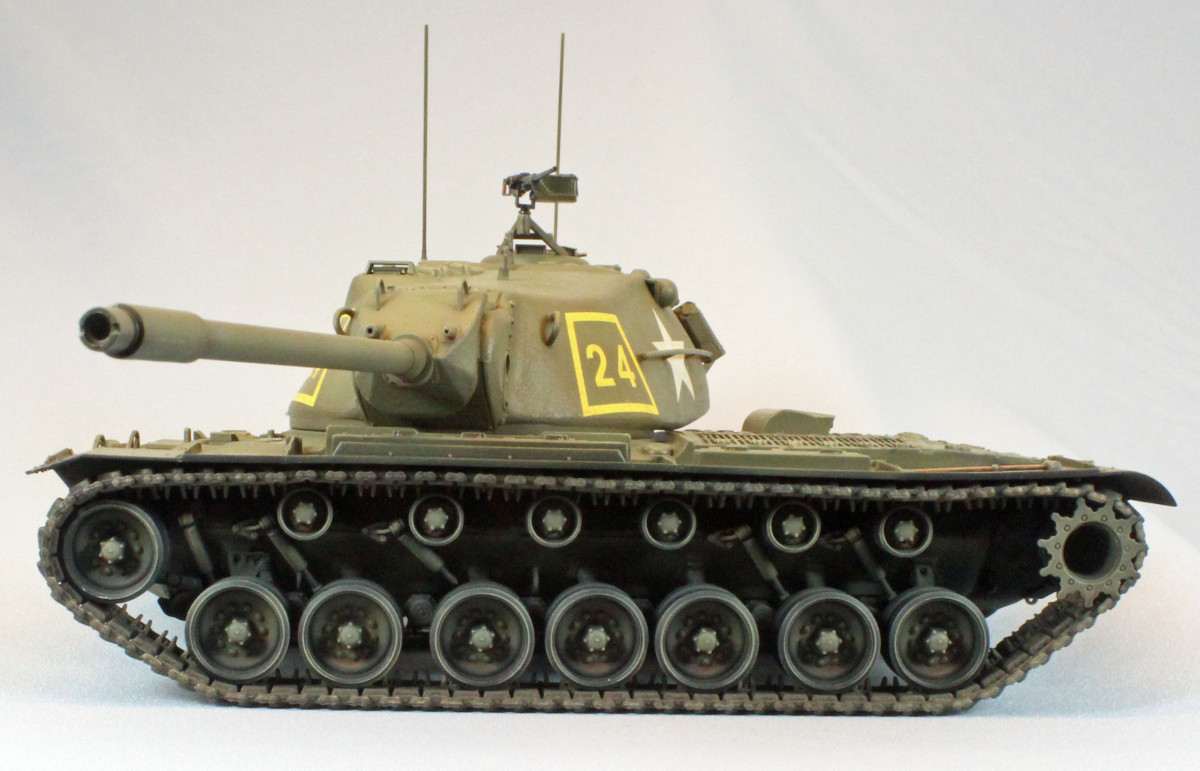
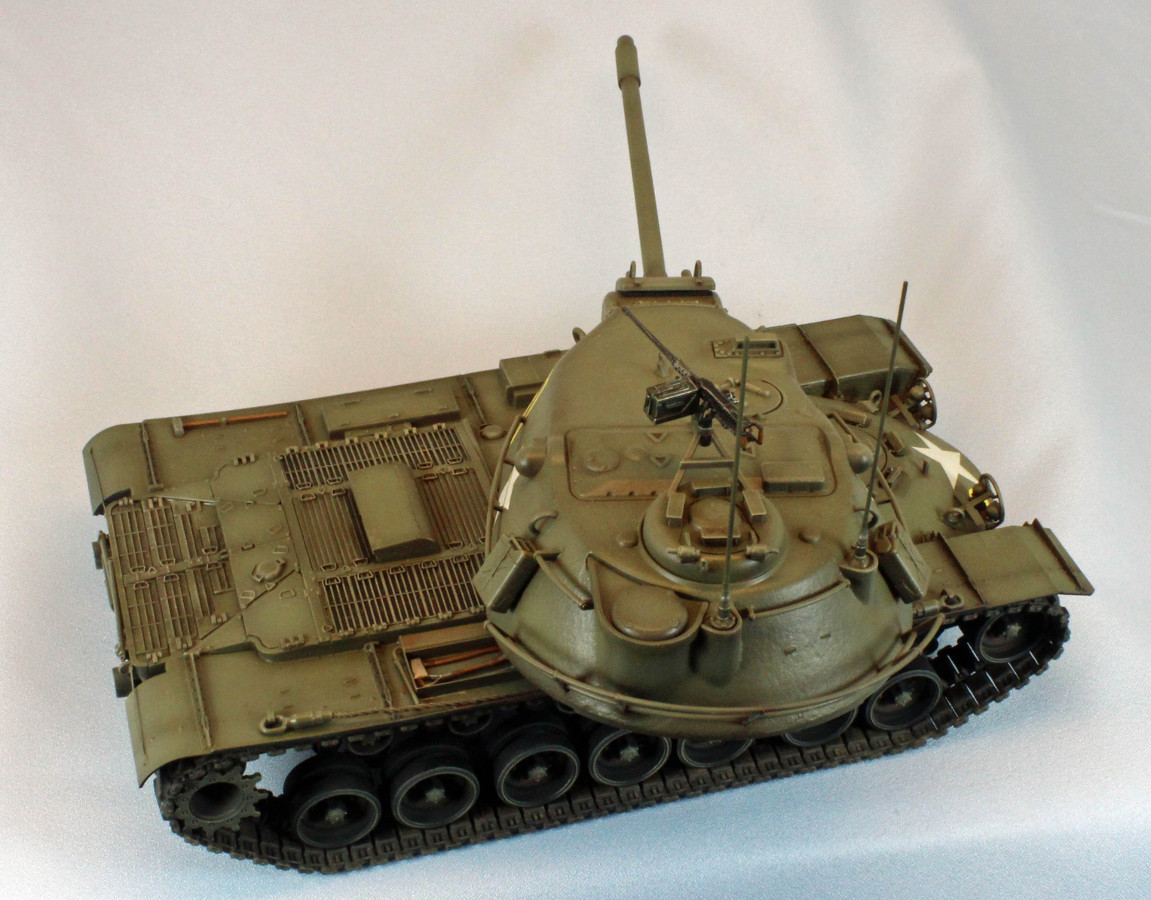
The 50cal Browning M2 machine gun is nicely done, and its mount is nice and sturdy. This is probably the first turret-top machine gun I've seen that drops into its mount and swivels around with just enough friction to pose it where you want it without glue: a perfect fit! The railing fit is also spot-on, and there are tiny raised marks on the turret to assist in their placement. The main weapon comes together well, but a word of caution: If you intend to glue the gun in place, be sure to account for the forward slope of the turret when the gun is seated on the top of the vehicle.
I first discovered that the turret doesn't fit on the tank during this 'wet-glue on the mantlet' stage! You can slip it on, but it only turns part way around, because it's blocked by Part B10, glued fast, way back in Step 6. The M103A1's turret, as rendered in this kit, won't point forward without some major surgery. It is even a very tight fit pointed sideways, so don't make the mistake of cutting off the two tabs that keep it connected to the top of the tank! I don't know how you will be able to keep the turret seated correctly without a LOT of glue and clamps, if you do.
The Photo-Etch (PE)
Dragon likes to include a lot of photo-etch and I like that about their kits. I usually have a choice between using the p/e or using a plastic alternative. I don't have that choice with this kit, unfortunately. Most of the p/e cannot be left off, like the M2 machine gun bracket and the aforementioned tool box. Luckily the folds and such in this kit are very basic and will provide you with good practice, even if you are averse to using photo-etched parts. Now if only I could get that glue to attach only the parts I want it to and not everything else!
The Track
The two runs of DS track in this kit are beautifully detailed and their assembly was a snap. I connected the ends using Tamiya thin liquid cement (with the green lid) and installed them without any problems. Fortunately, Dragon left enough slack in them to stretch over the drive sprocket and wheels and still look tight when in place. While I love the fact that the DS track takes glue and holds paint very well, they are only molded in bright yellow-tan. I wish Dragon used a different color of plastic-like something, anything, military. It would help immensely when painting.
The Finish
The M103A1 is going to be green, U.S. Army Green. The three schemes provided in the instructions are distinguished only by their markings. Still, with pre- and post- shading you can get a little depth in all that green.
(Note: I thin Model Master Paints using their own airbrush thinner. For hand-brushing I use Vallejo's own thinner for their paints. I thin all filters, washes and wet pigments using odorless Mona Lisa Paint Thinner. I use a Paasche "H" single-action airbrush with the #3 tip. I spray paints at 20 lbs. pressure.)
Track:
I painted the bright yellow/tan DS tracks with Rustoleum aerosol Flat Black Primer, followed by a dusting of Krylon Light Brown. Krylon/Rustoleum are just about the only paints that cover DS track initially, in my opinion. I could have used model paint and my airbrush but that just takes too much paint and too much time. I really wish these DS tracks came in, well, some version of track color? Once the Krylon was dry and tack free, I gave the tracks a heavy wash with Mig Dark Wash (aka Raw Umber) straight from the bottle.
M2 50cal 'Ma Deuce' Machine Gun:
I hand brushed the metallic portions of the guns and the ammo belts with Testors Flat Black. This is the only time I ever use flat black model paint. Then I painted the wooden handles with Vallejo New Wood. Once the paint was dry, I coated the brown parts with Mig Wash Brown oil paint straight from the tube and let that sit overnight. In the morning I moistened, and then wiped nearly 'dry' a small brush with Mona Lisa White Spirit and brushed off most of the oil paint. I left the stock darker near the edges where it met the metal parts and lighter in the middle. I painted the ammunition case Model Master Faded Olive Drab. Then I used a silver Prismacolor Artist Pencil to liberally highlight the flat black metal parts and the ammunition cases. I finished by giving everything a filter. I used Mig Wash Brown thinned with Mona Lisa Paint Thinner.
The rest of the vehicle
I spray-painted a pre-shade coat on the lower chassis with Rustoleum Flat Black Primer and the upper chassis and turret using Rustoleum Satin Leather. This is a cheaper alternative to hobby paint and it doesn't seem to have any adverse effect on the plastic or detail. You can also do the whole tank and track runs in about 1.6 seconds. Keep the can moving and spray in short bursts to keep from flooding on the paint. The dark paint fills in the recesses and creates a shadow effect near the flat surface edges, adding depth for the subsequent coats to come. Once the paint was dry and had a chance to de-tack and gas out, I brought the model in and touched up areas missed by the rattle-cans with Tamiya (XF-89) NATO Black.
Next came the first camouflage coat using Model Master Olive Drab. I airbrushed it carefully, allowing some of the black to show along the edges, behind the wheels, underneath the protruding detail.
Next I applied the second post-shading camouflage coat using Model Master Faded Olive Drab, lightening up all the panels moving from the center outwards, paying special attention to the upper surfaces exposed to sunlight, and leaving what was in shadow darker.
On-Board Tools: I painted the wooden portions of the on-board tools with Vallejo Acrylics New Wood and all the steel parts with Tamiya (XF-56) Metallic Grey. For brush painting I mix a tiny bit of Vallejo Slow Dry and water with each color until it flows smoothly off a 00 Liner Red Sable brush. To give the wooden parts of the tools more depth, I brushed on a little Mig Wash Brown Oil and I let that set overnight. I then carefully removed most of the brown oil paint using a brush dampened with Mona Lisa, leaving the areas near the buckles and metal parts darker than the wooden shafts.
Decals: I sprayed a heavy coat of Future acrylic over the areas that would receive decals to provide a smooth gloss coat for the decals, once the camouflage coats were dry. When the Future dried, I applied the decals using the Micro Sol/Set system without any problems, followed by another coat of Future over the decals to seal them. Even with the thick coat of Future there was some silvering, especially on the large, mostly clear Number 24, which couldn't be trimmed since it has a surrounding yellow frame. The decals are extremely thin and are prone to stretch, so some care should be taken to make sure they are symmetrical when set. Also, study the placement of the large white stars on the sides of the turret. The directions show the stars being slid down from above the railings, but they won't fit that way! You will need to slide them up from below the railings. They are so big and thin that the extra handling is something you want to try and avoid.
Once the sealing Future coat was dry, I airbrushed a quick spot coat of Vallejo Matt Varnish on the shiny areas to bring everything back down to a nice, even flat finish.
With a flat coat on the model, I applied several filters to enhance the basic green color. I first gave the whole vehicle a few filter coats of MIG Wash Brown. I gave the two exhaust pipe assemblies, one on each side; several filter coats of Mig Dark Rust.
For years I used to give the surface of my model a glossy coat of Future acrylic at this point in the weathering process, to prepare it for an oil-based pin wash and possibly some streaking. I found with experimentation that the filters I applied gave the surfaces a slightly satin finish that assisted in spreading a pin wash like it should, using capillary action. Furthermore, using the very mild Mona Lisa thinner with MIG Oils did not disturb the underlying paint and/or finishes, no matter how thick I slathered stuff on. So I gave the vehicle a pin wash using Mig Dark Wash (aka Raw Umber) straight from the bottle, paying special attention to the wheels, rear engine deck, fender supports and various panel lines.
I followed this with a heavy road-dusting coat of Vallejo Model Air Light Brown and then shot the whole vehicle with Vallejo Satin Varnish to give the model a slight sheen – I didn't think a dead-flat finish would look right on this big American tank. I cut each of these 50/50 with Vallejo Airbrush Thinner to improve flow.
Finally, I attached the two antennas and the machine gun and sent this big boy to the photo booth.
Conclusion
I have waited for the M103 to come out in kit form since I played with ROCO Minitanks back in the 70's. More recently, I climbed all over the real thing down at Fort Lewis, here in Washington State. The tank is big, bad and beautiful and has taken too long to arrive in our hands. I was thrilled to have received one to build.
I'm not sure what to make of the new Black Label company. There are aspects of this kit (their first) that I like and others that seem rushed and unfinished. The upper deck, rear, and lower hull axles have a lot of detail that is molded on. This is definitely not classic Dragon. They have built a solid reputation for producing highly accurate and detailed kits with lots (and lots) of parts. Black Label looks more like their CyberHobby line, with fewer parts, whilst still utilizing slide-mold technology, and interesting subjects. I look forward to seeing their future releases.
This M103A1 kit has a number of inaccuracies that have been well documented on the Internet, so I won't go into those here, except to say that if you are looking to build an accurate kit out of this offering, you will need to do some work to bring it up to snuff.
If on the other hand accuracy takes a back seat in your approach to modeling, the M103A1 is a lot of fun to build and the result is a one-of-a-kind addition to the show table and your model case - as long as you don't need the turret to point forward! My hat is off to Dragon for making the effort at any rate; this is a pretty cool tank.
I recommend this kit to anyone who likes to build and finish big armor. All things considered, the build went very smoothly and the result is a real head-turner.
I would like to thank Dragon Models USA and Stevens International for providing this kit for review, and to Internet Modeler for giving me the opportunity to build it.