

Hasegawa 1/72 F4F-4 Wildcat
By Matt Bittner
History
The history of the Wildcat is too vast for this article. However, it wasn't until I started this model that I realized the F4F served in other than the Pacific theatre.
The Kit
The Hasegawa kit of the F4F-4 Wildcat is an excellent reproduction of this ubiquitous World War 2 fighter. Accurate in shape and profile, when it first appeared on the market it was greatly appreciated and much needed.
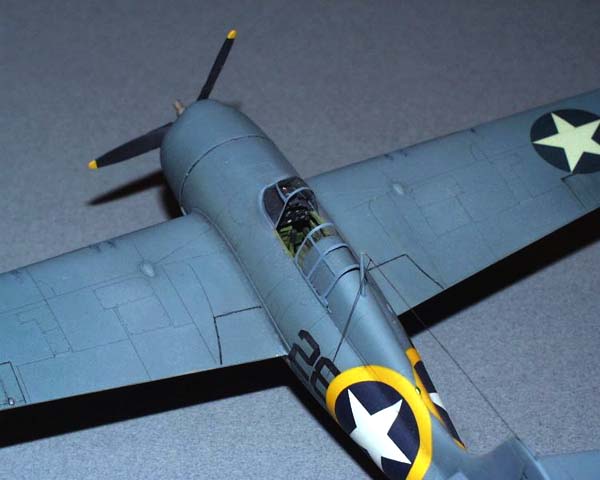 |
Since the kit cockpit is nothing like the real thing, I purchased the True Details (TD) resin cockpit and landing gear well update set. This aftermarket set is fantastic! The only problem I had with it was it wouldn't fit perfectly in my kit, so I had to do some sanding and filing until it did. Once painted, given a "wash" and followed by a "drybrush", everything in the cockpit really came to life. To ease construction I decided not to use the belly windows; instead, I used Kristal Kleer after the model was finished.
The TD resin landing gear well is not 100% representative of the real thing. The most noticeable items missing are the supports for the engine. Plus, if you leave the area where the wheels would retract into as is, there would be gaps that don't belong. The very noticeable gaps were the only flaws I decided to fix.
Once the TD set was glued in and painted, then the fuselage halves were joined together. After this step the rest of the kit goes together relatively easily. Some small gaps were taken care of, but overall this kit provided a decent fit.
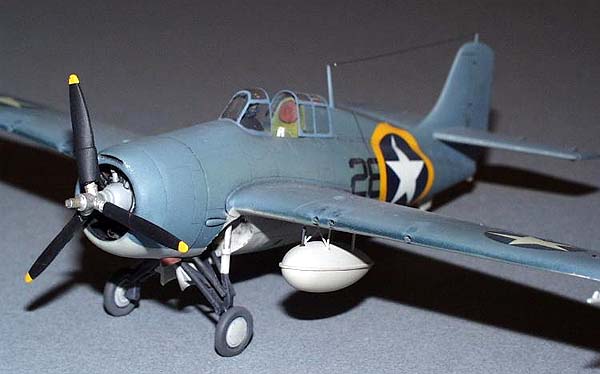 |
Since I had the Airwaves photoetch set, I decided to use the "W" supports for the underwing fuel tanks. The way the kit has you mount the tanks is better suited to the FM-1 variant than the F4F-4. The front supports were just brass rod, and a "hose" leading from the tank to the wing was made out of wire.
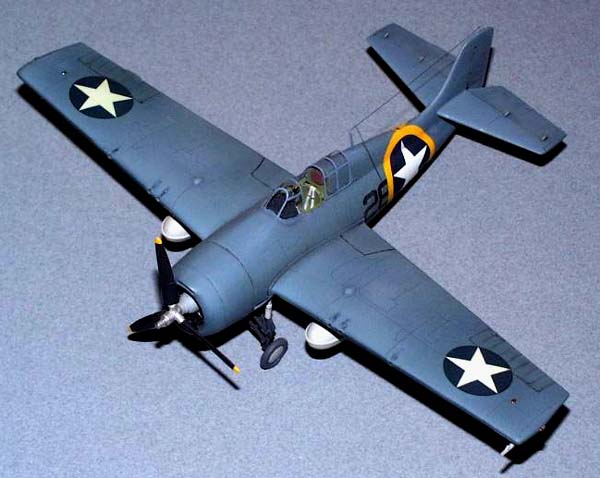
I also added an MV Products lens to the underside of the port wing to represent the flip-down landing light. TD resin wheels were used, and the canopy/windscreen were "squashed" using thinner clear sheet over the kit transparencies. The antenna is .004" carbon steel wire. The kit engine was enhanced with ignition wires made out of real wire.
The painting was a mixed blessing. When I first painted the model, I didn't realize until it was too late that I used the wrong color for an Operation Torch bird. In deciding how to continue, I figured since it was just a light coat I would use some fine sandpaper (in the 3200-4000 grit range) to sand as much of the paint off as possible. This meant that the paint in the panel lines and such wasn't removed. When I found the right color and sprayed it on, I misted it on thin enough so the panel lines wouldn't be too covered with the new color. This resulted in an excellent look to the panel lines, and no other enhancement was needed, except for the control surface joints, which were enhanced with a black, Pigma .005" marker. The paint used was Polly Scale/Aeromaster.
 |
The decals were pieced together from different Superscale sheets - it wasn't until the model had most of the decals on did I learn that Ministry of Small Aircraft already produced this version on one of their aftermarket sheets. Ah well
Conclusion
Although I put a lot of time and effort into the kit, if you decide not to go to the extremes I did an excellent example of the F4F-4 Wildcat can be made out of the box. If you want an easy to install - and accurate - cockpit, then by all means track down the True Details resin set.
Since I enjoy the Wildcat (I can't say that with a lot of WW2 aircraft) this kit was very enjoyable to build.